
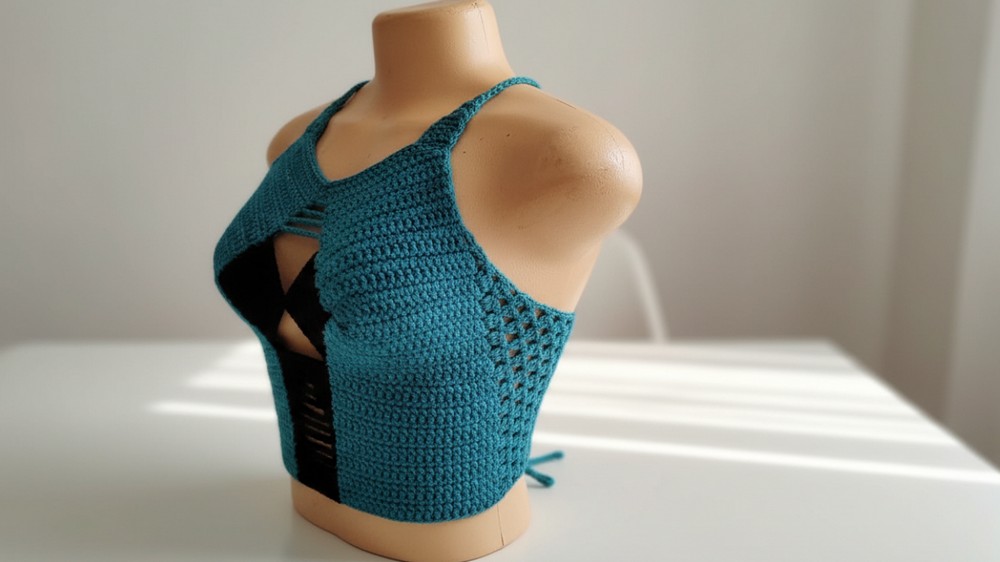
Turning heads at the next summer party with a cute, handmade top that’s all you. A crochet halter top pattern lets you whip up the ultimate flirty-meets-comfy outfit that screams carefree vibes. Pair it with denim cutoffs for a fun day out, or throw it over a flowy skirt to channel boho energy at festivals or beach hangouts.
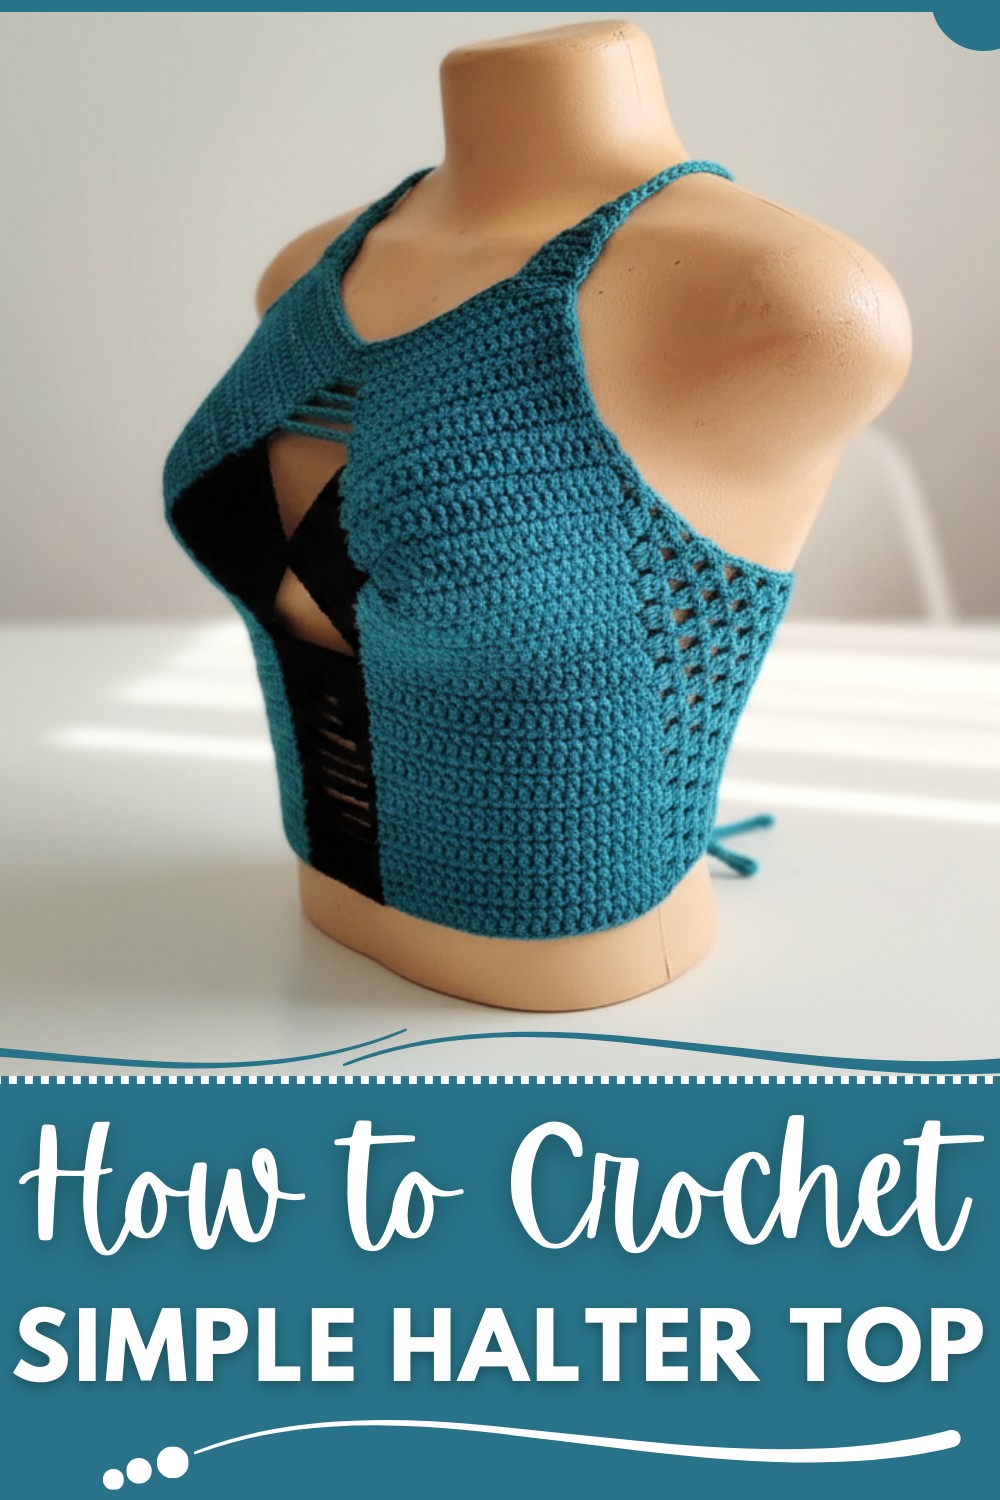
The halter style isn’t just super flattering, it’s also airy and perfect for staying cool on even the hottest days. Mix it up with bold colors, playful stripes, or subtle neutrals to match your mood.
Simple Crochet Halter Top for Any Summer Look
Materials Needed
- Yarn:
- Two shades of Teal Blue acrylic yarn or cotton yarn (fine weight yarn (#2) or lightweight yarn (#3) recommended).
- Suggested quantity: 2 balls of each color.
- Hook:
- 3.5 mm crochet hook.
- Additional Tools:
- Scissors.
- Darning needle for weaving in ends and joining the cups.
- Measuring tape for accurate sizing.
Crochet Halter Top – Step-by-Step Pattern
This crochet scalloped halter top pattern is perfect for intermediate-to-advanced-level crocheters. With its elegant scallop design and practical back straps, this halter top can be customized in size and color. Below is the comprehensive pattern for recreating this top.
Special Notes
- Customizable Design: Measurements and adjustments can be tailored based on size preferences.
- Color Management: To avoid unwanted color bleed, use two separate balls of yarn for the middle color or manage yarn carefully in order not to overlap colors.
- Block Work: Block the halter top lightly after completion for a smooth finish.
Step-by-Step Pattern Instructions
Part 1: Bra Cups
This project begins with the bra cups. Measure and customize based on your desired cup size.
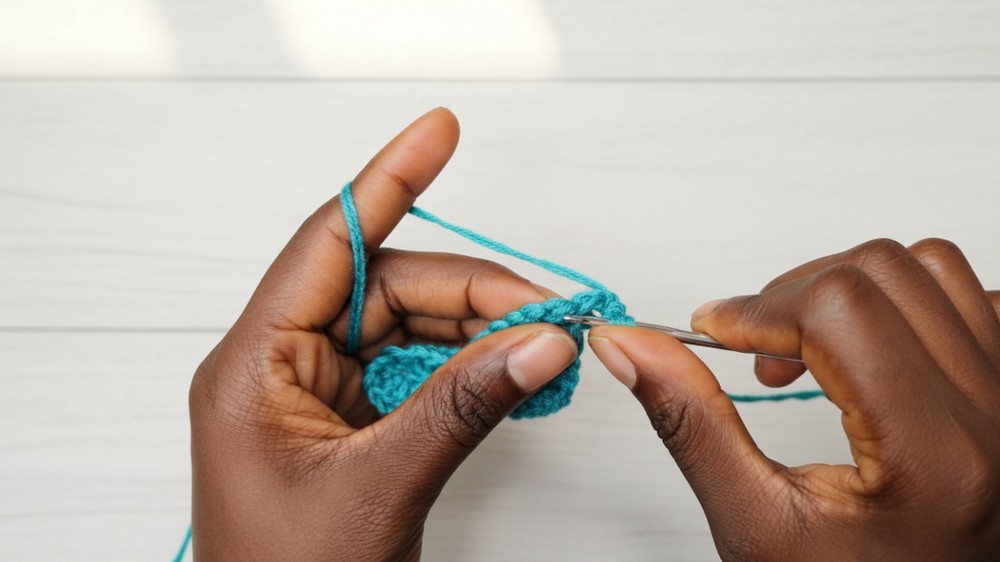
1. Foundation Chain
- Small Size: Chain 14.
- Medium Size: Chain 16.
- Large Size: Chain 18.
- Extra Large Size: Chain 20.
Add 2 additional chains (starting chain). Example: For medium size, chain 16 + 2 = 18 chains in total.
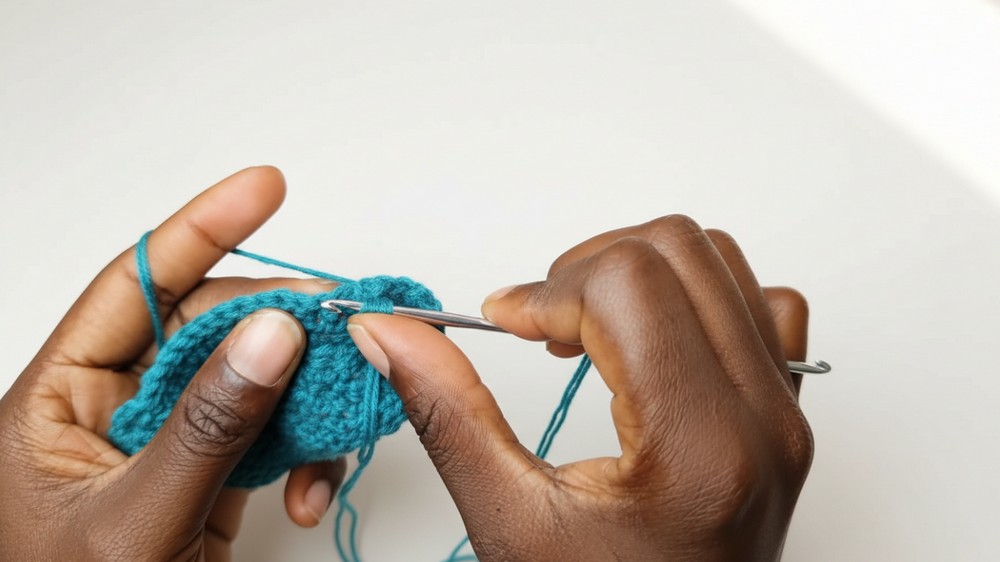
2. Row 1
- Work dc in the 3rd chain from the hook.
- Place 1 dc in each chain until the last chain.
- In the last chain, place 3 dc, ch 1, and 3 dc.
- Continue working 1 dc in each chain along the opposite side of the foundation chain.
3. Row 2
- Ch 2, turn your work.
- Place 1 dc in each st until the chain 1 space.
- In the ch 1 space, work:
- 2 dc, ch 1, 2 dc.
- Continue working 1 dc in each st until the end of the row.
4. Rows 3–8
- Repeat Row 2, alternating yarn colors every row in the middle section for the scalloped design:
- Switch colors carefully by adding new color during the last yarn-over of the final st of the current row.
- Leave the inactive yarn behind to avoid adding it to the stitches.
At the end of Row 8, cut the yarn used for the middle color carefully and weave in the ends.
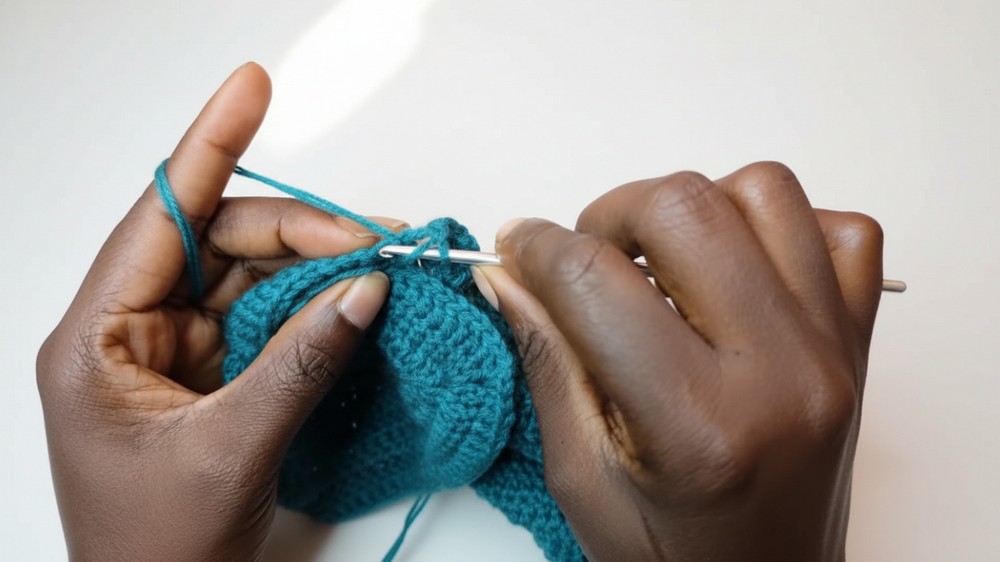
Part 2: Joining the Bra Cups
- Place both bra cups on the right side (matching their edges neatly).
- Take the dark-colored yarn and join the two bra cups at the ch 1 spaces using a darning needle or slip stitches.

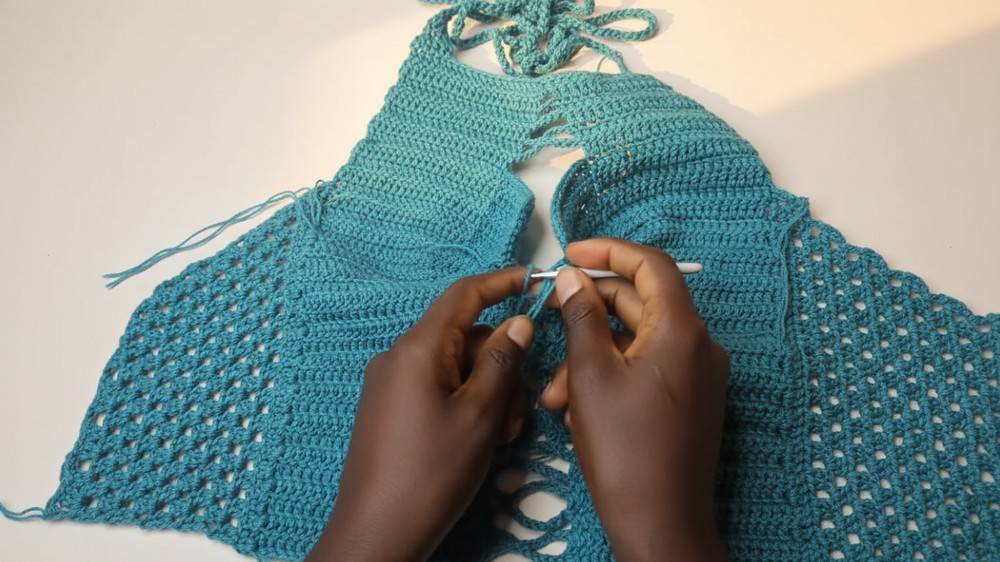
Part 3: Scalloped Body
Begin working from the joined bra cups downward to create the scalloped body texture.
5. Row 1 (Body Initiation)
- Attach the dark-colored yarn to one end of the joined cups.
- Ch 2, turn, and work 1 dc in each st until the last st of this color.
- Ch 10, skip the gap, and join to the first st of the other bra cup.
- Work 1 dc in each st until the end of the row.
6. Row 2
- Ch 2, turn.
- Dc in each st of the first cup until the gap.
- Work 1 dc into each of the 10 chains across the gap.
- Continue with dc in each st for the remainder of the row.
7. Rows 3–6
The scalloped pattern begins here:
- Row 3: Alternate sections of dc and ch 4. For instance: 4 dc, ch 4, skip stitches, and work dc.
- Gradually increase the chain spaces by 2 chains in each row until Row 6:
- Row 4: Ch 6 gaps.
- Row 5: Ch 8 gaps.
- Row 6: Ch 10 gaps.
8. Rows 7–13
- Work similar ch gaps in rows, alternating yarn for the scallop spaces.
- Finalize the scalloped body texture by adding more rows until reaching Row 13.
Part 4: Strap Design
9. Straps
- At the ends of Row 13, attach yarn and work 2 dc in the first 5 stitches.
- Gradually decrease stitches in each row until 1 stitch remains.
- Increase to 3 strands of yarn and chain 200–220 chains (adjust for size preference).
Tips for Success
- Changing Yarn Colors: Prevent color bleed by keeping yarn strands separate.
- Measuring Fit: Measure frequently to customize sizing around bust and back.
- Blocking: Lightly block the finished top for neat scallops and straps.
Pattern Correction
If stitches or rows are uneven, recheck stitch counts, especially for scallops or gaps. For extremely tight stitches, try increasing the hook size slightly.
Conclusion
This crochet halter top is a seamless blend of utility and aesthetic appeal, featuring scalloped rows and structured bra cups for support. The clean stitching and strong color management result in a professional-looking garment ready for summer outings. Customizable straps and body sizing ensure a perfect fit for any individual.
Pattern Variations
- Colors: Experiment with bold contrasts, gradient yarns, or alternating stripes for a unique touch.
- Size Adjustments: Add or reduce rows in the cups and body section to fit larger or smaller sizes.
- Decorative Touch: Add embellishments such as crocheted flowers or buttons to the front cups for personalization.


