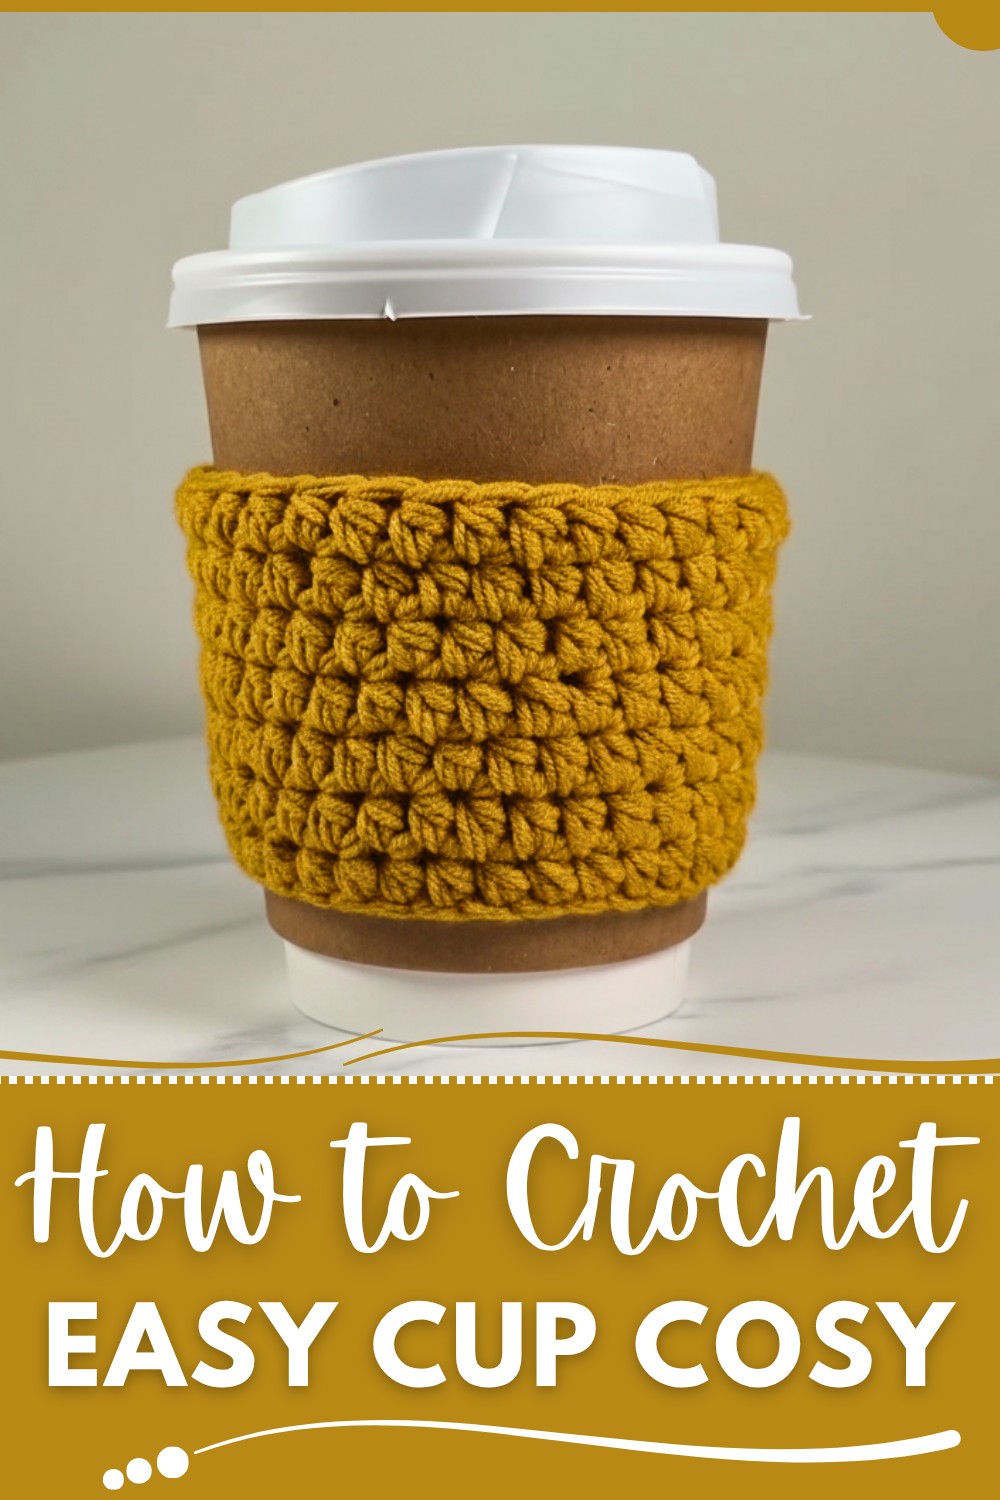
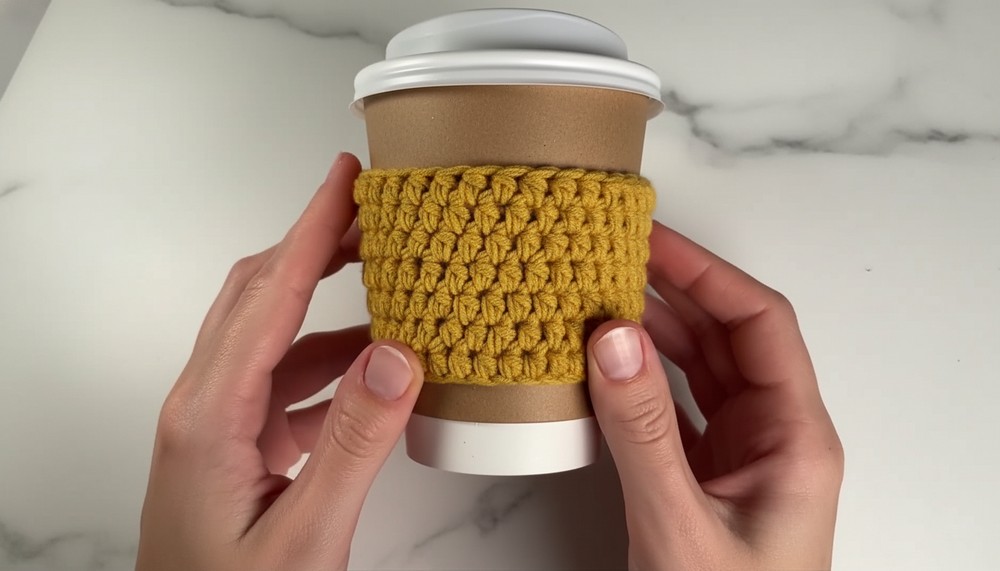
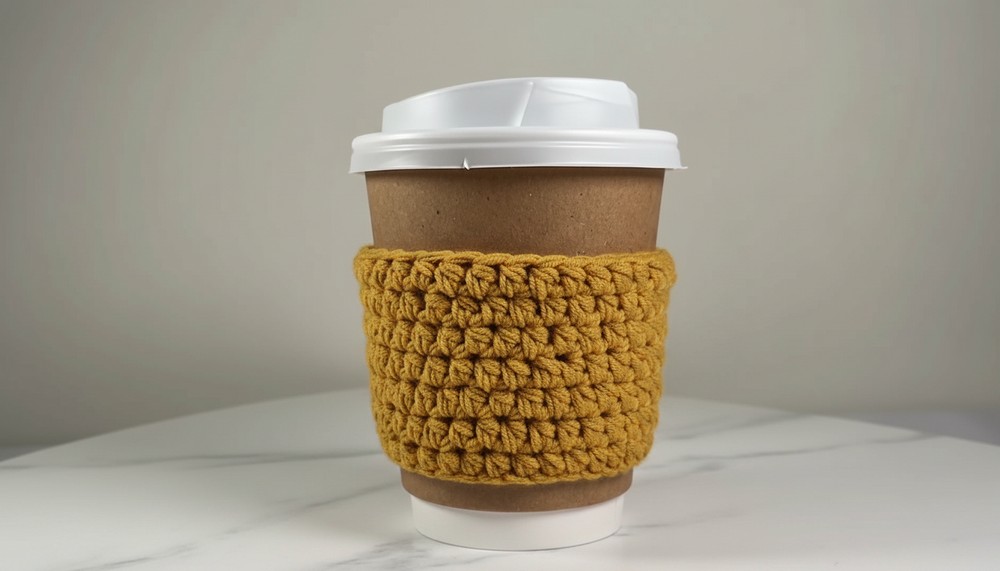
Revamp your everyday cup with a Crochet Cup Cosy Pattern that blends creativity and practicality into a warm, stylish, and personal touch.
Turn your daily coffee or tea ritual into a cozy delight with a Crochet Cup Cosy Pattern! This charming little creation wraps snugly around your cup, combining warmth, style, and practicality all in one. Not only does it keep your hands safe from hot surfaces, but it also turns an ordinary cup into a tiny work of art. The beauty lies in its versatility—you can experiment with vibrant colors, unique textures, and playful embellishments like bows, buttons, or seasonal appliqués.
Adorable Free Crochet Cup Cosy: Perfect for Coffee Lovers
Want to surprise your friends? Crochet cup cosies make adorable and heartfelt handmade gifts, perfect for any occasion. These little wonders are also eco-friendly, helping to replace disposable cup sleeves with a reusable alternative. Whether you’re sipping herbal tea or pumpkin spice lattes, this quick and creative project is an excellent way to infuse personality into your daily brew.
Cup Sleeve Crochet Pattern
Materials Needed
- Yarn: Cotton yarn is recommended for durability and heat resistance. Acrylic yarn can be used for cold drinks only.
- Hook: Size 4 mm crochet hook (adjust based on your yarn’s weight).
- Additional Tools:
- Scissors
- Yarn needle
- Stitch marker
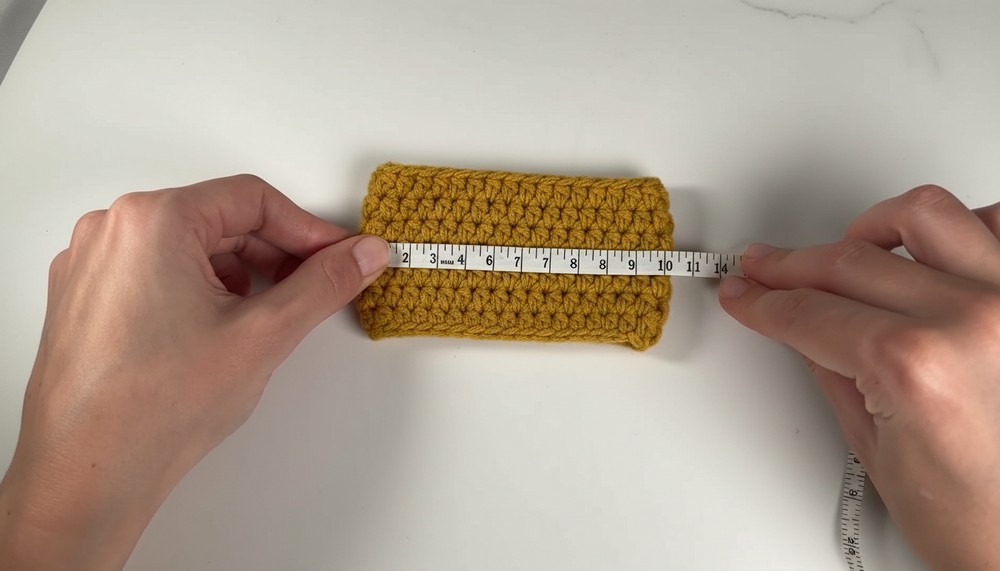
Gauge
For reference, the pattern creates an approximately 6 cm x 11.5 cm sleeve, depending on your yarn and hook size. The cotton yarn stretches slightly, so keep the tension uniform to maintain shape and fit.
Step-by-Step Instructions
Foundation Chain
- Create a slip knot: Make a loop with your yarn, insert your hook into the loop, grab the long yarn, and pull through the loop. Tighten around the hook.
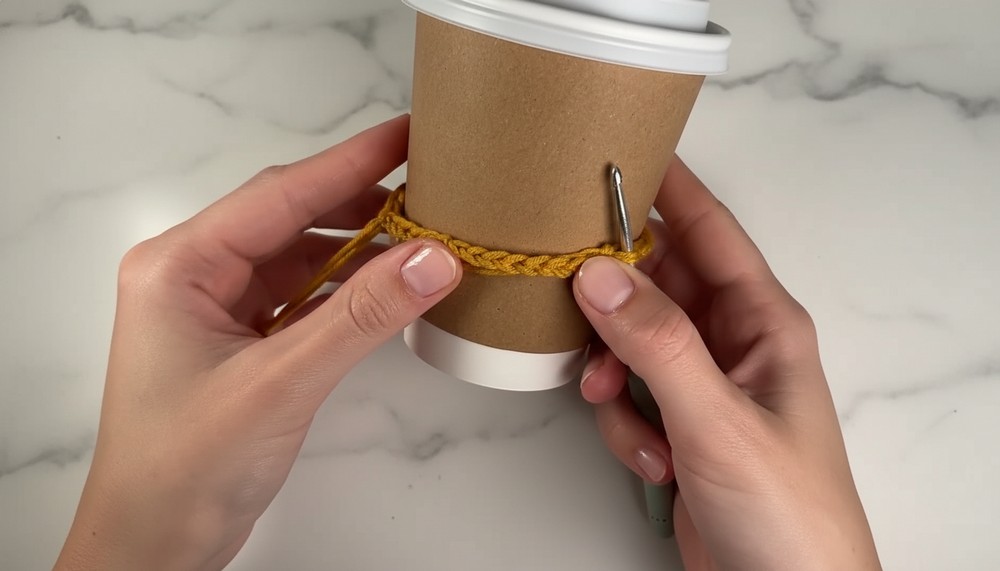
- Chain: Yarn over and pull through the loop on your hook to create chains. Make 35 chains or enough chains for your sleeve to fit comfortably around your cup.
- Tip: Wrap your chain around the cup to ensure it fits snugly without overstretching.
Join Chains & Begin Round 1
- Ensure your chain is not twisted. Flatten the chain and confirm it’s straight.
- Insert your hook into the first chain and create a slip stitch to join the ends together, forming a circle.
- Chain 1 for height.
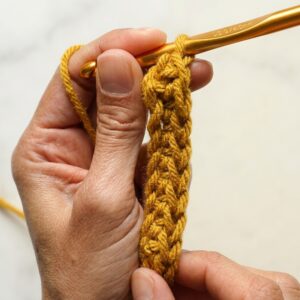
Round 1 – Half Double Crochet in Back Bumps
- Work into the back bump of the chain (the raised ridge on the back of a chain). Ignore the front V loops. This technique creates a cleaner edge for the base round.
- Half Double Crochet (HDC):
- Yarn over,
- Insert your hook into the back bump,
- Pull up a loop (3 loops on your hook),
- Yarn over and pull through all three loops.
- Mark the first stitch with a stitch marker.
- Repeat HDC into each back bump until you’ve completed the circle. You should have 35 HDCs by the end of this round.
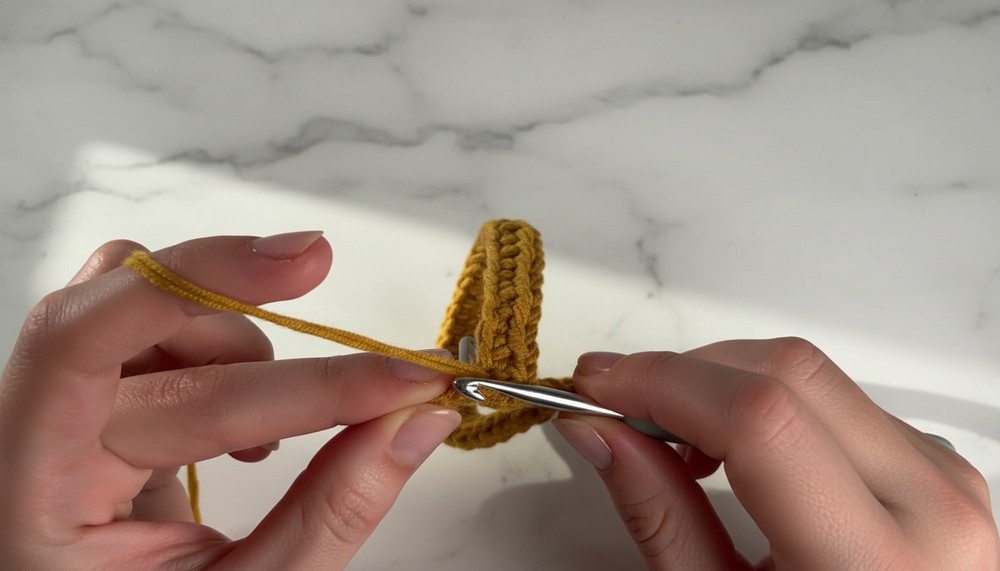
Round 2 – Half Double Crochet in Full Stitches
- Remove the stitch marker. Insert your hook into the marked stitch, yarn over, and pull through for a slip stitch to join the round.
- Chain 1 for height.
- Work HDCs into the full stitch (the front and back loops forming the V) of each stitch from Round 1.
- Mark the first stitch as before and continue until the end of the round.
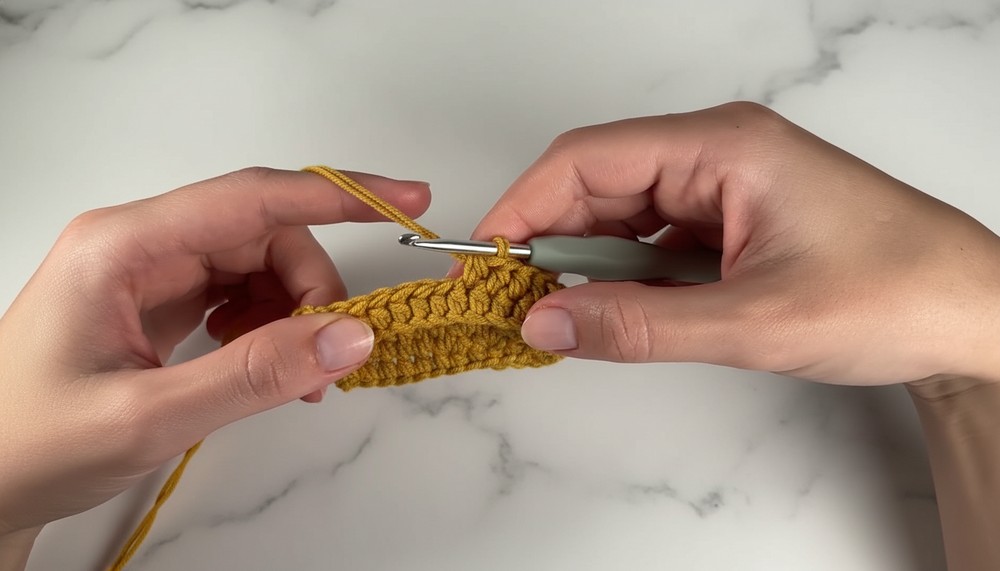
Additional Rounds – Building Height
- Repeat Round 2 until the sleeve reaches the desired height. In the example, seven rounds were made for a sleeve approximately 6 cm tall.
- Count stitches after each round to ensure consistency—there should always be 35 stitches per round to maintain the shape.

Finishing
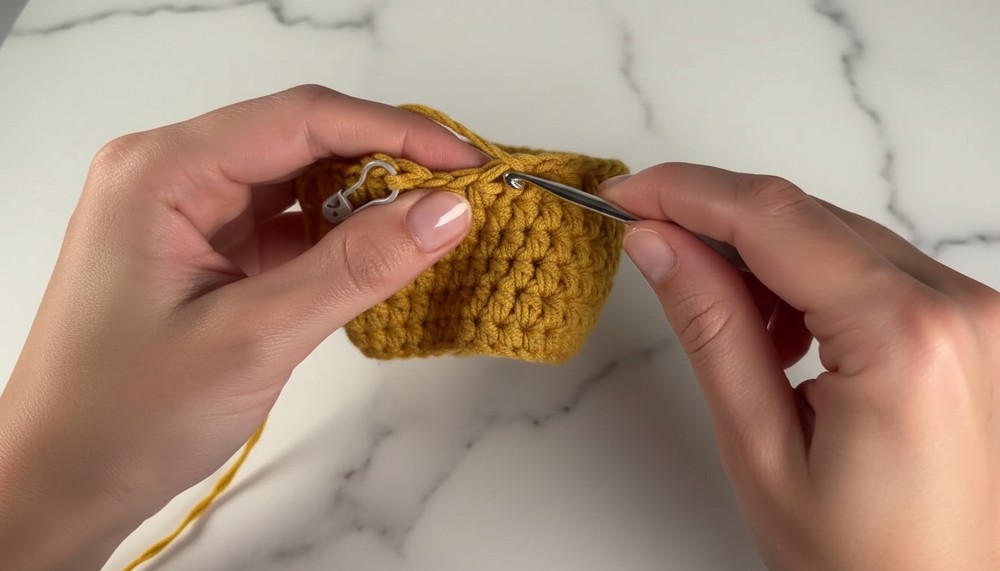
- At the end of the last round, remove the stitch marker and insert your hook into the marked stitch. Yarn over and complete a slip stitch.
- Fasten Off: Yarn over and chain 1. Cut the yarn, leaving a short tail. Pull the tail through the loop to secure the edge.
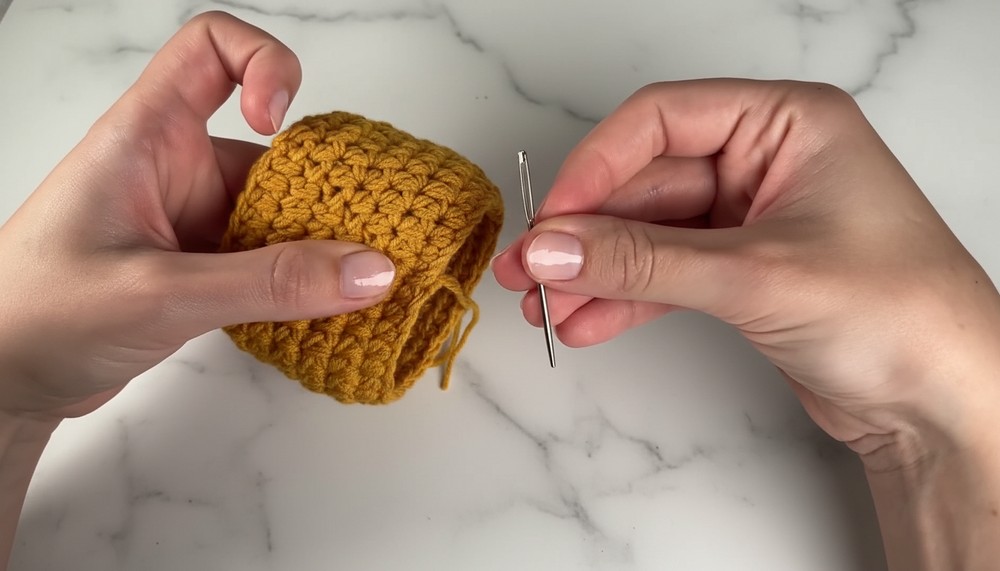
Weaving in Ends
- Thread the yarn tail onto a yarn needle.
- Hide the tail: Weave it into the inside stitches of the sleeve in one direction. Then, reverse direction to secure it further, skipping the last stitch you came from to avoid unraveling.
- Trim the excess yarn once secure. Repeat with the starting tail.
Special Techniques
- Back Bump Crochet: Working into the back bumps creates a tidy edge that enhances the overall look of the sleeve.
- Stitch Markers: Use stitch markers to track the first stitch—it simplifies joining and prevents accidental stitch increases.
- Slip Stitches at Row Ends: Ensure slip stitches are performed correctly; avoid adding stitches where slip stitches occur as this will distort the shape of the sleeve.
Suggestions to Enhance the Sleeve
- Customization:
- Vary the number of rounds to adjust the sleeve height for different cup sizes.
- Use striped or multicolored yarn for a playful design.
- Add embellishments such as crochet flowers, applique, or embroidery to personalize your sleeve.
- Durability:
- Cotton yarn is heat-resistant and sturdy, making your sleeve perfect for hot drinks.
- Add an inner lining with fabric if desired, especially for larger cups or heavy use.
Final Words
This cup sleeve is a versatile and beginner-friendly design that’s perfect for practical use or gifting. The rhythmic nature of half double crochet stitches ensures a relaxing and satisfying project. Remember to periodically check stitch counts to prevent distortion and keep your tension consistent for a neat finish.

Tips to Maintain the Pattern
- Gauge Check: Measure your chain’s length around your cup before starting to ensure proper fit.
- Secure Finishing: Always weave in ends securely to enhance durability—especially for items exposed to frequent use and washing.
- Prevent Twists: Ensure your chain is flat and untwisted before joining for the base round.