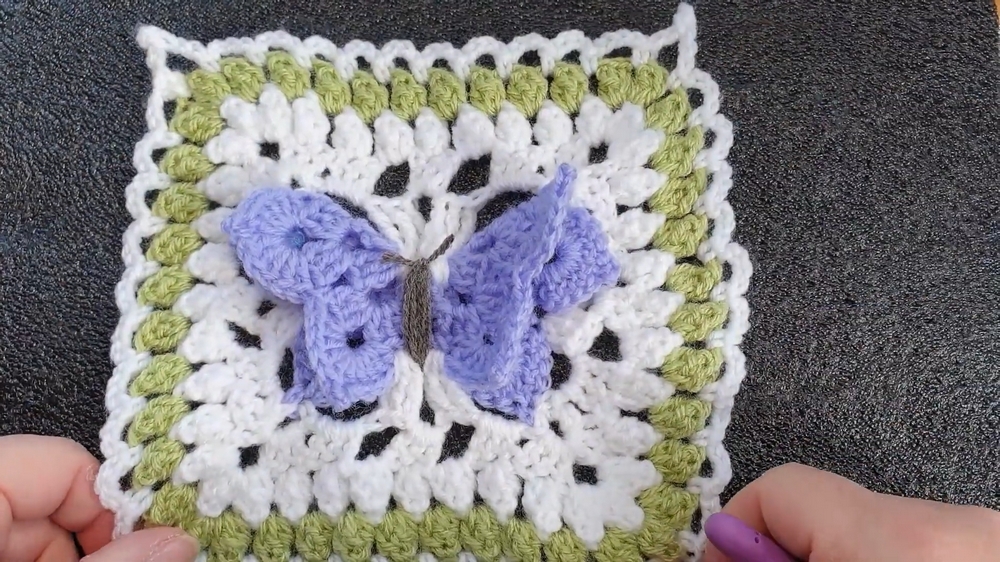
Innovative charm shines in the Crochet Butterfly Kisses pattern adding elegance, versatility and a graceful touch to gifts or home décor.
Graceful as a butterfly resting on a flower, the Crochet Butterfly Kisses pattern brings gentle beauty and symbolic meaning to every stitch. Known for representing hope and renewal, this motif is more than decorative; it adds a heartfelt accent to blankets, shawls, baby outfits, or even home décor. Its delicate shape instantly enhances the look of any piece, offering both charm and sentiment in equal measure.
Graceful Crochet Butterfly Kisses Pattern for Meaningful Details
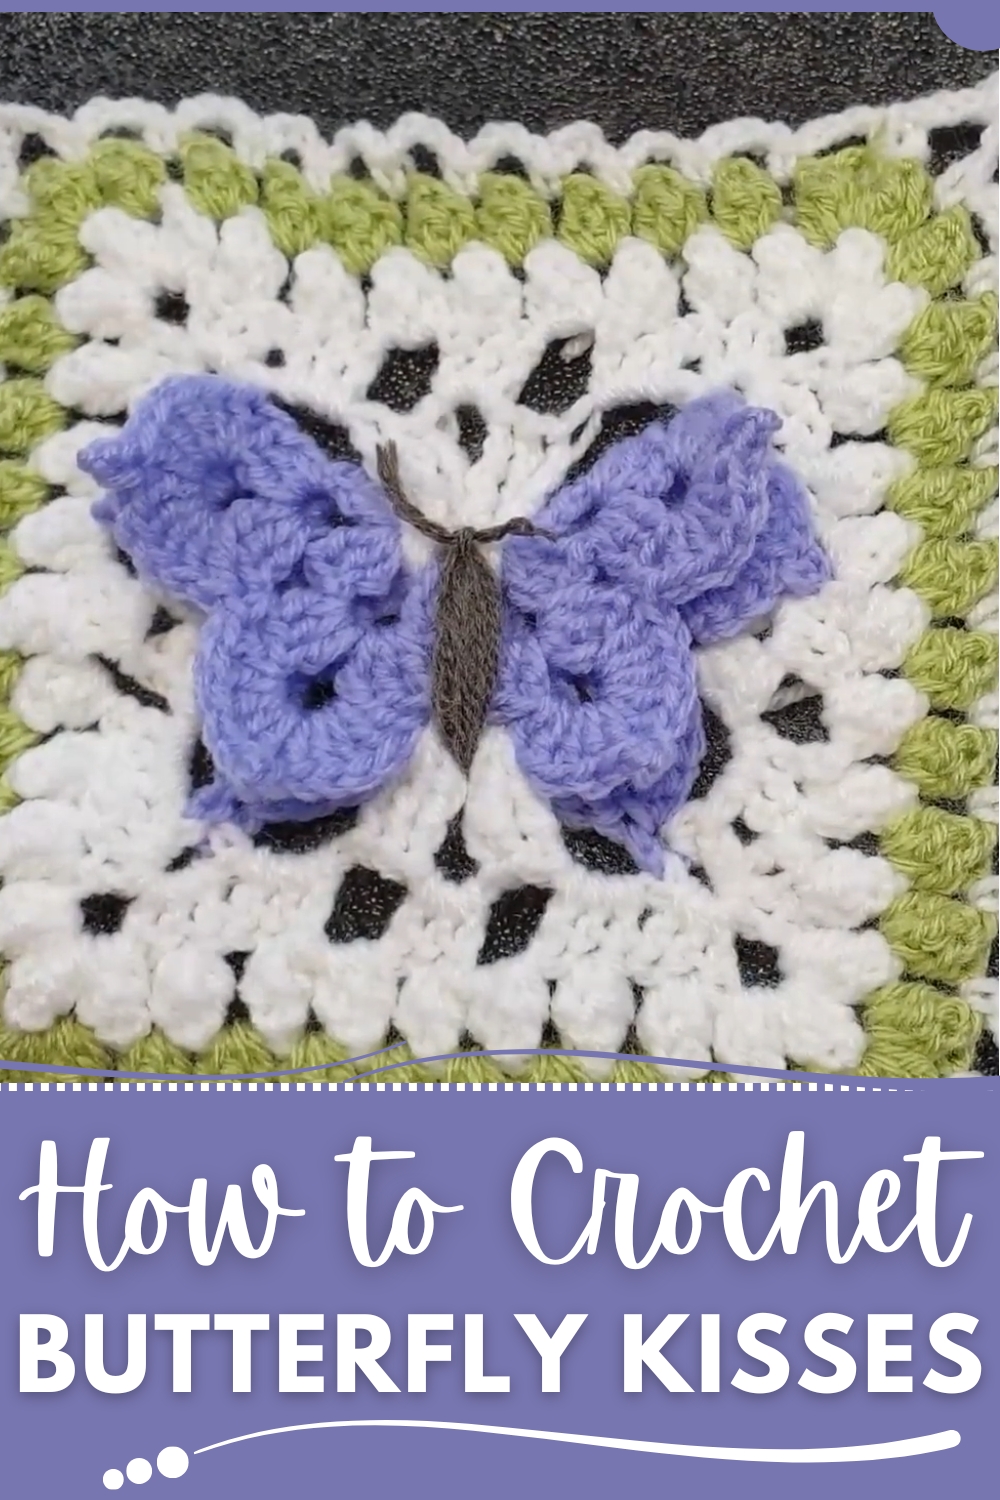
The feature that makes this pattern stand out is its refined structure. A small center forms the body, while evenly worked stitches extend outward to create symmetrical wings with soft curves. The open spaces between stitches add a light and airy quality, giving the motif an elegant appearance that feels timeless. Bright color choices give energy and joy, while softer shades convey calmness and subtle style.
Versatility is one of its greatest benefits. A single butterfly can be attached as an applique, several motifs can be joined to form striking garlands, and repeated rows make delicate borders for garments or linens. With durability and adaptability, the Crochet Butterfly Kisses pattern brings together beauty, meaning, and practicality, ensuring every finished piece carries both visual delight and emotional value.
Materials Needed
- Yarn: Double knit yarn in three colors:
- Butterfly color: A vibrant or bold choice (e.g., purple).
- Bordering color: A complementary shade (e.g., green).
- Background color: A neutral or contrasting color (e.g., white).
- Tools:
- A 4mm crochet hook.
- A darning needle (for sewing components together).
- Scissors.
Special Features of the Butterfly Kisses Crochet Square
- 3D Butterfly Effect: The square’s main highlight is its lifelike butterfly that creates a unique layered and textured design.
- Versatile Usage: This square can be used in blankets, table runners, wall art, or cozy throws, and it makes a perfect gift.
- Customizable Color Palette: With three yarn colors, you can mix and match shades to suit your preferences or project theme.
- Intermediate Techniques: The pattern introduces popcorn stitches, picots, and creative folding to form the butterfly.
Level of Difficulty
The Butterfly Kisses Square is an intermediate-level crochet project. While aspects like chaining and simple treble/double crochets are beginner-friendly, the 3D butterfly design, clusters, and picot stitches require a bit of practice and attention to detail.
Step-by-Step Instructions
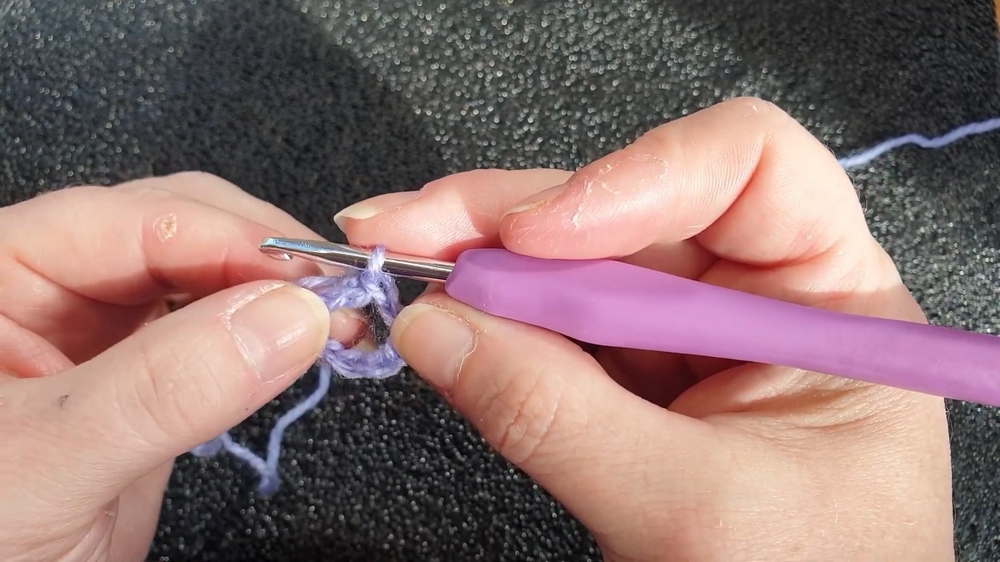
Step 1: Creating the Butterfly Center (Round 1–4)
- Foundation Chain: Start by creating a magic ring with 8 chains, joining the ends with a slip stitch. This forms the base loop for your butterfly design.
- Treble Clusters: Work groups of trebles separated by 3 chains to create a circular base. Repeat this 8 times, ensuring consistent spacing.
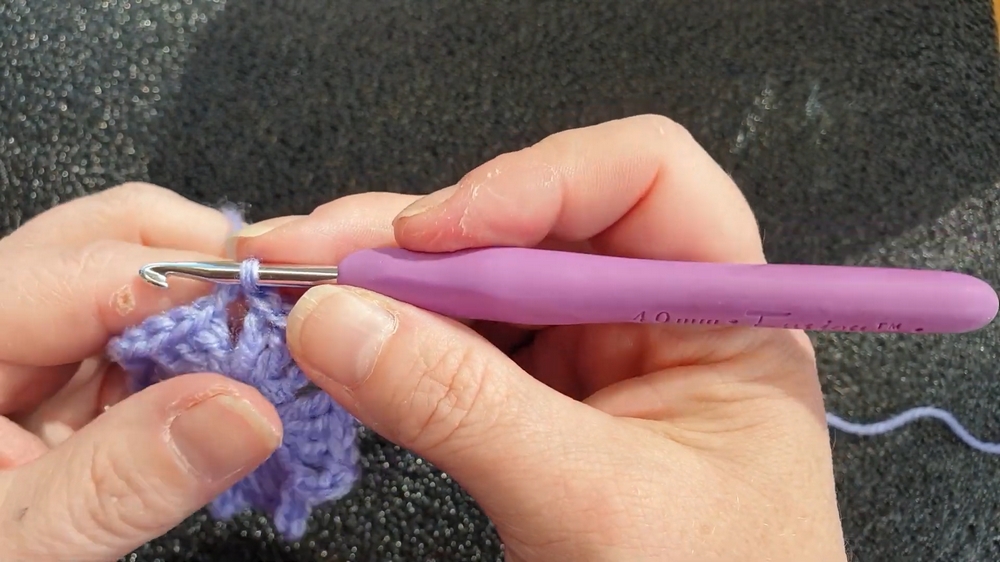
- 3D Wing Effect: On the third round, trebles are grouped, and picots are added to form butterfly wings. Each treble cluster is worked in alternation with picots for added texture.
- Folding the Butterfly: The butterfly design comes to life by folding the piece in half (right sides facing out). The center is wrapped with yarn in approximately 6–7 neat loops to form the body of the butterfly.
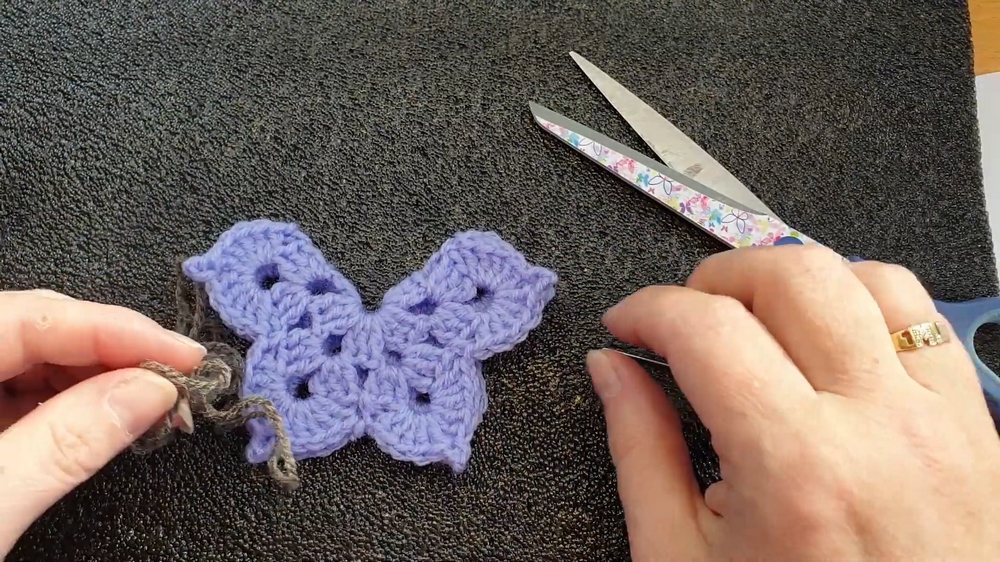
Step 2: Securing the Butterfly
Using a darning needle, sew the butterfly body tightly to hold its wings in place. Antennae are formed by leaving short yarn tails at the top of the body, trimmed to a suitable length.
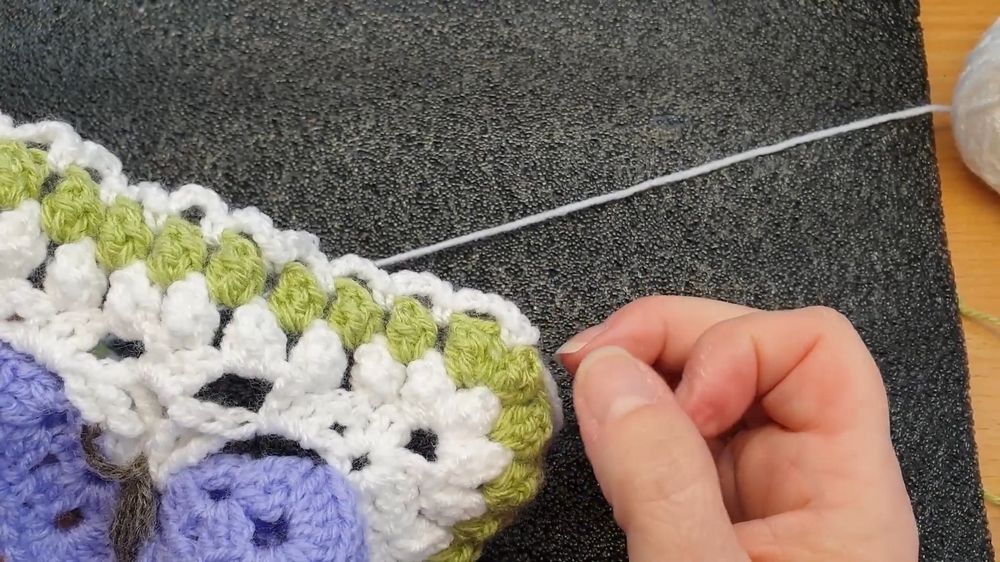
Step 3: Adding the Square Border (Round 5–6)
- Background Chains: Attach the background color yarn (e.g., white) to the back of the butterfly, working behind the wings. Work treble groups and clusters into the space between the wings, shaping the first row of the square.
- Corners and Edges: Use combinations of chains, treble stitches, and creative clusters to form the square’s edges and corners.
4: Building the Final Rows (Round 7 and Beyond)
- Expand the Square: Add further rows of clusters and treble groups to enlarge the square, ensuring clean, consistent corners.
- Edging: For the last round, incorporate double crochets and chains to create a neat, finished border. You can add decorative picot stitches in the corners for extra flair.
Tutor's Suggestions
- Take Your Time with the Butterfly Body: The butterfly wings and body are the centerpiece, so be sure to fold and sew them carefully for a neat appearance.
- Work on Even Tension: Consistent tension results in uniform stitches that make the square look clean and professional.
- Pause, Rewind, and Practice: If a specific technique (e.g., picots or clusters) feels challenging, the tutor encourages pausing the video and practicing until comfortable.
- Choose Your Favorite Colors: Personalize your square by selecting colors that resonate with you—bright, bold, or neutral.
Uses of the Butterfly Kisses Square
- Perfect as part of a larger project, such as blankets, throws, or even tablecloths.
- Great for decorative pieces, like framed wall art or crochet cushions.
- An excellent handmade gift with a personal touch.
- A fun way to showcase your crochet skills in craft fairs or crochet groups.
Tip for Success
When working on the butterfly body, wrap the yarn as neatly as possible. This ensures that the center remains tidy and secure. Additionally, always block the finished square to give it a flat, polished appearance.
Conclusion
The Butterfly Kisses Crochet Square is a beautiful and rewarding project that offers crochet enthusiasts an opportunity to explore new techniques. From the intricate butterfly design to the structured square border, this pattern combines texture, creativity, and functionality. With the option to customize colors and sizes, it’s a flexible and versatile square that can be adapted to any project.