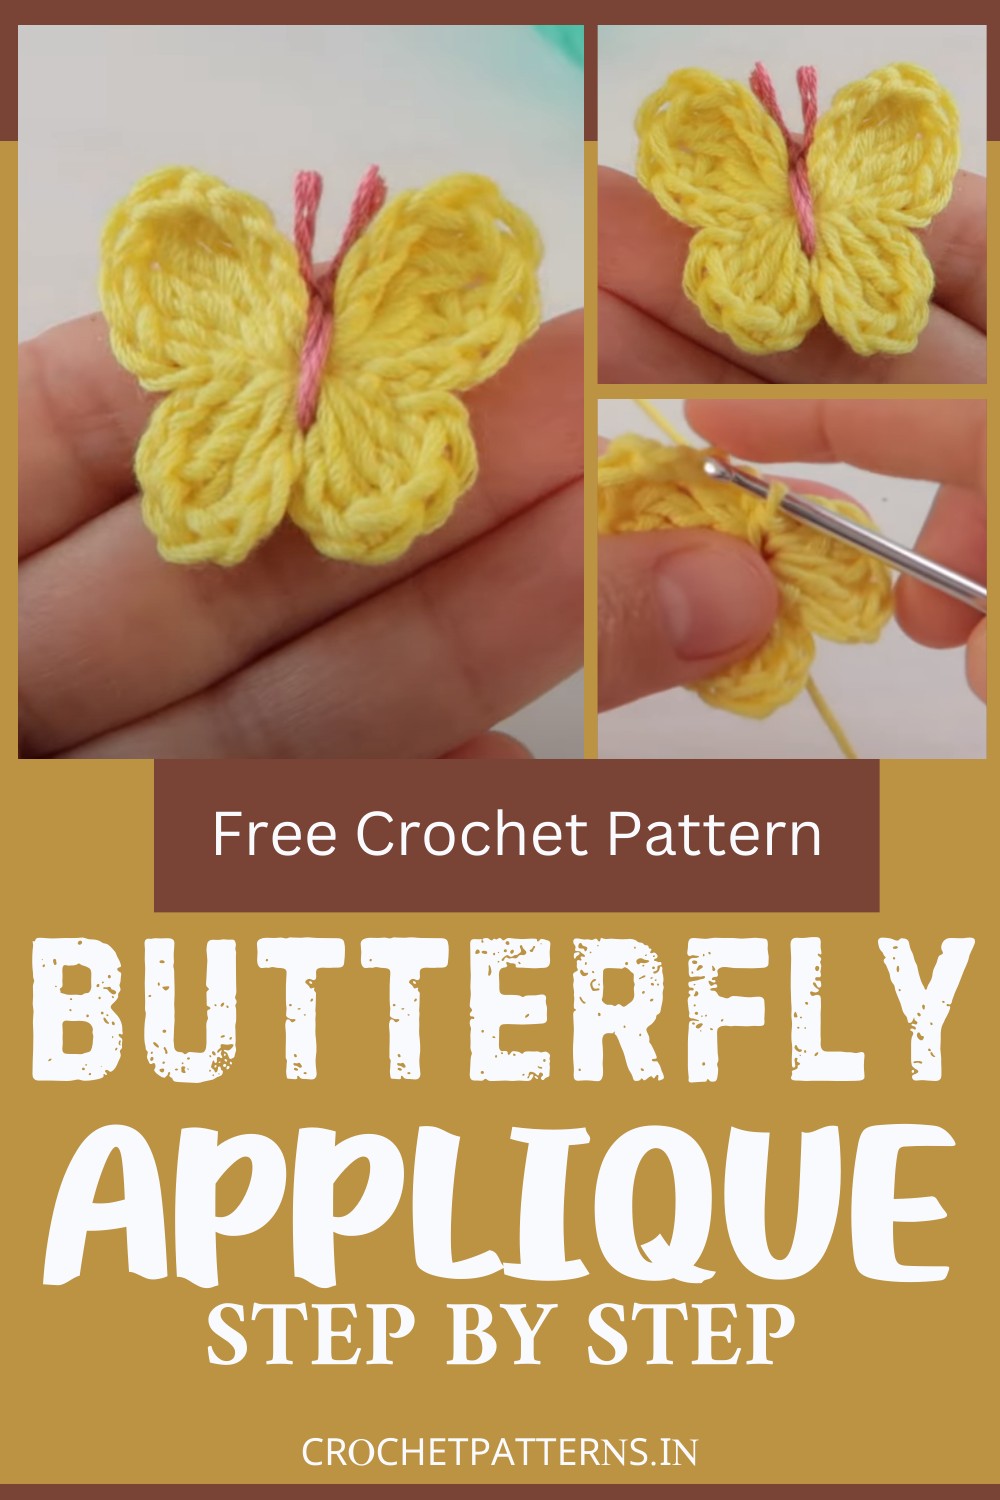
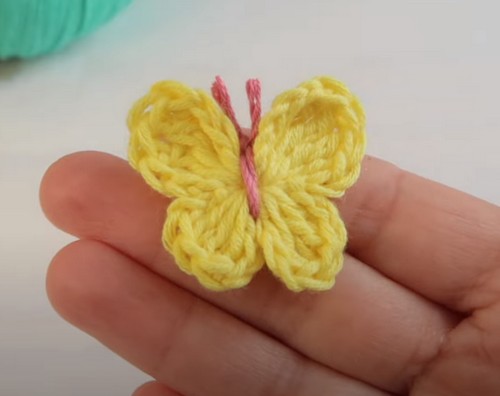
Butterflies, with their cute, delicate allure and embodying a sense of love, draw us into their enchanting world. The Crochet Butterfly Applique is a delightful handmade craft that brings this charm to our daily lives. The crocheted in 5 minutes appliques replicate the intricacy of a butterfly's wing, capturing its essence in a tangible form. Whether it's pinned on your favorite crochet scarf or brightening up your home decor, these crochet butterflies add an elegant and dreamy touch with their colors and shapes. So, go through the step-by-step visual and written pattern given below and start making these decorative critters.
Making Your Crochet Butterfly Applique
Materials Needed:
- Yarn of your choice (weight can vary depending on the desired size of the butterfly)
- Crochet hook compatible with your yarn
- Yarn needle for weaving in ends
- Scissors
Basic Stitches and Techniques:
- Chain (ch)
- Slip stitch (sl st)
- Single crochet (sc)
- Double crochet (dc)
- Treble (triple) crochet (tr)
- Magic ring (optional but recommended for starting rounds)
Generalized Pattern
This generalized pattern is designed to be a starting point. The beauty of crochet is in customization and experimentation. Adjust stitch types, counts, and wing shapes as you see fit to create unique butterflies.
Body:
Start by creating a small cylindrical or oval shape for the body. This can be achieved by crocheting in the round, creating a small chain, and working several rows in SC or DC stitches.
Example: Chain 6, join into a ring with a sl st, then work 10-12 sc in the ring for several rounds until the desired body length is reached.
Wings:
The wings can be divided into upper and lower sets. Each set can be created separately and then attached to the body.
Upper Wings (make 2):
Start with a foundation chain of the desired length, which will determine the wing's width.
Work in rows or rounds, increasing stitches to create the semi-circle or fan shape for the wing. Typically, starting with DC and moving to tr stitches works well for increasing size smoothly.
Finish the wing by working a decorative edge, if desired (e.g., picots or shell stitch).
Lower Wings (make 2):
Repeat the process for the upper wings, but start with a shorter foundation chain since the lower wings are often smaller.
Use the same or similar increase pattern to shape the wing.
Assembling:
Attach each wing to the sides of the body using slip stitches or sewing with a yarn needle.
For a more pronounced body, you can work a round of SC around the entire body after attaching the wings.
Antennae (optional):
Chain a small length (6-10 chains) and attach to the top of the butterfly’s head for antennae. Make two.
Customization Tips:
- Size: Vary the foundation chain length and the number of increased rows/rounds to adjust the wing sizes.
- Colorwork: Change colors between rows/rounds or use variegated yarn for multi-colored wings.
- Texture: Mix different stitches (e.g., bobble stitch) within the wings for a textured look.