Create your very own colorful crochet scrunchie to add a homemade touch to your hairstyles! All you need is some soft yarn, a crochet hook, and an old hairband. To start, just wrap the yarn around the hairband with simple crochet stitches, making sure they're snug and close together.
Crochet Scrunchie Pattern

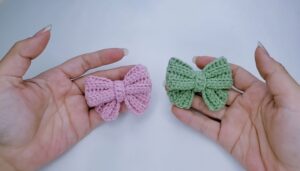
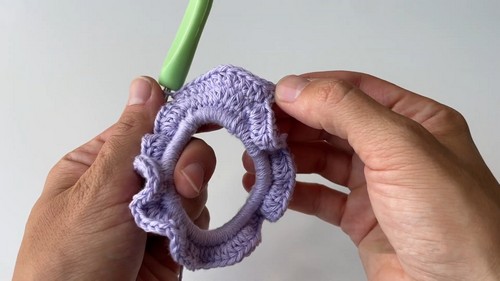
Then, as you go round and round, watch your scrunchie grow with pretty waves and ruffles. Once you're done, you'll have a charming accessory perfect for ponytails or wrist wear.
Materials Needed:
- Two colors of cotton yarn, 4 ply.
- A 3.5 mm crochet hook.
- Scissors.
- An old hairband to turn into a scrunchie.
Pattern Steps:

Starting the Scrunchie:
- Tie the yarn of your chosen starting color to the hairband, pulling it through to make a secure knot.
- Insert your crochet hook through the hairband, grab the yarn, and pull it up to create a loop on the hook.
- Chain one (ch1), which will count as your first single crochet (sc).

Single Crochet Around Hairband:
- Single crochet all around the hairband:
- Insert hook through hairband, yarn over (yo), and pull up a loop (two loops on hook).
- Yarn over again and pull through both loops on the hook (single crochet made).
- Continue this process, pushing stitches close together to densely cover the hairband.
Connect and Start the Second Round:
- Once you have crocheted enough single crochets around the hairband, connect the round with a slip stitch (sl st) into the first chain made.
- Chain two (ch2), which will count as your first half double crochet (hdc).
Half Double Crochet Increase Round:
- Half double crochet in the next stitch and throughout:
- Yarn over, insert hook into the stitch, yarn over, and pull up a loop (three loops on hook).
- Yarn over and pull through all three loops on hook (half double crochet made).
- After creating four hdc, make two hdc in the same stitch (increase made) to create a wavy edge.
- Repeat the pattern of 4 hdc and an increase around the hairband.
Completing the Rounds:
- Connect each round with a slip stitch into the chain at the round's beginning.
- For a fuller scrunchie, consider adding additional rounds following the same process of hdc and increases.

Fastening Off and Starting New Color:
- Cut the yarn of the first color and fasten off.
- Attach the second color yarn to the last round with a knot.
- Begin single crocheting around the top of each stitch from the previous round, hiding the new color's end as you go.
Final Round and Fastening Off:
- Once you’ve single crocheted around with the new color, connect the round with a slip stitch into the first chain.
- Cut the yarn, pull through the loop, and tug the end to fasten off.

Weaving in Ends:
- Use your crochet hook or a darning needle to weave in any loose ends, hiding them within the stitches for a neat finish.
Final Scrunchie:
- Your scrunchie is now complete! Feel free to experiment with different color combinations and enjoy your new accessory.
Additional Notes:
- Make sure to push your stitches closely together when crocheting around the hairband so that it is fully covered when stretched.
- The increase pattern (two hdc in the same stitch) creates a ruffled, wavy look around the scrunchie.