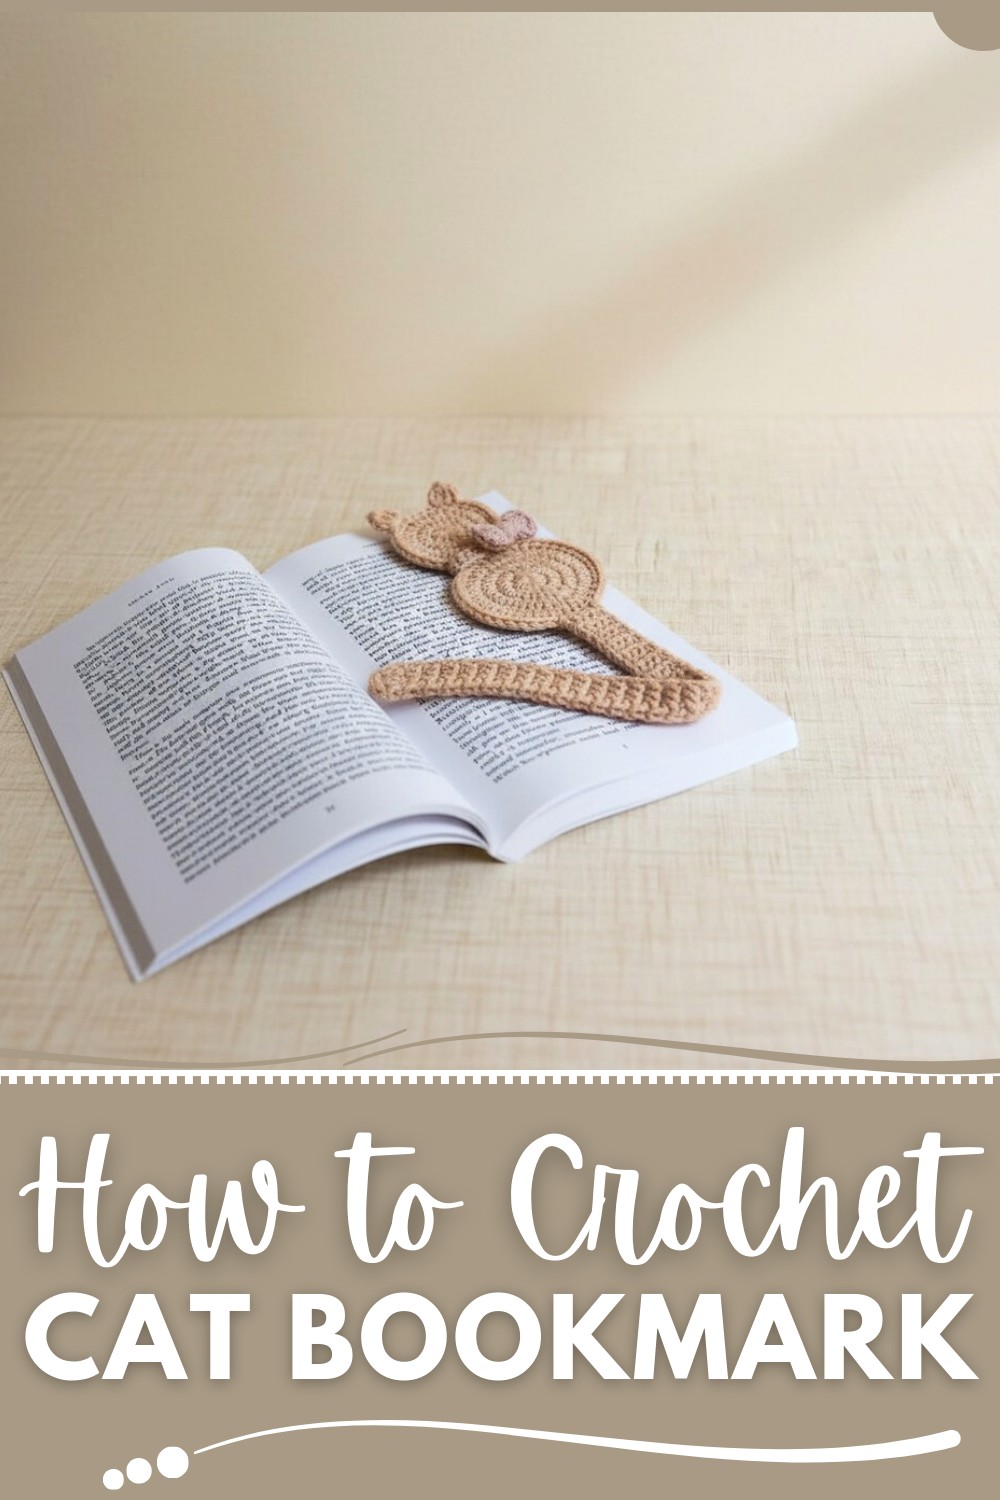
Whimsical Crochet Cat Bookmark Pattern Add Joy to Reading
Materials Needed
- Yarn:
- Soft, medium-weight yarn (Approx. DK/Light worsted yarn) in desired colors for the head, body, tail, bow, and necktie:
- Body: Primary color.
- Bow and Neck Tie: Contrasting color.
- Optionally, use yarn with texture or variegated color for added visual appeal.
- Soft, medium-weight yarn (Approx. DK/Light worsted yarn) in desired colors for the head, body, tail, bow, and necktie:
- Crochet Hook:
- Size 4mm hook fits well with medium-weight yarn. Adjust size based on your yarn thickness.
- Accessories/Equipment:
- Scissors (for trimming yarn).
- Yarn Needle: For sewing pieces together and weaving in ends.
- Stuffing: Polyester fiberfill to stuff the body and head (optional, depending on project intent).
- Hot Glue (Optional): For attaching the bow or securing details.
- Stitch Marker (optional): Helps keep track of rounds and starting stitches.
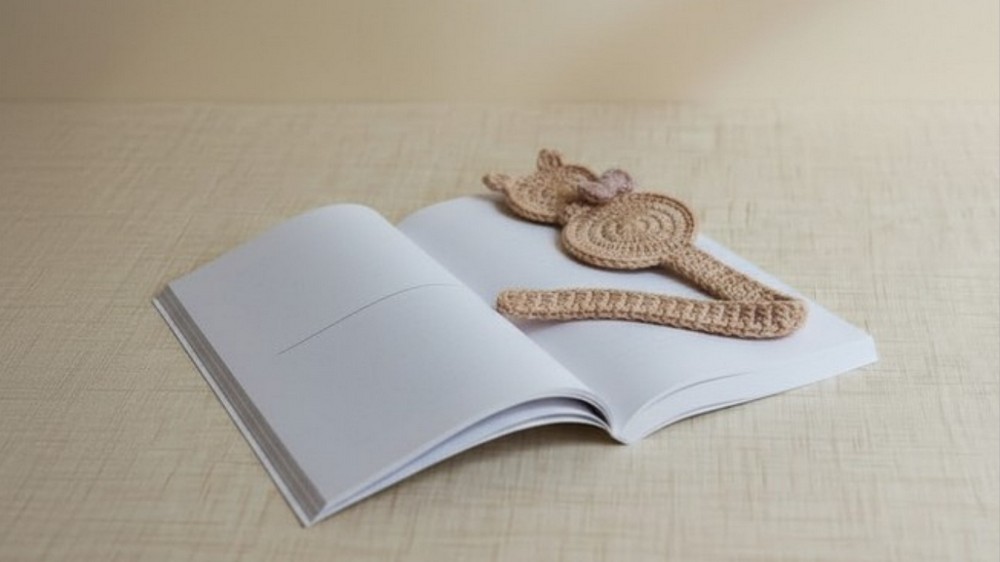
Crochet Cat Bookmark
This charming crochet project creates an animal (possibly a cat or a bear) featuring a rounded head, sturdy body, simple tail, and delicate accessories such as a bow and necktie. The pattern combines basic stitches and techniques to ensure a fun and rewarding result, even for beginners. Below is the full, detailed pattern crafted from the transcription.
Pattern Abbreviations
- Ch = Chain
- St = Stitch
- Slst = Slip Stitch
- Sc = Single Crochet
- Hdc = Half Double Crochet
- Dc = Double Crochet
- Dec = Decrease
Finished Size
- Using DK/Medium-weight yarn with a 4mm hook, the completed animal should be approximately:
- Height: 10-12 cm tall (adjustable based on yarn and hook size).
- Tail: Adjustable to desired length.
Pattern Instructions
Step 1: Head
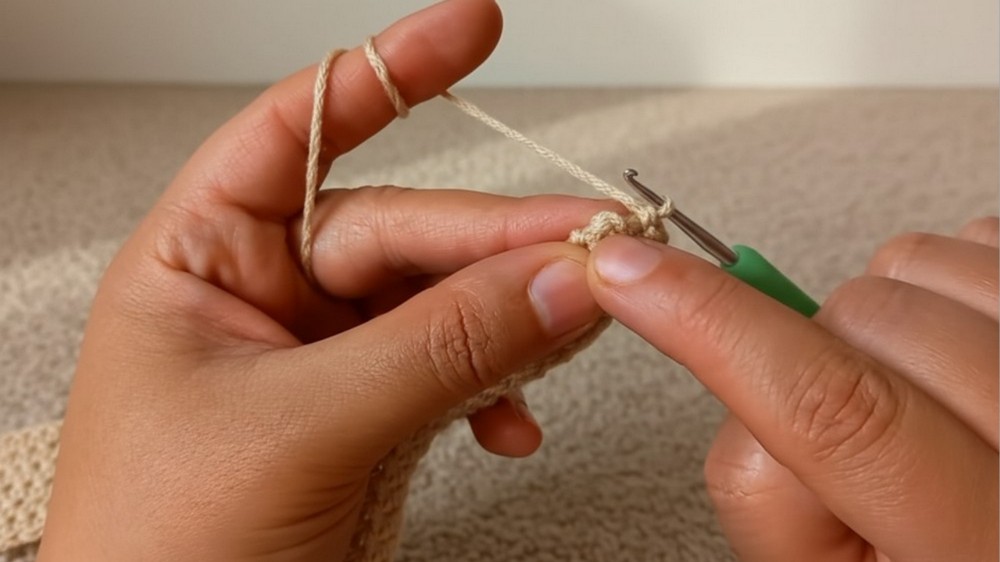
- Start with Magic Circle:
- Create a magic circle.
- Round 1:
- Ch 1, then crochet 11 Hdc into the magic circle.
- Slst into the starting Ch 1 to close the round.
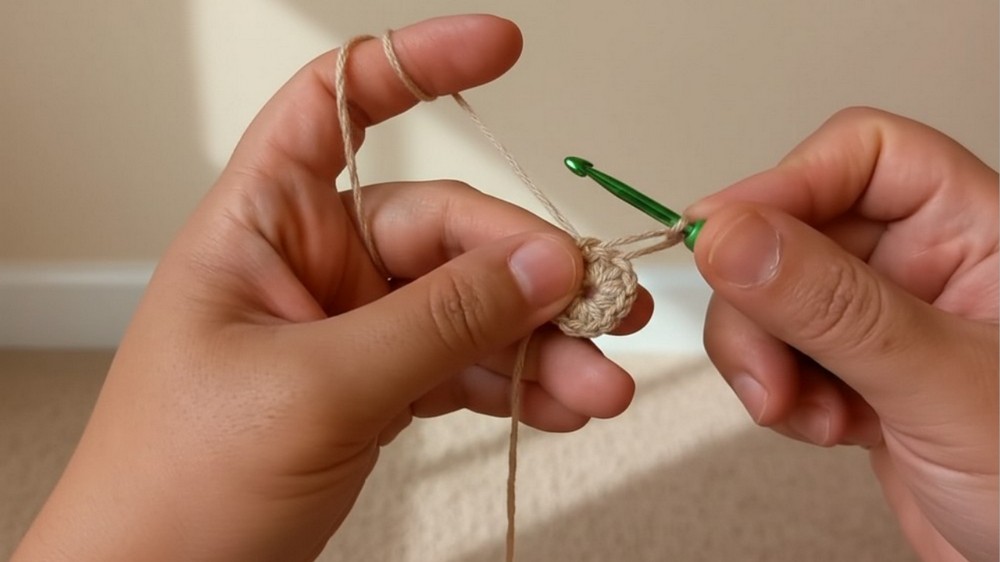
- Round 2:
- Ch 1. Work 11 increases (2 Hdc into each stitch).
- Total Stitches: 22 Hdc.
- Slst into the first Ch to close.
- Round 3:
- Ch 1. Increase every second stitch (1 Hdc, 1 increase).
- Total Stitches: 33 Hdc.
- Slst into the first Ch to close.
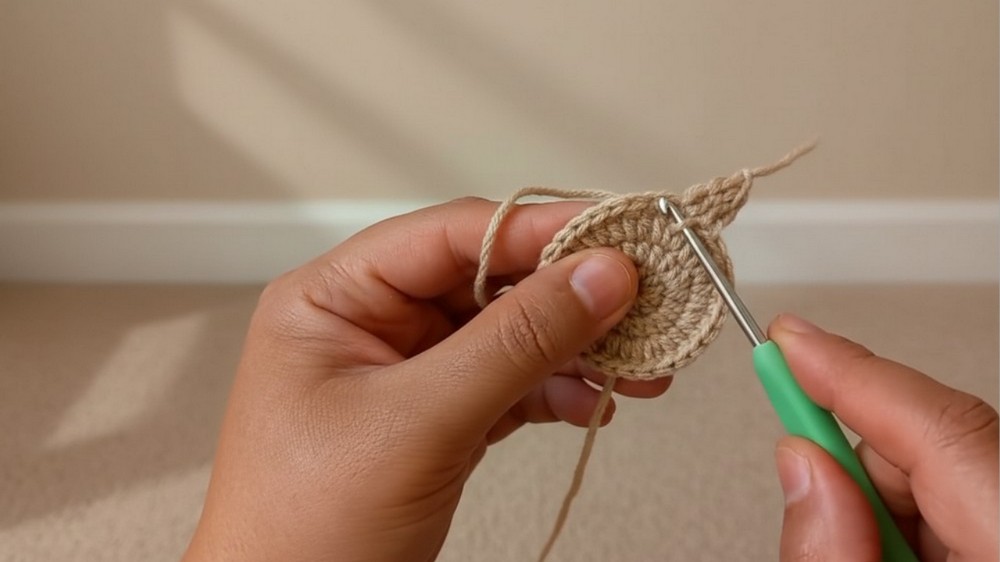
- Round 4 (Sc Round):
- Crochet 1 Sc into every stitch around (33 stitches).
- Ear Cluster Stitch:
- Ch 3. Work 3 Dc together (cluster).
- Skip 3 stitches, leaving space between the ears, and repeat the ear cluster stitch.
- Fasten off.
Step 2: Body
- Start with Magic Circle:
- Create a magic circle.
- Ch 1, crochet 11 Hdc into the circle.
- Round 1:
- Slst into the first Ch to close.
- Ch 1. Work 11 increases (2 Hdc into each stitch).
- Total Stitches: 22 Hdc.
- Round 2:
- Slst into the first Ch to close.
- Ch 1. Increase every second stitch (1 Hdc, 1 increase).
- Total Stitches: 33 Hdc.
- Round 3:
- Slst into the first Ch to close.
- Ch 1. Increase every third stitch (2 Hdc, 1 increase).
- Total Stitches: 44 Hdc.
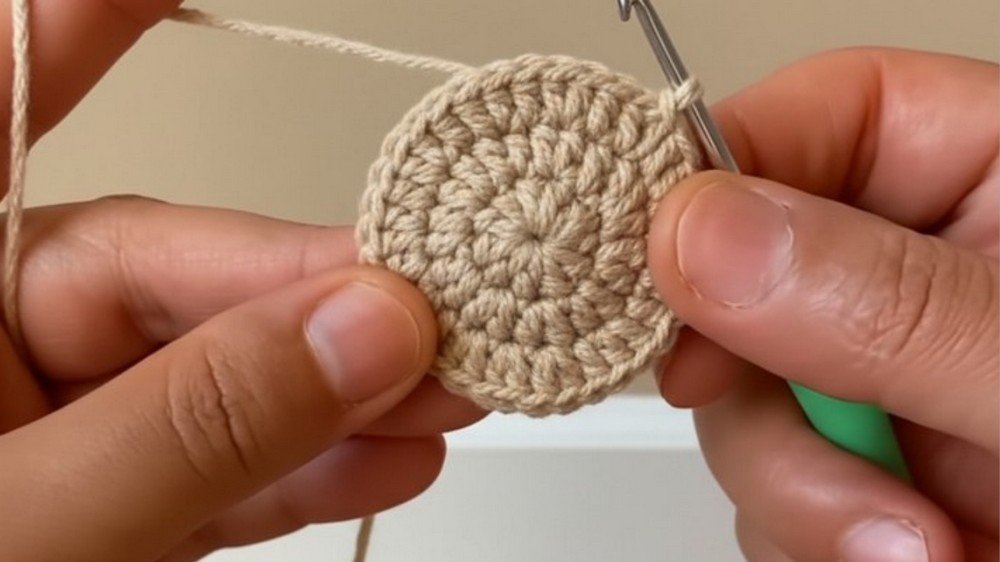
- Sc Finish:
- Crochet 1 Sc into each stitch around (44 stitches).
- Slst into the first stitch and fasten off.
- Weave in your ends neatly.
- Assembly:
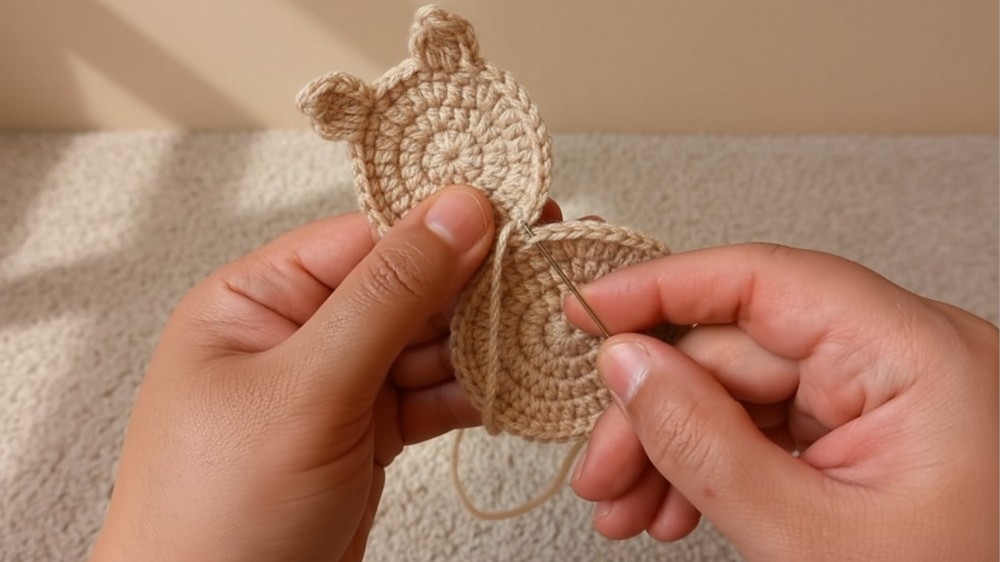
- Stuff the head and body if desired. Sew the head firmly onto the top of the body.
Step 3: Tail
- Attach Yarn:
- Join yarn 2 stitches from the middle of the bottom of the body.
- Rows (Repeat Length):
- Ch 1, Turn.
- Crochet 4 Sc each row. Repeat this until the tail achieves your desired length.
- Taper the Tail:
- Ch 1, Turn. Work 2 Dec Sc in the final row to taper the tail.
- Fasten Off:
- Securely weave in your ends to tidy the join.
Step 4: Neck Tie
- Chain Foundation:
- Ch 20 for the necktie.
- Row 1:
- Crochet 19 Sc evenly along the chain.
- Fasten off and set aside.
Step 5: Bow
- Create the Bow:
- Ch 5. Slst into the first Ch to make a circle loop.
- Form Bow Halves:
- Ch 3, then crochet 4 Dc into the loop, followed by Ch 3 and Slst into the loop. Repeat on the other side of the circle.
- Wrap the Middle:
- Use the yarn ends to wrap around the middle of the bow securely, creating a bow shape.
- Attach the Bow:
- Sew or hot glue the bow to the necktie.
Customization Ideas
- Color Variations:
- Use contrasting colors for body parts, or create a multicolored effect using variegated yarn.
- You can give the animal stripes, polka dots, or additional patterns using stranded crochet or embroidery techniques.
- Size Variations:
- Use thicker yarn and a larger hook to create a bigger animal if desired. Conversely, finer yarn and a smaller hook can result in a miniature version.
- Accessories:
- Add additional embellishments such as a hat, scarf, or even tiny paws/claws using embroidery.
- Create a matching bow at the tail or accessorize with beads for a playful touch.
Tips for Success
- Keep Tension Consistent: Ensuring tight and even stitches helps create a polished finish.
- Stuff Gradually: Add stuffing during crochet where required, especially for the head and body. This avoids uneven shaping later.
- Use Stitch Markers: Marking the start of each round prevents confusion during increases or decreases.
- Secure Ends: Always weave in or lightly burn ends with synthetic yarn to prevent fraying.
Conclusion
Your adorable crochet animal is complete! Featuring a rounded head, cute ears, a sleek tail, and lovely accessories like the bow and necktie, this project is perfect for gifting, decorating, or adding to your amigurumi collection.
Final Look
- Head: Rounded with symmetrical ear clusters.
- Body: Smooth cylindrical structure with a neatly attached head.
- Tail: Playful detail that adds charm to the overall shape.
- Accessories: Beautiful bow and necktie for whimsical flair.
Care Instructions
- Spot clean with a damp cloth. Avoid machine washing to maintain shape and finish.
- Handle hot-glued attachments gently; use sewing for extra durability.
Optional Add-Ons
- Seasonal Themes: Customize in festive colors (red and green for Christmas, pastel tones for Easter).
- Extra Embellishments: Add little crocheted eyes, embroidered stitches for fur texture, or miniature props for the animal.
- Animal Variations: Adapt the pattern to create a puppy, bunny, or bear shape.