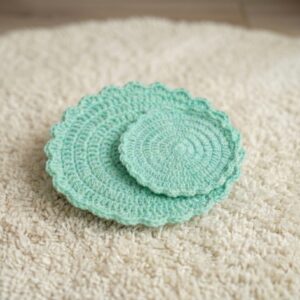
Step onto a cozy, handmade crochet Rug/Mat/Carpet that gently hugs the floor with its oval shaped. This delightful mat, carefully crafted with soft yarn, brightens any room with its inviting texture and unique design. Whether it's beside your bed, offering a soft spot for your toes in the morning, or laid out in your living room. Adding a touch of warmth and charm, this crochet carpet is a labor of love.
Oval shaped Crochet Rug/Mat/Carpet Pattern

With every loop and stitch, it tells a story of comfort and home, making it more than just a decoration—it's a small, soft oasis for your feet wherever you choose to place it.
Materials:
- LAN Brand Vanna's Choice in Oatmeal (2 skeins)
- Big Best Value Buttercup
- Big Best Value Medium Denim
- 4.5 mm crochet hook
- Tapestry needle
Foundation Chain:
- Start with an even number of chains, then add 3 more chains. For a larger rug size, make 44 chains and then add 3 for a total of 47 chains.

Row 1:
- Starting from the fourth chain from the hook, make 5 double crochet (DC) stitches in the same space. Note that the initial three chains also count as a DC.
- Continue by making 1 DC in every chain. You should have 42 DCs.
- At the end of the row, in the last chain, make 6 DC to finish. Turn your work.
Row 2:
- Chain 2 (counts as a double crochet). In the same space, make another DC. You’ll increase at each corner by making 2 DCs in each of the initial 6 DCs from the previous row.
- Along the side, make 1 DC in each DC from the previous row.
- Continue this pattern and finish the row by making 6 increases in the final corner. Turn your work.

For Row 3:
- Repeat the pattern established in Row 2, making 1 DC in each stitch along the sides and increasing at each corner.
- Switch colors if desired after completing the row by attaching a new color with a slip stitch.
Row 4:
- With the new color, start by making a single crochet (SC), chain 3, and a slip stitch (SL ST) in the same stitch. This creates a small arch.
- Skip one stitch, and in the next stitch, repeat the SC, chain 3, and SL ST pattern. Continue around the row.

Row 5 - Row 12:
- Continue increasing by following the pattern established in Rows 2 and 3. For arcs and scalloped edges, repeat the pattern from Row 4, adjusting the number of chains if you wish to create larger or smaller arcs.
Specific Increases and Changes:
- When increasing in corners, remember that each side between the marked increases will have a specific number of stitches based on the row you are on. Adjust accordingly based on the pattern established in the initial rows.
- For detailed decorative edges, alter the number of chains in your arcs to create variations in the design.

Finishing:
- To finish the rug, continue the established increase pattern until you reach the desired size. Remember to make the final increases consistent with your pattern.
- Cut the yarn, weave in ends securely with a tapestry needle.

Notes:
- Remember to mark your stitches with stitch markers if you find it helpful to keep track of increases, especially on corners.
- This pattern is very adaptable. Feel free to modify the size, colors, and border details to personalize your rug.
Closing:
- Remember to change colors as desired by attaching new yarn colors with slip stitches at the beginning/end of rows to introduce new color patterns into your project.