Decorate your favorite corner with this Crochet Mini Chicken Free Pattern and add a cute farm animal toy to your Easter or spring collection.
Small farm animals have a way of adding fun and happiness to even the simplest spaces. Their tiny shapes and friendly faces make them especially appealing as yarn toys. @CrochetToysIryna shares a delightful tutorial for a Crochet Mini Chicken that is sure to catch attention.
Quick Crochet Mini Chicken Free Pattern For Spring Decor
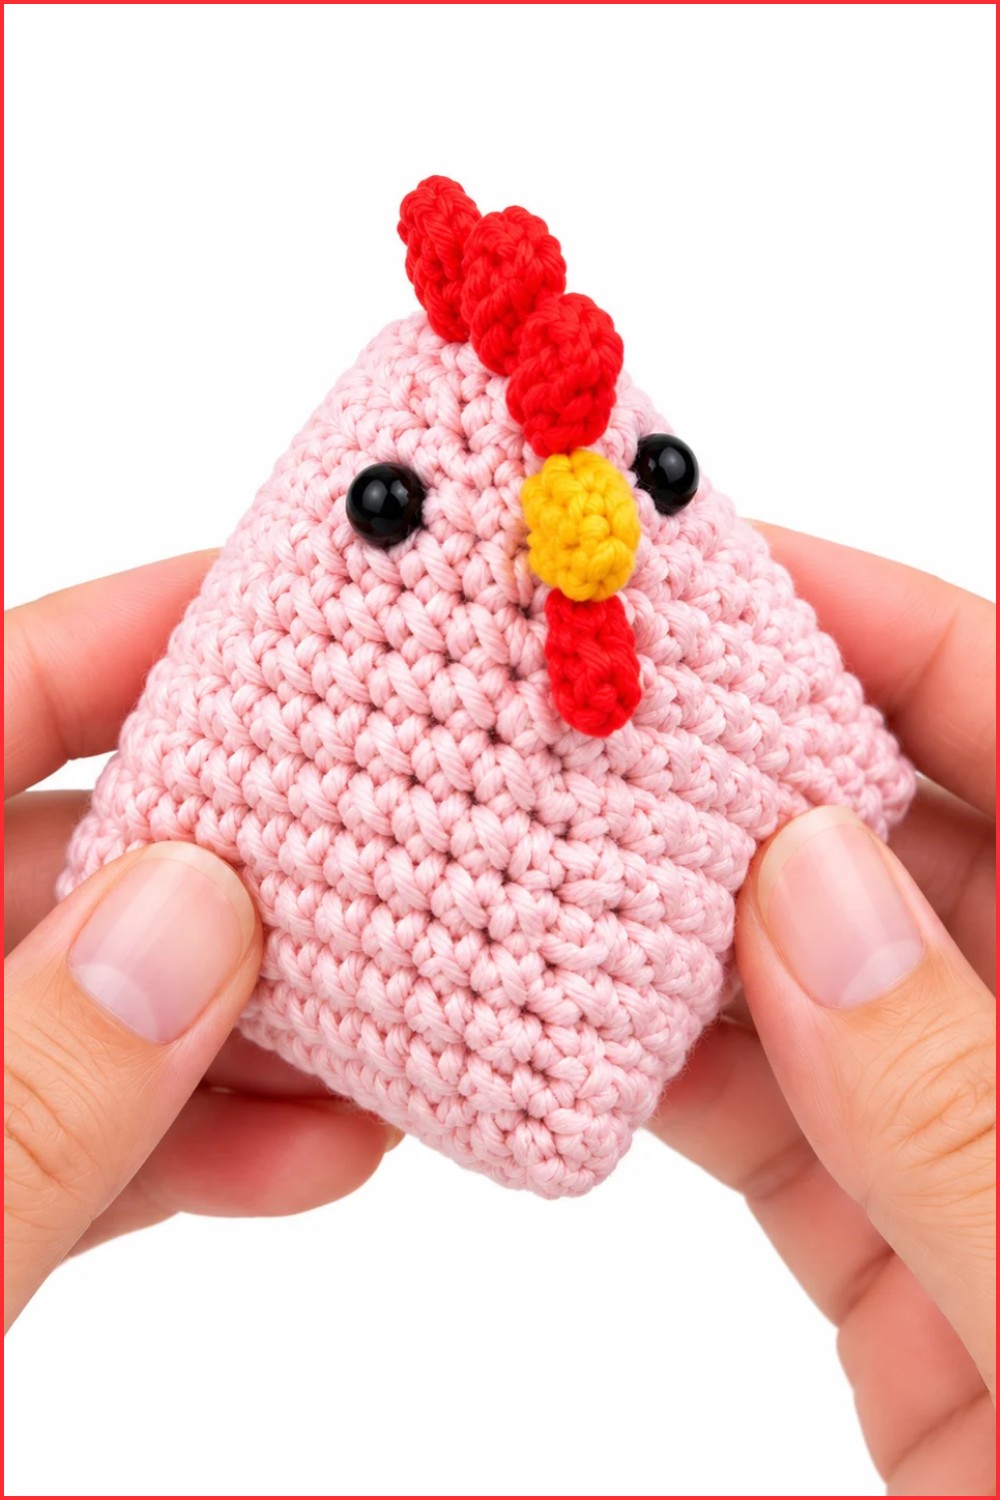
This Crochet Mini Chicken is a tiny stuffed bird with a plump body, short wings, and a small orange beak. Its rounded shape gives it a funny appearance, while the bright eyes and little comb on its head add personality. The neat stitches form a slightly raised texture that makes the finished chicken pleasant to touch.
The miniature size is one of its most appealing features. Yellow yarn can give it a baby chick look, while white or light brown offers a traditional farm style. A red comb and orange feet can help the smaller details stand out.
This chicken is a fun choice for kitchen decoration, Easter baskets, or a bedroom shelf. You can also include it in a collection of farm animals or give it as a handmade birthday present. Several chickens in different colors can form an amusing little group.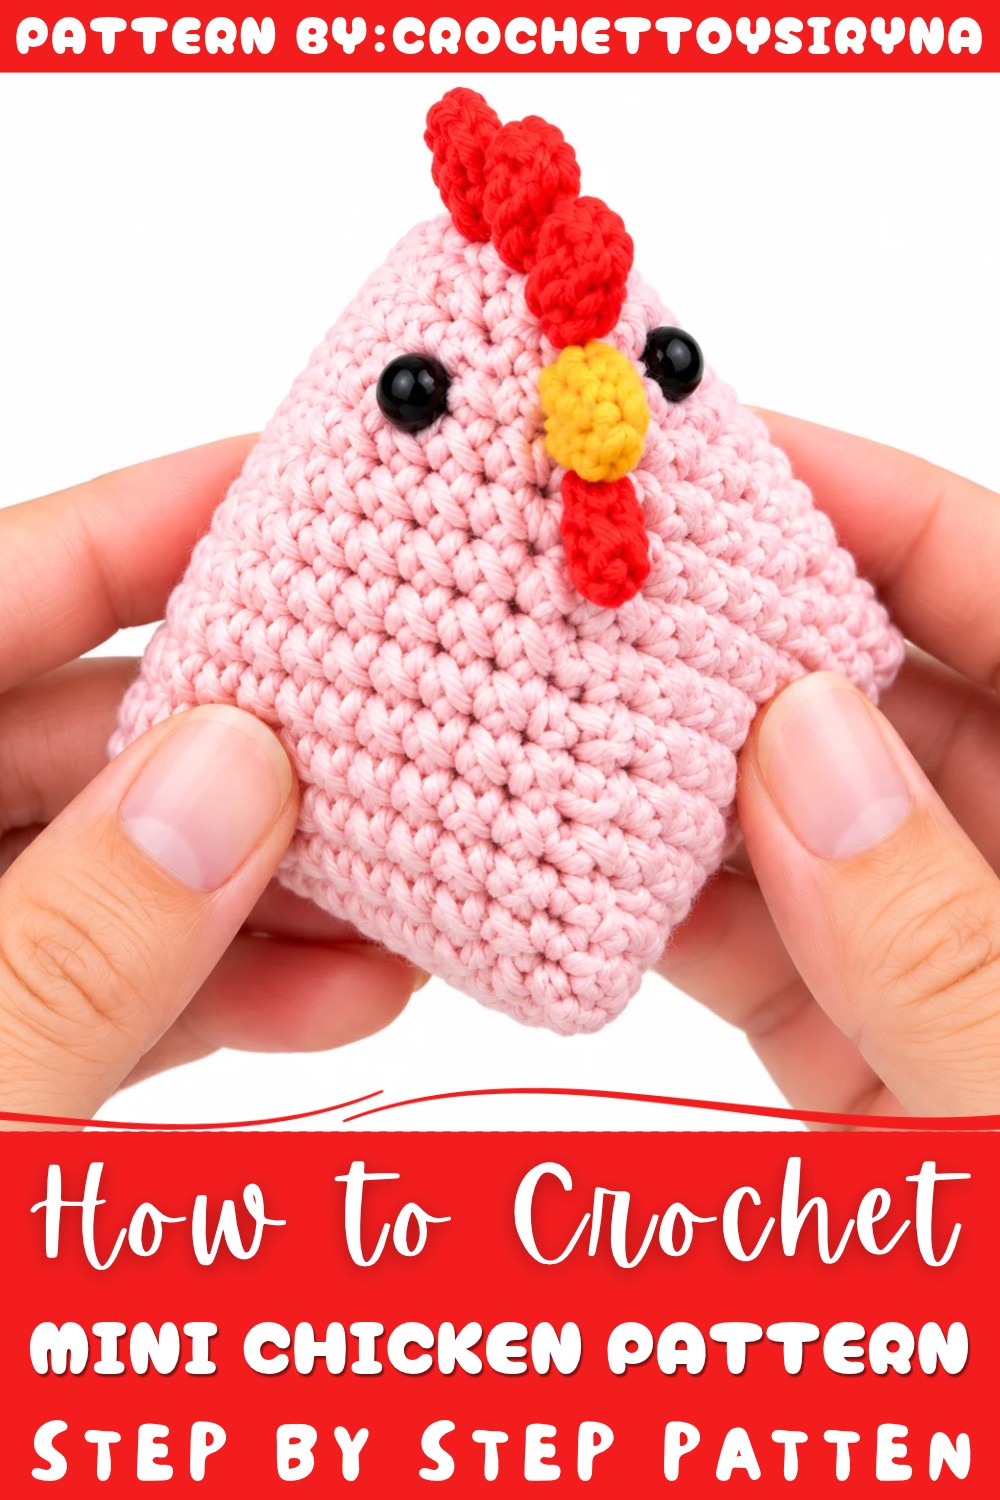
Making this bird involves working basic crochet stitches in rounds to build its body. A small amount of stuffing helps it stay plump, while the wings, beak, and other features complete its shape.
This free mini chicken pattern is a cheerful way to add a tiny farm friend to your home.
About the Pattern
The baby chicken crochet pattern creates an adorable, compact chick by forming a square body and adorning it with characteristic embellishments. The seamless construction in rounds facilitates a tidy, modern look. Using cotton/acrylic blend yarn for softness and durability, the chick is suitable for gifts, decorations, or children’s toys. Secure safety eyes, a sculpted comb, and a cheerful beak bring this project to life.

Pattern at a Glance
- Body: Formed by working continuous rounds into a square using Half Double Crochet (HDC) stitches.
- Eyes: Safety eyes secured at precise points before closing.
- Stuffing: Holofiber provides a soft, plush texture.
- Seaming: Fold and stitch to shape into a compact, huggable form.
- Embellishments: Crochet comb (crest), beak, and beard (wattle) in contrasting yarn for added charm.
Important Notes
- Work body in continuous rounds; avoid joining to preserve structure.
- Keep corners neat by correctly placing increases.
- Use stitch markers if needed for eyes or round tracking.
- Gauge is flexible; adjust yarn or hook for desired size.
Difficulty Level
Beginner to Advanced Beginner
No advanced shaping; suitable for anyone comfortable with basic stitches: HDC, SC (Single Crochet), and DC (Double Crochet).
Supplies Needed
- Yarn: Yarn Art Jeans (sport weight, cotton/acrylic blend)
- Yellow (body)
- Red (comb/wattle)
- Yellow or orange (beak)
- Hook: 2mm crochet hook
- Safety eyes: 2, 6–8 mm recommended
- Stuffing: Holofiber or equivalent fiberfill
- Tapestry needle: for sewing and weaving
- Scissors
- Stitch marker (optional)
Size & Measurements
- Flat square: ~6–7 cm (2.5–2.75 in) across.
- Finished chick: ~7x7x4 cm (2.75x2.75x1.5 in).
- Results may vary based on tension and yarn.
Gauge & Stitch Details
- Gauge: 12 HDC x 10 rows = 5x5 cm (2x2 in)
- Main stitch: Half Double Crochet (HDC)
- Corners: Worked with increases for shaping
Crochet Abbreviations
| Abbreviation | Stitch Name |
|---|---|
| ch | chain |
| sc | single crochet |
| hdc | half double crochet |
| dc | double crochet |
| sl st | slip stitch |
| st(s) | stitch(es) |
Special Stitch Guide
- HDC (Half Double Crochet): Yarn over, insert hook in stitch, yarn over, pull up loop (three loops on hook), yarn over, pull through all three loops.
- DC (Double Crochet): Yarn over, insert hook, yarn over, pull through (three loops), yarn over, pull through two loops, yarn over, pull through remaining two loops.
- SC (Single Crochet): Insert hook, yarn over, pull up loop, yarn over, pull through both loops.
- Continuous rounds: Do not join at end of each round; continue to next stitch for seamless finish.
Complete Crochet Pattern
Main Body (The Square)
Foundation
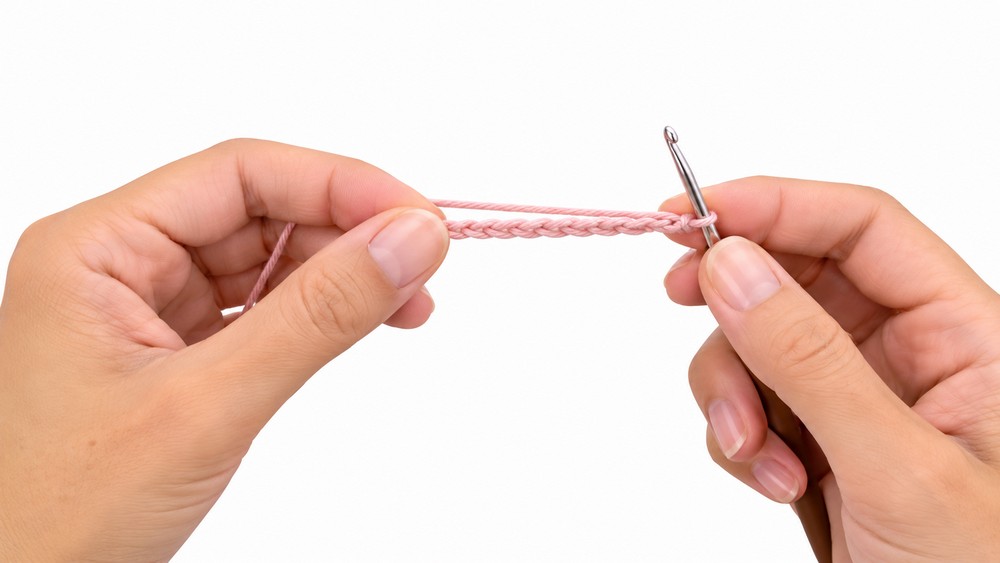
- Chain 16.
Round 1
- Starting in 2nd chain from hook, work 14 HDC (Half Double Crochet) (hdc) – one in each chain.
- In the final chain, work 2 HDC (hdc) to create the first corner.
- Turn, and crochet 14 HDC (hdc) along the opposite side of the foundation chain.
- Total stitches: 30 (hdc) with 2 added for corners. (Check your count for precision.)
Rounds 2-12
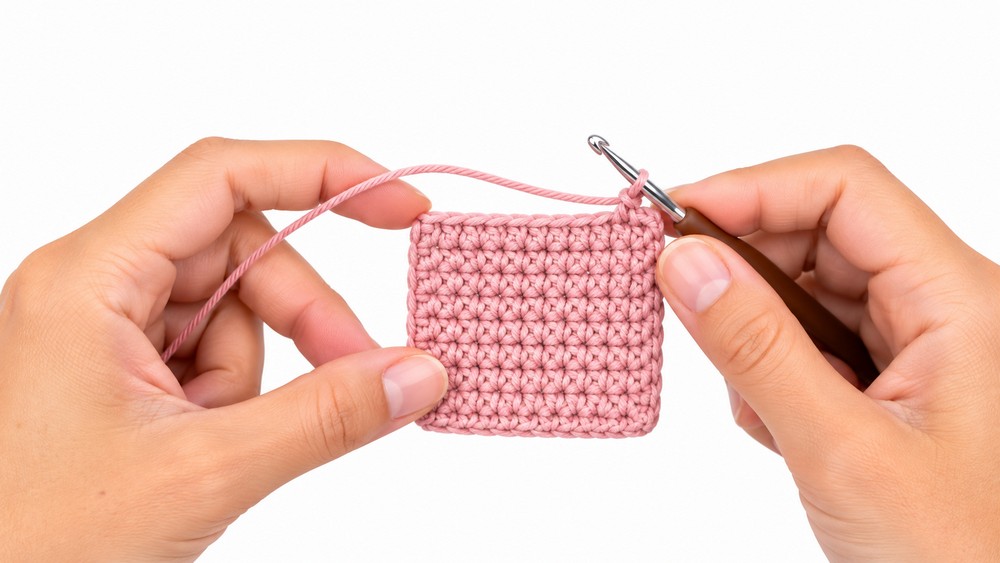
Work in continuous rounds for a seamless square.
- HDC (hdc) in each stitch around.
- At each corner, continue to place 2 HDC (hdc) to maintain the square’s shape.
- Repeat until approx. 12 rows are completed or body measures 6–7 cm.
Finishing Square
- Fasten off, leaving a long tail for closing.
Eyes & Stuffing
Insert Eyes
- Place safety eyes at the top corners of the flattened square (ensure symmetrical placement).
Stuffing
- Fill the body with holofiber, distributing evenly for a plump shape.
Sealing
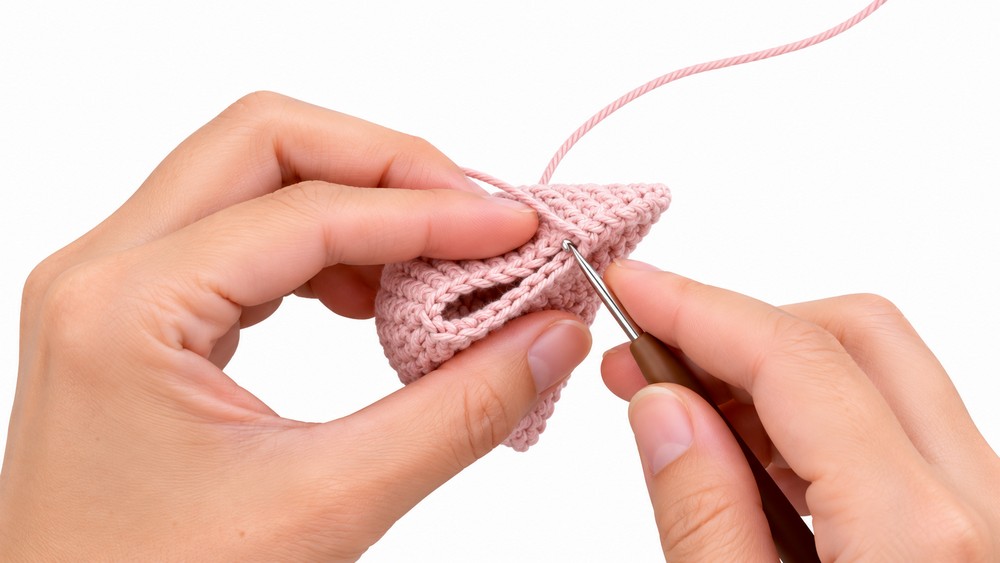
- Fold the square in half to create a compact pillow-like body.
- Stitch the opening closed using your needle or hook and whipstitch/mattress stitch with the yarn tail.
Embellishments
Comb (Crest)
- Using RED thread/yarn, attach to top center:
- Chain 2 (ch 2).
- Work 2 Double Crochets (DC) (dc) in the same stitch.
- In the next stitch, work 1 Single Crochet (SC) (sc).
- In the following stitch, work 3 DC (dc) to make a scalloped edge.
- Alternate between SC and groups of 3 DC (dc) for desired comb shape along the top center (usually 2–3 arches).
- Fasten off and weave in end.
Beak
- Using YELLOW thread/yarn, attach below safety eyes:
- Chain 1 (ch 1).
- Work 1 Double Crochet (DC) (dc) in same stitch.
- Chain 3 (ch 3).
- Finish with 1 Single Crochet (SC) (sc) in the next stitch (forms a tiny triangle).
- Secure and weave in end.
Beard (Wattle)
- Using RED thread/yarn, attach below the beak:
- Chain 1 (ch 1).
- Work 1 Double Crochet (DC) (dc) in same stitch.
- Finish with 1 Single Crochet (SC) (sc) in the next stitch (makes rounded wattle).
- Fasten off and weave in end.
Assembly & Finished Size
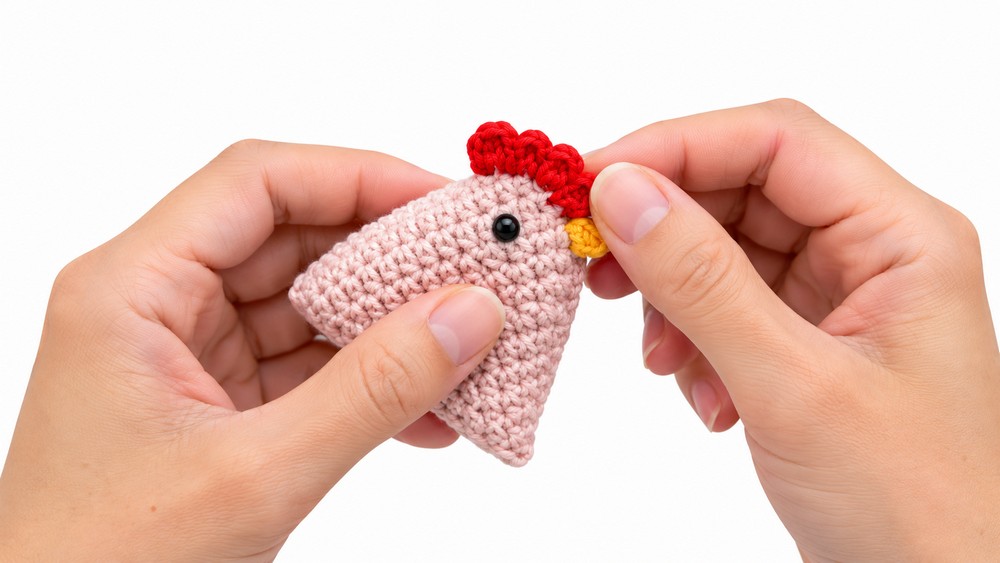
Shape the chick gently after all details are attached and ends woven. Use fingers to adjust the comb, beak, and wattle. The completed chick should have crisp corners, soft body, and lively features, measuring approximately 7x7x4 cm.
Conclusion
The baby chicken crochet pattern balances simplicity with delightful detail, using basic stitches to produce a neatly squared, plump chick. The highlighted stitches ensure clarity throughout assembly, and finishing touches like the comb and beak add extra personality. Ideal for gifts and playful decor, this chick’s construction allows customization, inviting creative color changes and expression variations. Each step produces a finished product that’s both charming and sturdy for its intended use.