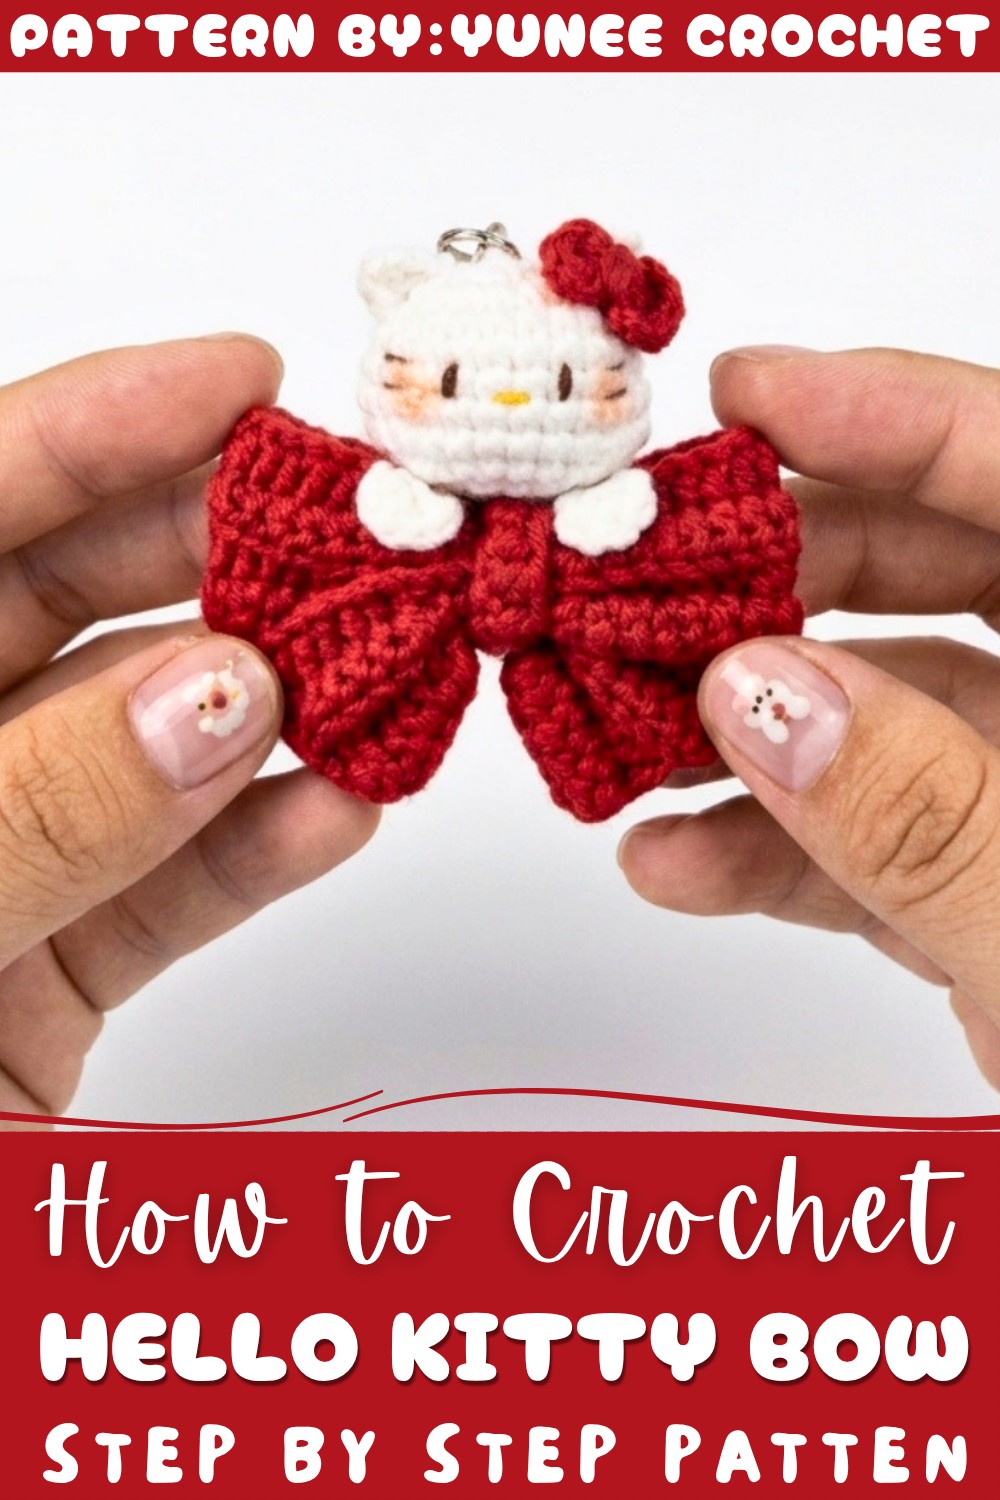
Personalize your belongings smoothly with this Free Crochet Hello Kitty Bow Keychain Pattern that's showcasing a playful bow that adds charm and color anywhere you go.
If you love cute and fun project, then you will enjoy the Free Crochet Hello Kitty Bow Keychain Pattern. This pattern lets you make a small and adorable keychain that shows off the famous chracter. It is a simple project where you use yarn and a crochet hook to create a charming little decoration you can carry with your keys or bag. The pattern is free and easy to follow, perfect for beginners or anyone who loves kitty. You can find this pattern and many other helpful tutorials on Yunee Crochet, a popular YouTube channel that offers clear, step-by-step crochet videos for all skill levels.
Free Crochet Hello Kitty Bow Keychain Pattern with Easy Steps
This Hello Kitty bow keychain looks very pretty and sweet. It is shaped just like the famous red bow that Hello Kitty wears on her head. The texture is soft because it is made with yarn, which feels nice to touch and hold. The size is small and handy, perfect to hang on your keyring or backpack. Its style is playful and cute, making it a great gift for friends or a lovely treat for yourself. The bright color and neat stitches make the bow really stand out, catching the eye easily.
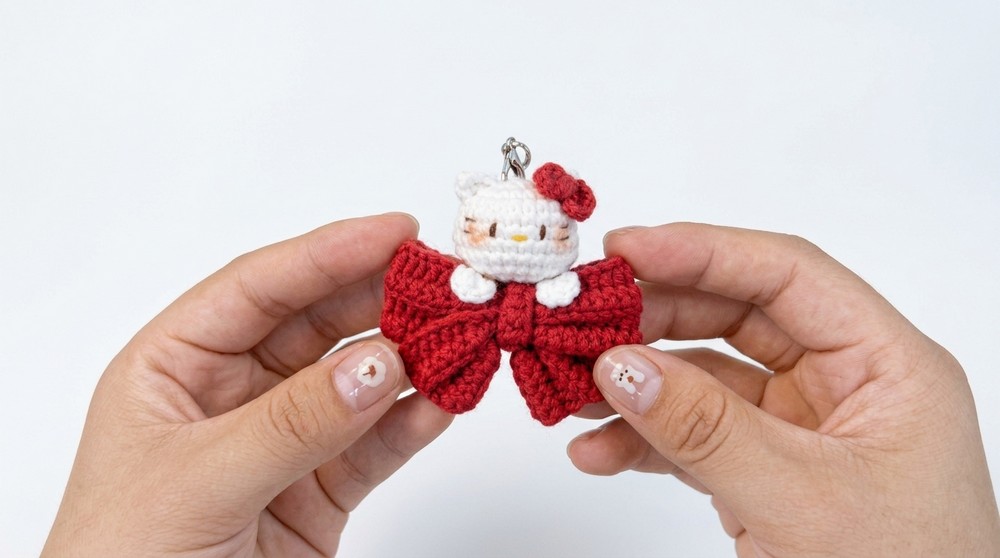
This fun project is great for anyone who wants to add a touch of charm to their everyday items. The bow’s simple shape and soft texture make it comfortable to carry around. Plus, it’s a quick and easy crochet project, so you can finish it in no time. Whether for personal use or as a special gift, this Free Crochet Hello Kitty Bow Keychain Pattern will add a little joy and color wherever you go.
Crochet Hello Kitty Bow Keychain Pattern
This crochet tutorial provides a step-by-step guide to creating a lovable Hello Kitty Bow Keychain. Utilizing red and white yarn, along with basic crochet stitches, it combines a large textured bow, a detailed Hello Kitty head, and small decorative elements into a charming keychain accessory. This handcrafted piece is perfect for Hello Kitty fans or as a thoughtful gift.
Pattern Highlights
- Large textured bow: Constructed with half double crochets and slip stitches worked through back loops to create ridges and dimension.
- Hello Kitty head: Worked in rounds with strategic increases and decreases for shaping, enriched with stuffing for a plush finish.
- Ears, legs, and small bow: Miniature pieces made with combinations of single and half double crochets, and double crochets with chains for the bow.
- Finishing assembly: Sewing and gluing ensure all components are perfectly attached for a durable accessory.
Notes
- Maintain even tension to keep stitches consistent, especially when working back loops only.
- Use a stitch marker to track the beginning of rounds on the head for accuracy.
- Crochet the small pieces carefully for precise shaping.
- Stuff the Hello Kitty head with fiberfill before closing to achieve a well-rounded, plush form.
- Glue is used to attach the head and legs to the bow securely; use textile glue for better adhesion.
- Secure sewing of ears and small bow ensures the figure’s longevity without parts detaching.
Skill Level
Beginner to Intermediate: Suitable for crocheters familiar with basic stitches such as chain, single crochet (sc), half double crochet (hdc), double crochet (dc), slip stitch (slst), and comfortable with working in rounds.
Materials
- Red yarn (for large bow and small bow)
- White yarn (for Hello Kitty head, ears, and legs)
- Crochet hook appropriate to your yarn (approximately 3.5 mm to 4 mm recommended)
- Fiberfill for stuffing the head
- Needle for sewing parts
- Textile glue or craft glue
- Scissors
Measurements / Sizing
- Large bow measures approximately 15 cm in width and 5 cm in height.
- Hello Kitty head approximately 5 cm in diameter before assembly.
- Finished keychain size varies by assembly, approximately 10 cm height overall.
Gauge (and Stitch Pattern if applicable)
- Half double crochet (hdc) gauge: approx. 14 stitches by 8 rows per 5 cm.
- Single crochet (sc) gauge: approximately 20 stitches by 24 rows per 10 cm.
- Working in back loops only (BLO) creates texture without changing stitch counts.
Stitch Abbreviations
- ch = chain
- sc = single crochet
- hdc = half double crochet
- dc = double crochet
- slst = slip stitch
- inc = increase (2 stitches in same stitch)
- dec = decrease (crocheting two stitches together)
- BLO = back loops only
Special Stitches
- Working in Back Loops Only: Crochet stitches by inserting the hook into only the back loop portion of each stitch, creating ridges and a ribbed texture effect.
- Magic ring: Starting circular foundation to minimize holes in tight amigurumi or motifs.
The Crochet Pattern!
1. Large Bow
Base foundation:
- Chain 63.
Row 1:
- Begin in the 2nd chain from the hook:
- Work 6 half double crochets (hdc).
- Work 6 slip stitches (slst).
- Work 16 hdc.
- Work 6 slip stitches.
- Work 16 hdc.
- Work 6 slip stitches.
- End with 6 hdc.
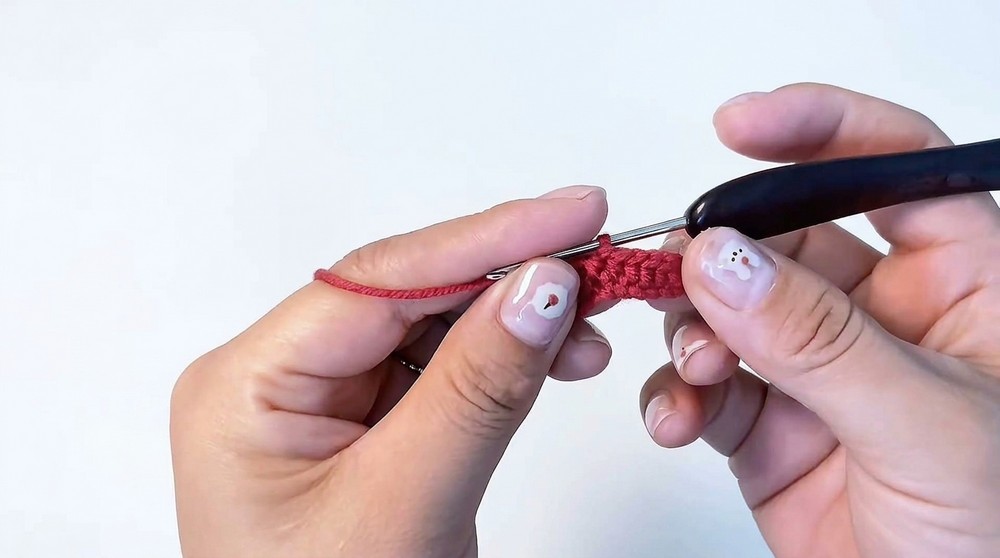
Rows 2 to 4:
- Chain 1. Turn your work.
- Work the whole row into the back loops only (BLO), repeating the stitch pattern from Row 1 for each row (6 hdc, 6 slst, 16 hdc, 6 slst, 16 hdc, 6 slst, 6 hdc).
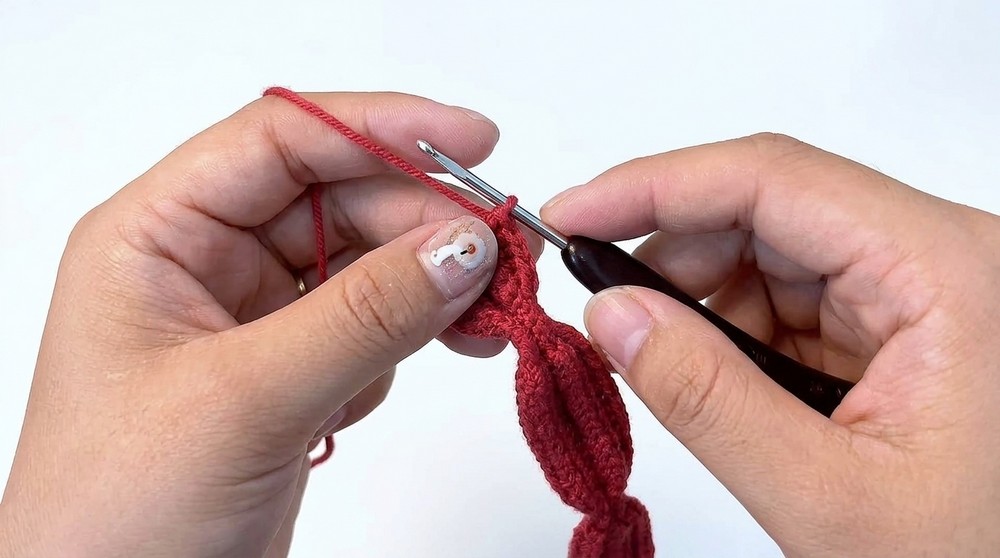
Center piece strip:
- Chain 10.
- Starting in the 2nd chain from the hook, work 9 hdc across.
- Sew this narrow strip securely around the center of the large bow, gathering it to create the classic bow center shape.
2. Hello Kitty Head
Round 1:
- Begin with a magic ring.
- Work 7 single crochets (sc) into the ring.
Round 2:
- Increase in every stitch (2 sc in each stitch around).
- Total stitches: 14.
Round 3:
- Work (1 sc, 1 inc) repeated 7 times.
- Total stitches: 21.
Rounds 4 to 6:
- Work 1 sc in each stitch (21 sc).
- Maintain stitch count for three rounds.
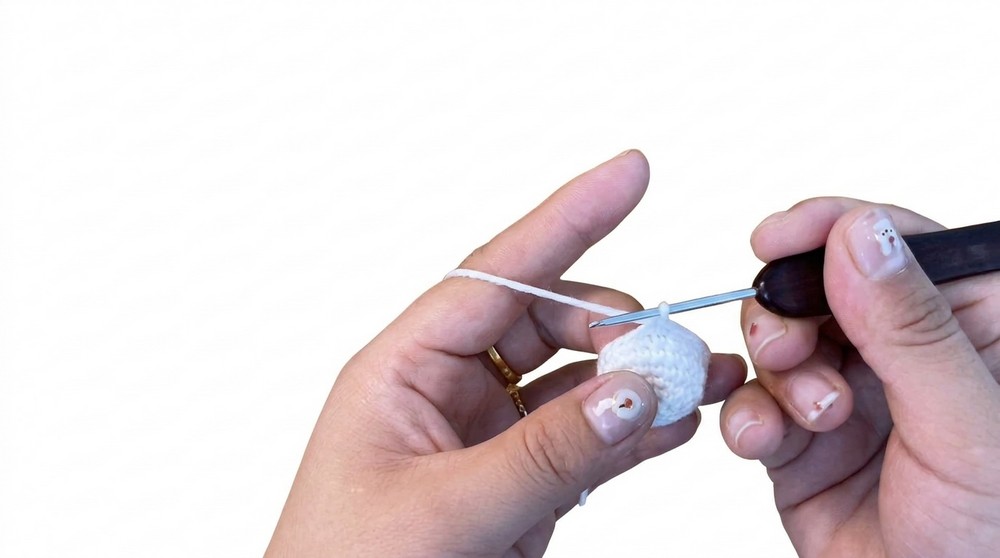
Round 7:
- Work 5 sc.
- Work 3 increases (inc).
- Work 5 sc.
- Work 3 increases (inc).
- Work 5 sc.
- Total stitches: 27.
Round 8:
- Work 1 sc in each stitch (27 sc).
Round 9:
- Work 5 sc.
- Work 3 decreases (dec).
- Work 5 sc.
- Work 3 decreases (dec).
- Work 5 sc.
- Total stitches: 21.
Round 10:
- Work (1 inc, 1 dec) repeated 7 times.
- Stuff the head firmly with fiberfill.
- Total stitches maintained at 21.
Round 11:
- Work 7 decreases (dec) evenly around.
- Cut yarn, leaving a tail.
- Sew through front loops to close the opening neatly.
3. Ears, Legs, and Small Bow
Ears:
- Chain 3.
- Starting in the 2nd chain:
- Work 1 sc.
- Work 1 half double crochet (hdc) in next chain.
- Repeat the same steps to create the second ear.
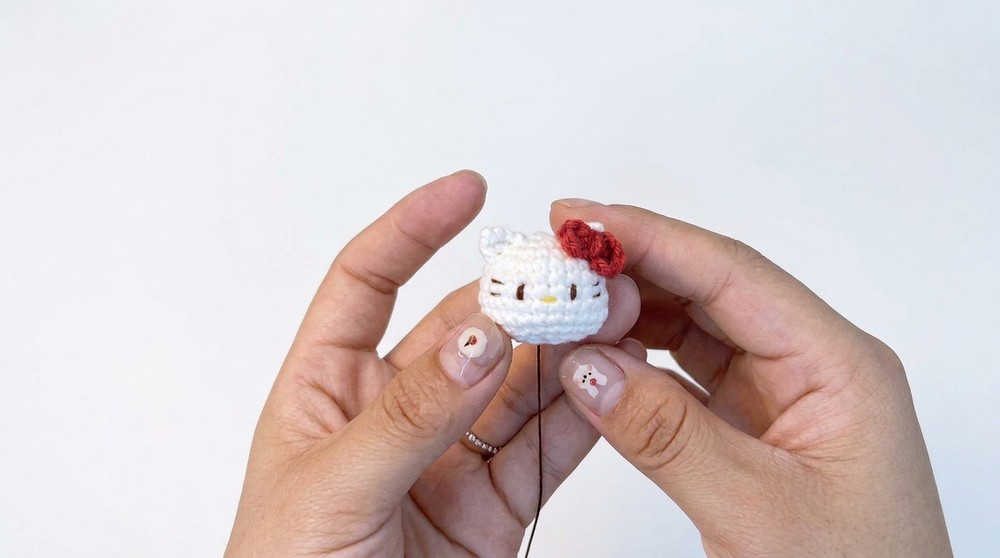
Legs:
- Begin with a magic ring.
- Work 5 sc into the ring.
- Cut yarn and finish.
- Repeat for the second leg.
Small Bow:
- Begin with a magic ring.
- Chain 2.
- Work 2 double crochets (dc) inside the ring.
- Chain 2.
- Slip stitch to starting point.
- Repeat these steps on the opposite side of the circle to form symmetrical loops.
- Wrap yarn tightly around the center 3 times to create the bow knot.
4. Assembly
- Sew the ears and small bow onto the Hello Kitty head securely.
- Glue the head and legs onto the center of the large bow.
- Arrange all components neatly to maintain proportion and stability.
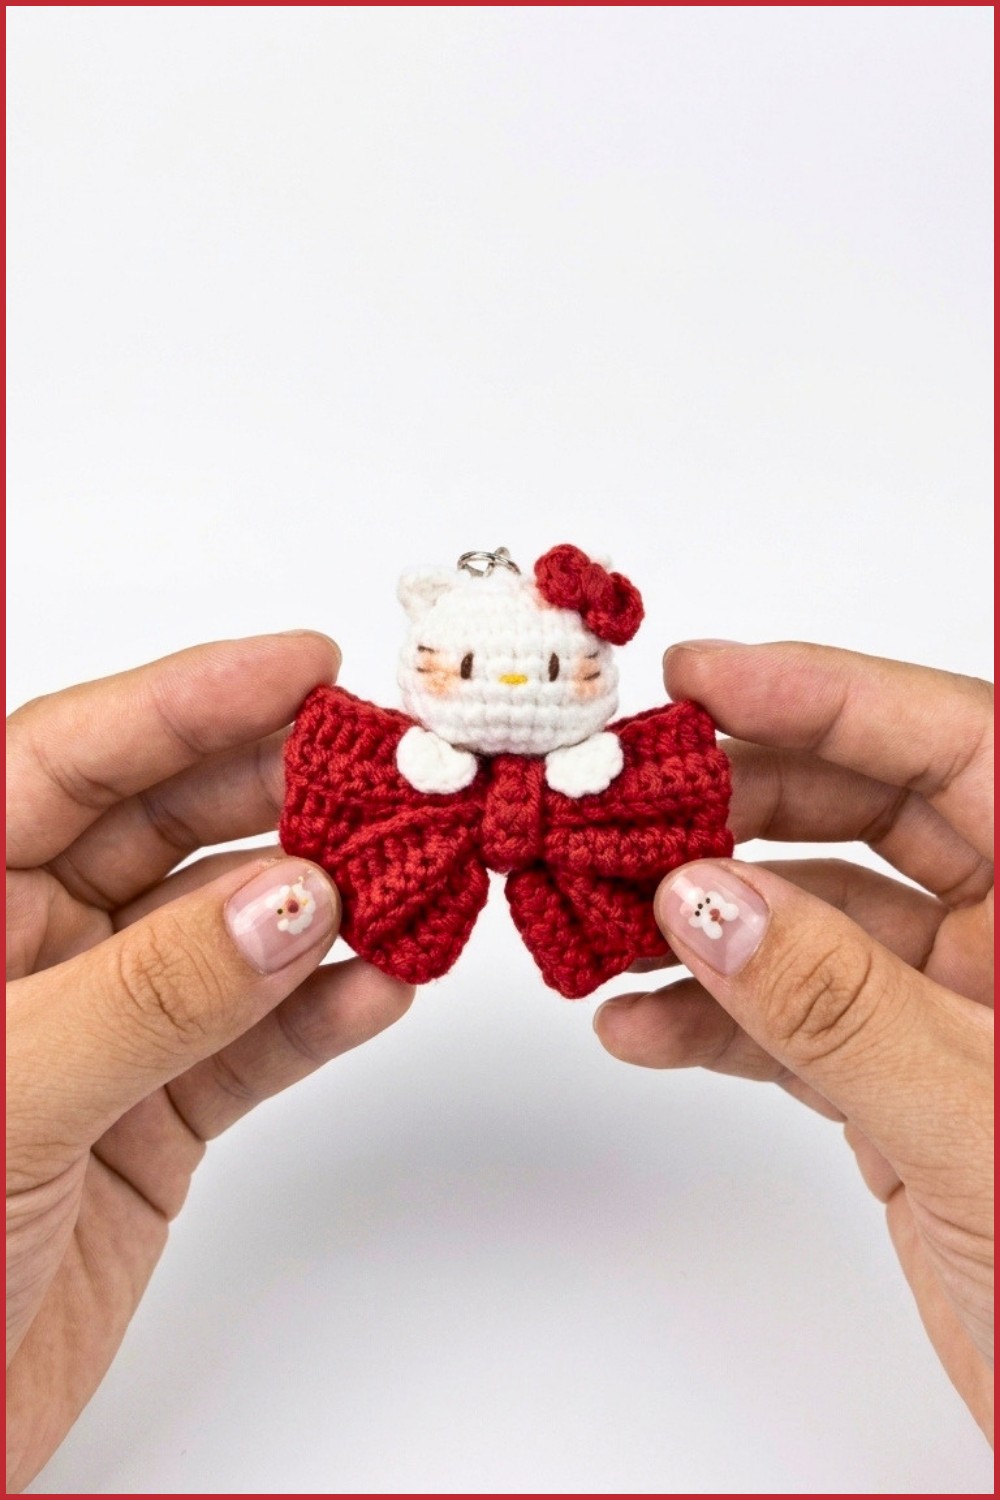
Assembly & Finished Size
- After final assembly, ensure all attachments are firmly secure by gently tugging on sewn and glued parts.
- The finished Hello Kitty Bow Keychain measures approximately 10 cm in height and 15 cm in width, portable for key rings or as a decorative charm.
Conclusion
This Hello Kitty Bow Keychain pattern offers crochet enthusiasts a delightful project combining textured elements, shaping techniques, and colorwork to produce a recognizable and charming accessory. By following the detailed instructions and pattern sequences, crocheters can easily achieve clean shaping and precise stitch counts, culminating in a perfect gift or personal keepsake. The combination of beginner-friendly stitches and intermediate techniques makes this a rewarding pattern for many skill levels.