Top off your festive decorations with this Crochet Halloween Witch Hat Free Pattern and enjoy a pointed hat for costumes and spooky displays.
The original YouTube tutorial by @CrochetToysIryna offers a wonderful guide to making a Crochet Witch Hat, and full credit goes to this talented creator for sharing such a clear and fun project. This crochet witch hat is a small, charming accessory that captures the spooky and playful spirit of Halloween or themed dress-up days.
Classic Crochet Witch Hat Free Pattern For Halloween Fun
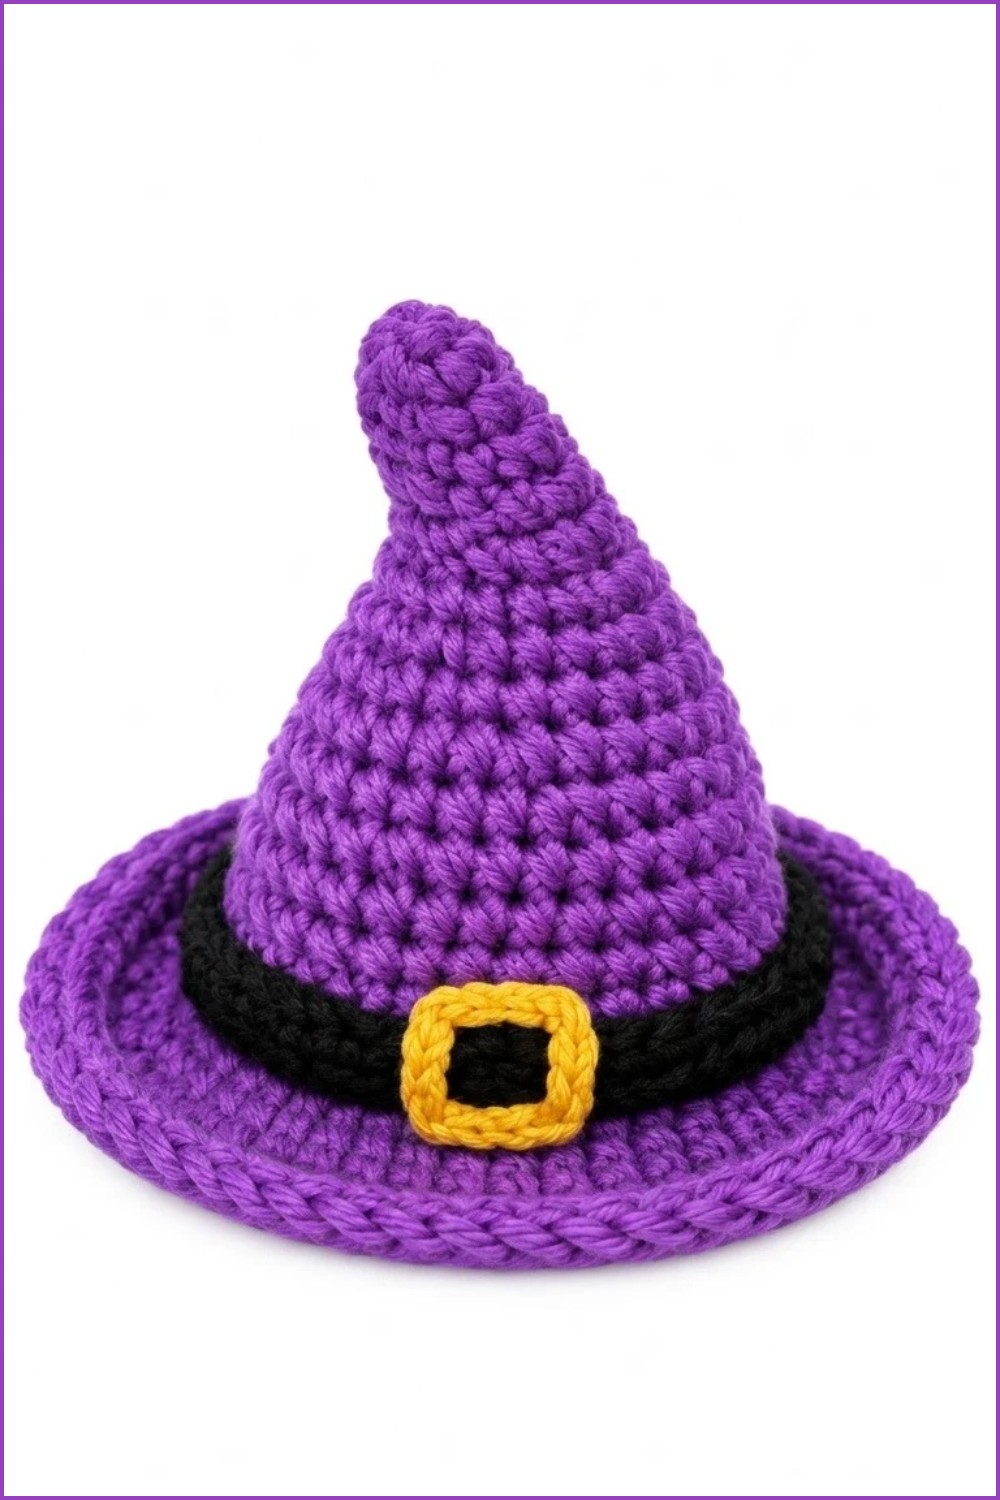
The hat features a classic pointed witch hat shape with a wide brim. It is usually made with dark-colored yarn like black or deep purple, which adds to its mysterious beauty. One of the best things about this project is how you can customize it—adding a decorative band, buckle, or even a little flower (optional) can give your hat a unique touch and personality.
This Crochet Witch Hat is great for dolls, stuffed toys, or as a whimsical decoration. It can also work well as a fun accessory for kids during Halloween parties or photo shoots. The project involves basic crochet stitches, starting with a circular base for the hat’s top and gradually expanding outward to form the brim and pointed tip. Stitch increases and decreases shape the hat just right.
Thanks to @CrochetToysIryna’s step-by-step instructions, crocheters of all levels can enjoy making this hat. It’s a creative and simple project that adds a bit of magic to your handmade collection.
About the Pattern
The Halloween Hat crochet pattern creates a classic conical witch hat with a sturdy, wide brim and a decorative band and buckle. The shaping technique utilizes steady, well-spaced increases in continuous rounds, resulting in a crisp cone and flat brim suitable for small dolls, pets, festive décor, or playful wearables. The use of single crochet keeps the stitch definition tight and smooth. The crispness of the structure is maintained by working the brim through the front loop only, giving stability and a slight visual flair. A contrasting hatband completes the look, offering the opportunity for further customization with Halloween-themed colors or embellishments.

Pattern at a Glance
- Hat Body: Worked in continuous spirals from magic ring upward, with systematic increases to form the cone.
- Brim: Created by working in front loops, then in both loops, with further increases for flaring.
- Hat Band: Constructed separately and sewn on, with a decorative buckle for a classic touch.
- Assembly: Minimal; most elements are worked in the round directly. The band and buckle details are tidily applied by hand.
Important Notes
- All rounds are worked in a continuous spiral unless otherwise noted. Use a stitch marker to mark the first stitch of each round.
- Increases are evenly spaced throughout the cone and brim for symmetrical shaping.
- Switch to the front loop only when indicated for structural definition between hat and brim.
- Complete assembly with neat, secure stitching to maintain form during handling and wear.
Difficulty Level
Advanced Beginner
Familiarity with basic crochet stitches, increases, and seamless spirals is required. Techniques include working in continuous rounds, increasing, and basic sewing/embroidery for the band and buckle.
Supplies Needed
- Yarn: Sport or light worsted (acrylic or cotton recommended)
- Main color (black or dark purple)
- Contrasting color for hat band and buckle (orange, gold, etc.)
- Hook: 2–2.5mm (match to yarn for sturdy fabric)
- Tapestry needle: For sewing and attaching band/buckle
- Scissors
- Stitch marker
- Measuring tape
Size & Measurements
- Height: Approximately 10–12 cm (top of cone to bottom of brim)
- Base circumference: About 14 cm (brim edge), inner opening 6–7 cm
- Band: 55 stitches/rows; wrap fits neatly at hat’s base
Gauge & Stitch Details
- Gauge: 7 rounds = 3.5 cm diameter; adjust for preferred density
- Main stitch: Single Crochet (sc)
- Brim shape: Enhanced by front loop work
- Gauge is not critical but ensures intended size and structure
Crochet Abbreviations
| Abbreviation | Stitch Name |
|---|---|
| ch | chain |
| sc | single crochet |
| inc | increase (2 sc in 1 st) |
| FLO | front loop only |
| sl st | slip stitch |
| st(s) | stitch(es) |
Special Stitch Guide
- Single Crochet (sc): Insert hook, yarn over, pull up loop, yarn over, pull through both.
- Increase (inc): Work 2 sc in the same stitch.
- Front Loop Only (FLO): Crochet into the front loop only of specified stitch.
- Slip Stitch (sl st): Insert hook, yarn over, pull directly through both.
Complete Crochet Pattern
Main Body (Cone)
Start
- Create a magic ring, work 6 SC into ring. (6 sts)
R 1

- [1 SC, 1 INC], repeat 3 times. (9 sts total)
2
- 9 SC—work 1 SC in each stitch. (9 sts)
3
- [2 SC, 1 INC], repeat 3 times. (12 sts)
Rounds 4–8
- 12 SC in each round, work one SC in each stitch for 5 rounds.
9
- [3 SC, 1 INC], repeat 3 times. (15 sts)
Round 10
- [4 SC, 1 INC], repeat 3 times. (18 sts)
11
- [5 SC, 1 INC], repeat 3 times. (21 sts)
12
- 21 SC—work 1 SC in each stitch.
13
- [6 SC, 1 INC], repeat 3 times. (24 sts)
Step 14

- [7 SC, 1 INC], repeat 3 times. (27 sts)
15
- 27 SC in each stitch.
16
- [8 SC, 1 INC], repeat 3 times. (30 sts)
Step 17
- [9 SC, 1 INC], repeat 3 times. (33 sts)
18
- [10 SC, 1 INC], repeat 3 times. (36 sts)
19
- [11 SC, 1 INC], repeat 3 times. (39 sts)

20
- [12 SC, 1 INC], repeat 3 times. (42 sts)
Rounds 21–22
- 42 SC in each round for 2 rounds, forming a flat base for the brim.
Brim
(Work in Front Loop Only)
- [5 SC, 1 INC], repeat 7 times around—crochet in FLO only. (49 sts total)
Round 24 (Work in both loops)
- [6 SC, 1 INC], repeat 7 times. (56 sts)
Round 25
- 3 SC, 1 INC, then [7 SC, 1 INC] 6 times, and finish with 4 SC. (56 sts)
Assembly
Hat Band
- Chain 55.
- Turn; work 54 SC (one in each chain) back down the chain.
Attachment
- Tack the band neatly around the base of the cone, where Round 23 (FLO) created a visible ridge.
- Using a tapestry needle and matching or contrasting yarn, sew the band’s ends together and secure horizontally around the base.
Buckle
- With contrasting yarn, stitch a small square or rectangle over the band where the seam joins, creating a classic witch’s buckle effect.
- Weave in all ends securely.
Brim Assembly
- Flatten the brim with your fingers, ensuring even shape and no curling at the edge.

Assembly & Finished Size
Double-check the hat shape for symmetry and evenness. The cone, built from uniform increases, should be smooth and straight, flaring into a classic brim. The contrasting band sits neatly at the join between the cone and brim, with the decorative buckle centered as desired. The completed hat stands 10–12 cm tall, with a base circumference of about 14 cm and brim about 3 cm wide. This size fits most fashion dolls or serves as a festive accent piece.
Conclusion
This Halloween Hat pattern encapsulates the spirit of seasonal celebrations with clear shaping, strong structure, and thoughtful trim. Steady increases and tight single crochet stitches ensure a conical silhouette and sharply flared brim, while the front loop technique provides a neat anchor point for customization. Thorough finishing with the classic hat band and a handmade buckle turn the hat into a striking statement piece. The design is suitable for both playful displays and practical use, offering reliable form through every round.