Decorate your Halloween table with this Crochet Pumpkin Spider Free Pattern and add a cute orange spider to your fall decorations and displays.
Halloween decorations become more fun when pumpkins and spooky animals come together in one playful design. @CrochetToysIryna shares a wonderful idea for turning these two seasonal favorites into a fun yarn project.
This Crochet Pumpkin Spider is a small stuffed figure that combines the round shape of a pumpkin with the long legs of a spider. Its bright orange body, curved pumpkin sections, and dark legs give it an unusual appearance. The raised stitches add a bumpy texture, making the finished toy look interesting from every side.
Fun Crochet Pumpkin Spider Free Pattern With Tiny Legs
The pumpkin-shaped body is the main feature of this design. Its spider legs stretch outward, giving it a funny Halloween style without looking too scary. You can choose classic orange and black colors or try purple, green, and white for a different seasonal look.
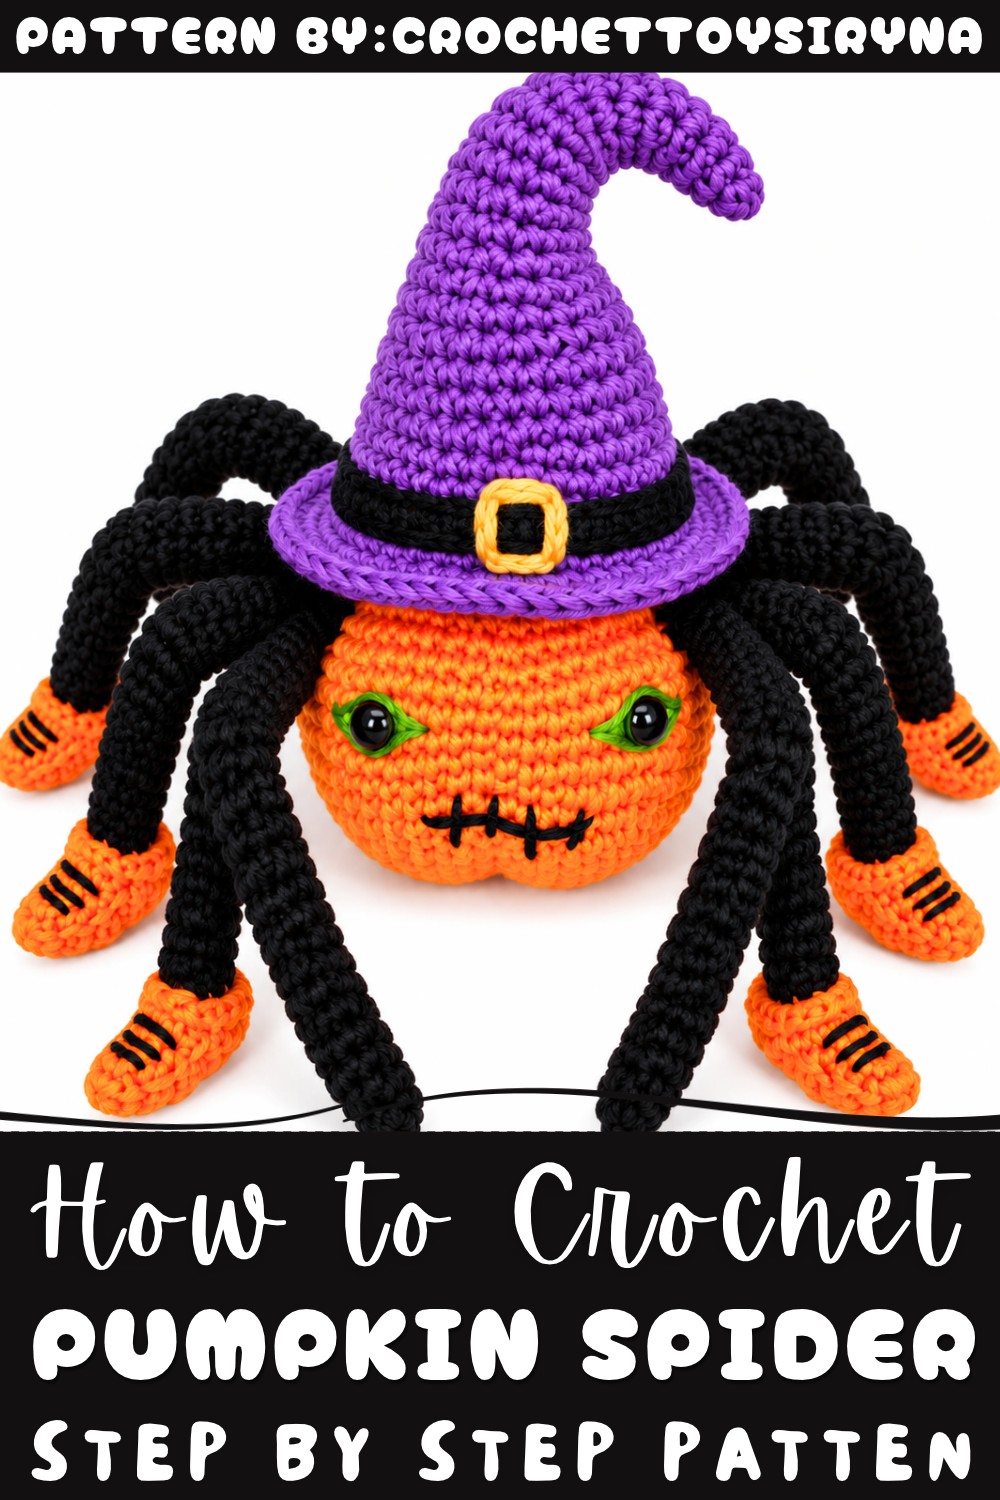
The making process includes crocheting the rounded body, filling it with soft stuffing, and shaping the spider legs. After joining the parts, small details complete its festive appearance.
Pick this free pumpkin spider pattern for your next Halloween project and give your decorations a funny little visitor!
About the Pattern
The Pumpkin Spider combines festive autumn aesthetics with a playful, whimsical spider shape. This amigurumi is defined by its ribbed pumpkin body, multiple shaped legs mimicking spider limbs, and charming face. Shaping techniques create classic pumpkin ridges and a dimensional form, while doubled arms and a realistic stem add character. Crocheted with orange and green yarn, it balances soft round structure with long, posable limbs—resulting in a seasonal decoration or unique toy with a strong visual impact.

Pattern at a Glance
- Construction: Amigurumi, crocheted in the round.
- Segments: Pumpkin body, six legs, two arms, pumpkin stem, embroidered face.
- Details: Pumpkin shaped body with segmented ribs, detailed legs, expressive face, and a textured stem.
- Techniques: Magic ring, increases/decreases in rounds, coordinated shaping for limbs, embroidery for facial features.
Important Notes
- Use a stitch marker to track the start of each round, as the body and limbs are worked in a continuous spiral.
- Stuff each piece as you complete it to maintain shape, especially for the pumpkin body and limbs.
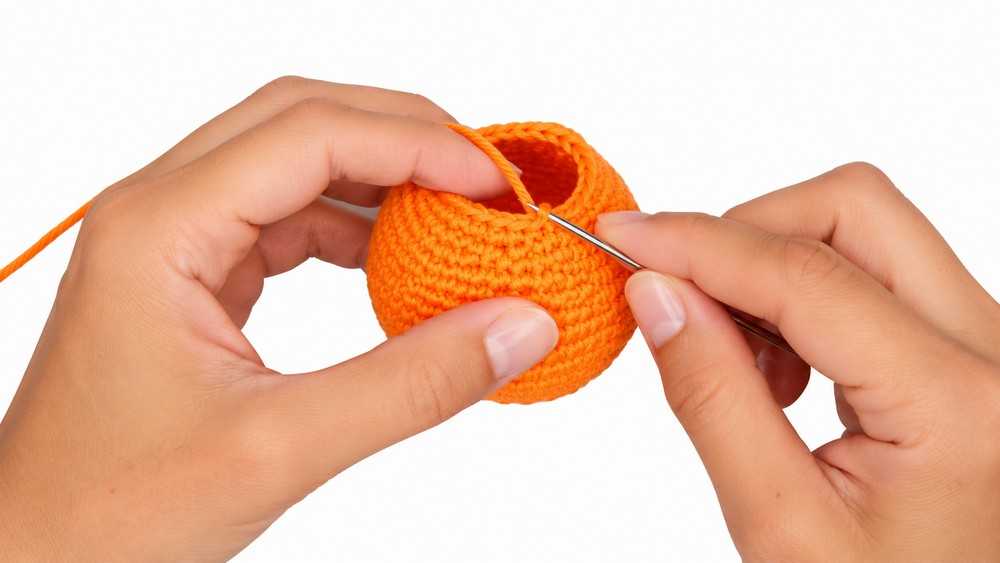
- The pumpkin ribs are created after body completion, by threading yarn through to form indentations for a realistic, ribbed effect.
- Leg and arm construction involves shaping using double crochets, particularly for knee and heel details.
- Adjust the tightness of your stitches as needed to keep the stuffing from showing through.
- Attach safety eyes before stuffing and closing the body for secure placement.
Difficulty Level
Intermediate
This pattern makes use of traditional amigurumi techniques—magic ring, increase/decrease in the round—but also introduces segmentation with ribbing, leg shaping, and assembly. Those with experience completing toys and basic embroidery will enjoy the process and result.
Supplies Needed
- Cotton yarn in orange for the pumpkin body and green for accents (legs/arms and stem)
- Crochet hook suitable for yarn (usually 2.5–3.5 mm for amigurumi with cotton yarn)
- Fiberfill stuffing
- Yarn needle for sewing and embroidery
- Stitch marker
- Safety eyes (size to match desired look)
- Scissors
Size & Measurements
- Approximate finished height: 5–7 inches (13–18 cm)
- Pumpkin body width: 4–5 inches (10–13 cm) at widest point
- Leg/Arm length: Approximately 5–7 inches (13–18 cm)
- Size will vary depending on yarn thickness, hook size, and tension.
Gauge & Stitch Details
- Gauge: Not critical; dense stitches are preferred to hold stuffing.
- Main stitches: Single crochet (sc), double crochet (dc), increase (inc), decrease (dec), slip stitch (sl st).
- Shaping: Strategic increases and decreases used for body, legs, and arm definition.
Crochet Abbreviations
- MR: Magic ring
- ch: Chain
- sc: Single crochet
- inc: Increase (2 sc in the same stitch)
- dec: Decrease (sc 2 together)
- dc: Double crochet
- sl st: Slip stitch
- st(s): Stitch(es)
Special Stitch Guide
- Magic Ring (MR): Start with an adjustable loop; work stitches into the ring and pull tight.
- Increase (inc): Work 2 sc into the same stitch.
- Decrease (dec): Single crochet 2 stitches together.
- Pumpkin ribbing: Created by threading yarn from top to bottom of the pumpkin, pulling snugly to create indentations.
Complete Crochet Pattern
Pumpkin Body
- Round 1: Using orange yarn, make a MR and work 6 sc into ring.
- Increase Rounds:
- Round 2: inc in each st around (12 sc)
- Round 3: (sc 1, inc) around (18 sc)
- Round 4: (sc 2, inc) around (24 sc)
- Round 5: (sc 3, inc) around (30 sc)
- Round 6: (sc 4, inc) around (36 sc)
- Round 7: (sc 5, inc) around (42 sc)
- Round 8: (sc 6, inc) around (48 sc)
- Round 9: (sc 7, inc) around (54 sc)
- Round 10: (sc 8, inc) around (60 sc)
- Body Height:
- Rounds 11–19: sc in each st around (9 rounds of 60 sc)
- Decrease Rounds:
- Round 20: (sc 8, dec) around (54 sc)
- Round 21: (sc 7, dec) around (48 sc)
- Round 22: (sc 6, dec) around (42 sc)
- Round 23: (sc 5, dec) around (36 sc)
- Round 24: (sc 4, dec) around (30 sc)
- Round 25: (sc 3, dec) around (24 sc)
- Round 26: (sc 2, dec) around (18 sc)
- Round 27: (sc 1, dec) around (12 sc)
- Before closing: Pause to stuff body firmly with fiberfill.
- Ribbing: With orange yarn, use a yarn needle to thread from top to bottom and back up again, tightly, six times evenly spaced around the body, pulling each rib to form six pumpkin segments.


Legs (Make 6)
- Round 1: With green yarn, MR, 6 sc into ring.
- Round 2: inc in each st (12 sc)
- Round 3: (sc 1, dec) around (9 sc)
- Foot:
- Work double crochets (dc) as you shape the heel (crochet as many as needed for a rounded heel edge).
- Leg:
- Rounds 4–21: sc in each st around (18 rounds of 9 sc)
- Knee Bend/Shaping:
- Rounds 22–25: Shape the knee by incorporating dc into a few stitches for a bend, sc in the remainder (details may depend on style; typically, 2–3 dc on one side).
- Lower Leg:
- Rounds 26–34: sc in each st around (9 rounds of 9 sc)
- Finish: Close the opening, leave a long yarn tail for sewing.

Arms (Make 2)
- Round 1: With green yarn, MR, 6 sc into ring.
- Round 2: inc in each st (12 sc)
- Round 3: (sc 1, dec) around (9 sc)
- Arm:
- Rounds 4–26: sc in each st around (23 rounds of 9 sc)
- Elbow Bend:
- Rounds 27–30: Incorporate dc into a few stitches to shape the elbow as for the leg's knee.
- Lower Arm:
- Rounds 31–39: sc in each st around (9 rounds of 9 sc)
- Finish: Close the opening; leave a tail for attaching.
Pumpkin Stem
- Round 1: Switch to green yarn, MR, 12 sc into ring.
- Round 2: (sc 2, dec) around to decrease to 6 sc.
- Rounds 3–5: Continue with stem by alternating sc and dc in the same round for a textured effect (e.g., sc, dc, sc, dc, sc, dc around for 3 rows).
- Finish: Fasten off, leaving a tail for sewing to top center of the pumpkin.
Assembly & Finished Size
- Attach safety eyes firmly between two pumpkin segments (place between rounds 4 and 6 of the pumpkin body), with even spacing.
- Use green yarn and a needle to embroider a border or lines around the eyes as desired for detail.
- Use black thread or yarn to embroider a simple smiling mouth below eyes (shape to preference).
- Securely sew the finished legs (3 on each side, spaced evenly) to the lower sides of the pumpkin body; bend at knee for effect.
- Attach both arms above the legs, on the sides of the pumpkin, slanting slightly forward.
- Sew the pumpkin stem to the very top of the pumpkin, anchoring securely.
- Weave in all ends neatly and adjust stuffing if needed.
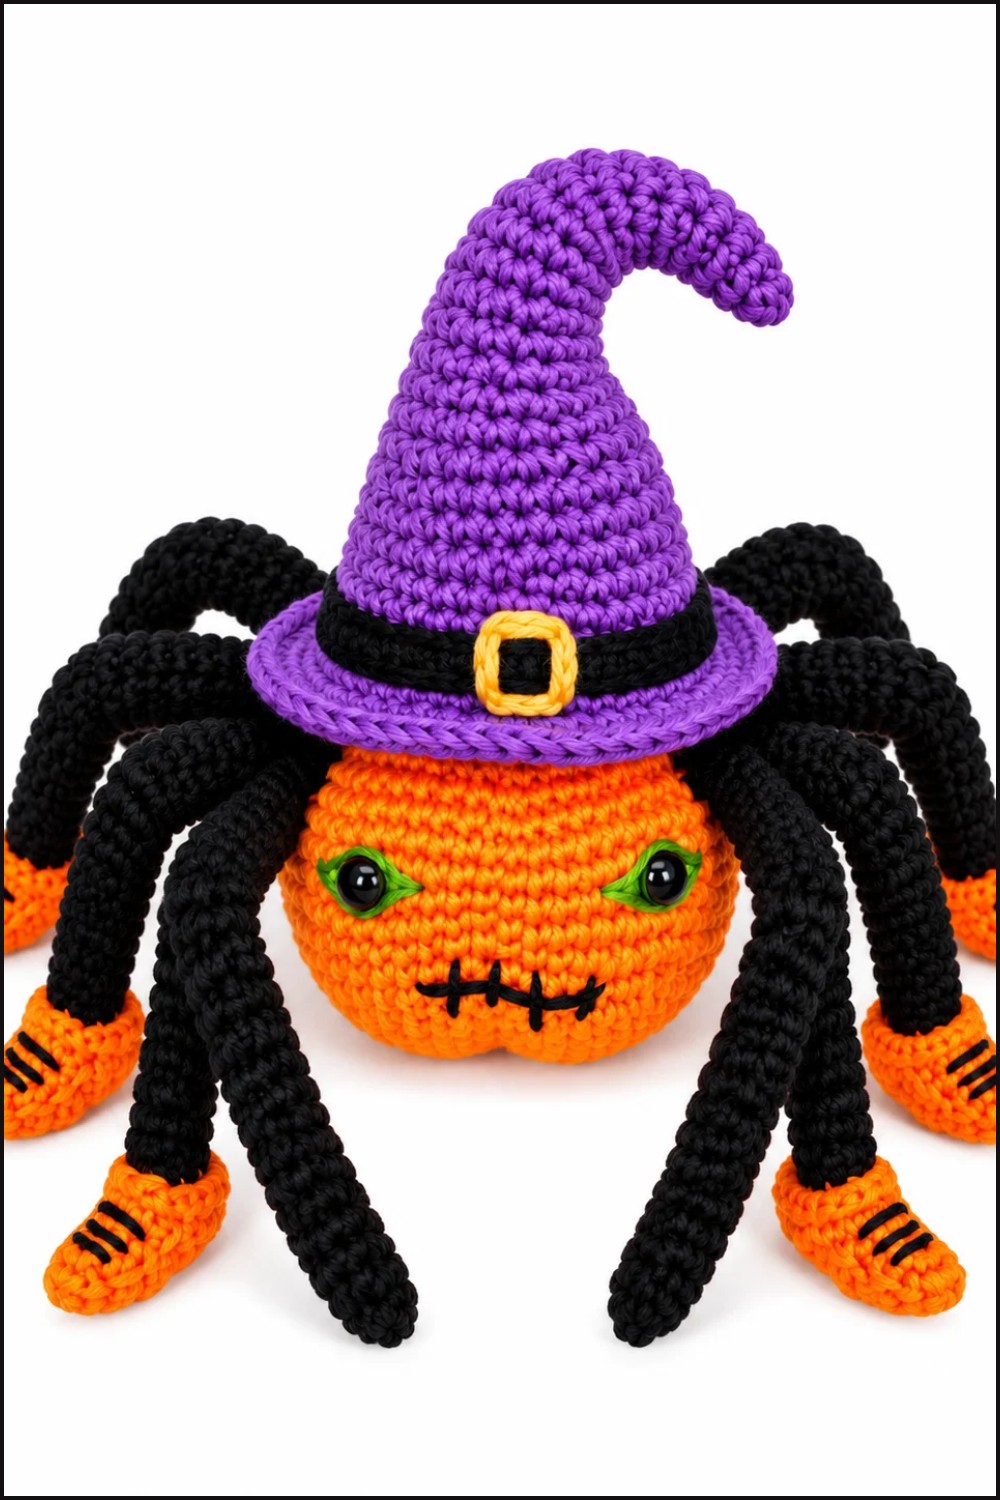
The finished Pumpkin Spider stands approximately 5–7 inches tall with six expressive legs, two outstretched arms, a ribbed pumpkin-like body, segmented by orange yarn, and topped with a stylized green stem. Safety eyes and embroidery bring facial features to life for an expressive, festive result.
Conclusion and Ending Words
This Pumpkin Spider pattern brings together the whimsy of autumnal themes and playful amigurumi design. The combination of a ribbed, segmented pumpkin form and detailed, flexible limbs brings dynamic personality and charming display value to the figure. Color contrasts of pumpkin orange and lively green add vibrancy and highlight the handmade ribbing, while embroidered facial details offer room for personalization. This pattern provides a delightful way to practice both 3D shaping and decorative assembly, resulting in a festive figure perfect for gifts, seasonal décor, or personal keepsakes.