Stitch a cute little light with this Crochet Lantern Or Flashlight Free Pattern and enjoy a sweet decoration for shelves, desks, and small gifts.
A tiny lantern made with colorful yarn can add a warm and cheerful feeling to your home. This interesting idea comes from @CrochetToysIryna, who shares a fun tutorial for making a small decoration inspired by an everyday light.
Lovely Crochet Lantern Free Pattern For Table Decoration
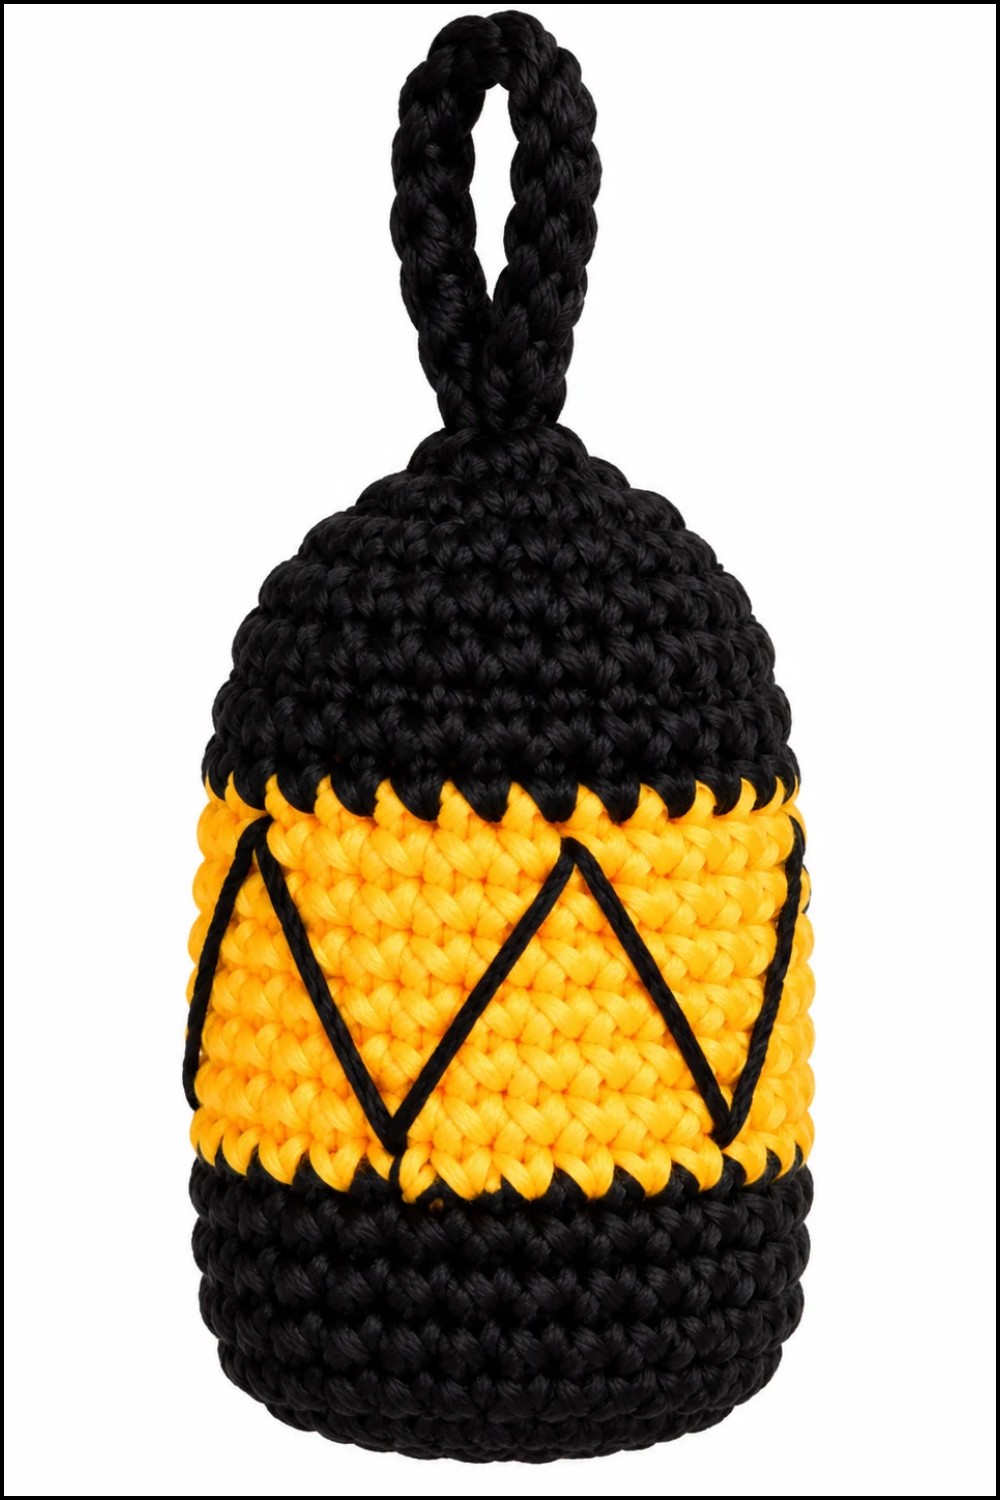
This Crochet Lantern Or Flashlight is a decorative item with a familiar shape and a soft, textured surface. Its rounded body, neat edges, and carefully worked stitches give it an attractive appearance. The small handle and light-inspired details add character, making it look different from ordinary crochet toys.
One interesting feature is the chance to play with bright and dark colors. Yellow or cream can represent the glowing part, while black and yellow can give the outer body a colorful finish. The shape can also be adjusted to give it a lantern or flashlight style.
This project is suitable for home decoration, bedroom shelves, or a children's play area. It can also become a handmade birthday gift for friends and family. A small crochet lantern looks especially nice among other seasonal decorations and can be displayed throughout the year.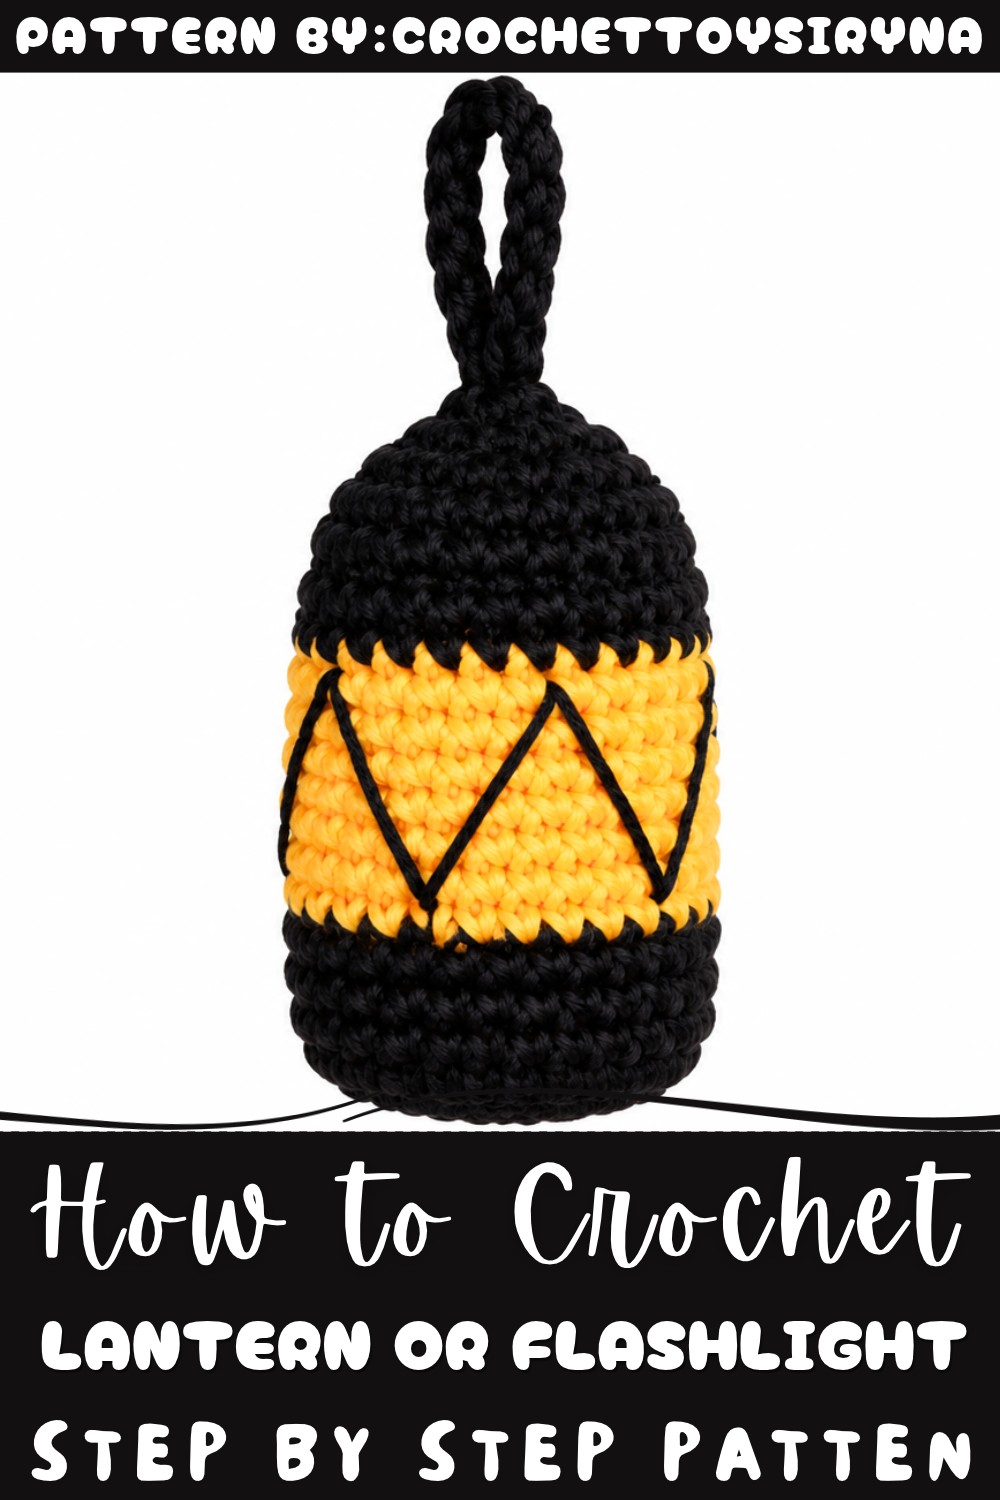
The making process involves working basic crochet stitches to form the main body, shaping the smaller sections, and joining the parts together. Careful finishing helps the item keep its neat appearance.
Give this free crochet lantern pattern a try and add a fun decorative piece to your collection!
About the Pattern
This 6 cm tall lantern is designed to be a charming miniature accent or festive ornament. Worked predominantly in single crochet with careful color changes, it features neat vertical lines and sharp shaping, enhanced by a stiffened base and a classic, functional handle. Utilizing 100% cotton and fine hook size, the lantern’s structure is crisp, and its color segments provide both decorative and realistic effects. The compact scale makes it ideal for garlands, gifts, table accents, or dollhouse décor.

Pattern at a Glance
- Shape: Cylindrical lantern with sculpted, color-blocked tiers
- Techniques: Amigurumi in the round; working in both loops and back loops; slip stitch joins; rising chain at the start of rounds for consistent height
- Features: Vertical surface embroidery and a crocheted handle for realism and function
- Colorwork: Alternates orange, yellow, and black sections to mimic classic lantern lighting and framing
Important Notes
- Rounds are joined with a slip stitch (sl st) and started with a rising/turning chain to maintain clean transitions and even rows; do not work in a spiral.
- The foundation magic ring ensures a tightly closed bottom. Weaving in ends as you go helps maintain neatness.
- For best structure, use fine cotton yarn and a small 1.5 mm hook to create a dense, firm fabric.
- Stuff gradually as you work decreases to achieve even shaping.
- Add the base stiffener before closing for stability; adjust stuffing as necessary once the insert is in place.
- Consistently count stitches throughout each round.
- Color changes are always made at the start of a new round.
Difficulty Level
Intermediate
Crocheters should have confidence with small-scale work, color changes, back loop only rounds, consistent slip stitch joining, and sewing simple embroidery details.
Supplies Needed
- 100% cotton yarn in orange, yellow, and black
- 1.5 mm crochet hook
- Small amount of stuffing fiber (hollow fiber or similar)
- Circular base stiffener (plastic, cardboard, or heavy interfacing)
- Tapestry needle for detailing and sewing in ends
- Scissors
- Stitch marker (optional)
Size & Measurements
- Finished height: Approximately 6 cm (including the handle, it may sit just slightly taller)
- Diameter: About 3 cm at the widest point
- Variation in yarn weight, tension, or stuffing may slightly alter finished measurements.
Gauge & Stitch Details
- Gauge: Not strictly necessary due to the small size, but close, dense stitches are important for neat results.
- Stitch pattern: Predominantly single crochet (sc) in the round, worked with joins and a turning chain for height, not continuous spiral.
- Shaping: Achieved with systematic increases and decreases.
- Back loop only (blo): Used for shaping ridges and transitions.
Crochet Abbreviations
- ch: chain
- sc: single crochet
- inc: increase (2 sc in same stitch)
- dec: decrease (single crochet 2 together)
- sl st: slip stitch
- blo: back loop only
- mr: magic ring
- st(s): stitch(es)
Special Stitch Guide
- Magic Ring (mr): Form a loop, work the first round of stitches in the ring and pull tight to close.
- Increase (inc): Work 2 sc in the same stitch to add a stitch.
- Decrease (dec): Single crochet two stitches together to reduce stitch count.
- Back loop only (blo): Insert hook only under the back loop of the stitch when instructed.
- Slip Stitch Join: At the end of each round, insert the hook into the first sc, yarn over, and pull through both loops on the hook for a neat join.
- Turning/Rising Chain: At the beginning of each round, chain one to bring the working yarn to the correct height.
Complete Crochet Pattern
Lantern Base and Body
- Foundation:
- With yarn, create a mr, work 6 sc into the ring. Close with a sl st and begin each subsequent round with a ch 1.
- Round 1:
- Inc in each st around (12 sc). Join with sl st, ch 1.
- Round 2:
- 1 sc, 1 inc, repeat 6 times (18 sc). Join with sl st, ch 1.
- Round 3:
- 2 sc, 1 inc, repeat 6 times (24 sc). Join with sl st, ch 1.
- Round 4:
- 3 sc, 1 inc, repeat 6 times (30 sc). Join with sl st, ch 1.
- Round 5:
- Working in blo, 30 sc around. Join with sl st, ch 1.
- Rounds 6–8:
- 30 sc in both loops around each round (3 rounds). Join and ch 1 after each.
- Rounds 9–15:
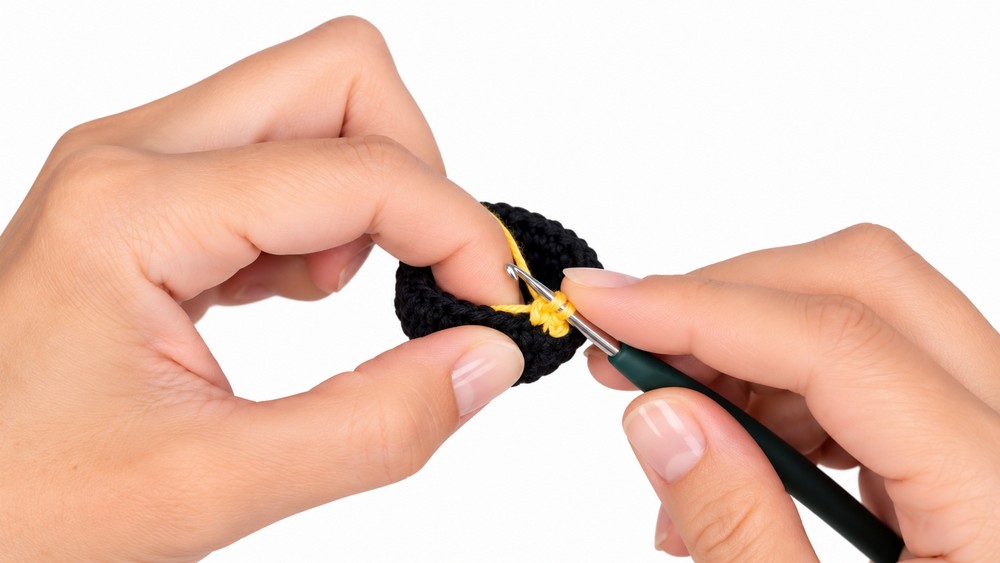
- Change to yellow yarn. Work 30 sc per round for 7 rounds. Join with sl st and ch 1 after each.
- Before closing, insert a suitably sized circular base stiffener into the lantern for structure.

Upper Rim and Closing
- Rounds 16–18:
- Change to black yarn, work 30 sc per round (3 rounds). Join and ch 1 after each.
- Round 19:
- Working in blo: 1 dec, 3 sc repeat 6 times (24 sc). Join and ch 1.
- Round 20:
- 1 dec, 2 sc repeat 6 times (18 sc). Pause to fill with hollow fiber for stability. Join and ch 1.
- Round 21:
- 1 dec, 1 sc repeat 6 times (12 sc). Join and ch 1.
- Round 22:
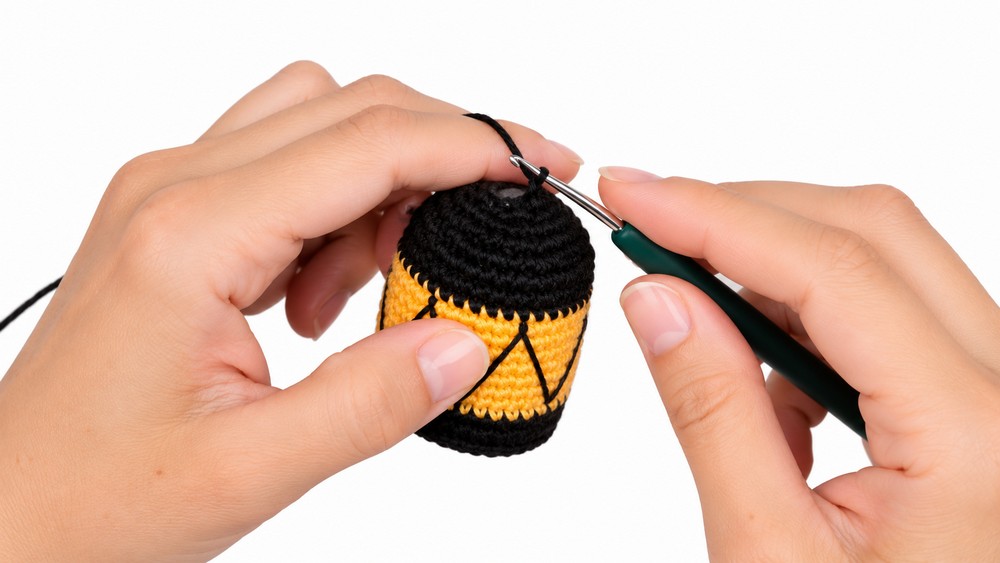
- 6 dec around to close (6 sc). Fasten off and use a yarn needle to close remaining hole securely.
Lantern Handle
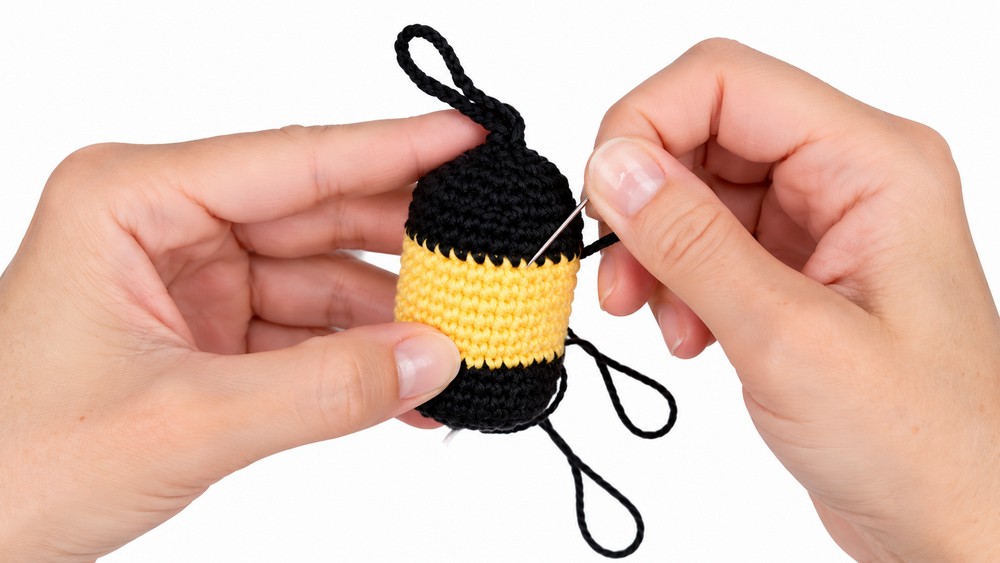
- With black yarn, join at the side of the black rim where desired.
- Chain 20 (or adjust length as needed for handle arch).
- Join to the opposite side of rim with a sl st.
- Turn, sc in each ch back to starting point.
- Fasten off and secure ends inside lantern rim.
Vertical Detailing
- Using a long piece of black yarn and a needle, stitch evenly spaced vertical lines running from the top (black rim) to the bottom (base) across the yellow body of the lantern. Adjust number and spacing for visual balance.
- Weave in all yarn tails and adjust surface threads for even placement.
Assembly & Finished Size
The lantern retains a sturdy, upright form due to the base stiffener and dense cotton fabric. The handle arches gracefully above the body and vertical stitched details evoke the segmented glass or paper of a classic lantern. The finished size remains compact at approximately 6 cm tall.
Conclusion and Ending Words
This carefully structured lantern pattern encapsulates elegance and festive spirit within a miniature form. Strategic use of color changes and loop techniques bring definition and realism. The integration of a handle and embroidered vertical details result in a highly recognizable, textured lantern. With minimal materials and clear structural cues, this pattern offers accessible artistry for a variety of decorative needs, from festival displays to imaginative play or collectible amigurumi collections. Crisp finishing and logical construction ensure a satisfying result and an ideal introduction to micro-crochet and amigurumi shaping techniques.