Turn your love for crochet into wearable art with the crochet square for vest pattern. Ideal for layering, these squares can be joined together to form stylish vests that pair effortlessly with casual jeans, summery dresses, or even cozy sweaters on chilly days. Personalize your vest by choosing vibrant colors, soft neutrals, or combining stitches to create a unique texture.
This approach is perfect for anyone looking to express their creativity while producing something practical and fashionable. From bold statement pieces to subtle additions to your wardrobe, this method encourages individuality while maintaining functionality. A perfect choice for those who appreciate handmade, comfortable, and durable clothing tailored to their personality and needs.
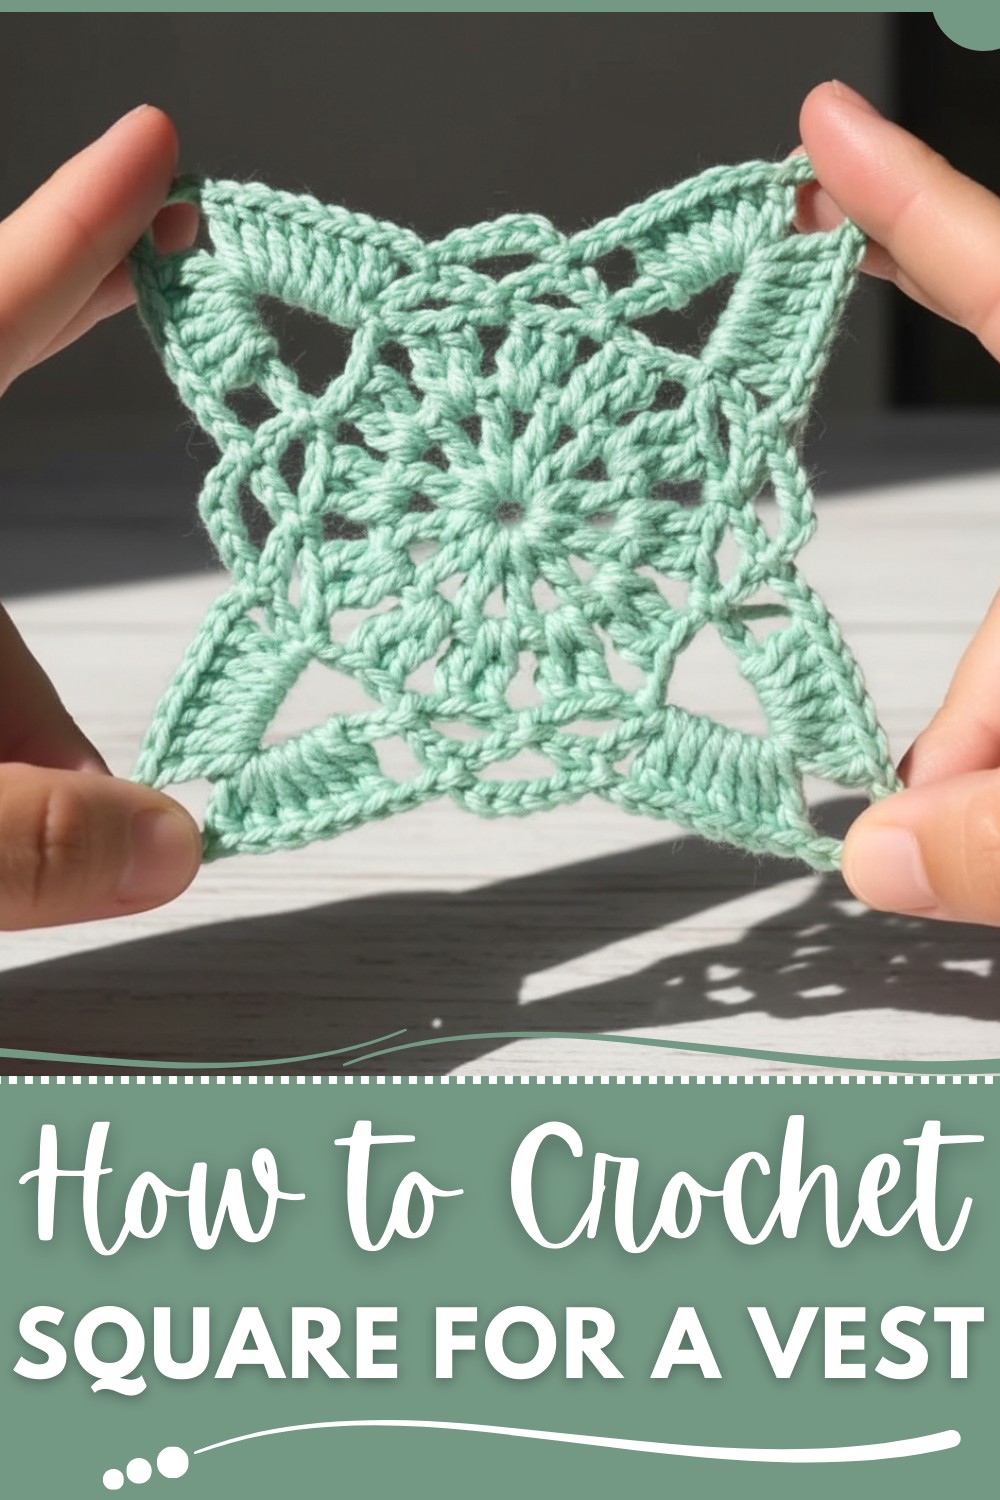
Trendy Crochet Square For Vest Pattern to rock any season
Materials
- Yarn: Worsted weight yarn (~300 grams total)
- Main Color (Emerald Green): 200g
- Accent Color (AC): Optional for contrast, ~100g
- Hook Size: 3.5mm crochet hook (or size required to meet gauge).
- Notions:
- Tapestry needle for sewing squares and weaving in ends.
- Stitch markers.
- Scissors.
- Measuring tape.
Crochet Square for vest Pattern
This detailed crochet pattern will guide you to create a beautiful plaid vest, perfect for layering. The design features modular construction using granny square motifs, precisely assembled to form a stylish garment. This pattern is versatile, allowing for customization in size and color. The instructions are structured for clarity and written in US crochet terminology.
Skill Level
- Intermediate: Requires basic knowledge of crochet stitches, working in the round, assembling granny squares, and finishing techniques.
Finished Size
- Bust circumference: 36 inches (adjustable by adding or removing squares).
- Length: Approximately 28 inches (adjustable based on the number of rows of squares).
Gauge
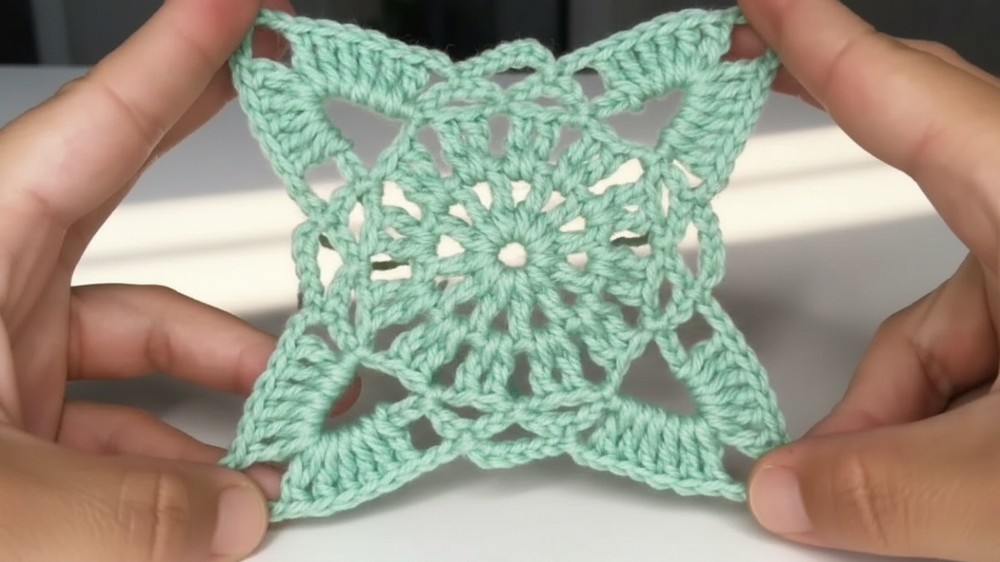
- Each granny square motif measures 5x5 inches after blocking.
- Ensure proper gauge by testing with your yarn and hook before starting the project.
Special Stitches
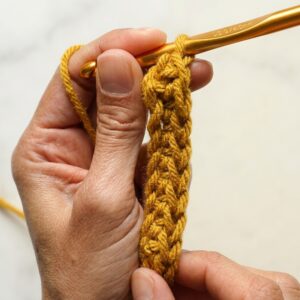
- Double Crochet (dc):
Yarn over, insert your hook into the stitch, pull up a loop (3 loops on hook). Yarn over, pull through 2 loops, yarn over, pull through remaining 2 loops. - Slip Stitch (sl st):
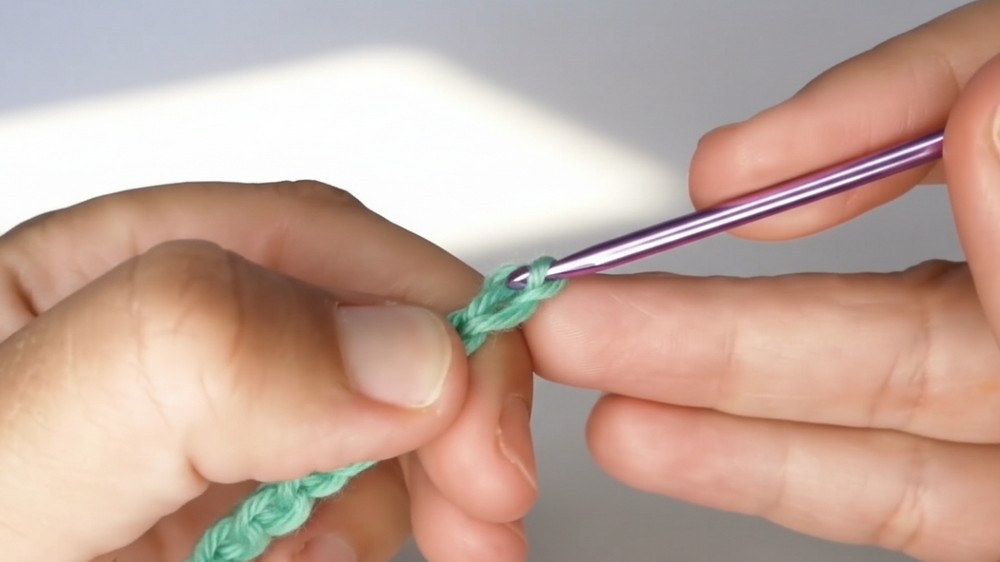
Insert your hook into the stitch, yarn over, pull through both loops on hook. - Magic Ring:
Create a loop with the yarn, insert your hook into the loop, yarn over, pull the strand through, and complete the required stitches into the loop. - Corner Joining:
Slip stitch joining at the corners allows for neat assembly while maintaining the square’s structure.
Pattern Overview
The vest consists of multiple granny squares sewn together to form the front, back, and open sleeves. The edges are finished with rounds of half double crochet for a polished look.
Pattern Instructions
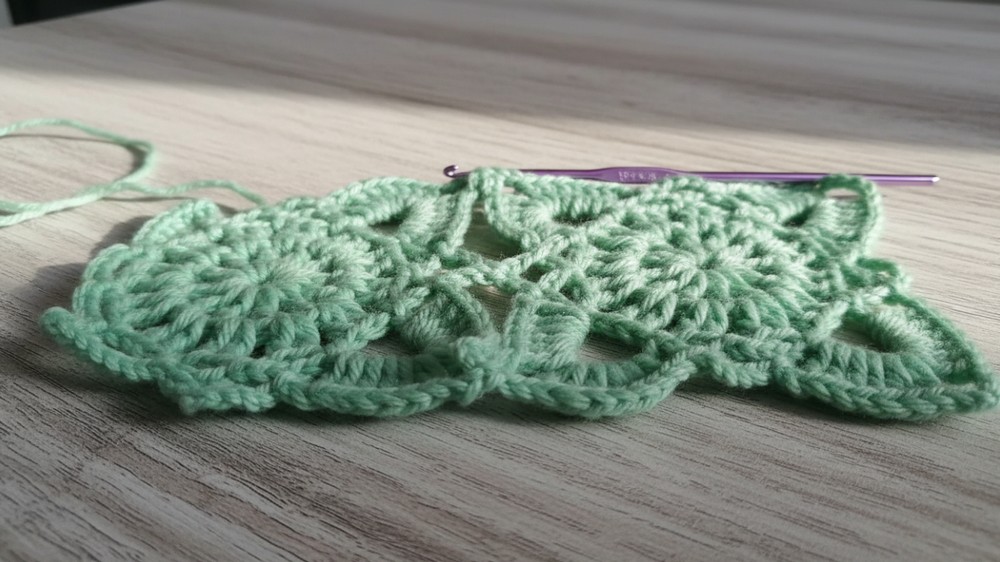
Step 1: Granny Square Motif
- Round 1:
- Create a magic ring or ch 7 and join with a sl st to form a circle.
- Ch 3 (counts as a dc), work 2 dc into the ring, ch 2. (3 dc, ch 2) Repeat 11 more times for a total of 12 dc clusters and 12 ch-2 spaces.
- Sl st into the top of the starting ch-3 to close the round.
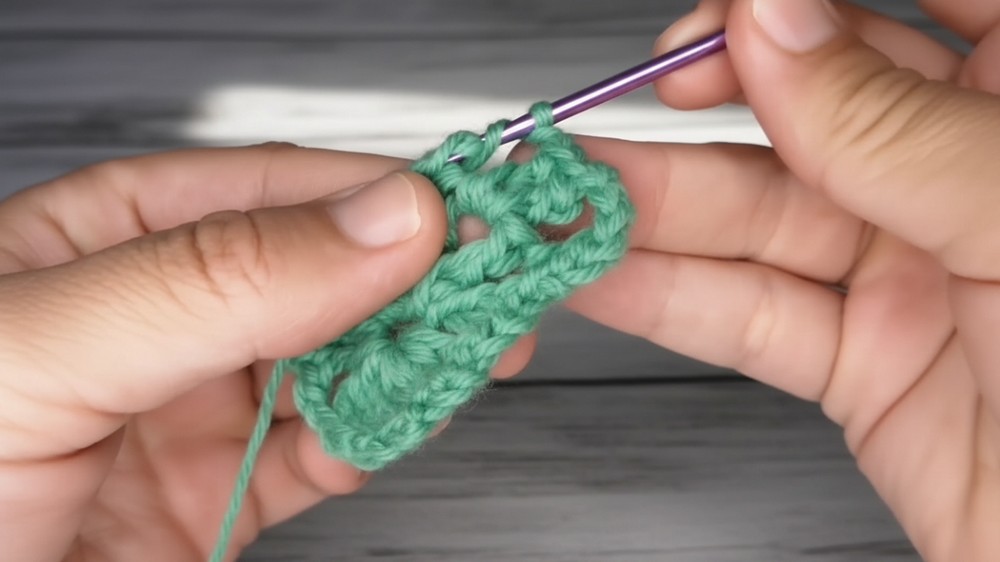
- Round 2:
- Sl st into the next ch-2 space, ch 3 (counts as a dc). Work 1 dc into the same space.
- Ch 2, work 2 dc into the next ch-2 space. Repeat 2 dc, ch 2 in each ch-2 space around. Sl st to the top of the starting ch-3 to join.
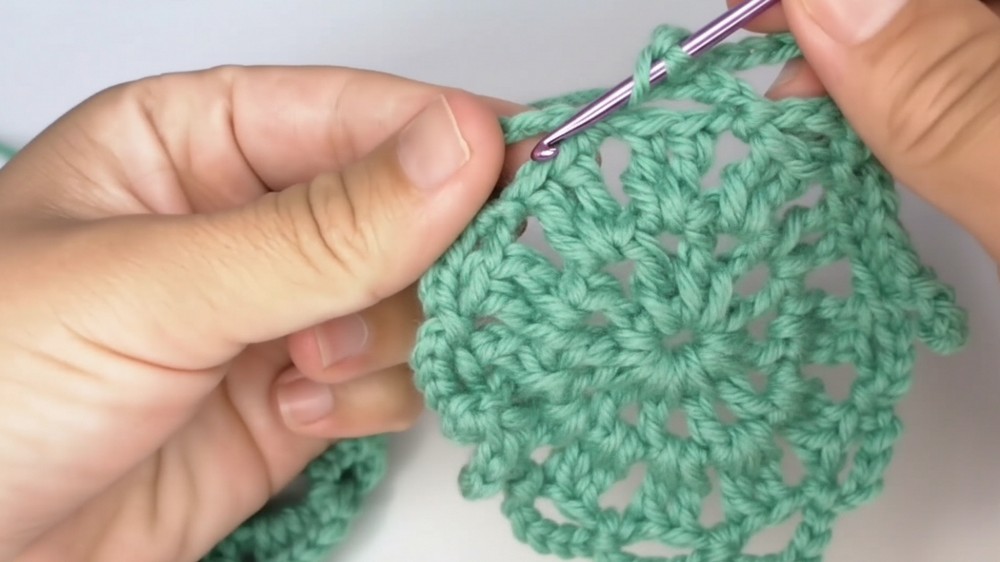
- Round 3:
- Sl st into the next ch-2 space. Ch 5 (counts as 1 dc and ch 2). In the same ch-2 space, work 1 dc.
- Ch 5 (to form a large loop), sl st into the next ch-2 space, ch 5. In the next ch-2 space: dc, ch 2, dc. Repeat around, alternating large ch-5 loops with corners (dc, ch 2, dc). Sl st to the top of the starting ch-5.
- Round 4 (Final Border):
- In each ch-5 space, work 6 dc. In each corner ch-2 space, work (2 dc, ch 2, 2 dc).
- Repeat this around the square, ensuring 6 dc in large loops and (2 dc, ch 2, 2 dc) in corners for a square shape. Sl st to the starting dc, fasten off, and weave in ends.
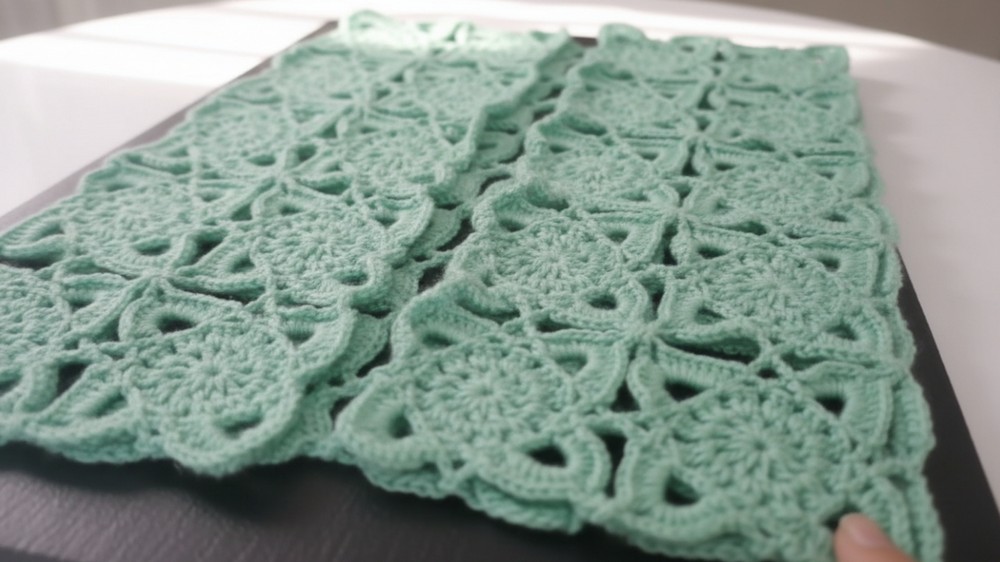
Step 2: Assembling the Squares
- Make 13 granny squares:
- Front (Left/Right Panels): 4 squares for each side.
- Back Panel: 4 squares.
- Sleeves (Optional for cardigan): Leave 2 squares unjoined on each side.
- Joining the Squares:
- Arrange the squares to form a rectangle: 4 squares for the front left, 4 for the front right, and 4 in the center back.
- Use sl st joining in the corners:
- Position the squares wrong side facing each other with corners aligned.
- Work sl st in the corner ch-2 space of both squares to join.
- Continue joining along all edges until the entire piece is assembled.
- For the sleeve openings, leave the top two squares on each side unjoined.
Step 3: Finishing Edges
- Body Ribbing:
- Attach MC yarn at one corner of the vest.
- Work 1 hdc in each stitch or space around the entire edge of the vest, skipping joins to ensure even stitches.
- Join with a sl st to the first hdc, ch 1, and work 3 rounds of hdc.
- Neckline:
- Work evenly spaced hdc stitches along the back of the neckline for a smooth finish.
- Join with a sl st to complete the round.
- Sleeves (Optional):
- If adding sleeves, work 3 rounds of hdc in each unjoined square, using the same ribbing method as the body.
Customization Ideas
- Color Variation:
- Use alternating shades for squares to create a plaid effect.
- Add a pop of color by edging each square in a contrasting color.
- Size Adjustment:
- Add more squares for a larger size, or reduce the number of squares for a smaller size. Adjust the width or height by adding or omitting rows of squares.
- Optional Add-Ons:
- Add buttons to the front edge for a closable vest.
- Use tassels, fringe, or pom-poms for an added playful detail.
Tips for Success
- Blocking: Block your granny squares before assembling to ensure straight edges and accurate sizing.
- Seams: Ensure corners are aligned perfectly when joining squares for a neat finish.
- Yarn Consistency: Use the same brand and weight of yarn to maintain uniformity in the squares.
Conclusion
Your beautiful crochet plaid vest is now complete! This charming vest is not only stylish but also perfect for layering, transitioning between seasons, or simply adding flair to an outfit. With a versatile and customizable design, you can make it uniquely yours by experimenting with different yarns and colors.
Important Remarks
- Shape Retention: Crochet squares tend to stretch over time; therefore, block the garment after completing it.
- Joining: Ensure that the squares remain centered and symmetric during assembly for a polished look.