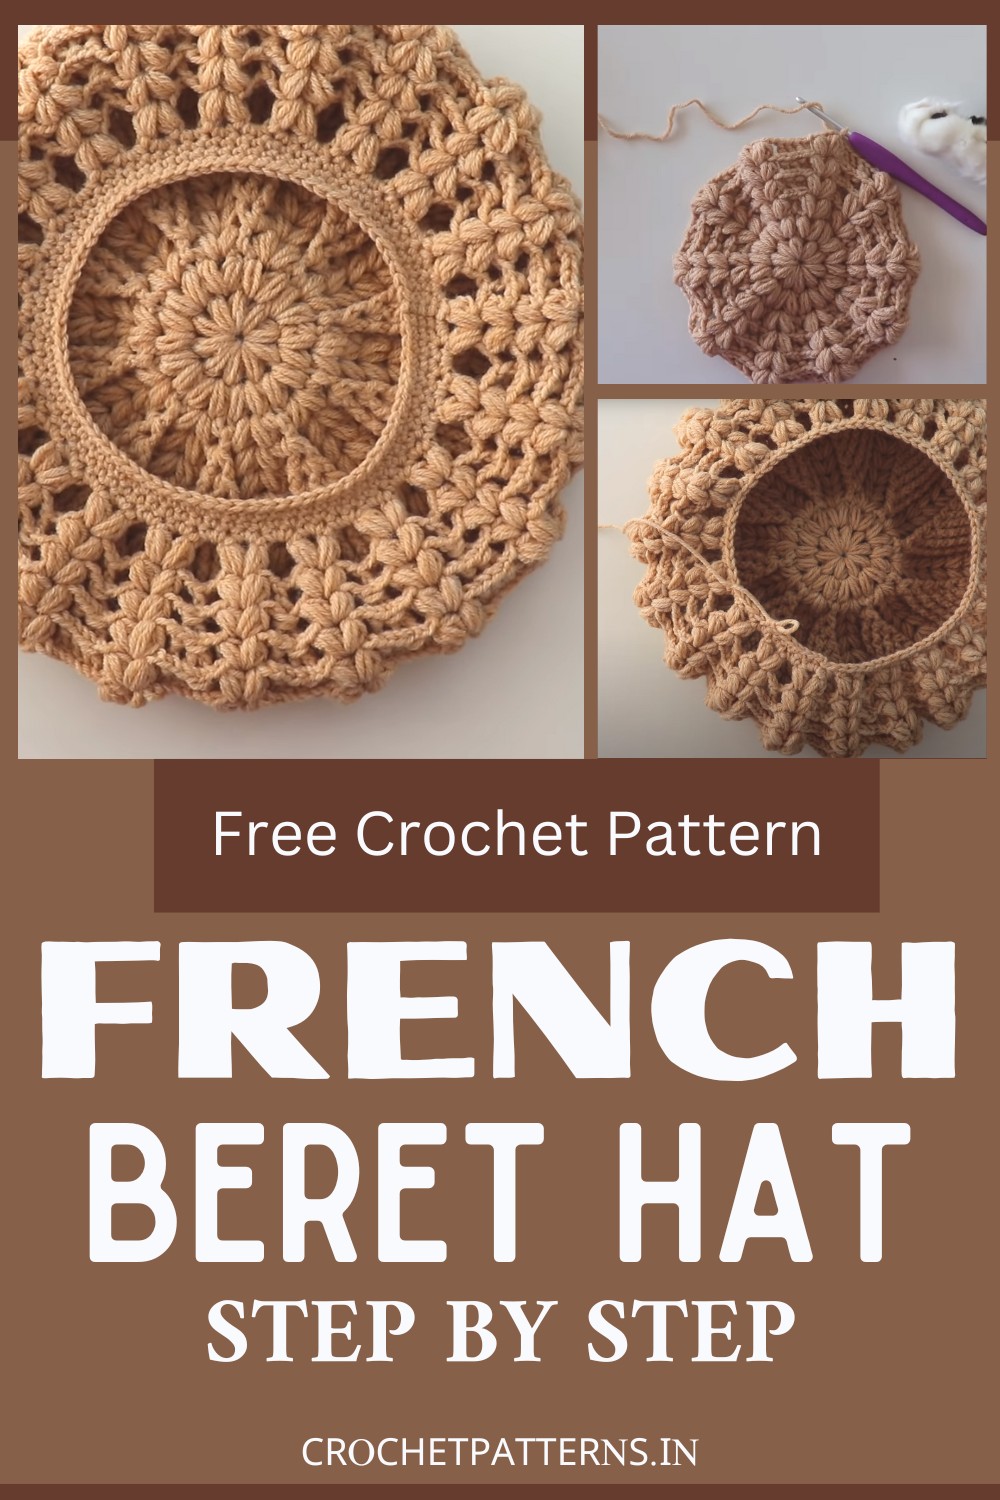
French Beret Hat Crochet Pattern For Autumn Leaf Peepers

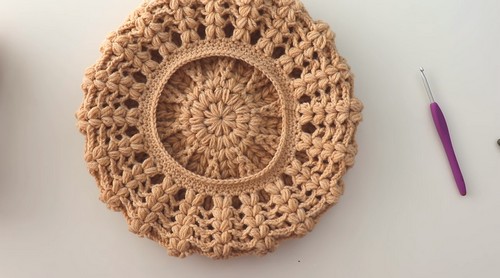
In the heart of France lies the elegance of the French Beret Hat, a symbol of fashion and flair. This iconic accessory, known for its soft, round shape and distinctive flat crown, has delighted fashion lovers worldwide. You can also add the charm and elegance of this French style to your ensemble with this crochet accessory pattern, which provides a step-by-step written and video tutorial. The crochet hat pattern uses soft and fluffy yarn, making it gentle to the touch. It has a breathable and floral design made with the puff stitch design. This technique creates a rich texture across the hat, giving a three-dimensional look that adds depth and visual interest. It is perfect for crochet fashion accessories, cultural symbols, military headgear, or artistic identifiers.
Making Your French Beret Hat
Materials Required
- Soft yarn (category 2-3, ≈100 grams, 290 meters)
- 4mm crochet hook (3.5mm for the last rows if available)
Measurements
The tutorial creates a beret hat that’s approximately 27 centimeters long. Adjustments in the number of rows can be made for different-sized hats.
Making Your French Beret Hat
Step 1: Starting the Hat
- Start with a slipknot.
- Make 5 chains and join with the first chain using a slip stitch, forming a loop.
- Chain 1 (this doesn’t count as a stitch)
- Complete 10 puff stitches inside the created loop, joined with a chain.
Step 2: Increasing the Rows
- Create 2 puff stitches each into all the chain-1 spaces from the previous row.
- Repeat this step until you have 20 puff stitches in total.
- For every next row, you will double the number of puff stitches in every chain-2 space and make a double crochet stitch between them.
Step 3: Making the Back Post Double Crochets
- Start every row with 2 puff stitches, then increase the number of back post double crochets in each row.
- Keep increasing until you reach around 20-23 centimeters in length.
Step 4: Maintaining the Rows
- Start every row with 2 puff stitches.
- Create back post double crochets around each double crochet from the previous row.
- Repeat this for 4-5 rows.
Step 5: Decreasing the Rows
- Start decreasing the number of back post double crochets in each row.
- Continue decreasing for several rows until you reach your desired hat size.
Step 6: Closing the Hat
- Start to close the hat by skipping the chain spaces and making 2 puff stitches into the following chain space.
- Repeat this row until the hat is fully closed.
Step 7: Finishing the Hatf
- Create 2 single crochets in each one chain space.
- Repeat this row until you have covered all the chain spaces in the hat.
- Hide the remaining tail with the help of a hook and scissors.
Video Tutorial:
Designer: @SirinsCrochet