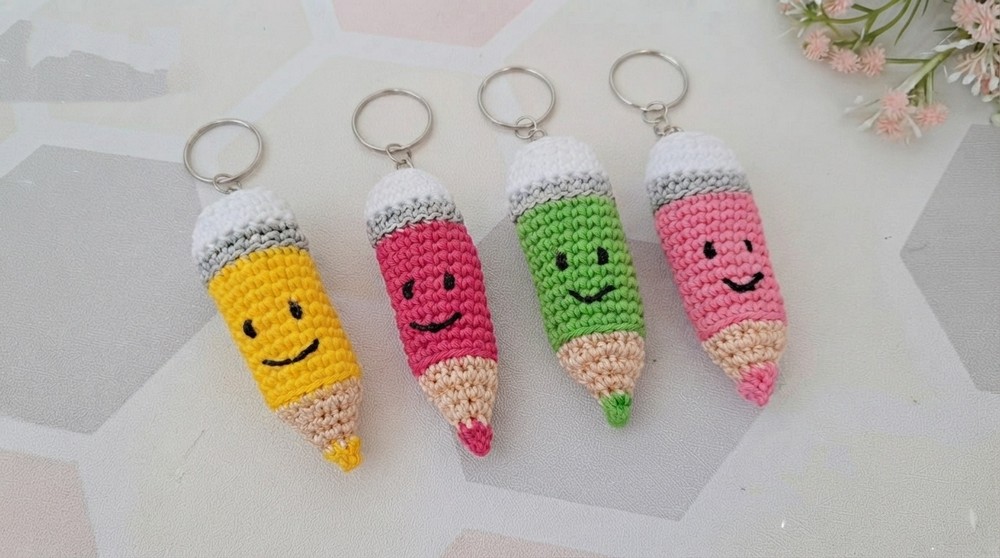
Learn how to make an adorable and charming accessory with this Free Crochet Pencil Keychain Pattern that adds personality and fun to your keys or gifts.
Small crochet projects often bring unexpected joy, especially when they combine function with a playful design. That’s exactly what you’ll find with the Free Crochet Pencil Keychain pattern—a charming little accessory that brightens up Keychain, backpacks, or pencil cases. It’s perfect for anyone who loves adding a handmade touch to everyday items.
Mini Crochet Pencil Keychain Pattern to Personalize Your Keys
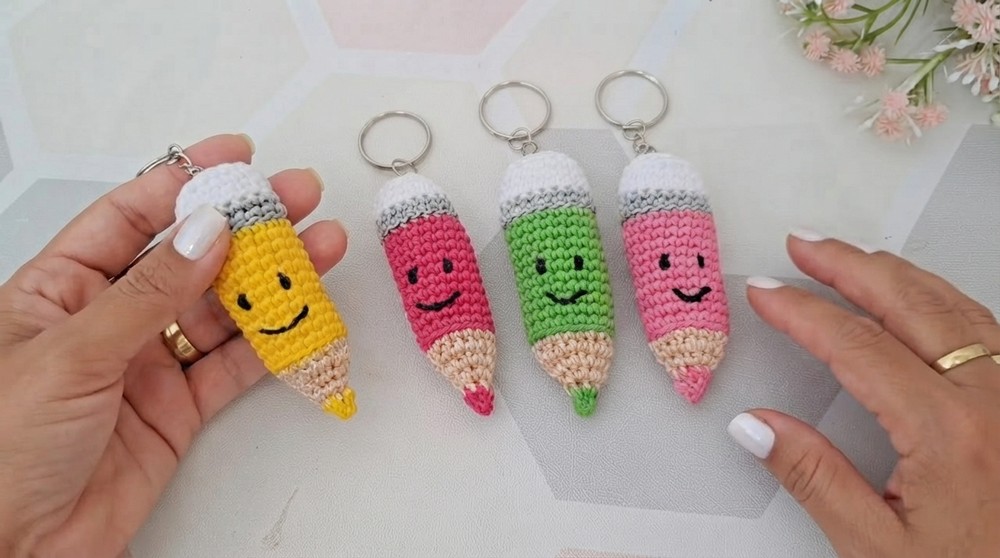
This project creates a miniature keychain shaped like a traditional pencil, featuring clear color divisions that represent the wood tip, yellow body, and pink eraser. The style is cheerful and simple, with a smooth texture thanks to basic crochet stitches worked tightly enough to keep its form. Its slim and elongated shape makes it convenient to carry without bulk, ideal for students, artists, or anyone who enjoys stationery themes.
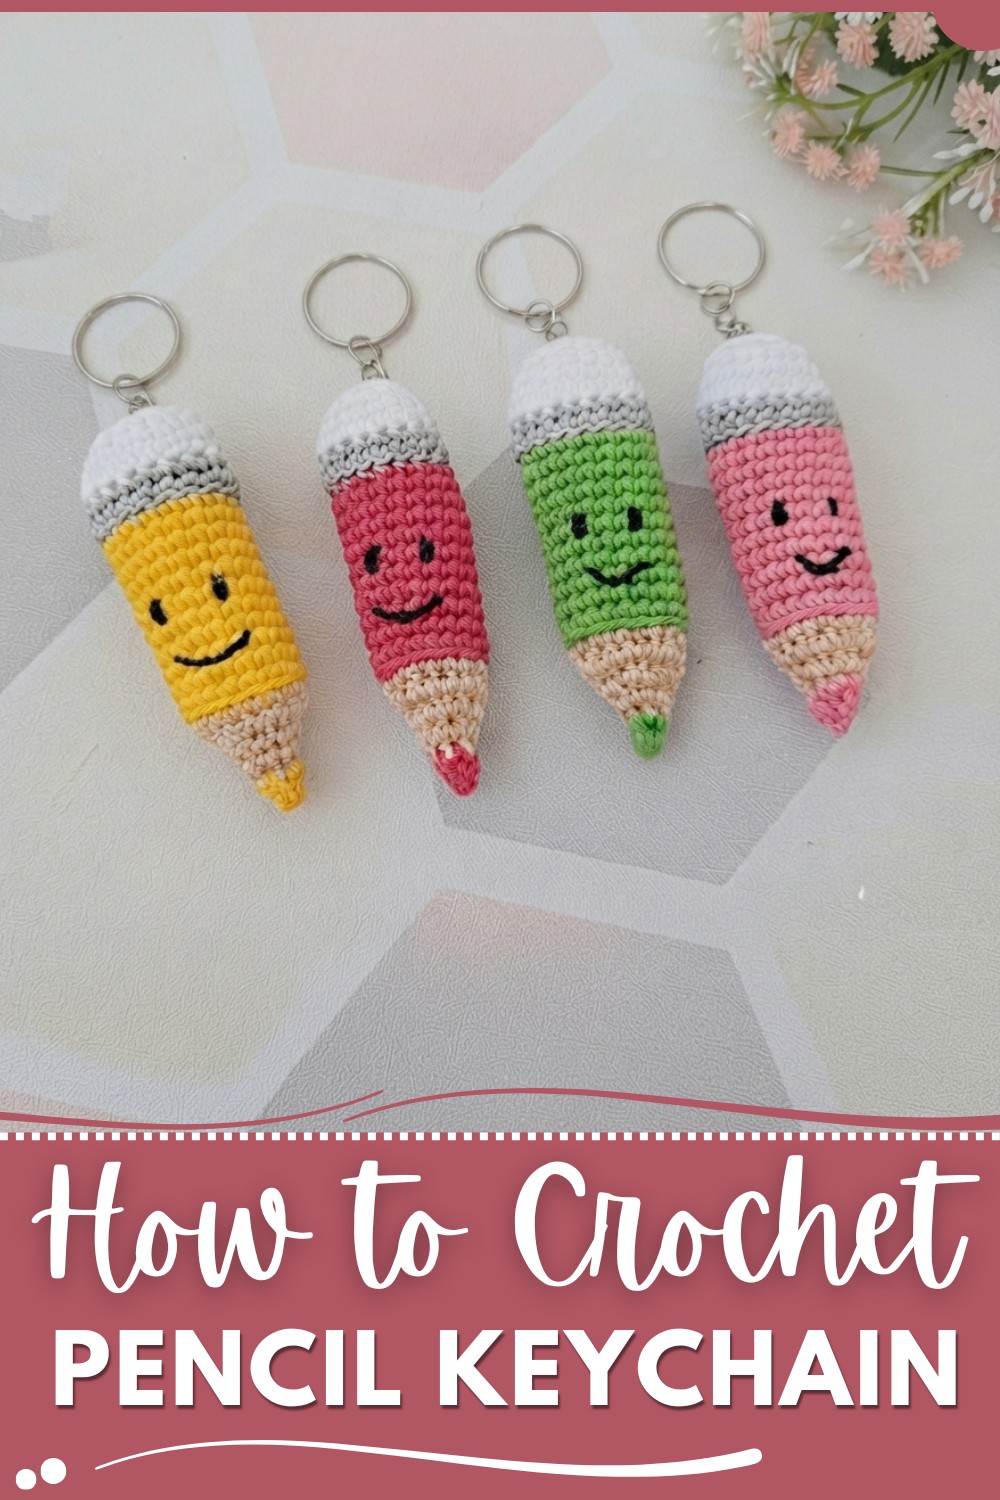
The keychain amigurumi is made by crocheting in rounds, carefully switching yarn colors to achieve the pencil’s distinct sections. Working with a small hook and firm tension helps maintain neat details and sturdiness. Attaching a metal keyring at one end completes the piece, making it easy to clip onto various items. Using cotton or cotton-blend yarn emphasizes stitch clarity and offers vibrant colors that stand up to daily use.
Inspired by simple tools we use every day, this design suits gift-giving occasions like teacher appreciation, school events, or as a small token for friends who love writing or drawing. You can customize by choosing different yarn shades or adding tiny decorations such as embroidered initials or cute faces, giving each keychain its own personality. This little project invites creativity and adds a fun, hands-on detail to the items you carry around.
Crochet Pencil Keychain Pattern
Pattern Notes
- Work mostly in continuous spiral rounds unless otherwise noted.
- Color changes emulate the pencil’s sections: white base, gray (eraser holder), beige tip, and pink eraser.
- Use stitch markers carefully to keep track of rounds.
- Inside loops are worked selectively for texture and design effect.
- Embroidery details (eyes and mouth) add personality and can be customized.
- Insert Tic Tac and light filling inside the pencil for shape and sound.
Skill Level
Intermediate beginner to intermediate crochet skills required. Familiarity with magic ring, single crochet, increases, decreases, and working in spiral rounds. Ability to embroider small details helpful.
Materials
- Charme yarn in White, Gray, Beige, and Pink (or your preferred colors for pencil parts)
- Crochet hook 1.75 mm
- Yarn needle for embroidery and assembly
- Small amount of stuffing/polyfill
- Tic Tac container (small size)
- Scissors
- Stitch marker
Measurements / Sizing
- Final length approx. 10-12 cm (4-5 inches)
- Diameter approx. 2.5 cm (1 inch)
- Size may vary depending on yarn tension
Gauge
Not critical for this project. The key is neat, consistent single crochet stitches.
Stitch Abbreviations
- ch: chain
- sc: single crochet
- sl st: slip stitch
- inc: increase (2 sc in the same stitch)
- dec: decrease (crochet two stitches together)
- mr: magic ring
- st(s): stitch(es)
- flo: front loop only (used in some rows)
- blo: back loop only
Special Stitches
- Magic ring (mr): Adjustable loop to start rounds tightly without holes.
- Picking inner loop only: Insert hook to pick the inner loop of stitches for texture.
- Decrease: Insert hook in next stitch(es), pull yarn through, yarn over and pull through all loops on hook to combine stitches.
The Crochet Pattern
Base and Beginning (White Body)
Round 1: Start by making a magic ring (mr). In the magic ring, make 6 sc. Tighten the ring.
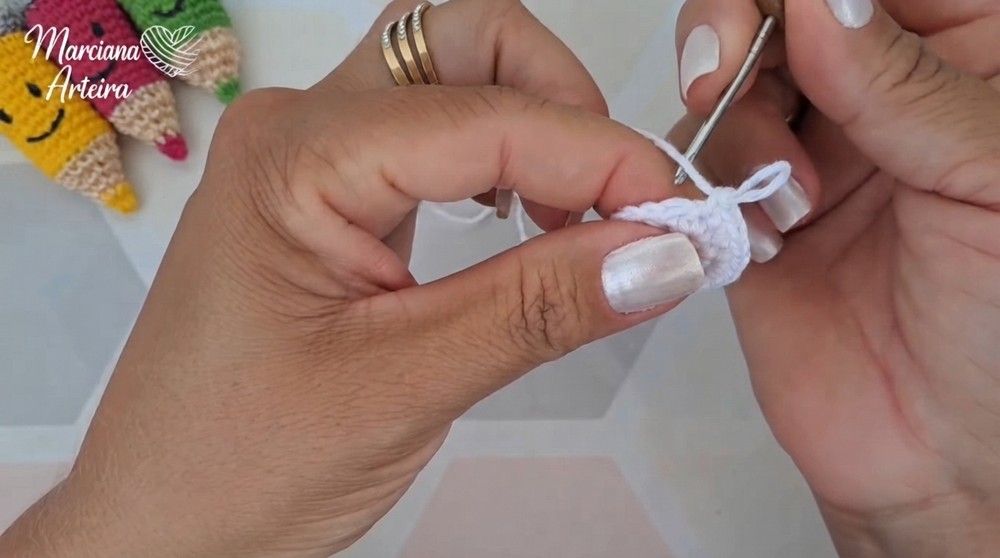
Round 2: Join with a sl st to first sc. Work 2 sc in each stitch around, total 12 sc.
Round 3: Mark your rounds carefully with stitch marker for tracking. (1 sc, inc) repeat 6 times (18 sc).
Round 4: (1 sc, inc, 1 sc, inc) repeat for 6 groups (24 sc).
Round 5: (1 sc, 1 sc, inc) repeat 8 times (32 sc).
Round 6: (1 sc, 1 sc, inc, 1 sc) repeat as needed to achieve correct circumference (about 38-40 sc).
Round 7: Work this row by picking only the inner loop of each stitch to create texture. Continue this round picking inner loops only for one complete round.
Continuing the Base Body
Round 8: Next round, work regular sc (picking both loops).
Round 9-19: Keep working sc in rounds spirally without joining, until you reach a total of 11 rows starting from the magic ring. Adjust with increases or no increases if necessary. Ensure to keep the diameter consistent around 2.5 cm.
Color Change: Eraser Holder (Gray yarn)
Round 20: Change yarn color to gray. Fasten off previous yarn securing it inside. Work one round picking only the inner loop of each sc as before, with gray yarn.
Rounds 21-22: Continue with sc rounds in gray yarn for additional rounds (approx. 2-3 rounds) maintaining stitch count. Finish gray section with slip stitch and fasten off, hiding ends inside.
Color Change: Eraser (Pink yarn)
Round 23: Insert pink yarn at the designated stitch of the previous round—pick only inner loops as in previous rounds. Work spirally 11 rows of sc picking the inner loop only, maintaining the stitch count.
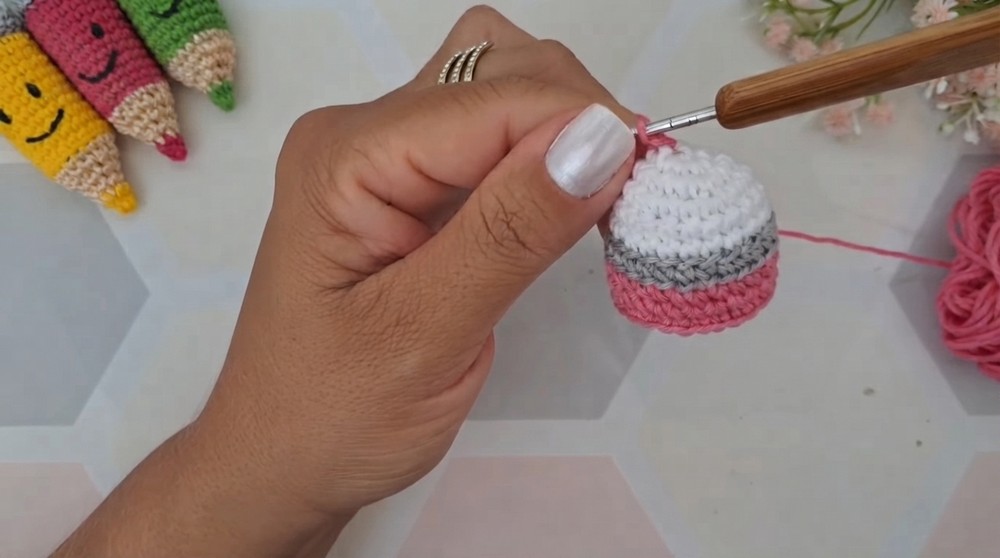
Round 34: End pink yarn round with slip stitch; fasten off securely.
Embroidering Eyes and Mouth
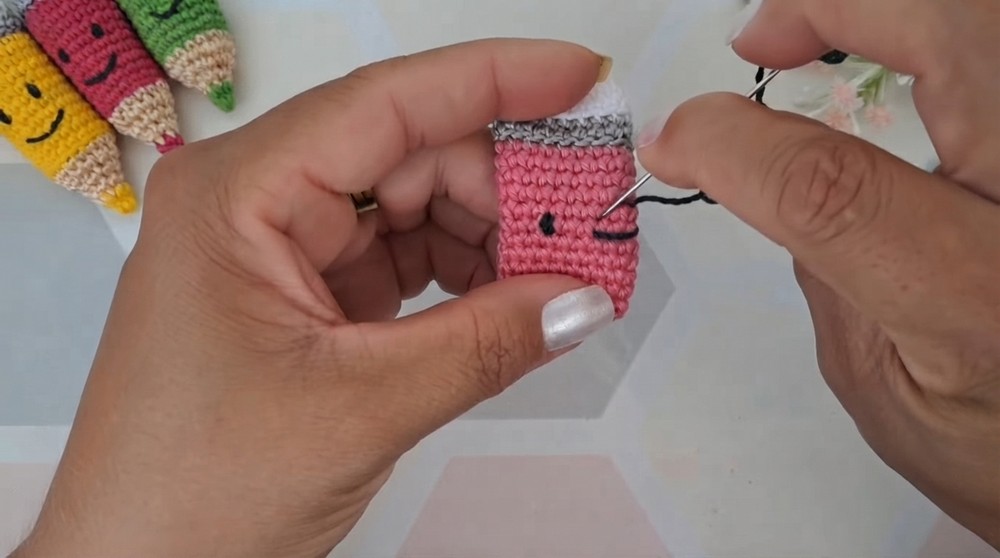
After Round 19: Using black embroidery thread, mark the 6th row location on body for the eyes.
- Insert needle at the center of 6th row, sew two evenly spaced eyes by skipping a couple of stitches between them.
- Embroider a small smiling mouth below the eyes using a curved stitch. Adjust size as desired.
- Use careful stitches to avoid distorting crochet fabric.
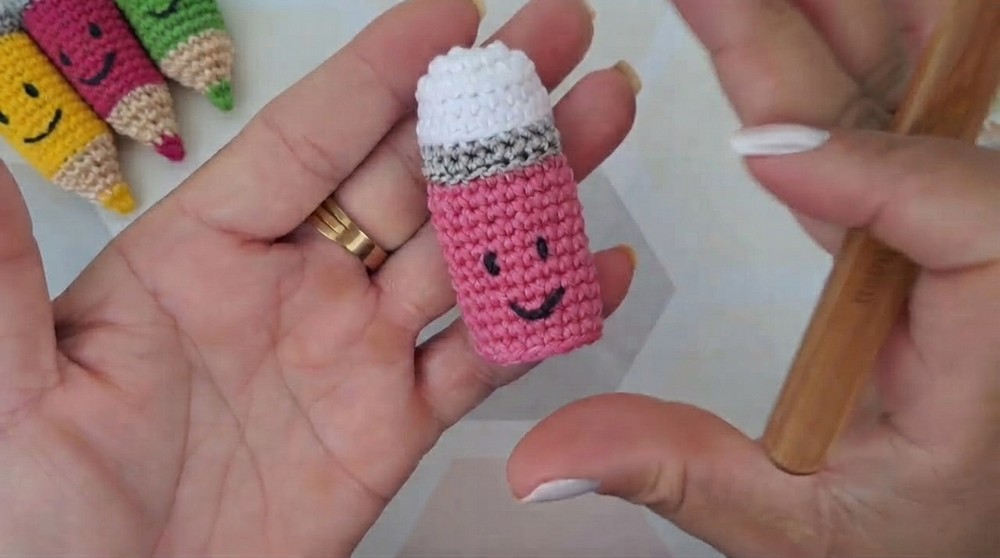
Color Change: Pencil Tip (Beige yarn)
Round 35: Join beige yarn at the next round to start tip. Pick only inner loops. Make sc in each stitch for 1 round.
Rounds 36-40 (Decreasing Rounds):
- Round 36: sc in next stitch, dec—repeat all around.
- Round 37: sc in next 2 stitches, dec—repeat.
- Round 38: sc in next stitch, dec—repeat.
- Round 39: Continue decreasing until the tip narrows down to a point.
Round 40: Fasten off, leaving a thread for sewing.
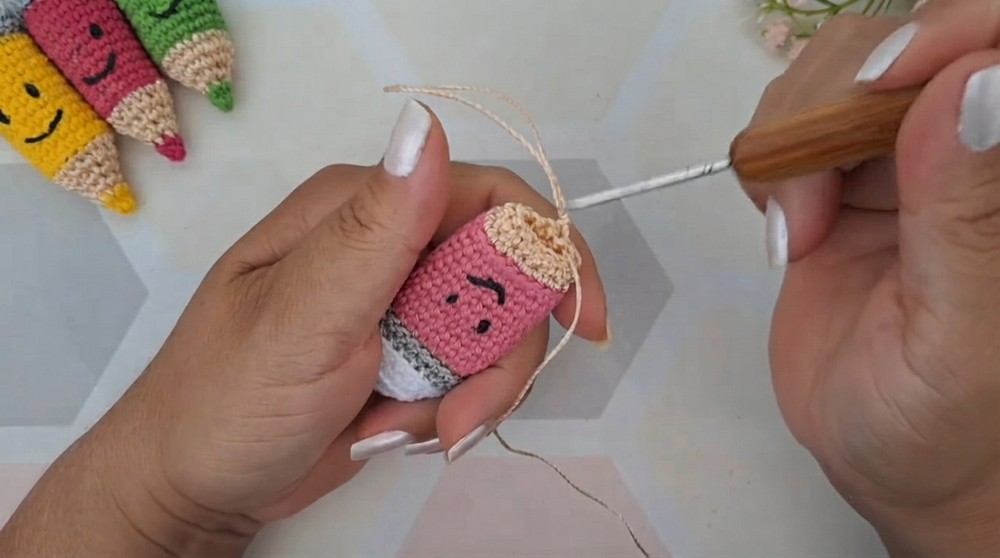
Assembly and Filling
After Round 40:
- Stuff pencil lightly with polyfill, just enough to keep shape firm but still soft.
- Place Tic Tac container inside.
- Tie ends and hide the leftover yarn inside by weaving ends carefully.
- Sew up the pencil tip securely closing the opening.
Final Round: Pink Eraser Wrap
Round 41: Pick pink yarn again to wrap a final round around the eraser end.
- Work sc all around the eraser scoop picking full stitches for neat edge.
- Finish with a slip stitch and weave ends in.
Assembly & Finished Size
- Approximate final length: 10-12 cm (4-5 inches)
- Diameter: about 2.5 cm (1 inch)
- Tic Tac container fits snugly inside for weight and sound
- Light stuffing for shape retention
- Embroidery adds personality with smile and eyes
- Perfect for keychain attachment (optional)
Summary
Create an adorable and functional crochet pencil keychain featuring a Tic Tac container inside that adds a fun jingle. This pattern uses single crochet stitches worked mainly in spiral rounds, with color changes to mimic pencil parts including the body, eraser, and tip. Embroider the eyes and mouth at the end for a charming finish. Perfect as a cute gift or a small item for sale, especially for back-to-school season.