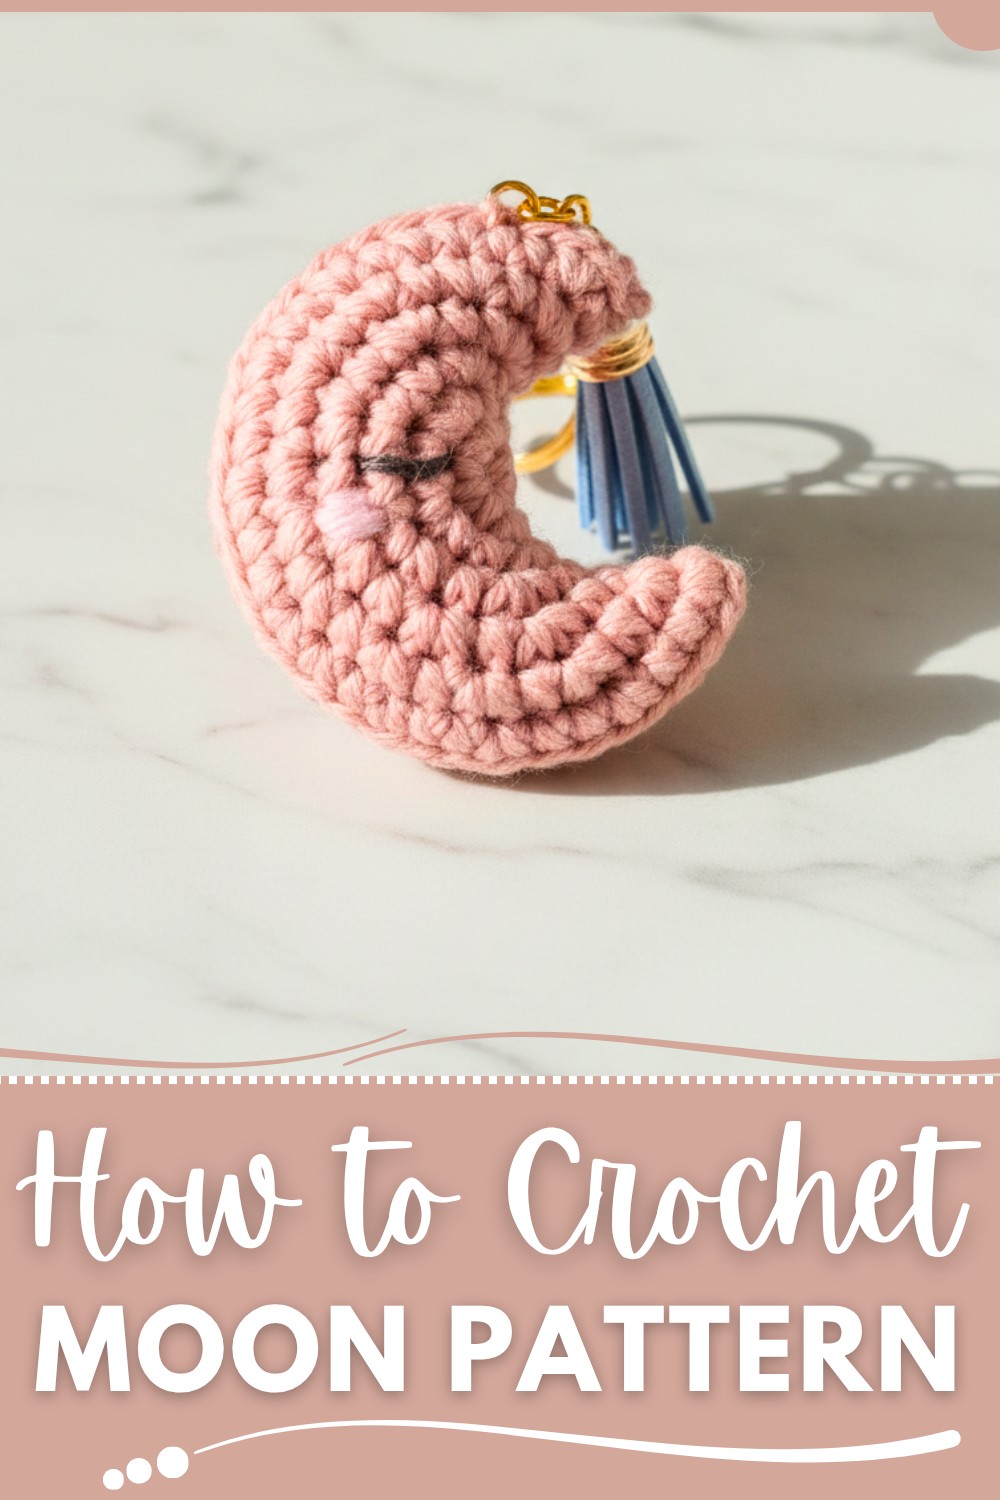
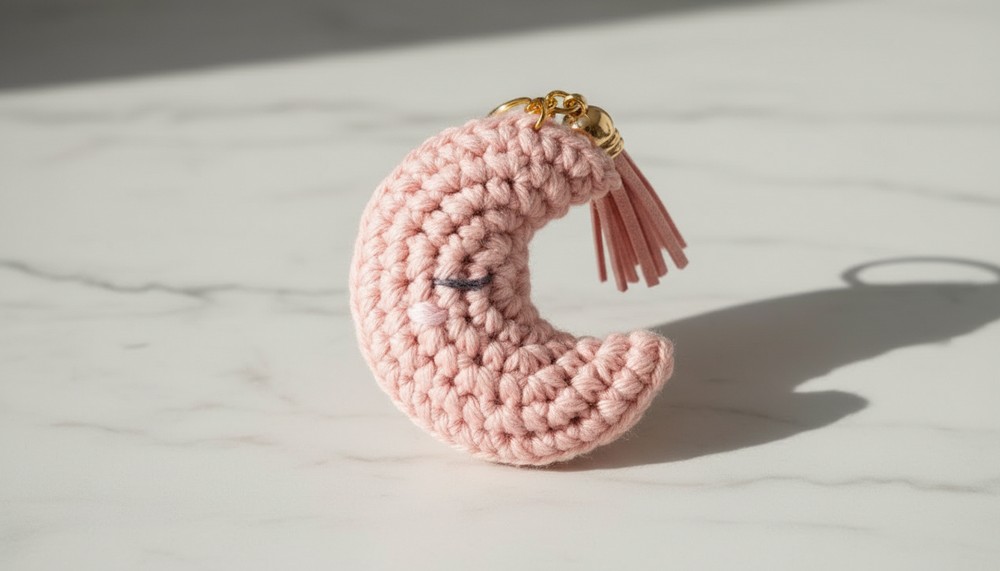
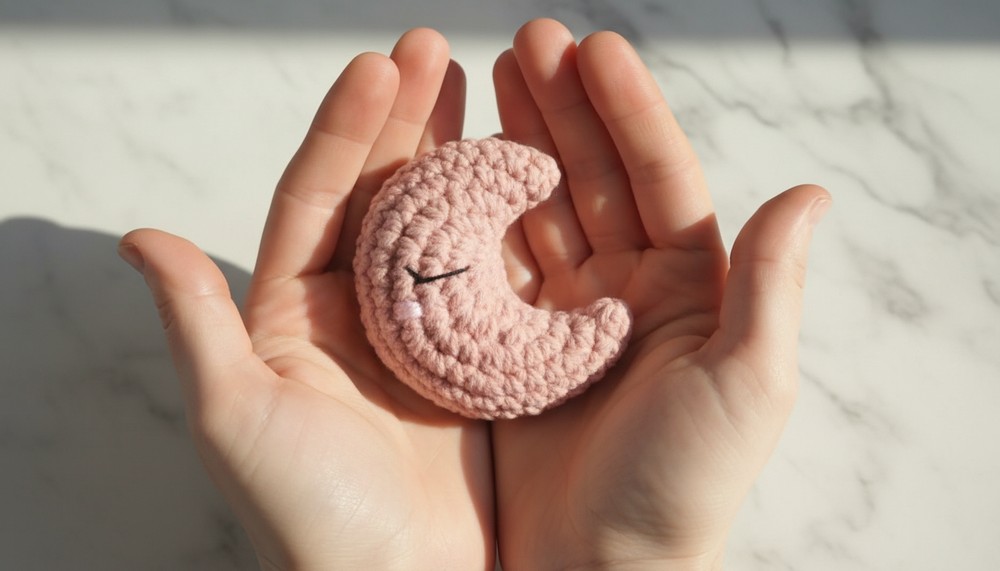
Have fun making a cute and soft crescent moon with this free crochet pattern that's easy to follow and great for gifting or adding charm to any space.
The soft, curved shape of a crescent moon makes it a wonderful piece of handmade beauty. It’s delicate, smooth, and charming, making it perfect for various uses like room decorations, gifts, or cute accessories such as keychains. Its small size and lightweight design make it easy to carry or hang, fitting neatly into different spaces or projects.
Free Crochet Moon Pattern for Unique and Creative Ideas
The simplicity of the moon shape allows you to explore endless color combinations, adding a personal and creative touch to every piece. Bright and light pastel colors can make it look magical and cheerful, while darker shades give it a relaxing and calming appearance.
Its gentle curves and soft texture make it unique and special, perfect for anyone who loves a subtle yet gorgeous touch to their creations. Whether used as a single piece or part of larger handmade items, this design brings joy, coziness, and beauty to any space.
Crochet Moon Pattern
Skill Level
Intermediate: This project involves working with a magic ring, increases, decreases, embroidering facial features, and assembling the crescent moon shape.
Finished Size
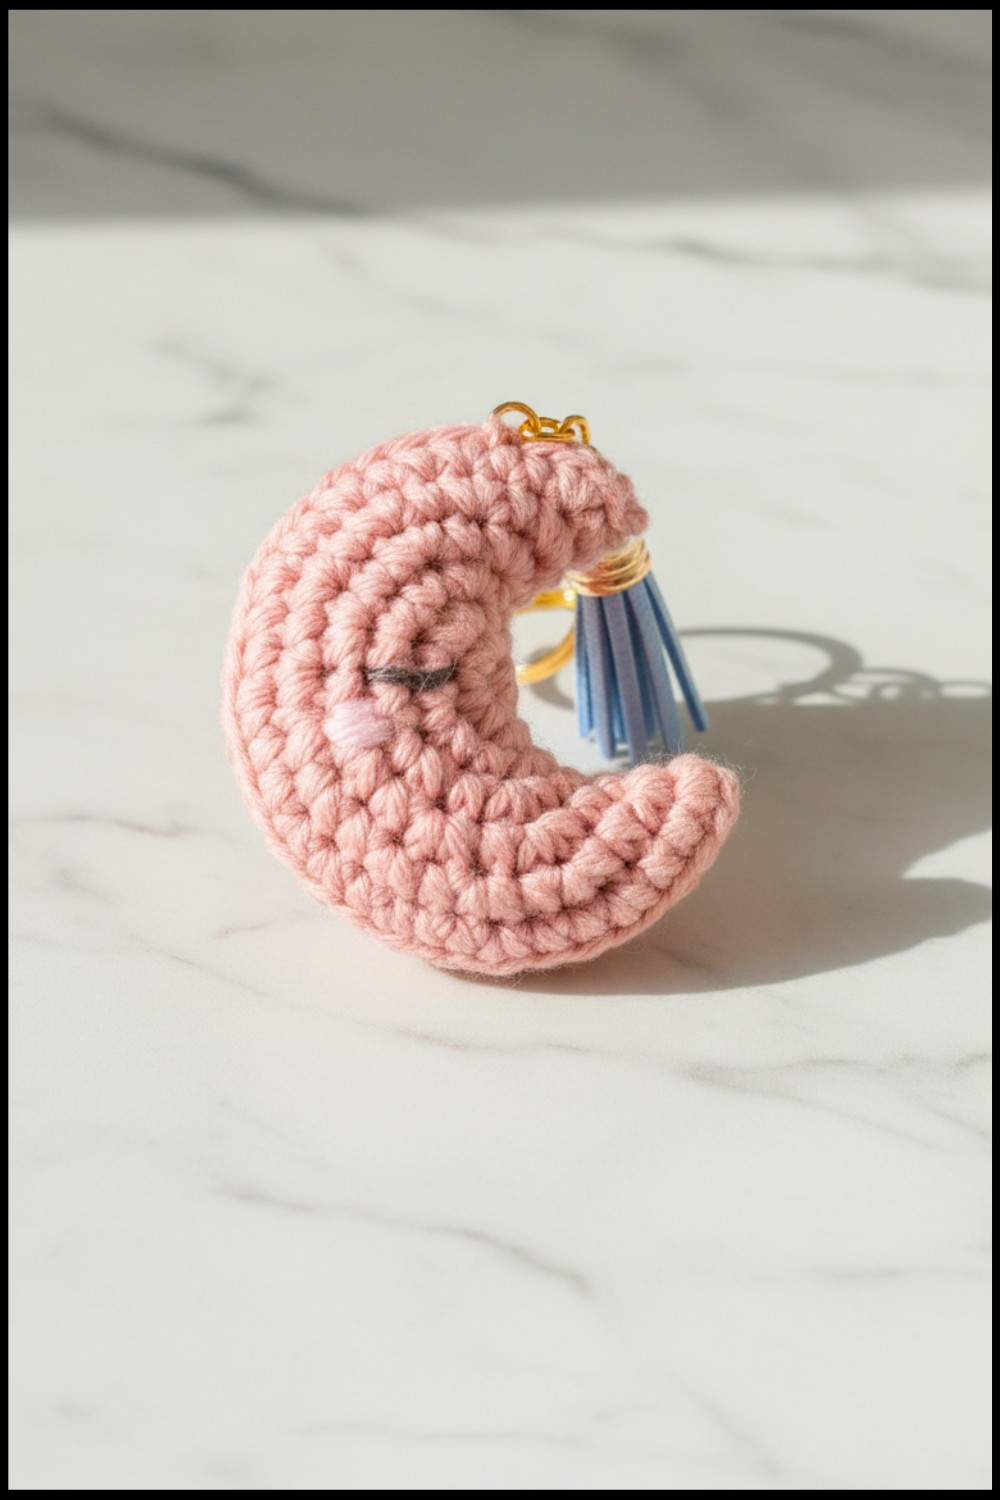
- Using worsted weight yarn and a 4 mm hook, the crescent moon measures approximately 4 inches (10 cm) long when folded and stuffed.
- The size will vary with different yarn weights and hooks.
Gauge
Gauge is not essential for this project. However, you should crochet tightly enough that stuffing doesn’t show through your stitches.
Materials
- Yarn:
- Rose Pink yarn for the moon body (worsted weight recommended).
- Black embroidery thread or lightweight yarn for the eyes.
- Pink scrap yarn for the cheeks.
- Hook Size:
- 4.0 mm (G-6) crochet hook (adjust for yarn weight).
- Additional Supplies:
- Stitch Markers: To track the rounds.
- Tapestry Needle: For weaving in ends and embroidering details.
- Scissors.
- Poly-fil Stuffing.
- Optional: Keychain ring or loop for turning it into a keychain.
Key Abbreviations (US Terminology)
- ch: Chain
- sc: Single Crochet
- inc: Increase (2 sc in same stitch)
- dec: Decrease (work 2 stitches together)
- sl st: Slip Stitch
- MR: Magic Ring
Special Notes
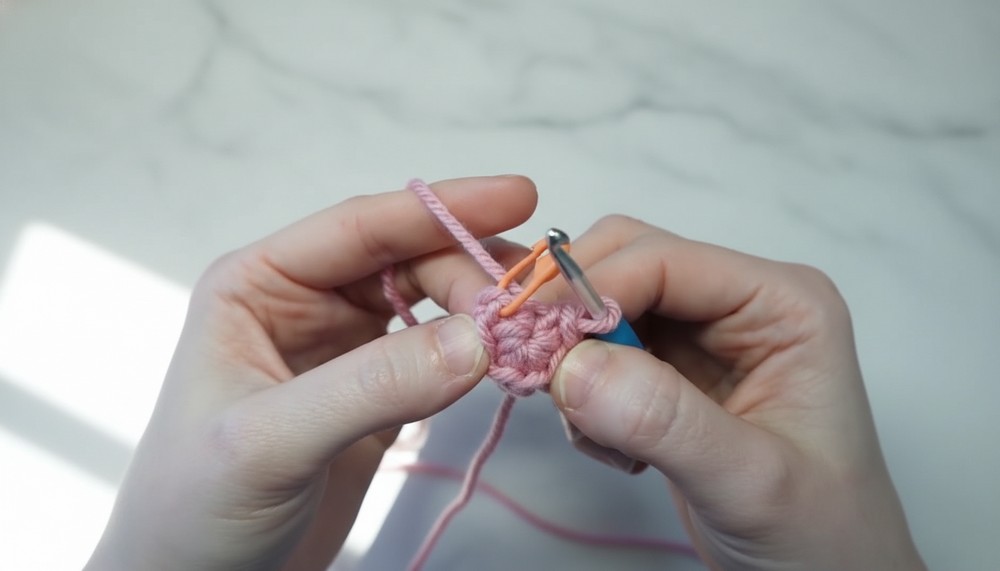
- Magic Ring: The moon begins with a magic ring for a tight, seamless center.
- Stitch Marker: Use a stitch marker to track the first stitch of each round since the moon is worked in continuous spirals.
- Shape and Stuff: The project takes on its crescent moon shape when folded and stitched together.
Pattern Instructions
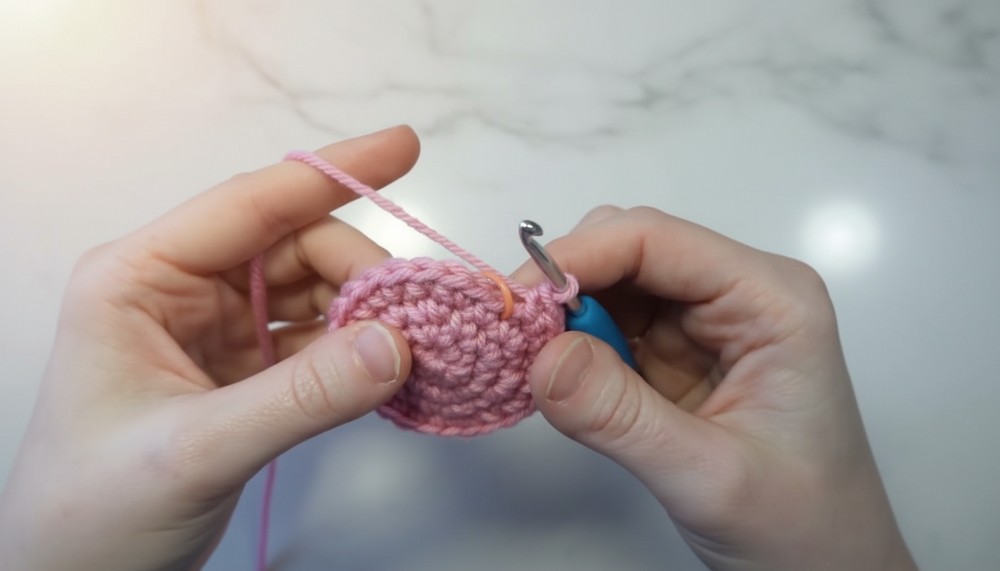
Step 1: Crescent Moon Body
Round 1:
- Work 6 sc into a magic ring (MR). Pull the tail tightly to close the ring.
- Stitch Count: 6 sc
Round 2:
- Work 6 inc (2 sc in each stitch).
- Stitch Count: 12 sc
Round 3:
- [1 sc, inc] – repeat around.
- Stitch Count: 18 sc
Round 4:
- [2 sc, inc] – repeat around.
- Stitch Count: 24 sc
Round 5:
- [3 sc, inc] – repeat around.
- Stitch Count: 30 sc

Round 6:
- [4 sc, inc] – repeat around.
- Stitch Count: 36 sc
Round 7:
- [5 sc, inc] – repeat around.
- Stitch Count: 42 sc
Stop and Shape the Moon:
- After completing Round 7, fasten off, leaving a long tail (about 12-14 inches) for sewing.
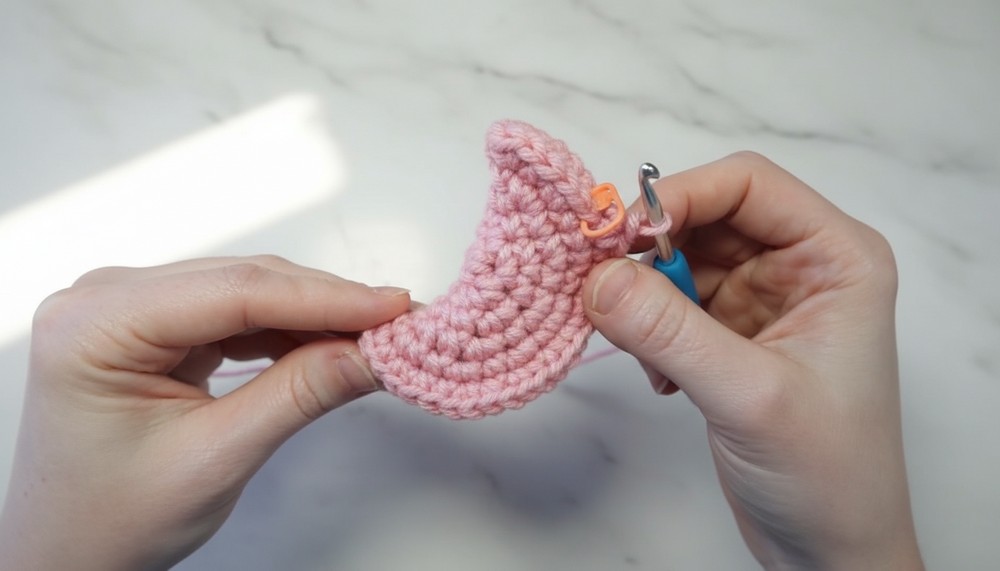
- Fold the circle in half to create the crescent shape with the wrong side of the magic circle (tail end) inside.
Stuff the Moon:
- Begin whip-stitching the edges of the folded circle together, sewing through both layers.
- Pause halfway through stitching to insert poly-fil stuffing. Use just enough to hold the crescent shape without overstuffing.
- Continue stitching to close the moon, and secure the end with a knot. Weave in the tail.
Step 2: Facial Features
Eyes:
- Thread black embroidery floss through a tapestry needle.
- Starting approximately between Rounds 2 and 3, make two straight stitches on either side of the moon’s face for closed eyes. Leave about four stitches between the eyes for balance.
- Knot the thread discreetly on the back side of the fabric and weave in the tail.
Cheeks:
- Using pink yarn or embroidery thread, thread a tapestry needle and secure a knot.
- Add blush by weaving two straight stitches at the sides of the eyes, positioned between Rounds 4 and 5.
- Secure the thread or yarn at the back and weave in the ends neatly.
Optional Finishing Touches
- Keychain Ring:
- Attach a ring or loop to one tip of the crescent moon for a functional keychain.
- Embroidered Details:
- Use white embroidery thread to add small "twinkles" or stars to the moon's body for decorative flair.
Conclusion
Congratulations on completing Luna Giggle Sky! Your charming crescent moon makes for a wonderful accessory perfect for gifts, personal use, or spreading crochet kindness. Its playful smile and soft crescent shape are sure to bring joy wherever it goes.
Pattern Corrections
- Ensure that the increases and repeats are evenly distributed to avoid a lopsided shape.
- Use your stitch marker for accuracy when working in continuous rounds.
Tips for Success
- Tight Stitches:
- Crochet tightly to ensure the stuffing does not show through the stitches.
- Stuff Gradually:
- Add small amounts of stuffing at a time to maintain the crescent shape.
- Customization Ideas:
- Use glow-in-the-dark yarn for a fun and unique effect.
- Add safety eyes for a playful look or make the expression different (sleepy, surprised, etc.).
- Experiment with different yarn weights and adjust hook size accordingly to create larger or smaller moons.