Keep your little one cozy and cute with the Free Crochet Baby Hoodie, a soft and practical handmade design perfect for adding warmth and charm to tiny outfits.
A soft breeze and the cooing of a baby wrapped in comfort—it’s the heartwarming beauty of a handmade crochet hoodie designed with care. The Free Crochet Baby Hoodie isn’t just a layer of warmth; it’s a practical and adorable addition to any baby’s wardrobe. Thoughtfully designed with flexibility, softness, and functionality, this cozy hoodie keeps little ones comfortable. Its hood provides a snug cover for delicate heads, while its lightweight fabric allows for ease of movement.
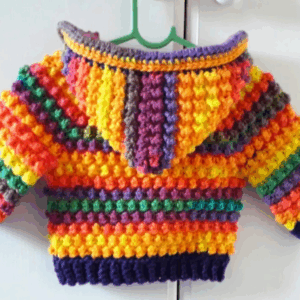
How to crochet a baby hoodie

Whether used for cool outdoor strolls or as a cuddly stay-at-home garment, this hoodie offers versatile charm and practicality. With easy-to-follow instructions, anyone from beginners to seasoned crocheters can bring this delightful creation to life. Beyond being a wearable item, it doubles as a keepsake that captures the love poured into each stitch. Its durable construction ensures it holds up to playful moments and frequent washes, making it a reliable favorite for parents and babies alike.
For gifting or everyday use, the Free Crochet Baby Hoodie combines timeless charm with everyday utility in the sweetest way imaginable. Keep a little one cozy, stylish, and surrounded by handmade care with this heartfelt piece.
Crochet Baby Hoodie Pattern Step-by-Step Guide
Materials You’ll Need
Ensure you have the following materials ready before starting:
- Yarn: Lightweight, loose yarn or double-knit yarn (300 meters/100 grams skein approx.).
- Main Color: About 200 grams.
- Contrasting Color: About 50 grams.
- Hook Size: 4mm crochet hook compatible with your yarn.
- Measuring Tools: Measuring tape (preferably in centimeters).
- Buttons: 4 buttons (can vary depending on your design).
- Accessories: Scissors and needle to weave in the ends.
- Optional: Stitch markers to organize corners and chain spaces.
Gauge
To ensure proper sizing, use the following gauge:
- Gauge: Approx. 22 stitches x 14 rows of double crochet (dc) = 10cm x 10cm square.
Ensure this matches the yarn and hook size you use for consistent fit.
Finished Size
This pattern includes various sizes. Measure carefully to match desired outcomes:
| Size | Chest Circumference | Hoodie Length |
|---|---|---|
| 0–3 Months | 40cm | 18cm |
| 3–6 Months | 45cm | 20cm |
| 6–9 Months | 50cm | 22cm |
| 9–12 Months | 55cm | 23cm |
Tip: Customize by increasing or decreasing chain counts depending on chest measurement.
Pattern Instructions
1: Starter Chain
- For the starting chain, follow the measurements listed below. Match your measurements to chain lengths:
- 0–3 Months: 45 chains (approx. 30cm).
- 3–6 Months: 55 chains (approx. 35cm).
- 6–9 Months: 61 chains (approx. 38cm).
- 9–12 Months: 79 chains (approx. 43cm).
- After chaining, measure the chain. Stretch lightly but avoid over-pulling. Do not go shorter than the target length.
- Add 1 extra chain for turning.
2: First Row Setup
Create the yoke base using double crochet (dc) stitches and corners:
- Begin the row:
- Skip the first 2 chains.
- Crochet 7 double crochets (dc) into successive chain spaces.
- Create the first corner:
- In the next stitch: (dc, ch2, dc) to form the shoulder corner.
- In the next stitch: (dc, ch2, dc) to form the shoulder corner.
- Count side chains:
- Crochet 13 double crochets (dc). For larger/smaller sizes, adjust as follows:
- 0–3 Months: 9 dc.
- 3–6 Months: 11 dc.
- 6–9 Months: 13 dc.
- 9–12 Months: 15 dc.
- Crochet 13 double crochets (dc). For larger/smaller sizes, adjust as follows:
- Create neckline corner:
- In the corner space: (dc, ch2, dc).
- Crochet 17 double crochets for back edge, adjusting as necessary for size. Smaller sizes use fewer stitches.
- Repeat corner stitching for symmetry:
- Create the shoulder on the opposite side with (dc, ch2, dc).
- Finish Row 1:
- Crochet 7 double crochets (dc) to end, same as the beginning.

3: Yoke Setup
The yoke forms the base of the hoodie, including shoulders and body.
- Row 2 - Enhance yoke structure:
- Chain 1, turn, and start with half double crochet (hdc) in the first stitch.
- Alternate between front post double crochets (fpdc) and hdc, ensuring fpdc loops around previous row’s double crochet posts.
- Ensure corner repeats continue with (dc, ch2, dc) in chain spaces for smooth expansion.
- Measure Yoke Length:
- Sizes 0–3 Months: Yoke height – 9cm.
- Sizes 3–6 Months: Yoke height – 10.5cm.
- Sizes 6–9 Months: Yoke height – 11.5–12cm.
- Sizes 9–12 Months: 12–12.5cm.
- Rows 3–4: Continue alternating between rows of double crochet (dc) and front post rows (fpdc + hdc) until you achieve the required yoke size.

4: Connecting the Yoke
Joining the yoke creates the armholes:
- Determine armhole chain counts: Measure the back chest circumference and adjust armhole chain spaces using odd numbers:
- Example: For 50cm circumference, if missing 2cm for back measurement, add 3 chains under each armhole (ensure odd numbers).
- Join sides:
- Double crochet (dc) into the corner spaces and add the chains for armholes. Skip the chain space underneath and continue crocheting across the remaining yoke.
5: Creating the Body
- After connecting, continue the double crochet rows until the body length matches your measurement:
- Sizes 0–3 Months: 15cm (allowing 3cm for ribbing).
- Sizes 3–6 Months: 16–17cm.
- Sizes 6–9 Months: 18cm.
- Sizes 9–12 Months: 19cm.
- Complete the body by stopping 3cm short of desired hem length and prepare for ribbing.

6: Hood Construction
- Attach the yarn to the neckline edge. Work stitch variations for height adjustment:
- Start with single crochet (sc): 5 stitches on shoulders.
- Transition to half double crochet (hdc) for width expansion.
- Use double crochet (dc) for the higher back neckline for additional height.
- Grow the hood by repeating the four-row sequence until hood’s height matches chart:
- 6–9 Months: Hood height – 22cm.
- 9–12 Months: Hood height – 23cm.
- For final shaping: Use additional rows or chain spaces to curve the top. Optional tapering improves fit.

7: Final Details
- Ribbing:
- Use fpdc and bpdc (back post double crochet) alternately for hem and cuff edges.
- Button placement: Attach 4 buttons evenly along the front edge.
- Hide Tails: Weave in all ends using a needle for a clean finish.
Stitch Highlights
| Stitch | Abbreviation | Purpose |
|---|---|---|
| Chain | ch | Foundation/base stitches. |
| Single Crochet | sc | Small height stitches, edges. |
| Half Double Crochet | hdc | Medium height stitches. |
| Double Crochet | dc | Standard height stitches. |
| Front Post Double Crochet | fpdc | Structural design enhancement. |
| Back Post Double Crochet | bpdc | Ribbing and textured effects. |
Important Numbers:
- Starting chain counts: 45, 55, 61, 79 (based on sizes).
- Yoke height: 9–12cm.
- Hood height: 22–23cm.
- Chest circumference: 40–55cm.
Conclusion
This baby hoodie pattern blends simplicity with design texture using versatile stitches like fpdc and hdc. The project is excellent for gifting and personalization, allowing you to explore color combinations, textures, and sizes.