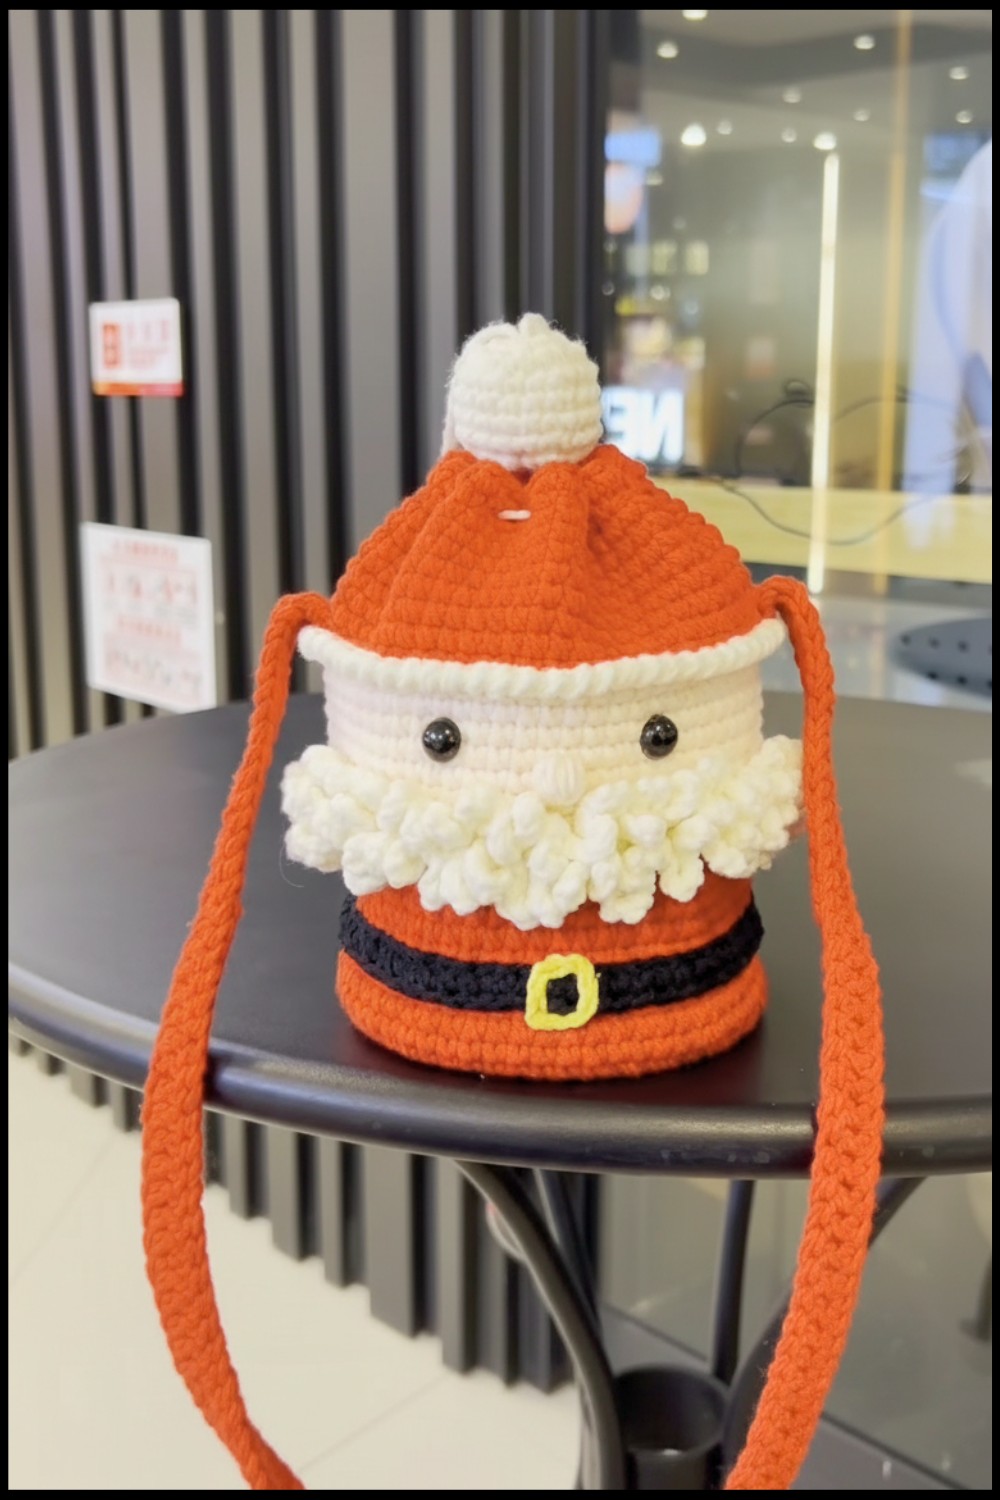
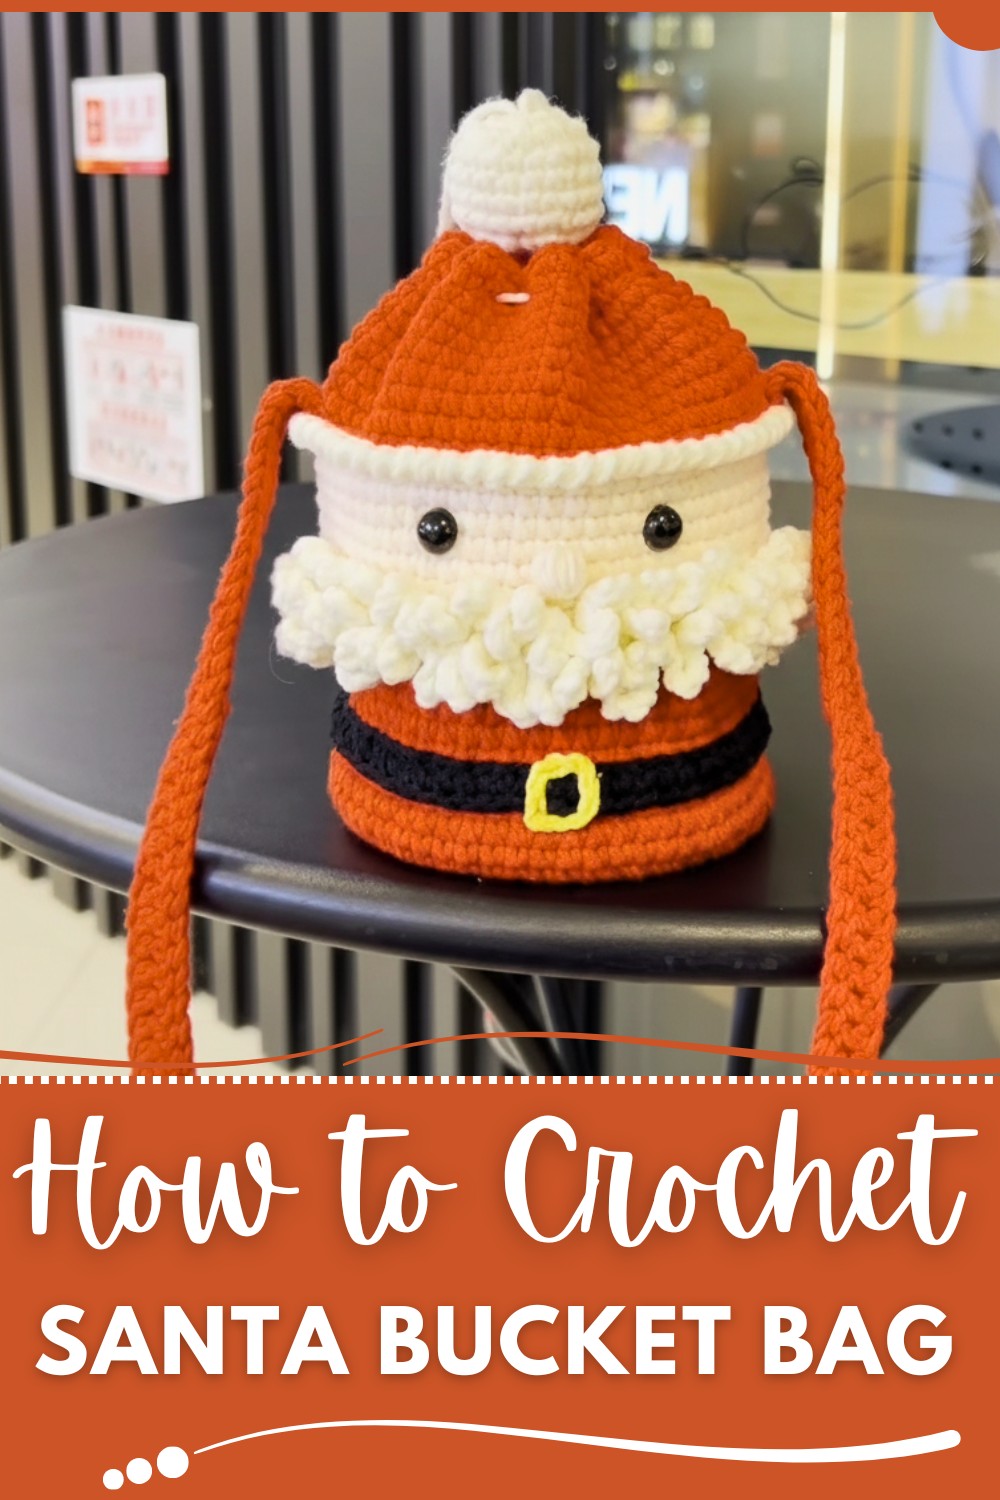
Create a festive Santa bucket bag with this free crochet pattern that is perfect for holiday gifts, home decorations, or storing treats in a fun and beginner-friendly way.
A festive bag that's as charming as it is practical! This adorable crochet piece comes to life with its fun Santa-inspired design, featuring a fluffy white beard, a bright cheerful hat, and a cute little belt detail. Crafted with love, the Free Crochet Santa Bucket Bag pattern offers both beauty and functionality, making it perfect for the holiday season. Its large capacity means it’s not just decorative—it’s useful too. Fill it with small gifts, candy, apples, or any holiday treats to bring joy to your loved ones. It can even be used as a creative stocking alternative or a fun decoration for your home.
Free Crochet Santa Bucket Bag Pattern for Festive Gift Giving
Using a double strand of milk cotton and a 3.5 mm crochet hook, this pattern is beginner-friendly and works stitch by stitch to create a durable design. Starting from the bottom with basic single crochets, the process builds layer by layer until the iconic Santa details come together.
You can discuss fun additions like crocheting his beard, adding the decorative drawstring, and even the fluffy pompom for the hat. Every step of this design captures the magic of Christmas and makes for a fun project to try.
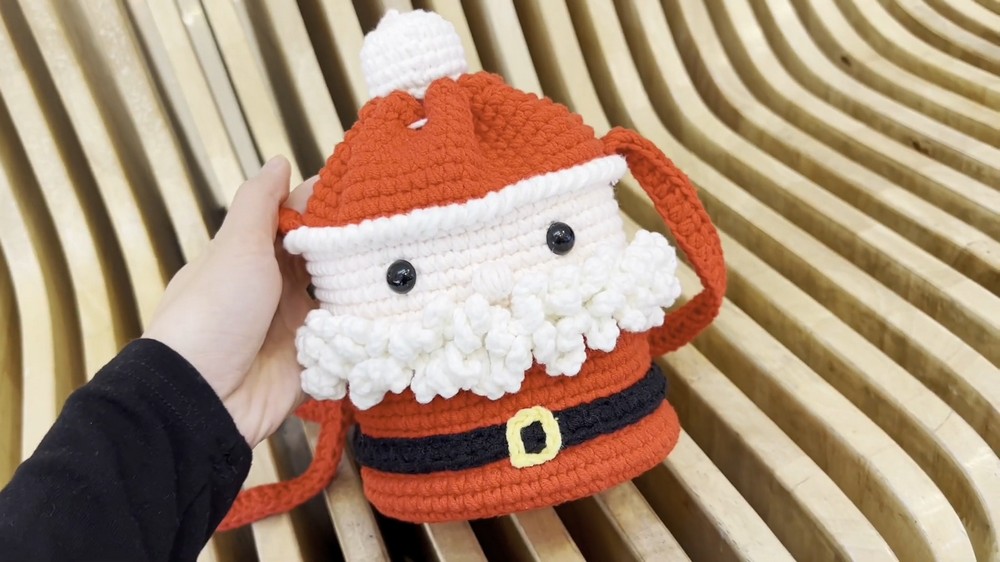
Crochet Santa Claus Bucket Bag Pattern
Finished Size:
- Diameter of the Base: Approximately 20 cm (8 inches)
- Height of the Bag: Approximately 28 cm (11 inches)
- Capacity: Large enough to store several apples or small gifts
Materials Required:
- Yarn:
- Five-strand milk cotton, used double-strand
- Colors: Red, White, Skin-tone, Black, and Yellow (for decorative details)
- Crochet Hook:
- 3.5mm crochet/hook
- Additional Supplies:
- Stitch markers
- Sewing needle
- Stuffing cotton (for small decorative baubles)
Gauge:
- 10 single crochets = 4 cm (1.5 inches)
- Gauge is approximate since this is a free-form bucket bag. Aim for consistency in tension and size.
Special Techniques Used:
- Magic Ring: Create secure and adjustable starting circles.
- Single Crochet (SC): The foundation stitch for most rounds.
- Single Crochet Increase: Adding extra stitches for expansion.
- Back Loop Single Crochet: Create texture and structure by crocheting into the back loop only.
- Reverse Single Crochet: Textured, decorative border crocheted left to right.
- Slip Stitch: Used to join rounds smoothly.
- Chain Stitch: Creates the drawstring and decorative elements.
- Stuffing and Gathering: Used for small baubles.
Pattern Instructions:
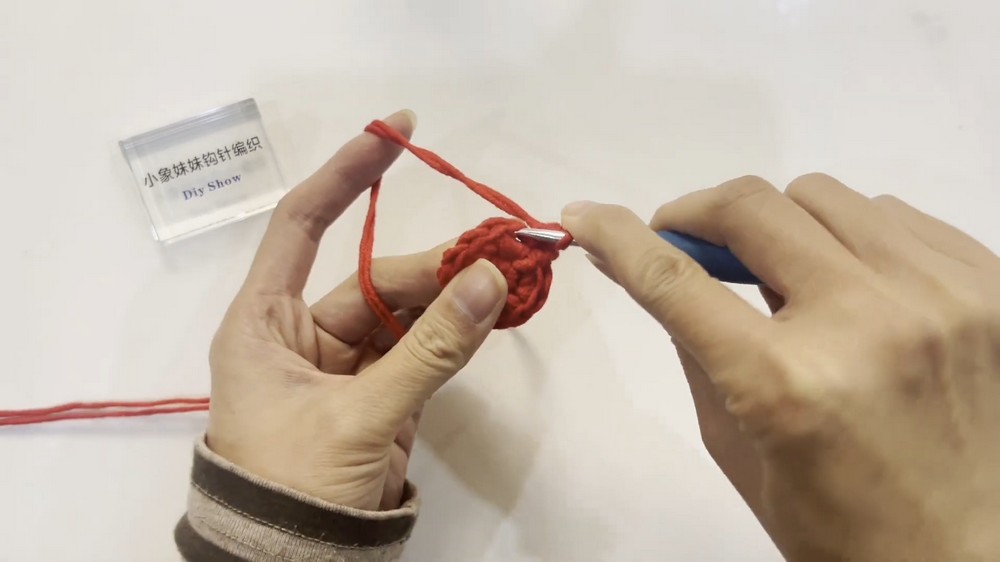
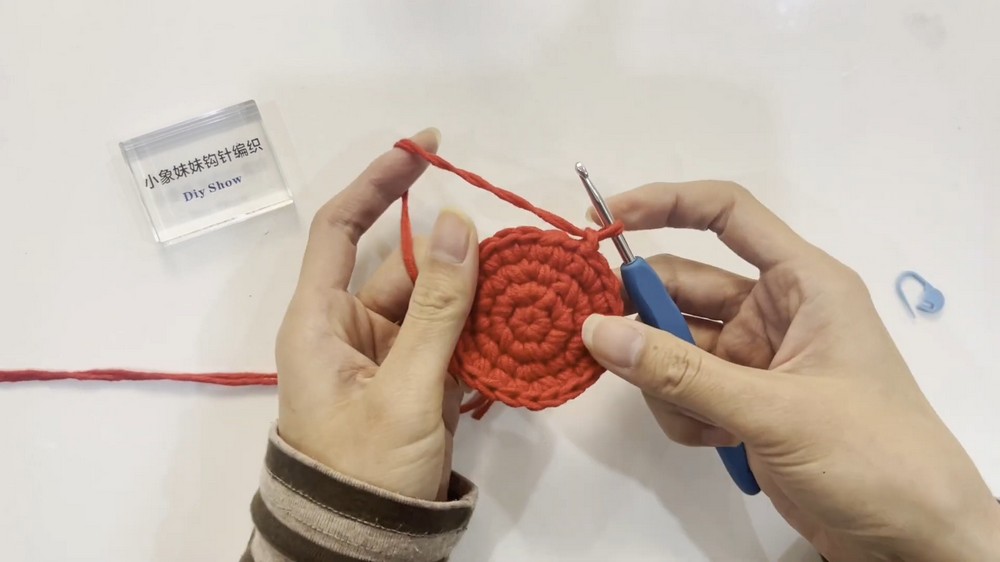
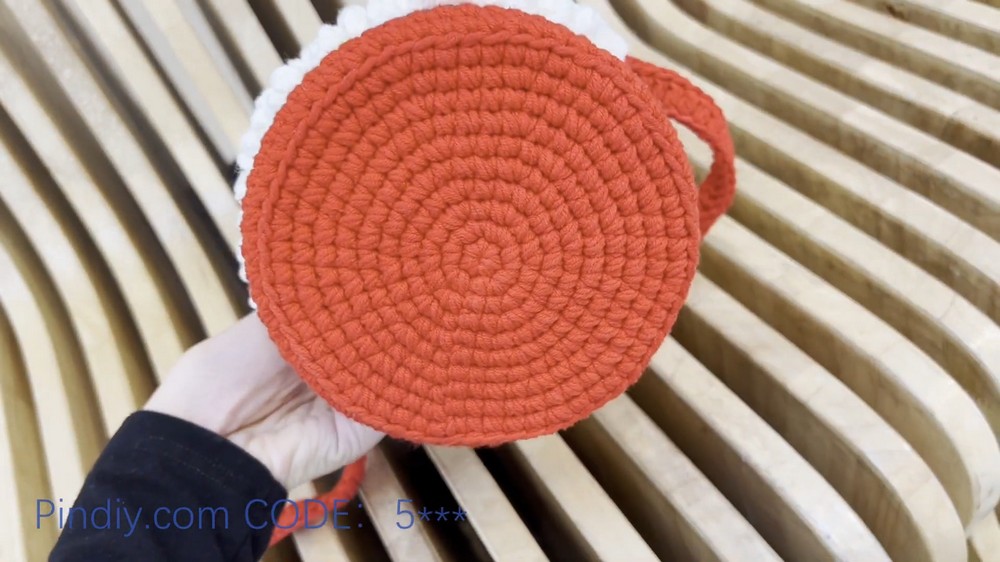
Step 1: Crochet the Bottom of the Bag
- Round 1:
- Start with a Magic Ring.
- Crochet 6 Single Crochets (SC) into the ring.
- Place a stitch marker on your first stitch for reference.
- Pull the yarn end tight to close the ring.
- Join with a Slip Stitch into the first SC.
- Round 2:
- Crochet 2 SC into each stitch around (increase).
- Total stitches = 12.
- Join with a Slip Stitch into the first SC.
- Round 3:
- Crochet 1 SC into the first stitch, then 2 SC into the next stitch (increase every other stitch).
- Repeat pattern for 6 sets.
- Total stitches = 18.
- Join with a Slip Stitch into the first SC.
- Round 4:
- Crochet 1 SC in the first two stitches, then 2 SC in the next stitch (increase every two stitches).
- Total stitches = 24.
- Join with a Slip Stitch into the first SC.
- Round 5:
- Crochet 1 SC in the first three stitches, then 2 SC in the next stitch (increase every three stitches).
- Total stitches = 30.
- Join with a Slip Stitch into the first SC.
- Continue rounds with the following increase pattern:
- Round 6: Increase every 4 stitches (36 SC).
- Round 7: Increase every 5 stitches (42 SC).
- Round 8: Increase every 6 stitches (48 SC).
- Round 9: Increase every 7 stitches (54 SC).
- Round 10: Increase every 8 stitches (60 SC).
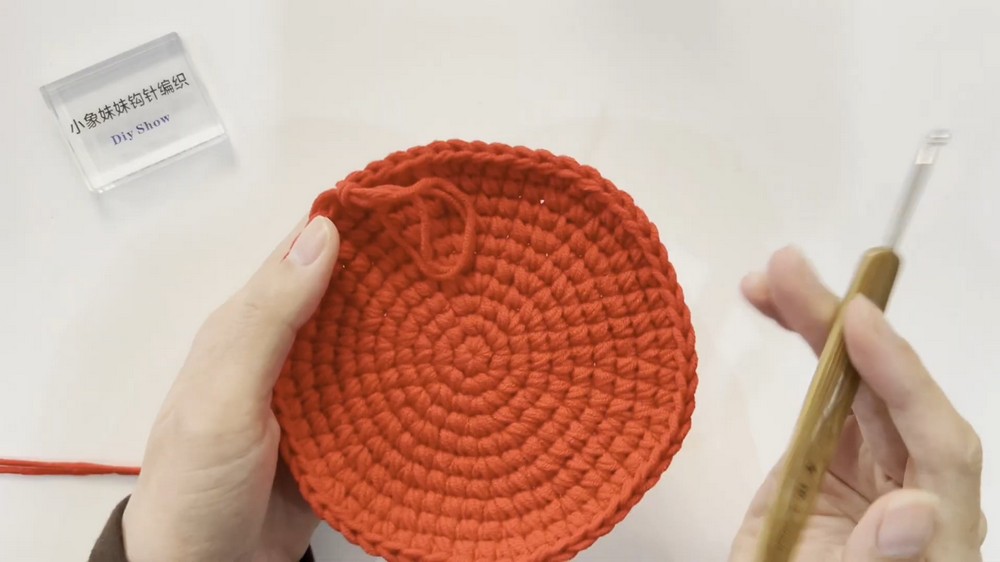
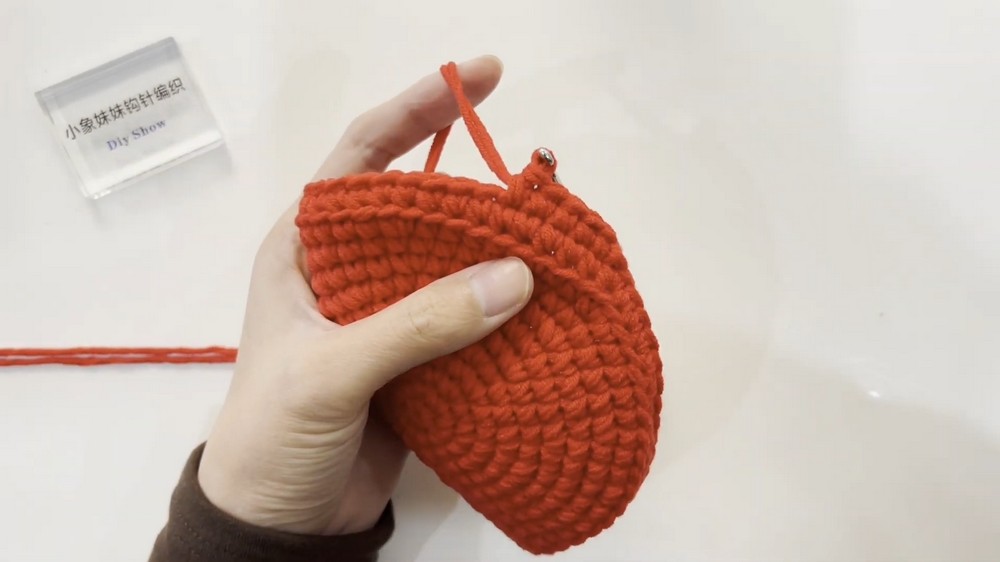
Step 2: Crochet the Bag Walls
- Round 11:
- Switch to Red Yarn.
- Work into the back loop only of each stitch. Crochet 60 SC around.
- Join with a Slip Stitch.
- Rounds 12–18:
- Continue crocheting 60 SC per round through both loops.
Step 3: Decorative Details
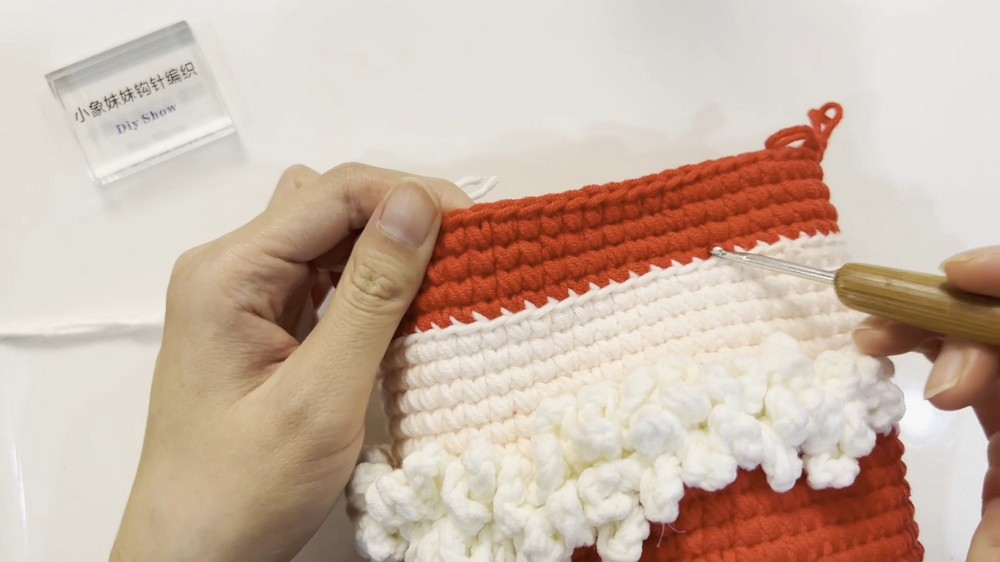
Santa’s Beard (Rounds 11–12 Inner Loops):
- Insert White Yarn into the remaining inner loops of Rounds 11–12.
- Crochet 6-chain loops, secured by slip stitches, to create a textured beard.
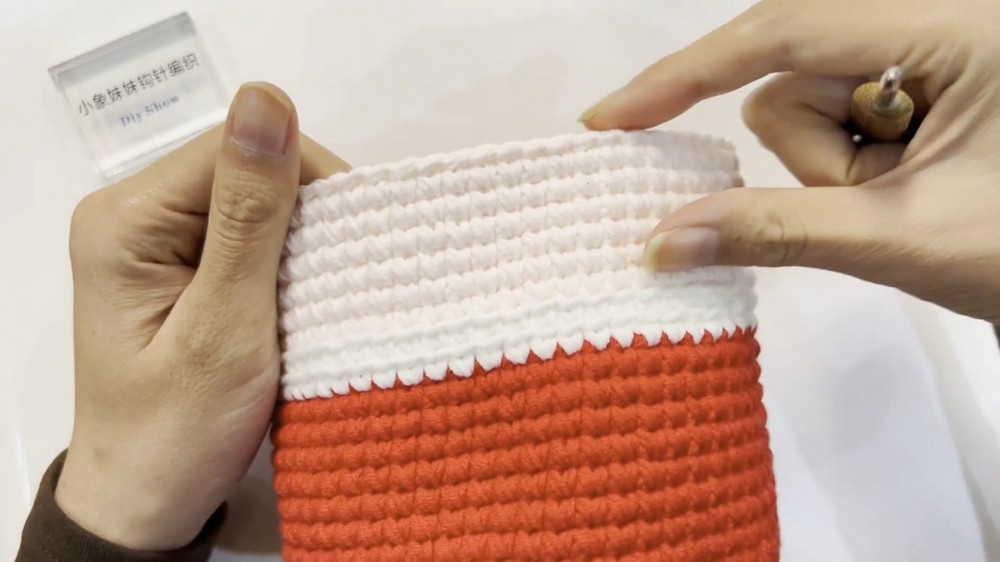
Skin-Tone Section (Rounds 14–18):
- Switch to Skin-Tone Yarn.
- Work 30 back loop SC followed by 30 regular SC for Santa's face.
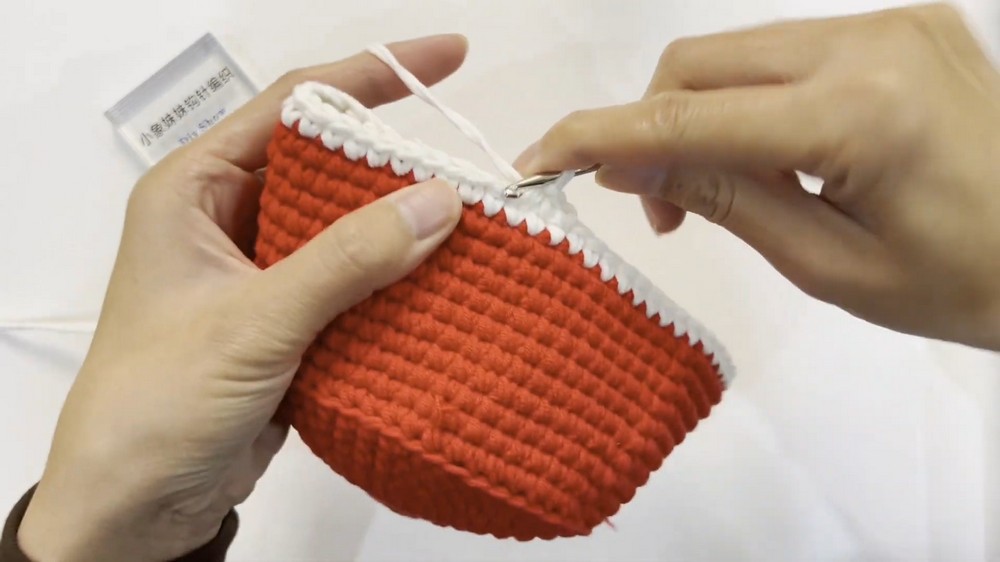
Step 4: Drawstring Hollow and Belt
Rounds 19–28:
- Switch back to Red Yarn.
- Crochet 60 SC per round.
Round 29 (Hollow for Drawstring):
- Skip 1 stitch, crochet 1 SC in the next stitch, then chain 1. Repeat around the bag.
- Slip stitch to join.
Rounds 30:
- Crochet 60 SC, filling the hollows with 1 SC each.
Santa’s Belt:
- Use Black Yarn, crochet a chain stitch to match the circumference. Attach to the middle of the red section.
- For the buckle, use Yellow Yarn and sew a square shape.
Step 5: Santa’s Nose, Eyes, and Hat Pom-Poms
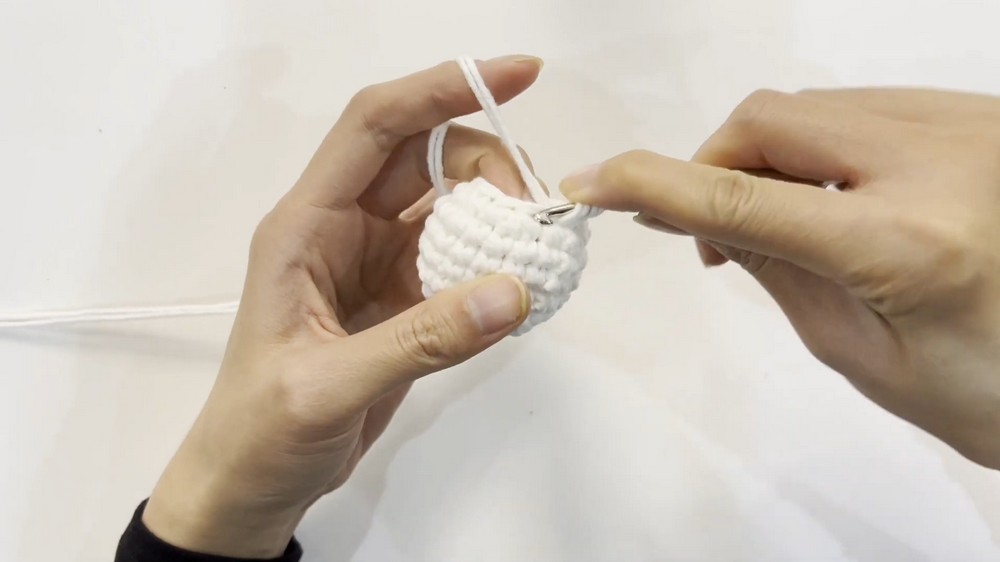
Nose:
- Use Skin-Tone Yarn.
- Make a small puff stitch ball (see video transcription). Attach it to the center of the face.
Eyes:
- Sew small black dots or use felt/fabric for eyes.
Pom-Poms:
- Crochet puff balls using White Yarn for the top of the hat.
- Attach to the ends of the drawstring for added charm.
Tips and Customization Ideas:
- Color Variation: Use green and white instead of red for a modern twist.
- Adjust Size: For smaller bags, stop increasing after Round 7 or 8.
- Decorations: Add embroidery, buttons, or glitter details.
- Straps: Add a longer strap for wearing over the shoulder.
Conclusion & Important Remarks:
Your beautifully crocheted Santa Claus bucket bag is now complete. This festive accessory is not only functional but also a charming addition to your holiday décor. With its large capacity, you can fill it with gifts, candies, or ornaments.
Final Look:
- Santa’s face and beard give the bag character.
- The red and white pattern adds holiday vibrance.
- The functional drawstring resembles Santa's hat pom-pom.