Bright petals and cheerful colors make a Crochet Potted Sunflower a simple and lovely decoration for any room.
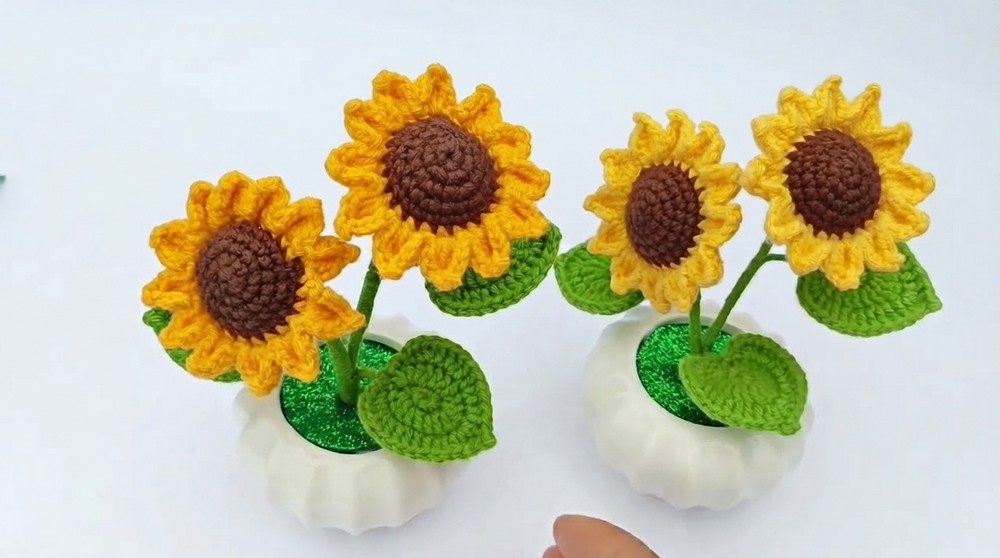
A bright and happy decoration can make any room nicer. A Crochet Potted Sunflower is a small flower made with yarn. It has yellow petals that are soft and round. The center is dark, and it sits in a little pot. It looks warm and friendly.
Lovely Crochet Potted Sunflower Free Pattern for Floral Home Decorations
The yellow petals are very bright and catch your eye. The green leaves and brown pot look like a real plant. Because it is made from yarn, the colors stay bright and do not fade. This sunflower does not need water or sunlight, so it stays nice all the time. This flower uses easy stitches, so anyone can make it. It is small and light, so you can put it on a desk, shelf, or window. It adds a nice touch to the room.
A Crochet Potted Sunflower does not cause allergies and needs no care. It lasts a long time and can be a good gift for friends or family who like pretty decorations.
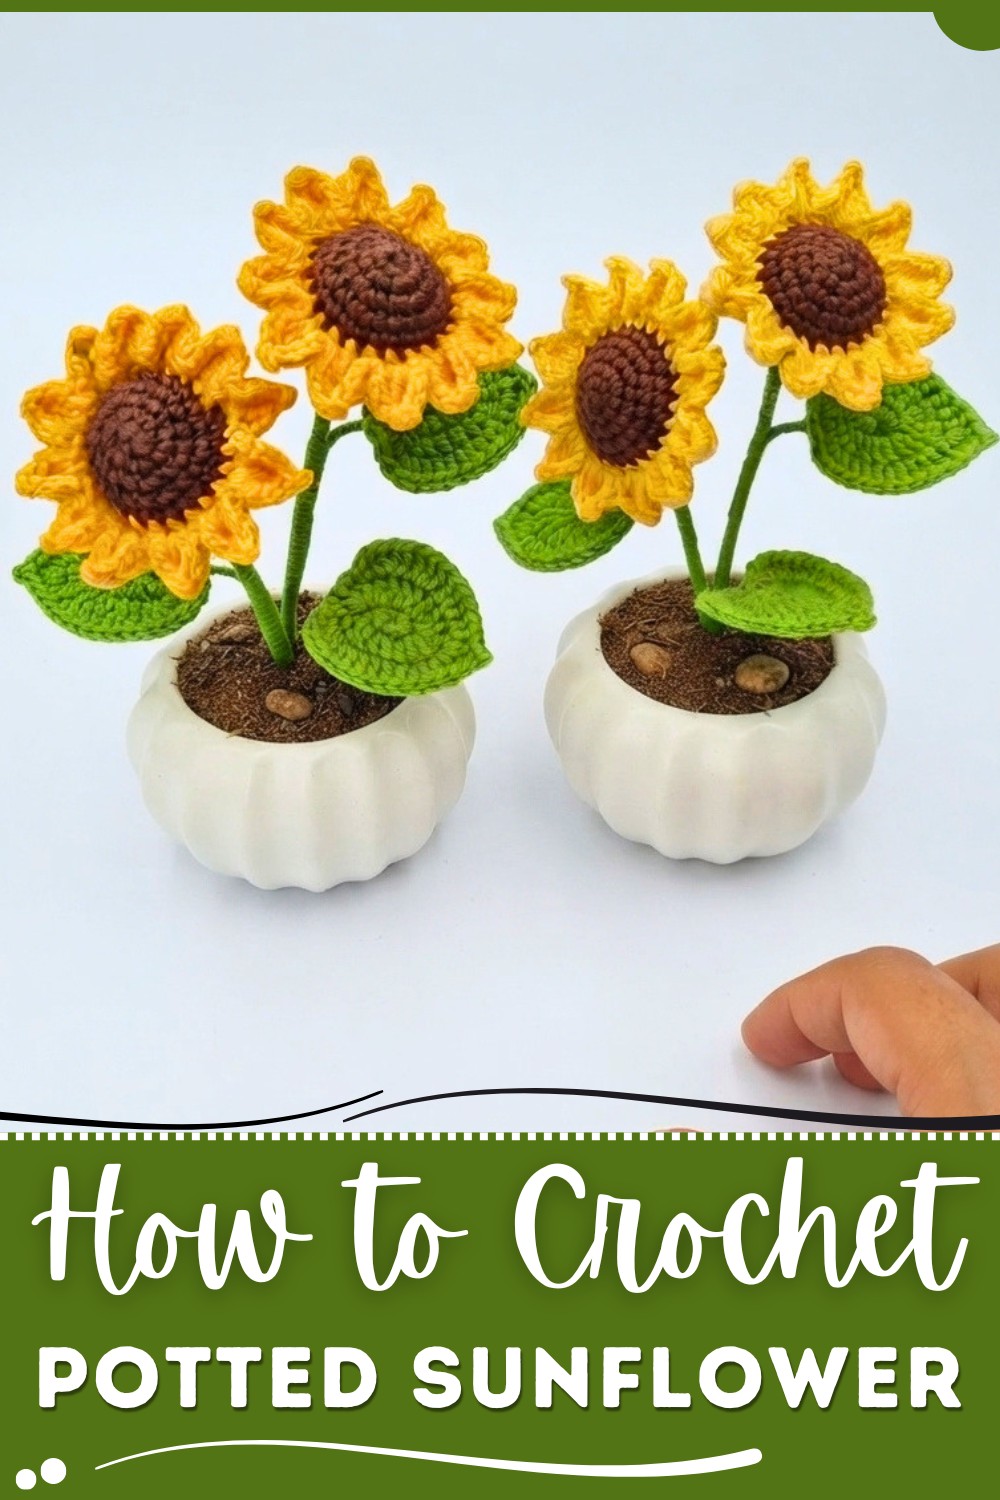
In short, a Crochet Potted Sunflower is a bright and friendly item that makes your space happy without work.
Little Sunflower Flowerpots – Crochet Tutorial
In this project we will be knitting beautiful little flowerpots featuring two sunflowers and three little leaves. These miniature crochet arrangements are perfect for both plastic or ceramic pots about 13 cm tall. The tutorial will guide you through every step, including making the sunflowers, assembling the leaves, wiring the stems, and finishing off for a charming display.
Pattern Highlights
- Sunflowers with Three-Dimensional Texture: Realistic double-layered petals and dense flower centers.
- Flexible Assembly: Designed to fit small ceramic, plastic, or hand-knitted flowerpots.
- Sturdy Wired Stems: Use galvanized wire for adjustable, poseable stems and leaves.
- Decorative Leaves: Three lush green leaves add balance and realism.
- Beautiful for Gifting or Decor: Perfect as an ornament, table centerpiece, or a gift.
Notes
- For the best result, work tightly so stuffing does not show through the stitches.
- Galvanized wire comes in different gauges. Use recommended gauges for stability.
- You may use adhesive (hot glue or silicone) to better secure the stems and filling.
- Adjust shades of yellow and green to match your taste or available yarns.
- Take care when working with wire—pliers may be needed, and ends should be tucked safely.
Skill Level
Adventurous Beginner to Intermediate
Familiarity with working in the round, increases, magic ring, and basic assembly is required. The project is approachable for most with clear instructions and is a good practice for amigurumi shape and construction.
Materials
- Yarn:
- Brown (sunflower centers)
- Yellow (sunflower petals)
- Green (leaves and stem lining)
- Wire:
- For stems: Galvanized wire #18 or #20 (for strength)
- For leaves: Galvanized wire #22 or the kind found in cables (thinner, flexible)
- Flowerpot: Small, 13 cm tall (ceramic, plastic, or knit)
- Filler: Floral foam (Oasis), cotton, or suitable stuffing for the pot interior
- Microporous material: (frosted green sheet) for surface cover (adhesive or not)
- Crochet hook: 2.0 mm
- Pliers: For cutting/bending wire
- Scissors and yarn needle
- Hot glue/silicone (optional): For securing wires and assembly
Measurements / Sizing
- Flowerpot Height: ~13 cm
- Total Arrangement Height: ~13–15 cm (depends on wire stem length)
- Sunflower Head: ~3–5 cm diameter
- Each Leaf: ~4–6 cm long
Gauge
Gauge is not critical, but keep stitches compact and firm for structure. If using different yarn or hook, proportions may vary.
Stitch Abbreviations
| Abbreviation | Meaning |
|---|---|
| MR | Magic ring |
| ch | Chain |
| sc | Single crochet |
| inc | Increase (2 sc in st) |
| sl st | Slip stitch |
| dc | Double crochet |
| tr | Treble crochet |
Special Stitches
- Magic ring (MR): Adjustable yarn circle for starting amigurumi in the round.
- Picot: (for leaf/petal tips) ch 2, sl st in first ch (creates a tiny peak).
Compelete Crochet Pattern
Sunflower Center (make 1 brown and 1 green per flower)
Round 1:
- MR, ch 1. Work 6 sc in ring. Pull tail tight. [6]
Round 2:
- Inc in each st (2 sc in each sc) around. [12]
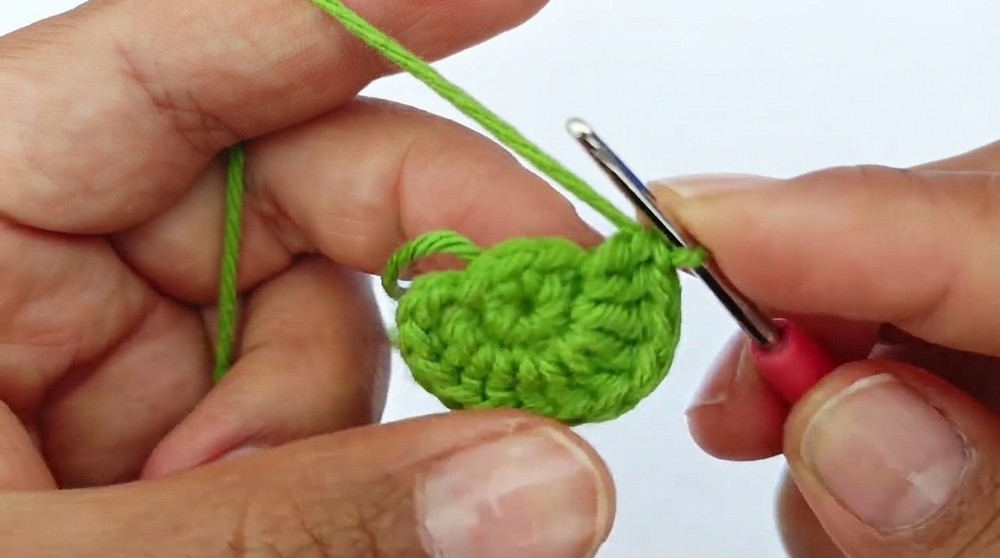
Round 3:
- (1 sc, inc) repeat 6 times. [18]
Round 4:
- (2 sc, inc) repeat 6 times. [24]
Round 5:
- Sc in each st around. [24]
- At the end, use a seamless finish:
- Leave one st free, sl st to the next st, then with needle, weave yarn through center of previous st to flatten.
- Tie ends securely.
Repeat with green yarn for second center.
Joining Centers & Creating Flower Rim
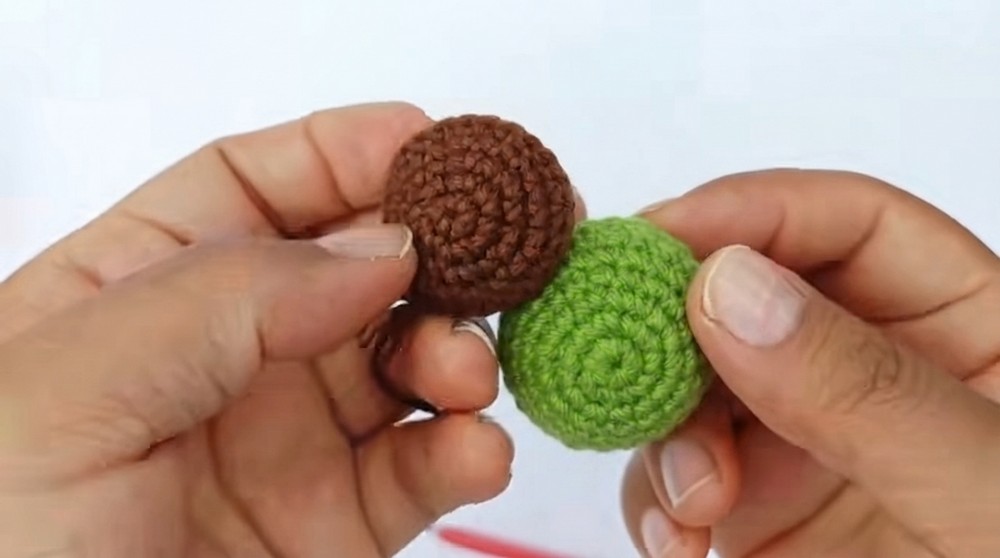
- Place brown and green centers back to back.
- With yellow yarn, insert hook through any st of both layers.
- Pull through yellow and ch 1.
- Sc in same st. Continue sc through both layers around until almost closed; before finishing the round, add a small piece of stuffing for dimension.
- Finish with sl st to join round.
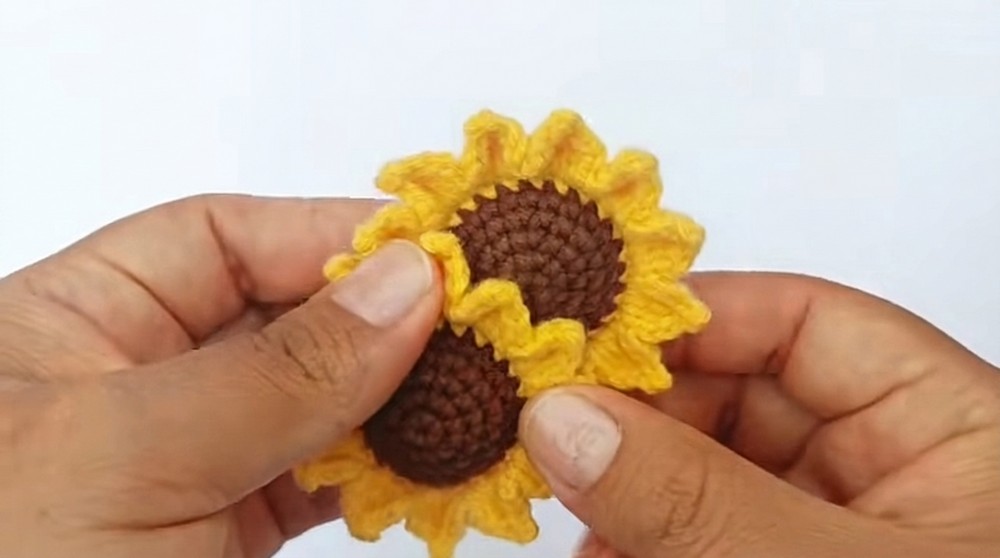
Sunflower Petals
Work petals directly around the sc rim:
Repeat for desired fullness (approx. 2 rounds of petals):
- Ch 2, (dc, tr in same st), picot (ch 2, sl st in base of chains),
- In next st: (tr, dc in same st), ch 2, sl st.
- Continue all the way around.
- Optionally, work a second round for more fullness.
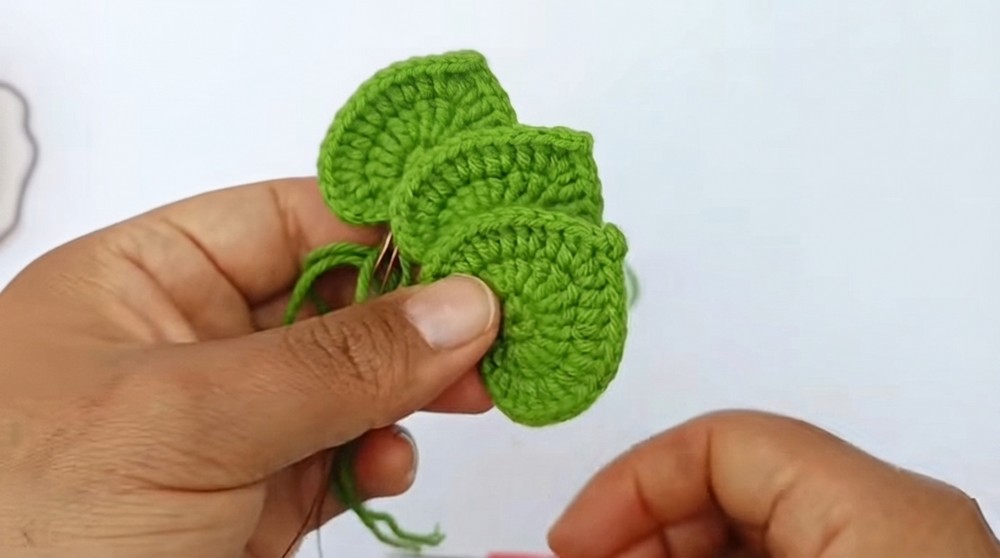
Leaves (Make 3)
Round 1:
- MR, ch 1. 7 sc in ring. Pull tight. [7]
Round 2:
- Sl st in first st, ch 2, in same st: 3 dc.
- In each of 2 next sts: 2 dc each.
- In each of 2 next sts: 2 dc each.
- In next st: 3 dc.
- Mirror pattern on other side (as for leaf structure).
- At tip, ch 2, sl st to base for pointed shape.
- Fasten off, leaving a long yarn tail.
Leaves will be later lined with wire during assembly.
Assembly & Wiring
Flower Stems:
- Cut two wires: one 14 cm (for a taller sunflower), one 12 cm (for a shorter).
- Use pliers to bend and prepare one end if desired.
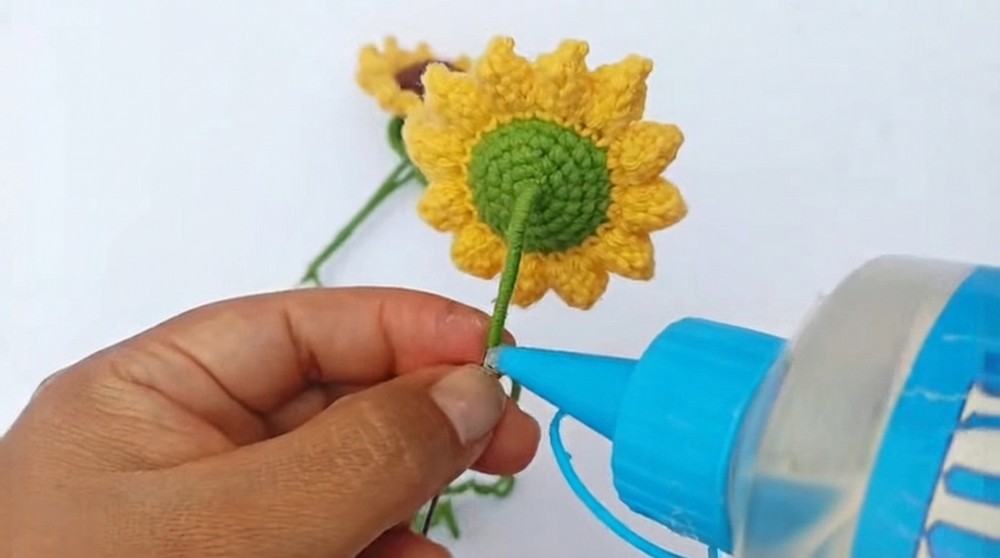
- Insert wire into the back of the sunflower securely but gently, twisting until fully through but not piercing the front.
- Secure with glue if desired.
Leaf Veins:
- Feed thinner gauge wire through the back of each leaf.
- Leave about 1 cm sticking out for later arranging.
Lining Stems/Leaves:
- Using green frosted microporous material or yarn, begin wrapping wire stems close to the sunflower.
- For better adhesion, periodically add a drop of silicone/glue and press material as you wind.
- When reaching desired length, add the leaves at intervals, securing with glue.
- Once fully aligned, cut the lining and glue the end securely.
- Continue the process for all stems and leaves, joining both sunflowers together and arranging leaves for balance.
Flowerpot Assembly:
- Place floral foam or filler into the small pot.
- Cover the top with a green microporous circle cut to size and slit to fit around stems.
- Insert wired sunflowers and leaves, using silicone/glue at wire ends for a firm hold.
Finished Size
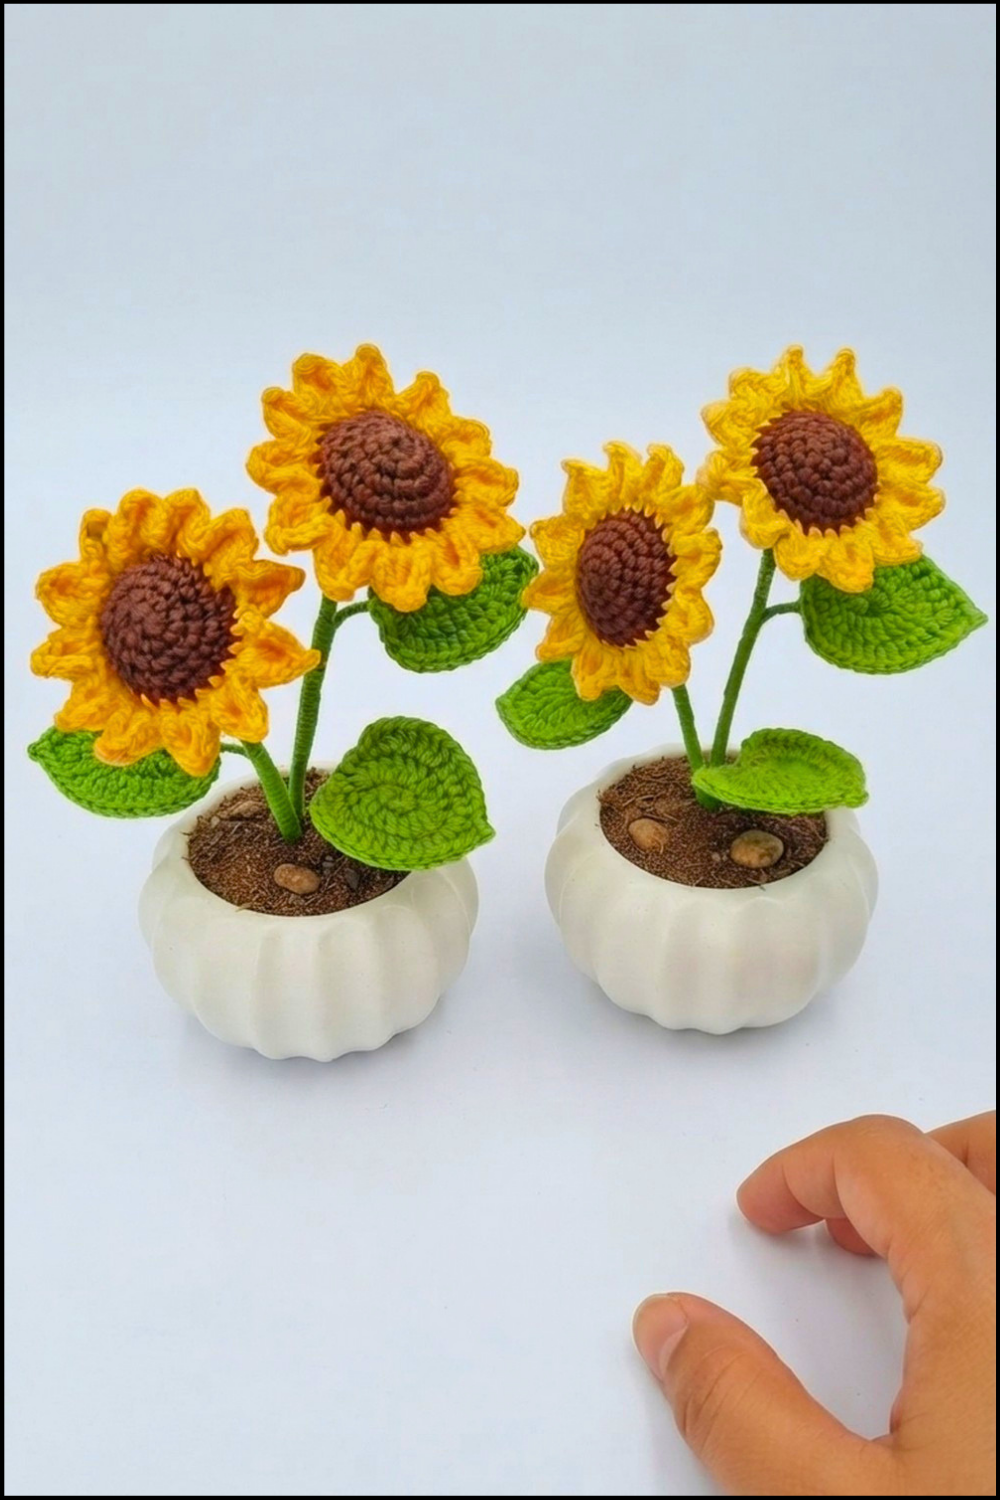
- Entire flowerpot with sunflowers stands about 13–15 cm tall.
- Sunflower heads are approx. 3–5 cm wide each.
- Each leaf is 4–6 cm long.
- Arrangement is stable, beautifully lifelike, and ready for display.
Conclusion and Ending Words
You have completed your own mini flowerpot of sunflowers! With bright petals, lush leaves, and flexible stems, your arrangement will bring warmth and joy wherever it is displayed. You can give it as a handmade gift, use it to brighten a table, or add cheer to a desk or shelf.