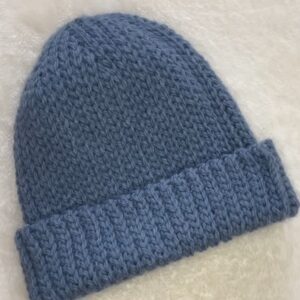
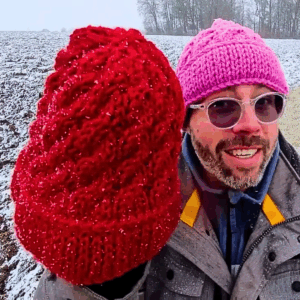
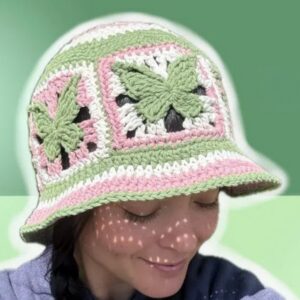
Snap stylish comfort with this Free Crochet Hat Pattern as a handmade accessory perfect for sunny days chilly evenings and casual everyday wear
Headwear has served both practical and cultural purposes throughout history, offering warmth, protection, and a chance to express personal style. The Free Crochet Hat pattern provides a simple yet versatile approach to creating a stylish accessory suitable for a variety of occasions. Instructions guide through forming a snug, well-shaped crown, working down to a comfortable band that sits securely without being tight. The stitch choices balance texture and flexibility, allowing the hat to maintain its shape while stretching gently to fit different head sizes.
Bright Crochet Hat Pattern that Adds Colorful Flair
Lightweight and breathable, it provides warmth during cooler days without causing overheating, making it ideal for transitional seasons as well as colder months. Beyond practicality, the pattern offers opportunities to customize through color, yarn type, and subtle embellishments, allowing each hat to reflect personal taste. Perfect as a thoughtful handmade gift or a personal wardrobe staple, the hat combines utility with a timeless appeal.
Its soft texture ensures comfort against the skin, while the structured construction keeps it looking polished over repeated wear. Each finished piece represents patience, skill, and attention to detail, transforming a straightforward crochet project into a functional, stylish, and enduring accessory suitable for everyday life or special occasions.
Special Features of the Hat
- Beginner-Friendly Design:
- The tutorial is detailed, with step-by-step instructions that are easy to follow for those new to crochet.
- Lovely Two-Tone Finish:
- The hat is designed with two colors, adding a vibrant and modern look to the accessory.
- Textured Front-Post Stitches:
- The use of front-post double crochet creates an eye-catching texture that sets this hat apart from other basic designs.
- One-Size-Fits-All:
- The hat is designed to fit most sizes, with flexibility to adjust by modifying the hook size or yarn thickness.
- Reproducible in Many Colors:
- The hat looks great in a variety of color combinations, making it easily customizable.
Level of Difficulty
This project is suitable for beginners, with clear steps provided for all stitches. Slightly challenging areas involve:
- Creating the magic ring for the foundation.
- Completing front-post double crochets.
- Managing consistent tension while working on textured stitches.
With careful attention, even first-time crocheters can complete this project effectively.
Materials Needed
To crochet this stylish hat, you’ll need:
- Yarn:
- Two colors of 2-ply acrylic yarn (dark pink and lilac in the tutorial).
- Double-up the strands to create a "4-ply" thickness for better structure.
- Hook:
- A 4.5 mm crochet hook is recommended.
- Basic Tools:
- Scissors.
- Tapestry needle (for weaving in ends and attaching stitches).
- Stitch markers (to keep track of specific spots).
- Measuring tape.
Tutor's Suggestions
- Adjust the Hat Size with Hook and Yarn:
- Use a larger hook for a bigger hat or a smaller hook for a snugger fit.
- Keep Gauge Consistent:
- Maintaining even tension when working on double and front-post stitches will ensure a neat and tidy finish.
- Trace Front-Post Locations with Markers:
- Using stitch markers on front-post stitches keeps the pattern aligned and avoids errors.
- Create Contrast with Colors:
- Alternating colors for the brim or body adds contrast and enhances the two-tone look.
Step-by-Step Instructions
Step 1: Start the Hat
- Create a Magic Ring:
- Start with a magic ring and chain 3 to begin.
- Add 12 double crochets (DC) into the magic ring.
- Close the Round:
- Close the ring and slip stitch into the 3rd chain of the first DC to complete the round.
Step 2: Begin Row 2
- Chain 3:
- This serves as the first double crochet.
- Alternate Stitches:
- Add a front-post double crochet (FPDC) into the first stitch.
- In the next stitch, add a normal DC. Follow this pattern:
- DC in the next stitch, then FPDC into the same stitch as the DC.
- Complete the Round:
- Repeat this sequence until the end of the round.
- Slip stitch into the 3rd chain of the starting DC.
Step 3: Continue Texturing in Row 3
- Chain 3:
- Again, this serves as the first double crochet.
- Increase the Count:
- Add two DCs in the next stitch, followed by a FPDC into the existing front-post stitches (from Row 2).
- Repeat this sequence as:
- Two DCs in the next two stitches, then FPDC into the corresponding front-post stitch.
- Repeat and Finish:
- Continue this pattern around the ring.
- Slip stitch into the chain-3 stitch to complete the round.
Step 4: Build the Main Body of the Hat
- Count and Adjust:
- For each subsequent row, increase the number of DCs between FPDC stitches by one (e.g., Row 4 will have three DCs between FPDCs, and so on).
- Continue until you reach 6 stitches between FPDCs.
- Color Transition:
- Once the main textured rows are complete, switch to the lilac yarn.
- Add Rows of Single Crochet:
- Crochet two rows of single crochet without increases to smoothen the transition into the hat body.
Step 5: Create the Hat Body
- Switch Back to Main Color:
- Reattach the pink yarn and begin working rows of double crochet.
- Avoid Increases:
- Work evenly across all stitches to create the straight walls of the hat’s body.
- Measure Length:
- Continue crocheting until the body measures 2 ½ inches in height.
Step 6: Add the Brim
- Start Increases for the Brim:
- For each row, add increases evenly distributed.
- Example: Row 1 of the brim adds increases every 7 stitches, while Row 2 increases every 8 stitches, and so on.
- Alternate Brim Colors:
- Switch between pink and lilac yarn to create the brim's pattern.
- Finalize with Two Rows of Single Crochet:
- Switch to lilac yarn and end with two neat rows of single crochet for a firm finish.
Uses of the Crochet Hat
- Everyday Accessory: Stylish and functional for both casual and formal outfits.
- Handmade Gift: Makes a thoughtful present for friends and family.
- Small Business Product: A great addition to a crochet business inventory due to its trendy and customizable design.
Conclusion
This beautiful crochet hat combines texture, color contrast, and functionality into one easy-to-follow design. Perfect for beginners, it showcases foundational crochet techniques while allowing space for personalization through color choices and sizing adjustments. Whether creating this hat for yourself or as a thoughtful gift, it serves as an excellent crochet project to elevate your skills.
Bonus Tip
Plan Your Colors Ahead: Use complementary shades to create a harmonious and eye-catching design. Consider experimenting with gradients or bold contrasts for added visual appeal!


