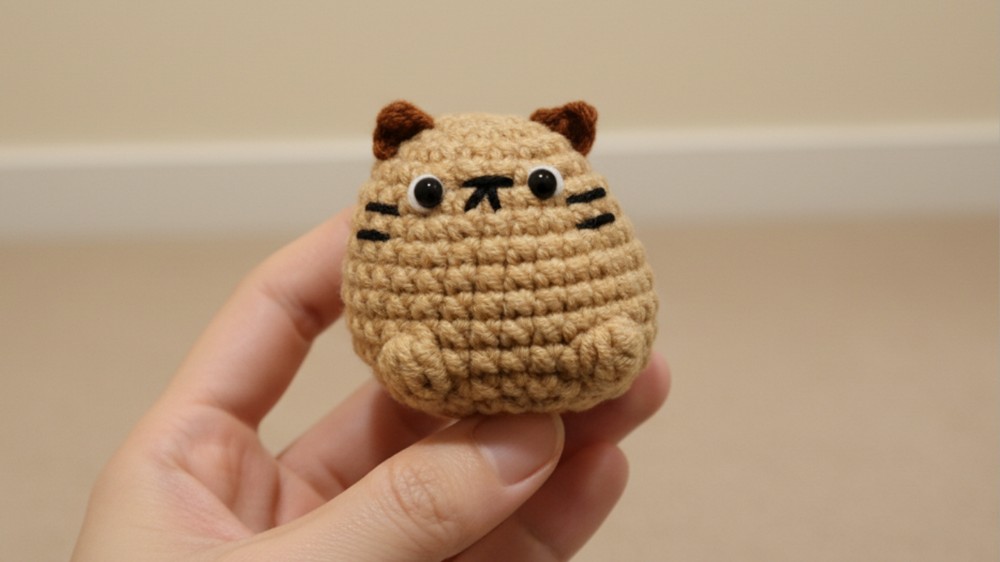
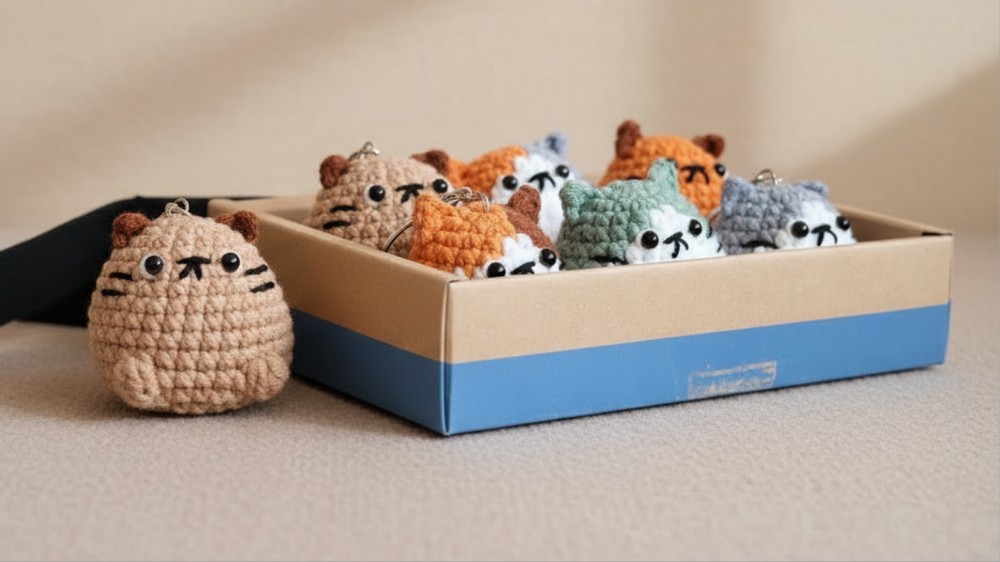
Small crochet projects offer a wonderful way to practice skills while producing something practical. This free crochet cat keychain pattern is charming and versatile, perfect for personal use or as a handmade gift. Attach it to your keys, clip it onto a backpack, or use it as a decorative charm for pouches or zippers.
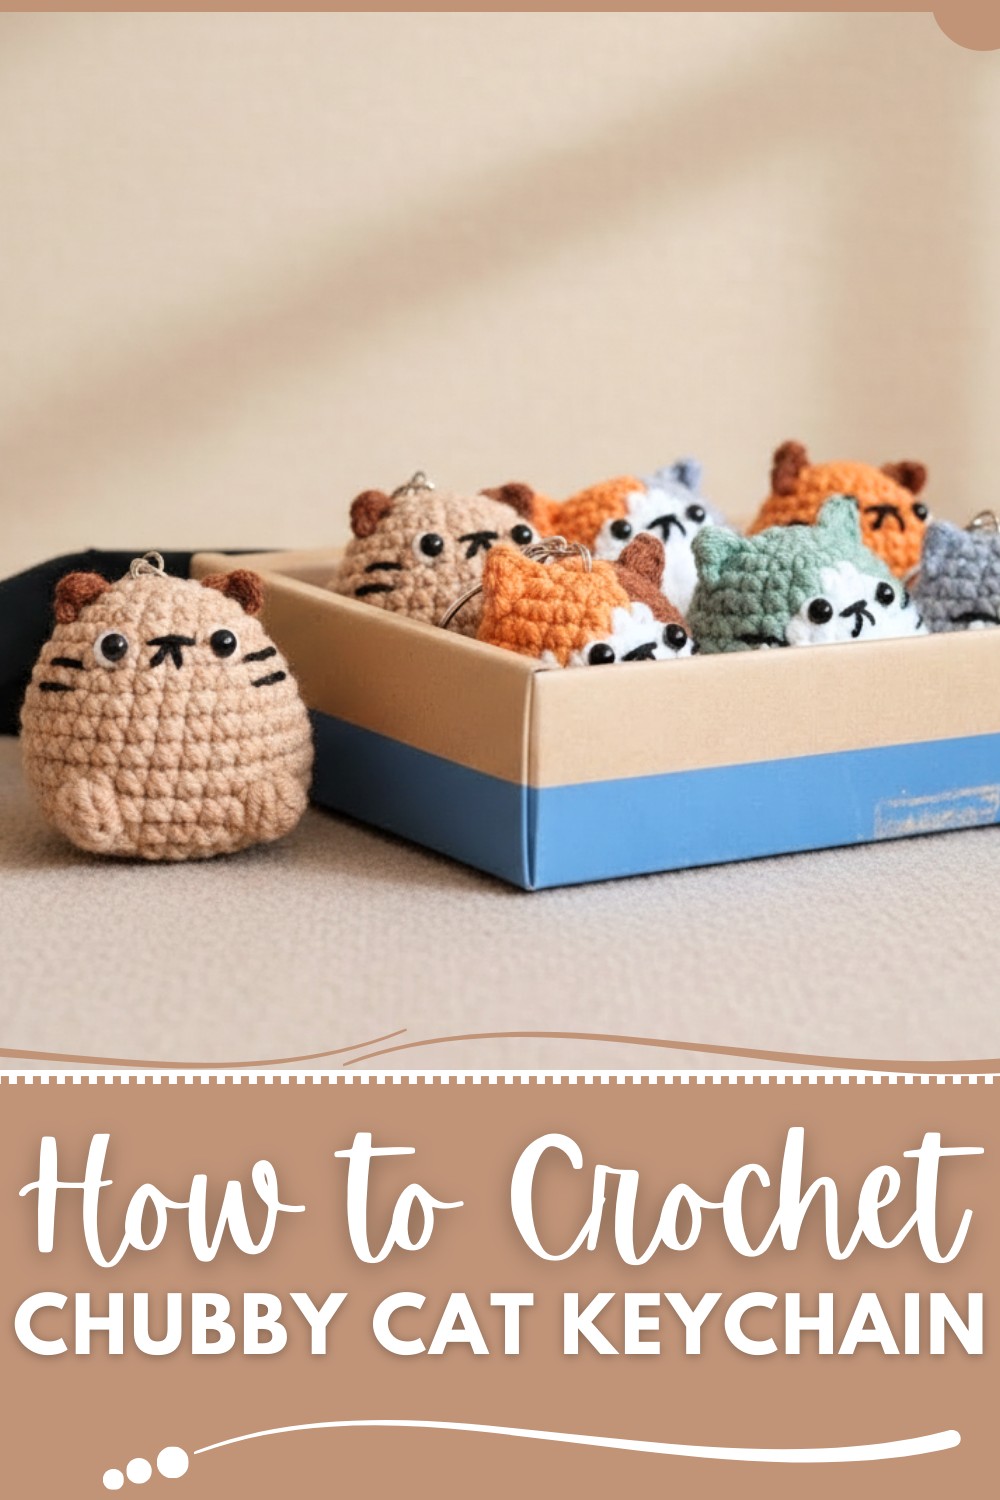
Sweet Crochet Cat Keychain Pattern for Handmade Charm
The design allows for customization of colors to match moods or preferences, making it truly unique. Ideal for beginners, it’s not just fun but also helps sharpen crochet techniques. Plus, the compact size makes it quick to finish, offering instant gratification. Whether for a loved one or yourself, this project is a thoughtful and useful item that adds personality to everyday accessories.
Materials Needed
- Yarn:
- Two/Three colors of yarn (e.g., Soft Coffee, black, Hairy Heath, and white)
- Optional: thinner white polyester yarn for details (eyes)
- Hook Size: Crochet hook suitable for yarn weight (e.g., 2.5mm or 3mm)
- Safety Eyes: 5mm plastic safety eyes
- Stuffing: Polyester fiberfill for stuffing
- Tapestry Needle: For sewing and weaving ends
- Stitch Markers: To mark the rounds clearly
- Scissors
Crochet Chubby Cat Keychain
This detailed guide contains all necessary instructions to crochet an adorable "Chubby Cat Keychain." The pattern includes customization options, tips for success, and variation ideas to enhance your crocheting experience.
Pattern Details
Body Base
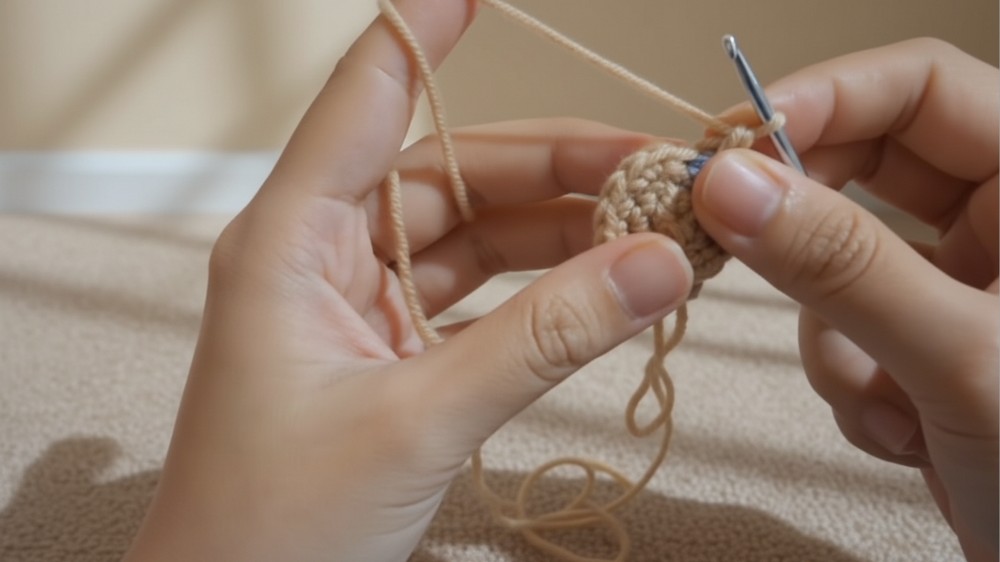
1. Row 1: Magic Ring + Single Crochet
- Start with a magic ring:
- Wrap yarn around your fingers to form two parallel lines.
- Insert the hook under the first line and pull the second line through.
- Complete with a chain stitch to secure the ring.
- Make 3 single crochets into the magic ring.
- Continue with 3 single crochets.
- Pull the yarn tail to close the ring.

2. Row 2: Increases
- Start with an increase (work 2 single crochets into one stitch).
- Place a stitch marker to mark the beginning of the row.
- Repeat increases for the next two stitches.
- Continue with increases for the rest of the row.
3. Row 3: Single Crochet + Increases
- Alternate between 1 single crochet and 1 increase.
- After completing 3 repetitions:
- Repeat the same pattern (single crochet + increase) till the end of the row.
4. Rows 4 - 6: Expanding the Shape
- Row 4: Begin with 8 single crochets, followed by 2 single crochets. Continue with 8 single crochets.
- Secure the yarn by tying it off.
- Row 5: Incorporate increases for desired shape by alternating single crochets and increasing stitches.
- Row 6: Work evenly in Soft Coffee color sections.
5. Rows 7 - 11: Body Shape
For Rows 8 - 11:
- Stitches involve single crochets in a continuous circular formation until the body expands evenly.
- Insert plastic safety eyes.
- Place between Rows 5-6, spacing them apart by 3 stitches.
6. Row 12: Adding Bobble Stitches for Texture
- Start with 14 single crochets and create bobble stitches.
- Wrap yarn, pull through loops, and repeat until 5 loops are on the hook.
- Complete by pulling yarn through all loops.
- Alternate between single crochets and bobble stitches to add detail.
7. Row 13 - Final Stitches
Begin decreasing stitches:
- Row 13: Alternate between 3 single crochets and decreases.
- Subsequent rows: Narrow the pattern, switching to 2 single crochets and decreases.
- Final row: Alternate 1 single crochet and decreases.
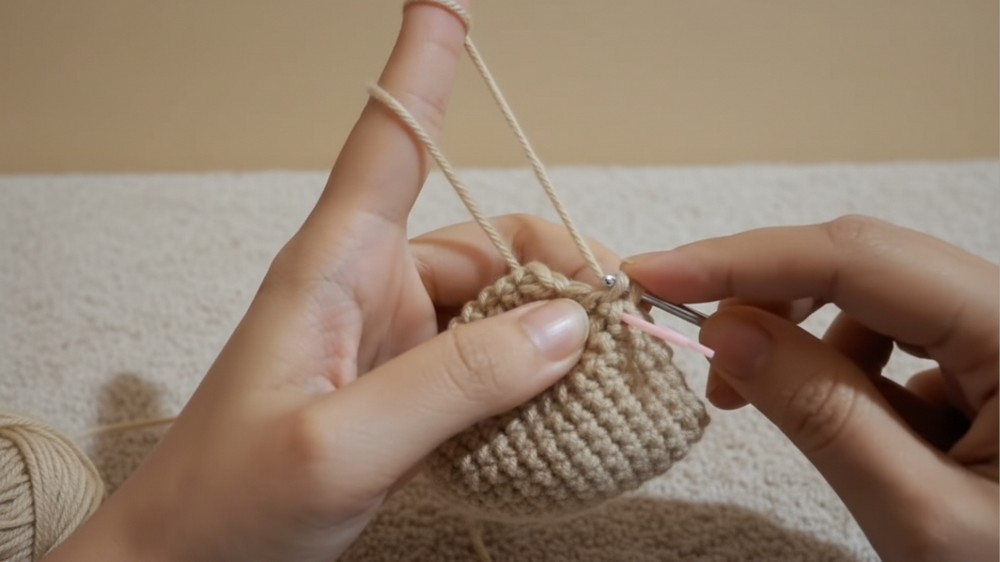
8. Stuffing and Closure
- Insert polyester stuffing into the body.
- Use a tapestry needle to sew through the front loops of the last row's stitches.
- Pull yarn to close the bottom hole. Weave in the ends securely.
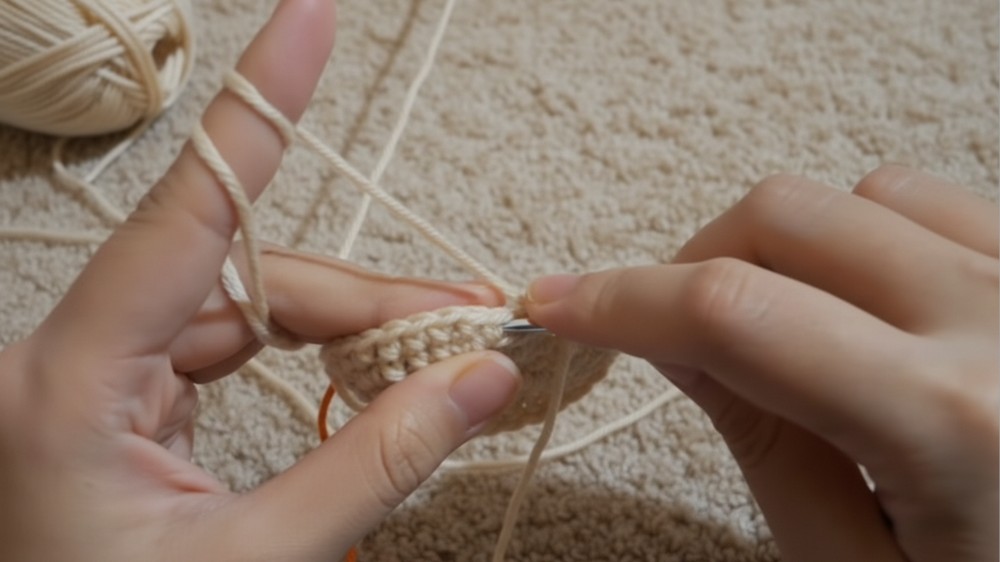
Ears
- Begin with a slip knot and insert it between Rows 4-5.
- Chain 3 stitches.
- Skip the first chain. Make:
- A slip stitch in the second chain.
- A single crochet in the last chain.
- Secure with a slip stitch between Rows 2-3.
- Repeat for the second ear, mirroring placement.

Tail
- Start with a magic ring, work 6 single crochets inside it.
- Rows 2-8: Continue working single crochets in the round for the tail.
- Leave a long yarn tail for sewing. Attach tail between Rows 13-14.
Face Details
- Using thin polyester yarn, embroider the nose and whiskers.
- Add white yarn accents around the eyes for extra detail.
Customizations & Variations
- Color Variations:
- Create monochromatic cats using one yarn color throughout.
- Explore creative color combinations (e.g., calico patterns or bold contrasts).
- Size Variations:
- Use larger or smaller yarn and hook sizes to create larger or smaller cats.
- Adjust body rows for elongated shapes or smaller keychains.
- Embroidery Add-Ons:
- Add stripes, dots, or themed accessories (scarves, bows).
Tips for Success
- Managing Yarn Changes: Ensure smooth transitions when switching yarn colors. Use tight knots and weave ends for neatness.
- Stitch Markers: Always mark the beginning of rows to avoid miscounting.
- Uniform Tension: Maintain consistent tension throughout to avoid uneven stitches.
- Finishing Touches: Weave in all yarn tails securely to reinforce the structure.
Conclusion
The crocheted chubby cat keychain is a perfect crochet for personal use or gifting! Its adorable two-tone design can be adapted to suit various preferences. Whether you prefer soft pastel-colored cats or vibrant hues, the pattern provides ample customization opportunities.
Important Remarks:
- Ensure proper placement of safety eyes for symmetry.
- Use quality fiberfill for plushness.
- Attach securely to keychains for durability.