Creating your very own Crochet Wilder Scarf with pockets is like weaving a magic spell with yarn. Picture wrapping yourself in a warm, cozy scarf that you made, with special spots to keep your hands toasty or to stash treasures.
Crochet Wilder Scarf With Pockets

Starting with a simple loop and a hook, you'll see your scarf grow longer and cozier, stitch by stitch. Then, adding cute little pockets is like putting the cherry on top of a sundae. They're not just practical, they also give your scarf a touch of charm. Imagine the pride and joy of wearing something so unique, knowing your hands created it from scratch! Whether for keeping warm or giving as a heartfelt gift, this scarf is all about comfort, creativity, and a dash of delight.
Materials Needed
- Any weight of yarn
- Recommended hook size for the yarn (Example: 5.5 mm hook for a #4 medium weight yarn)
- Additional tools: scissors, yarn needle
Pattern Instructions

Starting the Scarf
Begin by chaining: Work a chain that is 8 inches longer than your height.
- Example: If you are 64 inches tall, work a chain to be 72 inches long, which could be about 270 chains. Then add two more for the starting chain (272 total).
First Row: Half double crochet (hdc) into the third stitch from the hook and continue with one hdc into each chain across. You should end with the same number of hdc as your initial chain minus the extra two chains.
Continuing the Pattern

Second Row:
- Turn your work and start with a chain of two (does not count as a stitch).
- Skip the first stitch, work two hdc into the second stitch.
- Continue the pattern across the row: skip one stitch, then two hdc in the next stitch.
- The row ends with two hdc in the last stitch.
Third Row:
- Turn your work, start with a chain of two (does not count as a stitch).
- Hdc into the very first stitch and each stitch across the row.
Repeat for growth: Alternate between the pattern of the second row and third row until you reach Row 29.
Adding Borders

Border Setup:
- Do not cut the yarn.
- Turn your work, chain one and work one single crochet into each stitch all around the scarf, placing three single crochets in each corner to maintain the shape.
Making Pockets

Pocket Construction:
- Start by chaining 28 for the pocket.
- Begin half double crochet into the third chain and each chain across (26 hdc).
- Turn your work and establish the pocket pattern similar to the scarf pattern (described in step 3 and 4) for 17 rows, alternate between the row patterns.
Finish Pocket:
- Once the pocket reaches the desired size (7x7 inches suggested), work a single crochet edge along the top of the pocket.
- Cut the yarn, leaving a long tail for sewing.
Attaching Pockets
Sew Pockets on Scarf:
- Position pockets approximately 1.5 inches from the bottom of the scarf.
- Use the whip stitch to sew around three sides of each pocket, ensuring the top remains open.
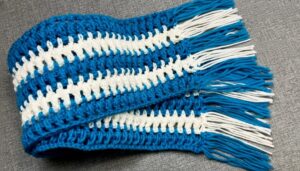
Adding Fringe

Fringe Application:
- Cut 12-inch pieces of yarn.
- Fold each piece in half and use a crochet hook to pull the loop through the scarf’s edge, pulling the yarn's ends through the loop.
- Trim the fringe evenly.
Final Touches
- Weave in all ends using a yarn needle. Trim any excess yarn.