Make a beautiful little Crochet Hanging Plant With Roses that never needs water or sunlight, and it stays green and bloony all year long! This special plant is made from yarn, with a cute little pot at the bottom, rich brown soil in the middle, and vines spilling over with tiny, colorful roses blooming on them.
Crochet Hanging Plant With Roses

It's created by crocheting, a fun way of knitting that turns yarn into amazing things. This hanging plant brings a touch of nature inside, brightening up any corner of a room or heart, without the worry of caring for it. Perfect for decorating or gifting, it's a sweet little piece of art that combines the charm of nature with the joy of making.
Materials Needed
- Yarn in the colors: beige or white (for the planter), brown (for the soil), green (for the vines), and purple (or any color for the roses)
- Crochet hook (3mm recommended)
- Scissors
- Darning needle
- Stitch marker
- Stuffing
Step 1: Making the Planter

Start with a magic circle. (Tutorial links can be found on the creator’s channel.)
Crochet the first round using standing double crochets into the magic circle:

Make 1 standing double crochet and 13 regular double crochets. Close the round with a slip stitch into the first double crochet/stitch, then place a stitch marker. Total 14 stitches.

Second Round: Increase each stitch:

Make 2 double crochets in each stitch from the previous round (total 28 stitches).

Close with a slip stitch and mark it.

Third Round: Double crochet back loop only for each stitch.
Marks the beginning with a standing double crochet and continue in the back loops only.

Close as previous rounds.

Rounds 4-6: Double crochet in each stitch.
Similar to Round 3, work normally through both loops.

Round 7: Slip stitch in each stitch around to finalize the planter.
Chain 80 for suspension.

Step 2: Making the Soil
Start with a magic circle.
Make 14 double crochets into the circle and close.
For the increase round, make 2 double crochets in each stitch from Round 1, totaling 28 stitches.
Step 3: Crocheting the Vines

Make slip knots and chain 4. Start with a bubble stitch in the 4th chain from the hook, followed by chaining 3 and slip stitching in the same space.
Continue making chains (varying the numbers for natural look) and repeating the bubble stitch for leaves.
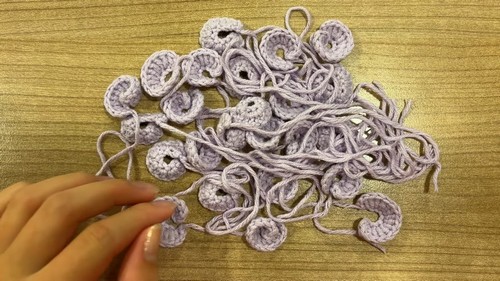
Step 4: Creating Roses

Chain 10, then double crochet in the third chain from the hook.
Make 2 double crochets in each of the next 6 chains (increases).

Stitch a chain of 2 and slip stitch in the last for edges.
Roll the crocheted strip into a rose shape and sew the base to secure.
Step 5: Assembling

Attach the vines symmetrically around the soil piece.
Secure the planter's chains, add stuffing, and attach the planter to the soil.
Sew each rose onto various points on the vines.
Completion
Upon finishing all attachment steps, ensure all parts are neatly secured and cut any excess yarn. Your hanging plant crochet is now ready to be displayed!