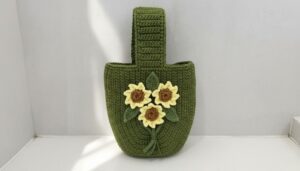
Bloom with style! Crochet Granny Square Sunflower Bag pattern lets you crochet a vibrant, sunny bag that's sure to turn heads.
Crochet Square Sunflower Bag tutorial offers a fun and easy way to make a unique accessory. Featuring vibrant sunflower motifs and classic granny squares, this bag combines style and functionality. Ideal for all skill levels, the step-by-step instructions ensure a smooth process from start to finish. The cheerful sunflower design adds a bright, uplifting touch to any ensemble, making it perfect for daily use or as a thoughtful gift.
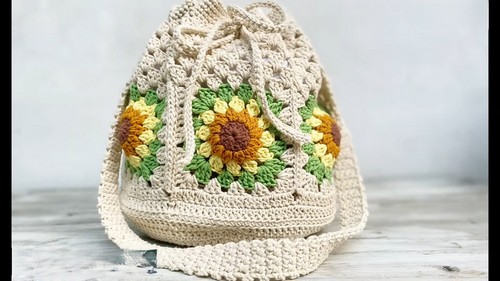
Crochet Granny Square Sunflower Circle Base Bag

Granny Square Sunflower Circle Base Bag
Materials Needed:
- Yarn in sunflower colors: yellow, brown, green, and any other colors for the granny squares and joinings
- Crochet hook (appropriate size for your yarn, usually 4.0 mm or 5.0 mm)
- Scissors
- Tapestry needle

Step by step Instructions
- Crochet the Sunflower Granny Squares:
- Center: Using brown yarn, make a magic ring.
- Round 1: ch 3 (counts as dc), 15 dc into the ring, join with a sl st to the top of the ch-3. (16 dc)
- Petals (yellow yarn):
- Round 2: Join yellow yarn in any stitch, [ch 2, 3 dc, ch 2, sl st in the same stitch], sl st into next stitch. Repeat around.
- Fasten off yellow yarn.
- Create the Granny Square Around the Sunflower:
- Join green yarn into any chain-2 space.
- Round 3: ch 3 (counts as dc), 2 dc into the same space, ch 1, [3 dc into next ch-2 space, ch 1] around.
- Round 4: Join any color (background color):
- Corner: In any ch-1 space, (ch 3, 2 dc, ch 2, 3 dc);
- Side: In each ch-1 space along the edge, (3 dc, ch 1).
- Repeat the corner and side instructions around.
- Join with sl st to the top of beginning ch-3.
- Fasten off and weave in ends.
- Make Multiple Sunflower Granny Squares:
- Create the desired number of granny squares to form your bag. For instance, you might need around 13-14 squares for a small bag or more for a larger bag.
- Assemble the Granny Squares:
- Lay out your granny squares in the desired pattern (e.g., 3x2 or 3x3).
- Use a join-as-you-go method or seam them together using a whip stitch or a slip stitch.
- Create the Circle Base:
- With your chosen base color yarn, start with a magic ring.
- Round 1: ch 3 (counts as dc), 11 dc into the ring, join with a sl st to the top of the ch-3. (12 dc)
- Round 2: ch 3, dc into the same stitch, 2 dc in each dc around, join with a sl st to the top of the ch-3. (24 dc)
- Continue increasing rounds: for each round, increase the number of stitches between the increases by 1, e.g., 2 dc in first stitch, 1 dc in next stitch (repeat around), then 2 dc in first stitch, 1 dc in next 2 stitches (repeat around), etc., until the circle base matches the bottom of your bag.
- Attach the Circle Base:
- With the wrong sides together, use a single crochet or slip stitch to join the circle base to the bottom of the granny squares.
- Adding a Border and Handles:
- Border: Add a few round of single crochet around the top edge of the bag for a finished look.
- Handles: Decide the length of the handle you want. You can make simple long chains, and then single crochet into each chain to strengthen them, or make a wider handle using rows of single crochet.
- Assemble the Final Bag:
- Attach the handles securely to the sides of the bag.
- Weave in any remaining ends.


Finishing Touches:
- Optionally, line your bag with fabric to add structure and prevent stretching.
- Decorate with any additional crochet flowers or embellishments as desired.