Highlight springtime vibes easily with this free crochet flower scrunchie pattern that merges lovely flower textures and gentle hair grip perfectly.
A crochet scrunchie is a simple and stylish accessory that adds a handmade touch to any hairstyle. The Free Crochet Flower Scrunchie Pattern from the popular YouTube channel WOWSUPRAVA guides you through making a charming flower scrunchie that looks both pretty and unique. This pattern is perfect for anyone who wants to create a cute and useful hair tie with bright and cheerful colors.
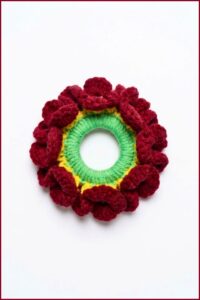
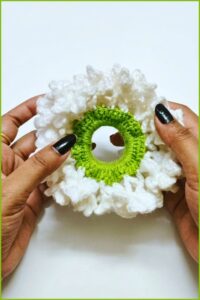
The scrunchie features soft, yarn petals wrapped around a stretchy band, giving it a lovely flower shape. Its smooth texture makes it comfortable to wear without pulling or damaging the hair. The floral design stands out from regular scrunchies, adding a fresh and fun look to your everyday style or special occasions. This easy crochet project lets you enjoy making something beautiful and practical at the same time.
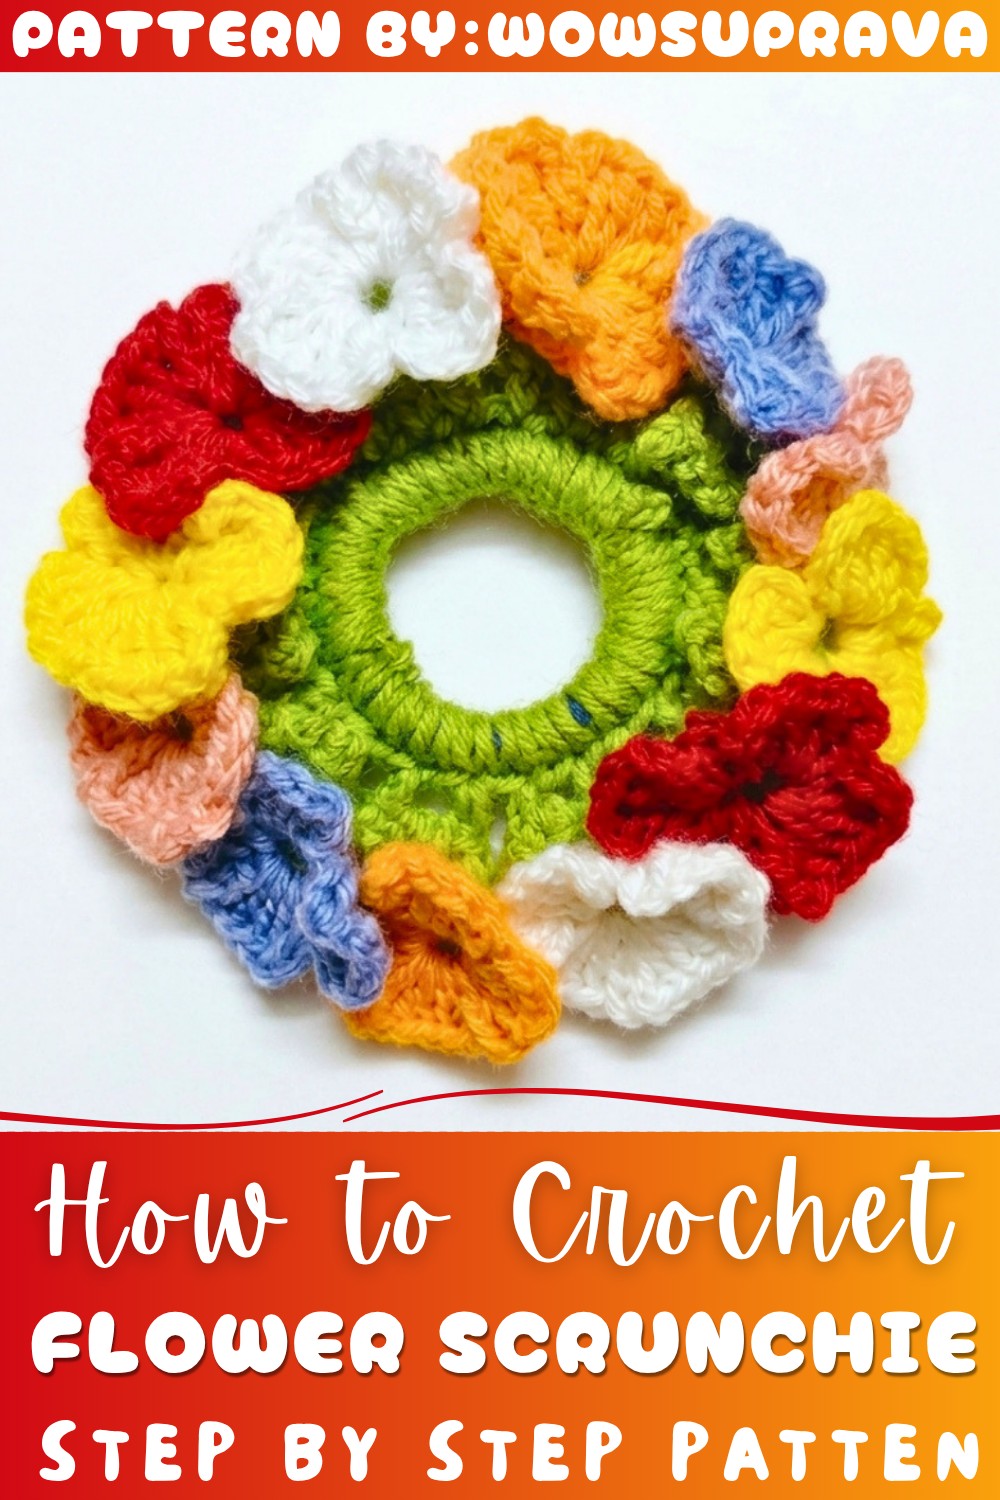
Free Crochet Flower Scrunchie Pattern for Cozy Hairstyles
This flower scrunchie is also a thoughtful handmade gift option. It shows care and effort, making it perfect for friends and family who appreciate unique and creative items. When not worn in the hair, it can be used as a cute bracelet. The Free Crochet Flower Scrunchie Pattern offers a great way to crochet a pretty, functional, and charming accessory that suits many uses and styles.
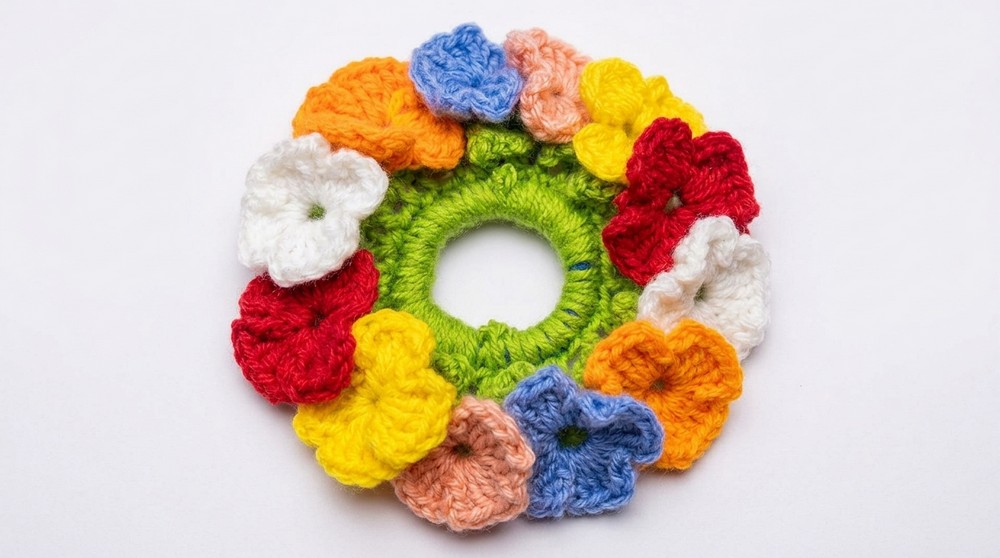
With clear instructions from WOWSUPRAVA, this pattern is easy to follow even for beginners. It’s a fun way to try crochet and make a lovely item that brightens up any outfit. Creating this scrunchie adds a little handmade beauty and joy to your daily life.
Crochet Floral Scrunchie: Step-by-Step Pattern Guide
This tutorial instructs on creating a charming crochet floral scrunchie, featuring a lush green base and multi-colored blossoms. The project uses simple crochet stitches combined in a structured sequence to build a textured, three-dimensional floral accessory. Perfect for those who enjoy adding handmade charm to everyday hairwear, the scrunchie is both decorative and functional.
Pattern Highlights
- Constructed with a multi-color yarn palette for vibrant floral effects
- Fully covered elastic band base worked with tight single crochet (SC) stitches for durability
- Second row introduces a patterned chain and single crochet combination establishing points for petals
- Petal bases formed by groups of double crochet (DC) stitches separated by chains for a ruffled appearance
- Final floral texture developed by attaching flowers through chain 1 spaces and working elaborate petal clusters
- Finished with neat securing and shaping for a professional look
Notes
- Keep tension consistent, especially on the base foundation, to avoid visibility of the rubber band.
- The scrunchie size can slightly vary depending on the number of base stitches and tension. Adjust the initial chain to fit your rubber band circumference.
- Chain spaces are critical anchoring points for petals; precise stitch placement ensures even distribution of flowers.
- Weaving in yarn ends securely prevents loosening over time and in use.
- Feel free to customize flower colors to suit your style.
Skill Level
Ideal for beginner to intermediate crocheters comfortable with:
- Working in rounds/joining with slip stitches (SL ST)
- Basic stitches: chain (CH), single crochet (SC), double crochet (DC)
- Creating chain spaces and petals within a round
- Color changes and yarn attachment
Materials
- Multi-color yarn (including green for base and chosen colors for flowers)
- Hair rubber band (elastic)
- 3.5 mm crochet hook
- Scissors
- Needle or tapestry hook for finishing ends
Measurements / Sizing
- Initial chain length and total stitches approximate 55 single crochet stitches around the standard rubber band.
- Scrunchie diameter after finishing ranges approximately 7–9 cm depending on yarn bulk and petal fullness.
- Flower petals span roughly 3–4 cm in length, providing decorative volume.
Gauge and Stitch Pattern
- Gauge is flexible for accessory projects, aiming for a dense single crochet foundation round to cover elastic fully.
- Flower petal bases and embellishments incorporate double crochets separated by chain stitches creating airy, ruffled texture.
Stitch Abbreviations
- CH = Chain
- SC = Single Crochet
- DC = Double Crochet
- SL ST = Slip Stitch
Special Stitches
Chain Spaces
Using chains between stitches to create open spaces which function as anchors for petals.
The Crochet Pattern!
1. Base Foundation
Attach Yarn and Begin:
- Secure the green yarn to the rubber band with a knot.
Work Foundation Round:
- Crochet approximately 55 single crochet (SC) stitches around the entire rubber band.
- Make sure your SC stitches are worked close together to prevent any gaps exposing the elastic.
- Maintain even tension to keep the band covered snugly and the shape uniform.
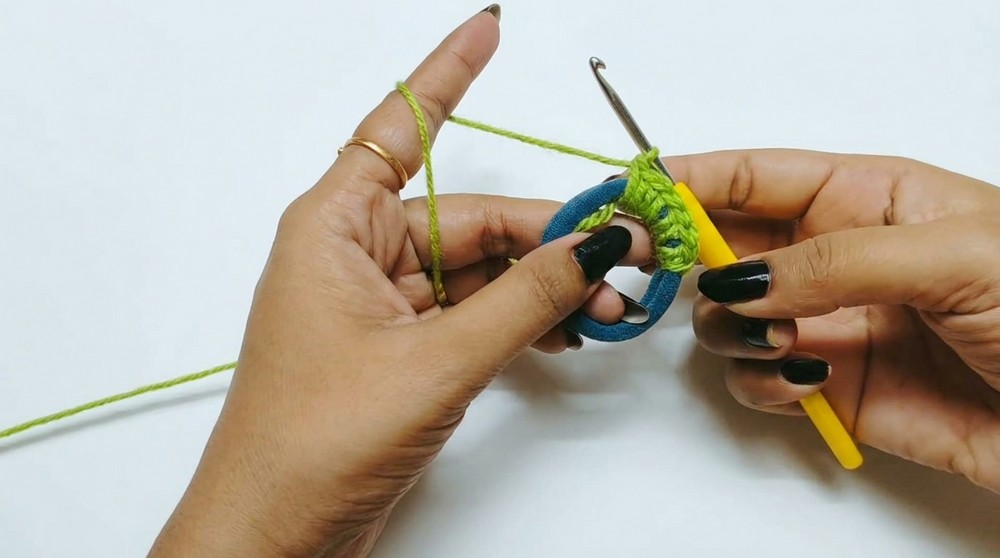
2. Second Row (Patterned Round)
Join and Begin Patterning:
- Join your round with a slip stitch (SL ST) into the first stitch or chain space from the previous row.
Pattern:
- Chain 3, skip one stitch, single crochet (SC) into the next stitch.
- Repeat this chain 3, skip 1, single crochet next sequence all around the scrunchie.
- This creates evenly spaced chain spaces which will become the bases for your petals.
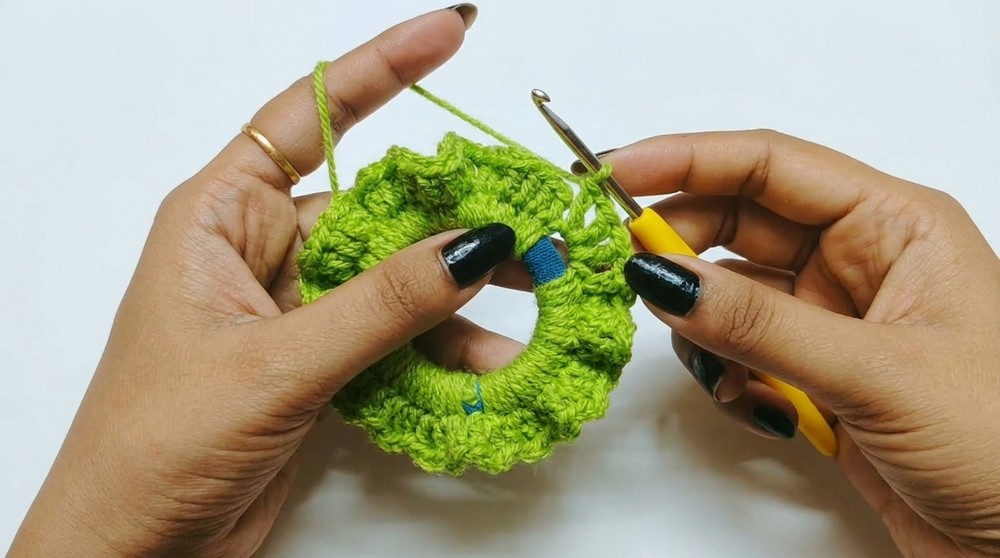
3. Petal Base Setup
Slip Stitch and Prepare Petals:
- Work a slip stitch (SL ST) into the chain spaces created during the previous round to position your hook for petal base work.
Petal Base Pattern:
- Into the same chain space where you slipped, work:
- Chain 3 (counts as your first double crochet (DC)),
- Chain 1,
- Double crochet (DC),
- Chain 1,
- Double crochet (DC),
- Chain 1,
- Double crochet (DC).
- This totals 3 double crochets (DC) separated by chain 1 stitches, creating a ruffled petal base.
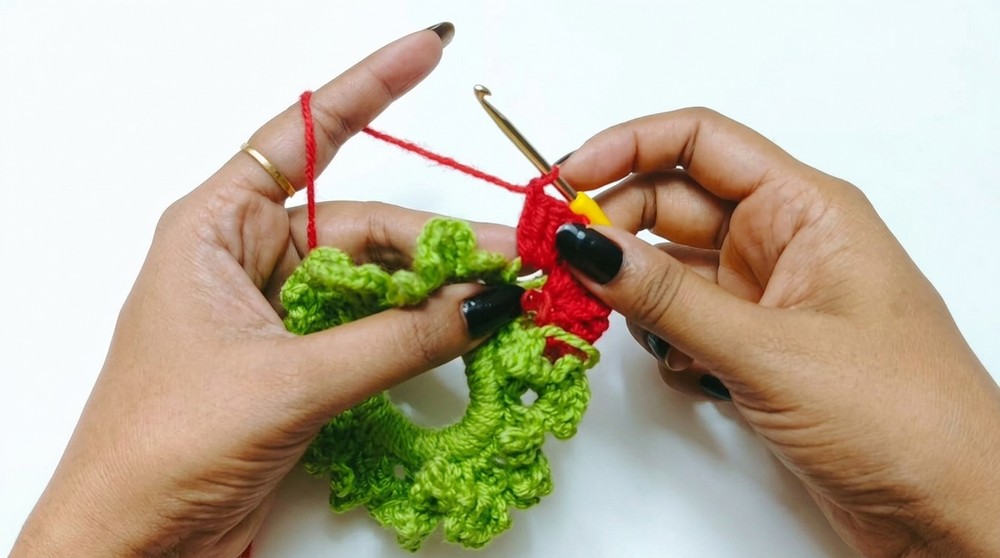
Complete the Petal Base:
- Chain 4, then slip stitch into the same space to finish the petal base fully.
Repeat Petal Base:
- Repeat the petal base pattern (the 4 DC stitches with chain-1 separators and chain 4 finishing) into each chain space around the scrunchie base.
- This forms the structured foundation on which the flowers will be built.
4. Adding Flowers
Attach Flower Yarn:
- Attach your chosen flower color yarn into the chain 1 spaces created between the double crochet stitches of the previous petal base row.
Flower Petal Formation:
- Into each chain 1 space, work the following flower petal sequence:
- Single crochet (SC),
- Chain 3,
- 4 double crochets (4 DC) made consecutively into the same space forming the curved petal shape,
- Chain 3,
- Single crochet (SC) into the same space.
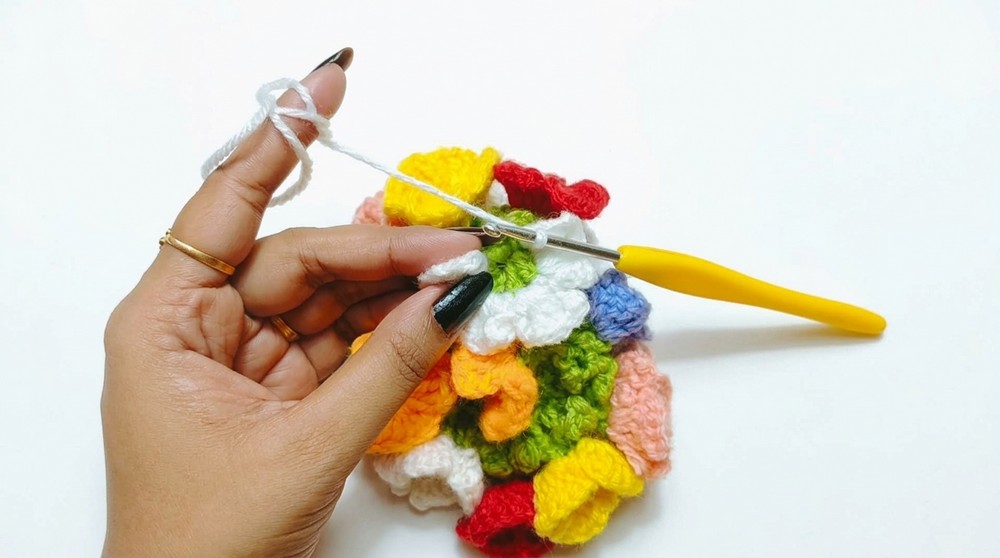
Repeat Flowers:
- Perform this flower petal pattern on all chain 1 spaces around the scrunchie to create a full floral texture on the outer surface.
5. Finishing
Secure and Weave Ends:
- Upon completion of the floral row, fasten off your yarn securely.
- Using a needle or hook, weave in all yarn ends neatly on the inner side of the scrunchie, hiding them to prevent loosening or unraveling.
Adjust Petal Arrangement:
- Gently arrange and adjust your petals to enhance fullness and visual appeal, ensuring the scrunchie looks balanced and lively.
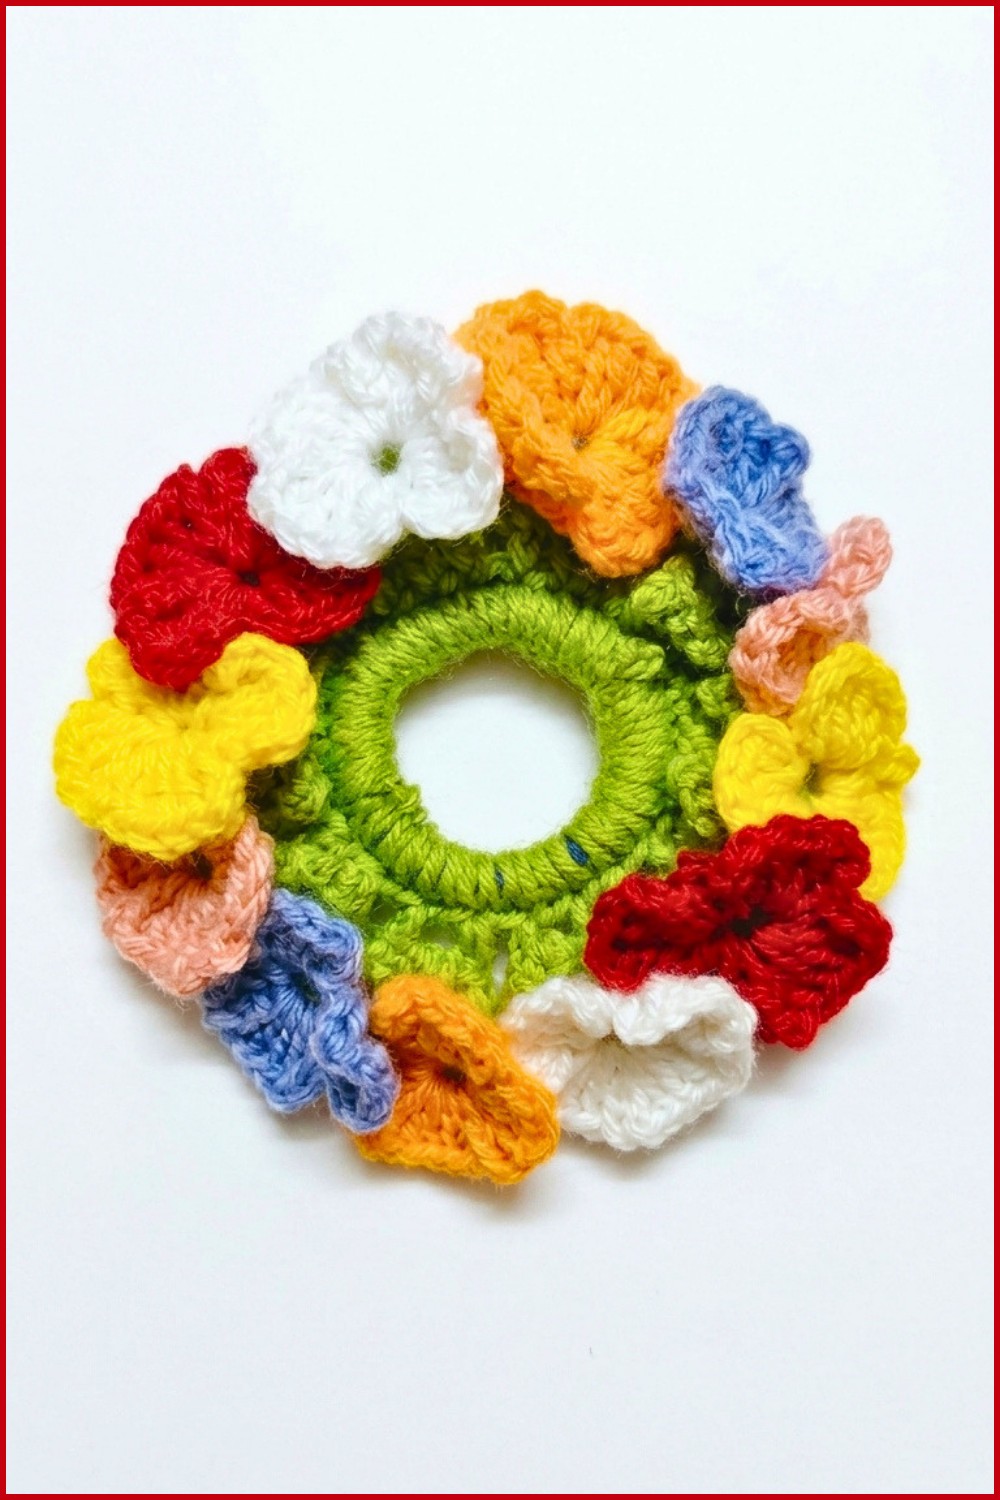
Assembly & Finished Size
- The scrunchie consists of a dense green base that completely encases the elastic rubber band, ensuring comfortable stretch and secure hair hold.
- Floral embellishments made of multiple petals form the outer decorative layer, measuring approximately 7–9 cm in overall diameter.
- The multi-color petals impart a vibrant and textured look, perfect for securing hair with style.
Conclusion
This crochet floral scrunchie merges fundamental crochet techniques with decorative flower work to create an accessory that is both practical and eye-catching. By working a solid base foundation followed by layered petal bases and ornate flower construction, the pattern cultivates texture and volume. Whether as a personal statement piece or a thoughtful gift, this project enriches your crochet repertoire with a floral motif that is tactile and visually appealing. Consistent tension, precise stitch placement, and careful finishing will reward you with a scrunchie that embodies handmade beauty and reliability.