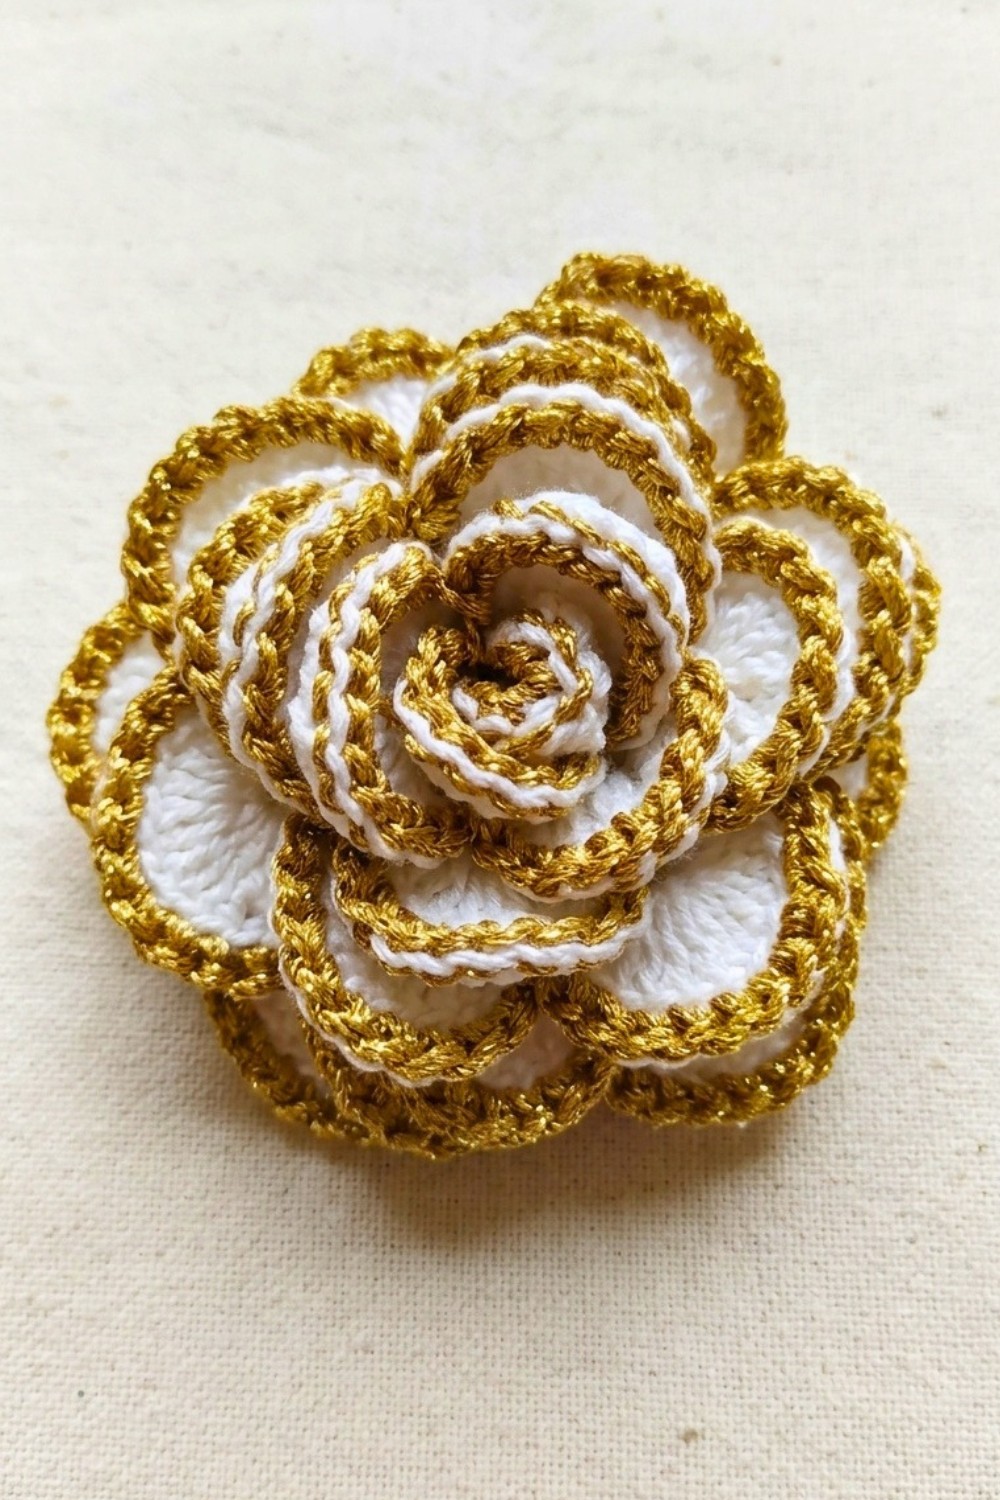
Turn leftover yarn into a floral accent with the Crochet Beautiful Rose Free Pattern and sew it onto a plain tote bag for everyday use.
Mônica Moda Crochê presents an exceptional opportunity to add a timeless floral touch to your projects with her detailed tutorial. Huge credit goes to the creator for the expert guidance and intricate flower design that brings to life a stunning Crochet Beautiful Rose Pattern. Through this tutorial, you will learn how to craft a rose that elevates any accessory or home décor item with elegance.
Two-Tone Crochet Beautiful Rose Free Pattern For A Vase Display
This beautiful rose pattern exudes charm and sophistication, perfect for adding a delicate yet striking accent to your seasonal outfits or interiors. Whether used as an appliqué on scarves, hats, or bags, or as a standalone decorative piece, it adapts seamlessly to various styles and occasions—from springtime celebrations to cozy winter gatherings. Its comfortable texture enhances any piece without overpowering the overall design, making it an excellent choice for those seeking subtle beauty with lasting appeal.
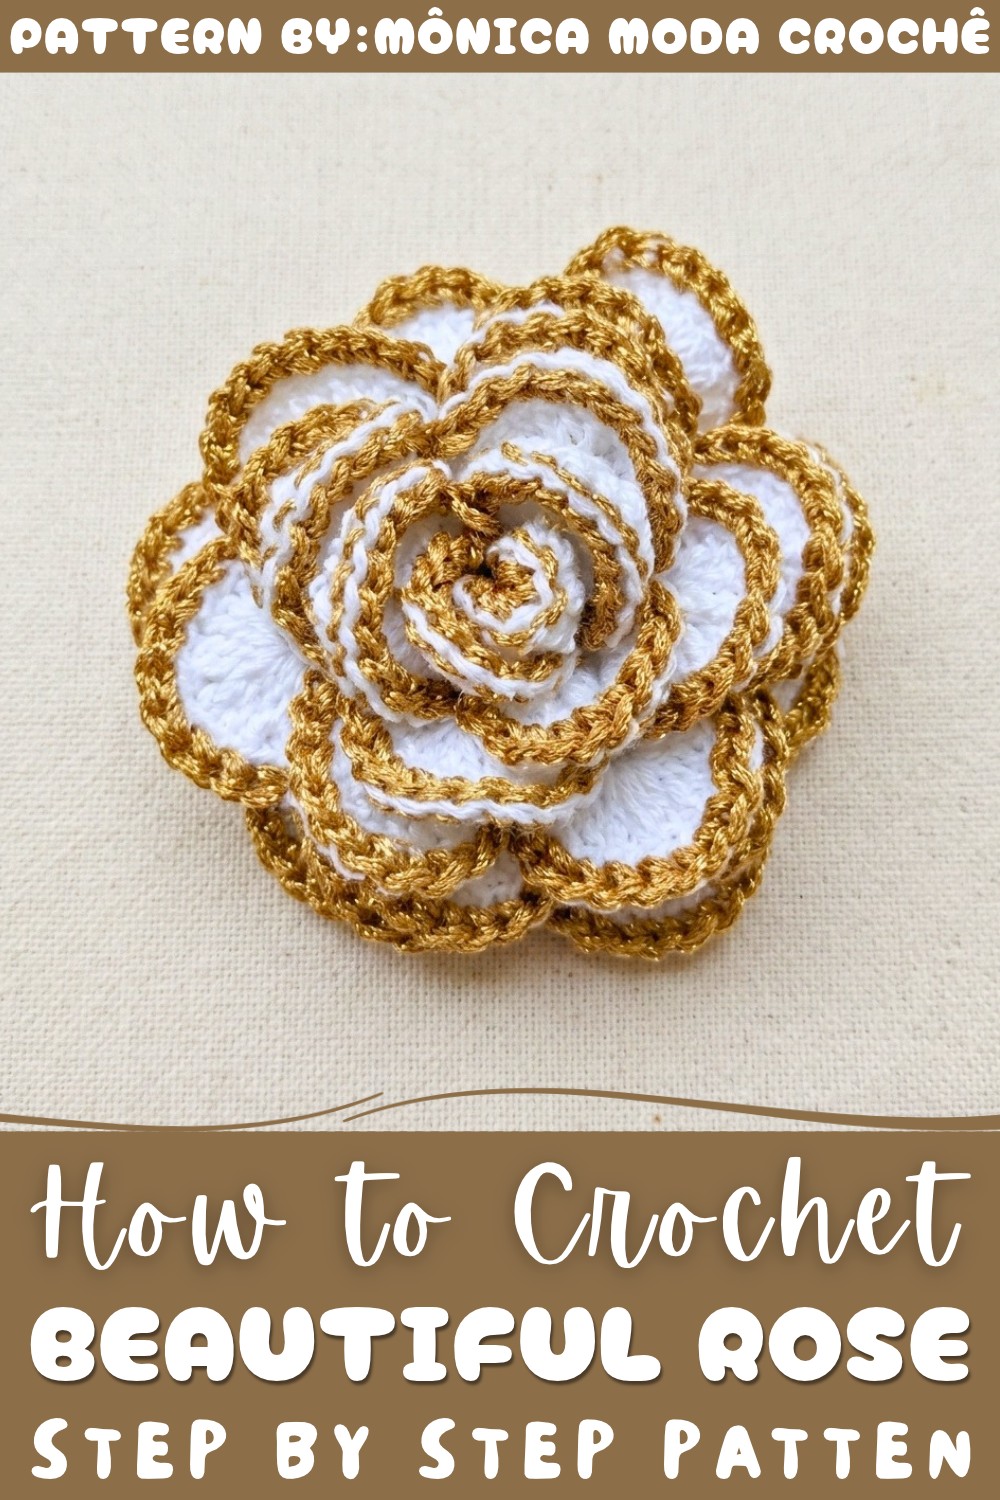
The texture of this rose pattern is rich and dimensional, achieved by a harmonious mix of tight and airy stitches that mimic the natural layers of rose petals. Its standout features include carefully formed petals that showcase gentle curves and a finished outline that adds depth and refinement. The pattern's elegance lies in the balance of softness and structure, creating a flower that feels both romantic and vibrant.
Perfect for pairing with minimalist designs or contrasting boldly against textured backgrounds, this rose brings a boutique feel to your creations. Its versatility means you can experiment with different yarn colors and sizes to match your personal style. Dive into the complete Crochet Beautiful Rose Pattern and unlock the potential to transform simple pieces into cherished treasures.
Decorative Crochet Beautiful Rose Free Pattern
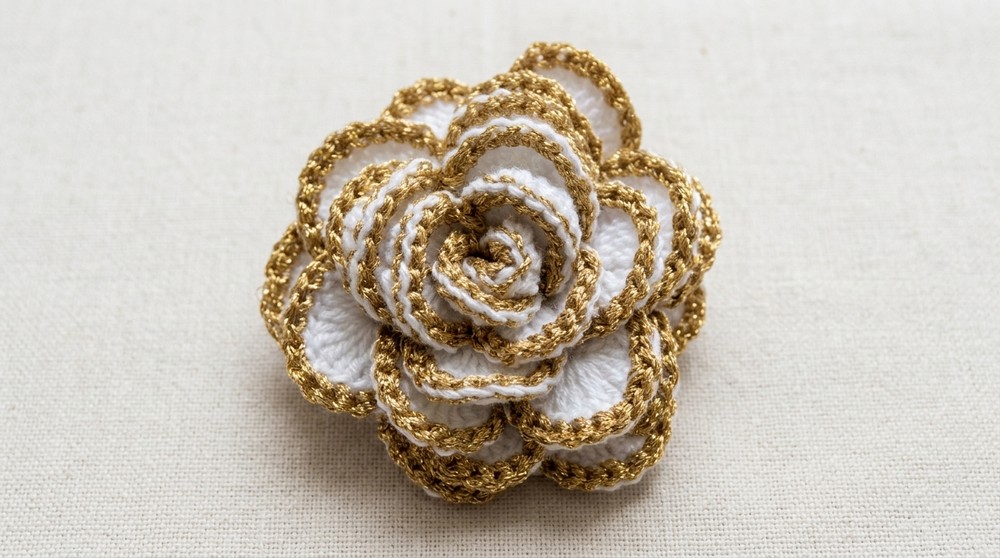
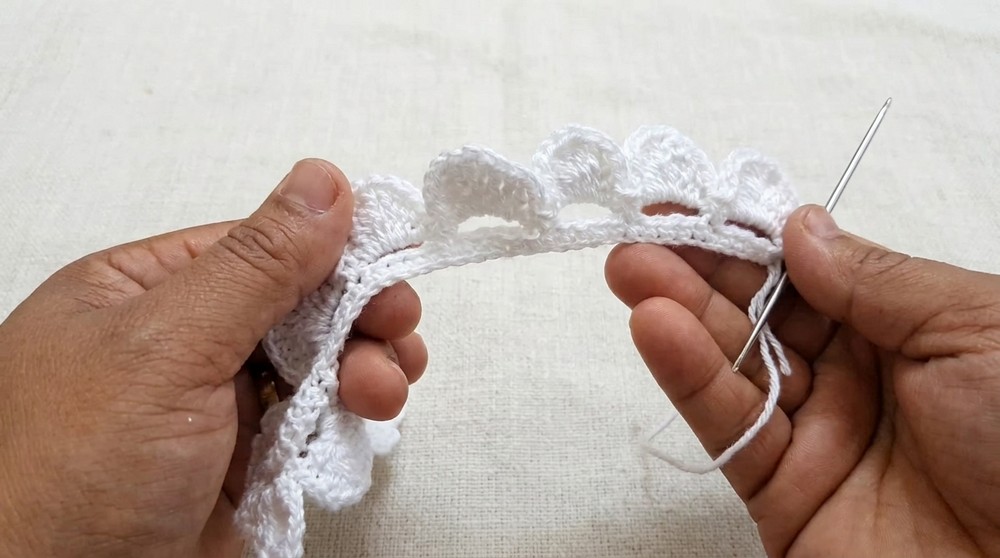
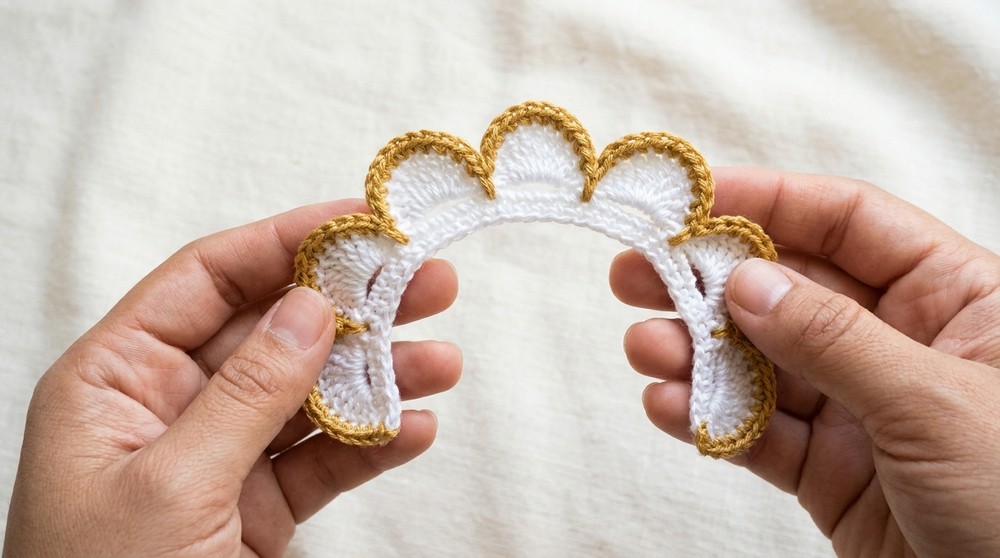
The design is thoughtfully paced: first, a straight strip of petals is formed; then, this strip is elegantly transformed into a blossoming rose. Trimmed in gold, each petal stands out with clear definition. Through systematic rounds and careful assembly, the rose retains its form and charm, making it fit for appliqué or decoration in various settings. The process emphasizes clarity—every step carries keen attention to neat edges, secure finishing, and pleasing folds. Each element is purposefully developed to highlight both the color contrast and the layering of petals, culminating in a sophisticated crochet motif.
Quick Overview Of Pattern
- Foundation Chain & Base Row:
- Make a long foundation chain, then fill it with single crochet stitches for structure.
- Petal Spaces (Chain-5 Loops):
- Work chain-5 loops to establish placement for each petal.
- Crocheting the Petals:
- In every loop, create a petal using a graded sequence from single crochet to double treble crochet, then mirror the sequence back down.
- Gold Trim Edging:
- Slip stitch gold yarn around each petal, anchoring firmly between petals for a polished effect.
- Rolling & Assembly:
- Roll and sew the completed strip into a rose shape, securing for lasting form.
Notes
- Keep an even tension throughout the project, especially when switching between different stitch heights.
- The petals rely upon properly skipping base stitches when making loops—care with counting is key.
- When applying the gold edging, always work into the second loop of each stitch (the “back bump”) for a firm, raised gold outline without bulk.
- For secure assembly, leave a generous white yarn tail at the end for sewing.
- Always anchor the gold slip stitch between petals directly into the base row, not into the petal stitches, for best structure.
Skill Level
Advanced Beginner to Intermediate
Knowledge of basic stitches and increases, along with ability to seam and edge, is needed. Focus is placed on clean finishing and maintaining petal shape.
Materials
- Main Yarn: Charme yarn (white) for petals
- Accent Yarn: Encanto yarn (gold) for trim
- Crochet Hook: Nickel-plated size 4 (or as appropriate for your yarn)
- Other Tools: Tapestry needle
Measurements / Sizing
- Petal strip: Approximately 32–36 cm long before rolling (based on individual tension).
- Assembled rose: Approx. 6–8 cm across, though size is easily adjusted by changing hook/yarn weights or foundation length.
Gauge and Stitch Pattern
- Gauge is not strictly crucial; strive for a strip flexible enough to roll, but firm enough for petals to hold their shape.
- Main stitch pattern: Single crochet (base), chain spaces, layered tall stitches (hdc, dc, tr, dtr).
Stitch Abbreviations (US Terms)
- ch: chain
- sl st: slip stitch
- sc: single crochet
- hdc: half double crochet
- dc: double crochet
- tr: treble crochet
- dtr: double treble crochet
Special Stitches
- dtr (double treble crochet): Yarn over three times, insert hook, yarn over, pull through two loops at a time, four times in total.
- Petal sequence: In each chain-5 space: sc, hdc, dc, 3 tr, dtr, 3 tr, dc, hdc, sc.
- Gold slip stitch edging: Worked into the second loop (back bump) of each petal stitch for a smooth highlight.
The Crochet Pattern
Foundation Chain & Base Row
- Foundation:
- Ch 131.
- This chain determines your overall rose length.
- Row 1:
- Insert hook into second ch from the hook, work 1 sc.
- Continue: 1 sc in each chain, all the way to the end.
- At the end, you have 130 sc (since the first chain is skipped).
Petal Spaces (Chain-5 Loops)
- Turn your work.
- Ch 5.
- Skip 4 sc from row below, then sl st into the 5th sc.
- Repeat:
- [Ch 5, skip 4 sc, sl st in next sc]
- Work this sequence across the row until reaching the end.
- Each ch-5 loop will form a base for a petal.
- At the end, fasten off if needed.
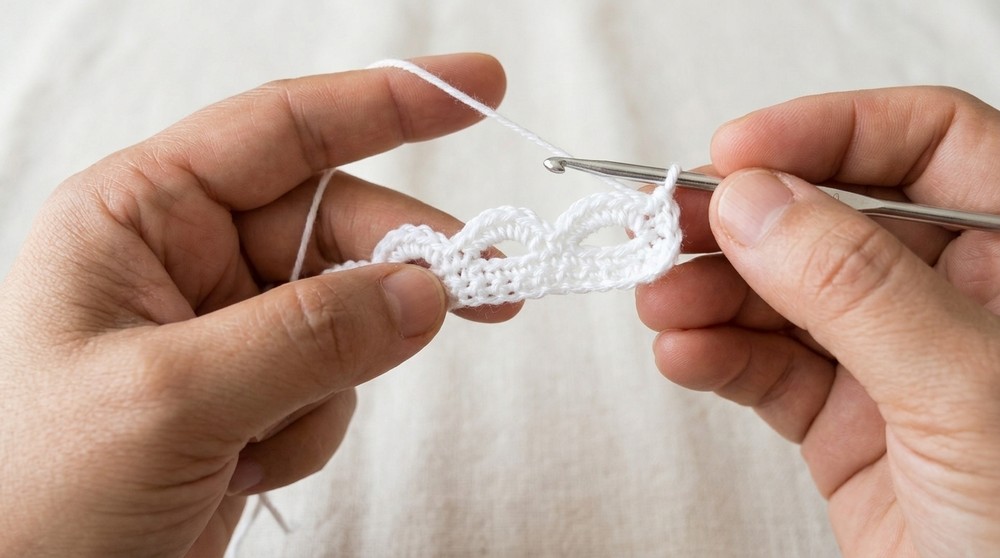
Crocheting the Petals
- Ch 1 and turn.
- Work directly into each ch-5 space (repeat for every petal):
- sc
- hdc
- dc
- tr (three times)
- dtr (wrap yarn over three times, insert into chain space, draw through two loops at a time, repeat four times)
- tr (three times back down)
- dc
- hdc
- sc
- Move immediately to the next ch-5 space and repeat the same sequence.
- Continue until all chain-5 spaces have been filled and all petals are complete.
- After the last petal, ch 1 and cut the yarn, leaving a long tail for sewing the flower together.
Gold Trim Edging
- Attach gold Encanto yarn to the base sc of the first petal with a sl st.
- Working around the edge of the petal:
- Insert hook into the second loop (back bump) of each stitch on the petal’s edge.
- Slip stitch along the contour: up one side, across the top, and down the other—always into the next back bump.
- At the valley between two petals:
- Ch 1 and insert your hook into the base sc row (the middle stitch under the valley).
- Sl st to anchor the gold trim before moving up the next petal.
- Continue in this manner, outlining every petal, always anchoring in the base row at the valley, then slip stitching up the next petal.
- Once all petals are outlined, fasten off gold yarn and weave in the end.
Assembly & Finished Size
- Roll the completed strip into a rose:
- Fold the first petal gently in half for the central bud.
- Continue rolling the strip around this “bud” to form spiraling layers.
- With the long white tail and a tapestry needle:
- Sew through the base of the rose, passing from one side to the other.
- Catch each coil as you go, making sure all petals stay tightly wound and layers are secure.
- Make several passes through the center and sides for added strength.
- Weave in all yarn ends at the base for a neat finish.
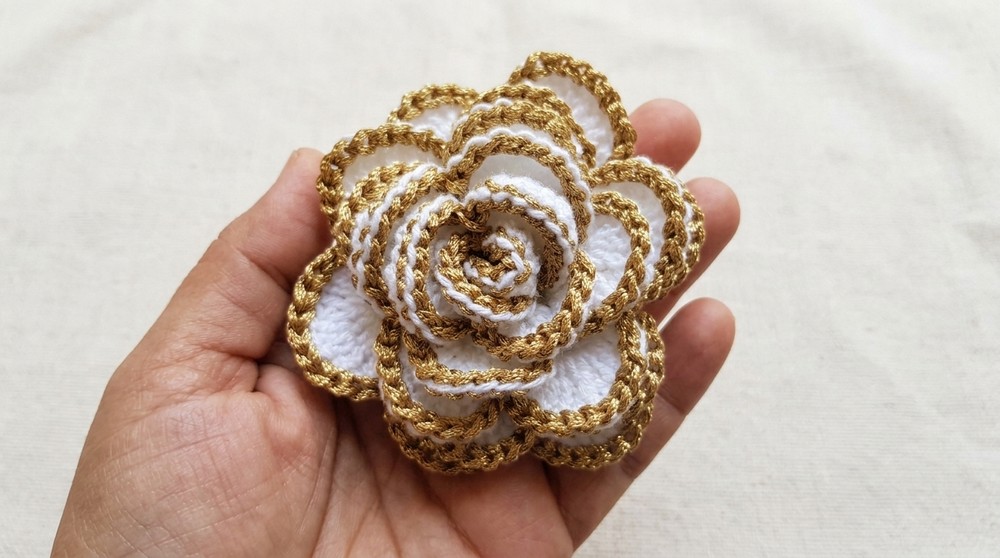
- The completed rose should measure approximately 6–8 cm across.
Conclusion and Ending Words
This elegant crochet rose, with its pristine white petals edged in luminous gold, stands out as both ornamental and versatile. Each step—beginning with the long foundation, through methodical petal construction, to the delicate handling of metallic trim—ensures both cohesion and beauty. Careful attention to counting, tension, and edge finishing highlights the petal structure and the overall rose silhouette. Rolling and stitching the strip effectively yields a dimensional, layered result. Such a motif, whether used as an appliqué or a stand-alone embellishment, offers refinement to any project. With clear guidance and systematic assembly, your finished rose will reflect both skill and conscientious technique, resonating with charm in both modern and classic contexts.