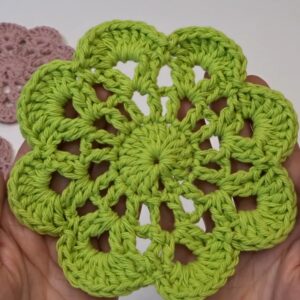
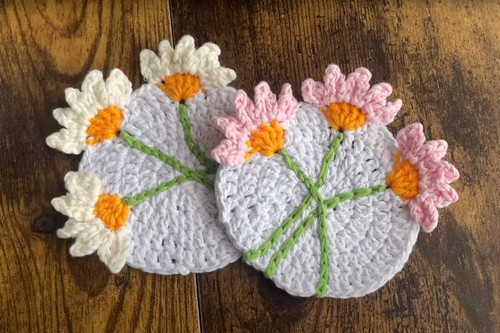
Daisies, symbolizing innocence and cheerfulness, have always been loved by many. Crochet 3D Daisy Coasters have skillfully captured this sweet charm. These handmade accessories transform ordinary yarn into an extraordinary delight. They feature a combination of off-white or light pink for the petals and orange or yellow for the centers, with a white base, creating a striking contrast. The petals are made using a technique that adds texture and a 3D effect, making the crochet flowers pop. Green yarn is used for the stems, enhancing the floral theme. Functional, decorative and perfect for spring gatherings!
Making Your Crochet 3D Daisy Coasters
Materials Needed
- Yarn in off-white, light pink (or your choice of petal colors), orange or yellow for the flower center, and green for the stem.
- Crochet hook (size not specified; please refer to your yarn's label or personal gauge preference).
- Scissors
- Needle for weaving in ends
- Optional: fabric glue, stiffening spray
Step by step Pattern
Center Section
- Start with a magic ring, chain 1 (this ch1 does not count as a stitch).
- Make 10 double crochets (DC) into the magic ring.
- Pull the ring tight, slip stitch (SL ST) to the first DC to close the round, then chain 1.
Round 1
- Increase in every stitch by making 2 DC in each stitch around (20 stitches total).
- SL ST to the first DC, chain 1.
Round 2
- 1 DC in the first stitch, then an increase (2 DC) in the next stitch; repeat - around (30 stitches total).
- SL ST to the first DC, chain 1.
Rnd 3
- Make 1 DC in the first 2 stitches, then an increase in the third stitch, and repeat this pattern 7 times.
- Mark the 21st stitch.
- After reaching the 21st stitch, make an increase in the marked stitch.
- Make 1 DC in the next 3 stitches.
- On the last DC, only pull through 2 loops, leaving 2 loops on the hook, and change to orange/yellow yarn with an SL ST, ready for the flower's center.
Adding the First Flower
- Chain 1, make 5 DC in the next stitch; carry the white yarn along by crocheting over it.
- After the 5th DC, change back to the white yarn and continue making 1 DC in each of the next 5 stitches.
Next Rounds (Adding More Flowers)
- Repeat the pattern from Round 3, adjusting the number of initial DCs before increases and flower creations as needed to fit the coaster size and flower placement. Each time you reach a point of changing color to orange/yellow, you're setting up for another flower's center.
- For additional flowers, ensure the inclusion of the white yarn beneath stitches when working with the orange/yellow yarn to facilitate easy color changes.
Finishing Touches
- After completing the flowers, work on the petals. Attach the petal color (light pink or off-white) with a SL ST to the front loop of the first stitch at the base of the flower. Chain 3, then 1 DC into the same stitch.
- Make a picot (chain 1, slip stitch in the first chain).
Chain 3, SL ST in the same stitch, then SL ST to the next front loop and repeat the petal pattern. - Once the petals are done, tie off and weave in the ends.
Adding Stems
- With green yarn, start at the base of a flower, SL ST through to anchor the yarn.
- Slip stitch a path down to the coaster's edge to create a stem. Trim and secure the end.
Final Steps
- Weave in all remaining ends, possibly securing them with some fabric glue.
- Optionally, apply a stiffening spray to help the coaster maintain its shape.
Video Tutorial:
Designer: @MakeItYourselfByPapari