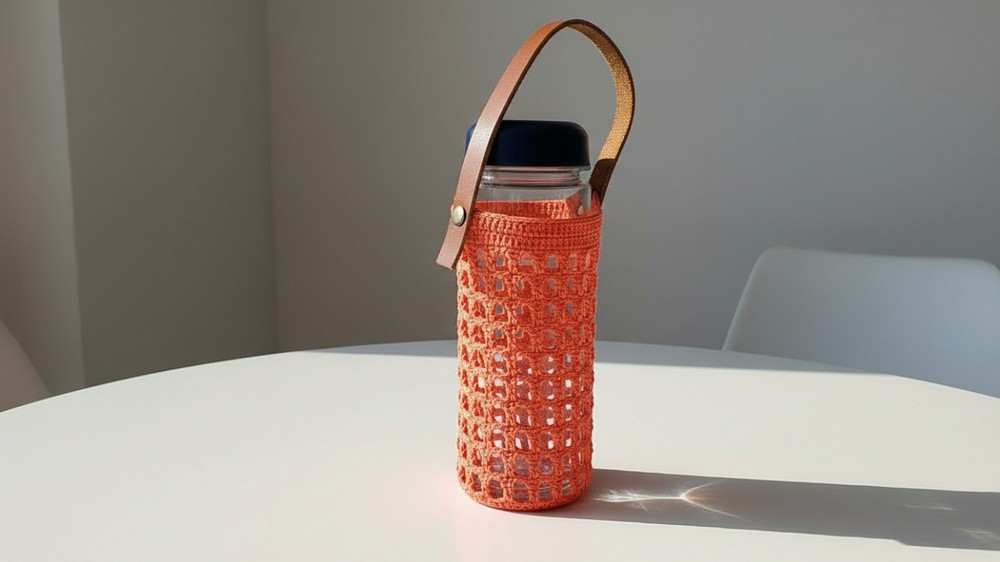
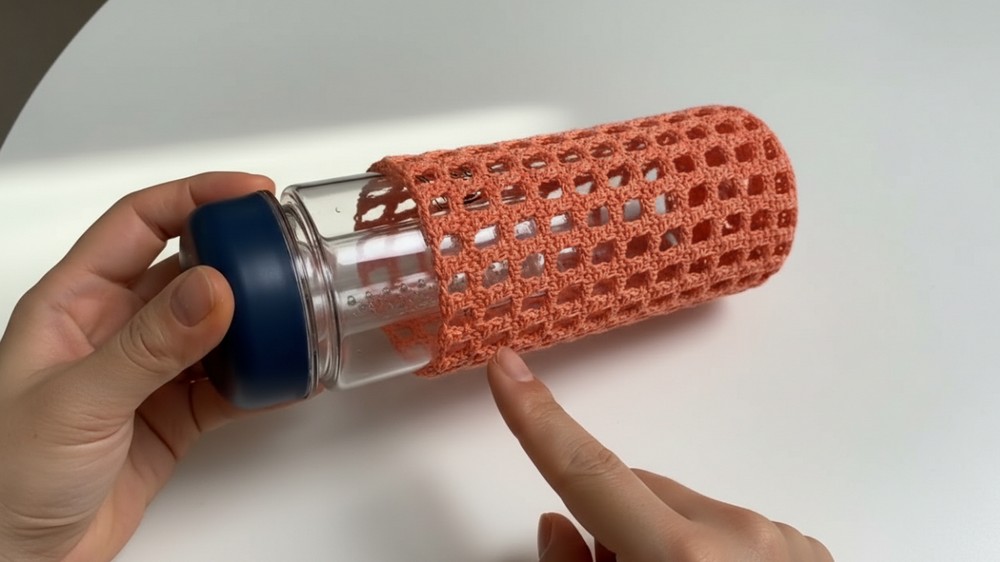
A sunny day out, your favorite drink in hand, and a stylish handmade cover safeguarding the bottle from both the heat and accidental slips. A crochet bottle cover pattern isn't just about aesthetics, it blends form with functionality. Perfect for picnics, hikes, or even as a chic addition to your desk, this bottle cover protect glass bottles from scratches while adding a personalized charm.
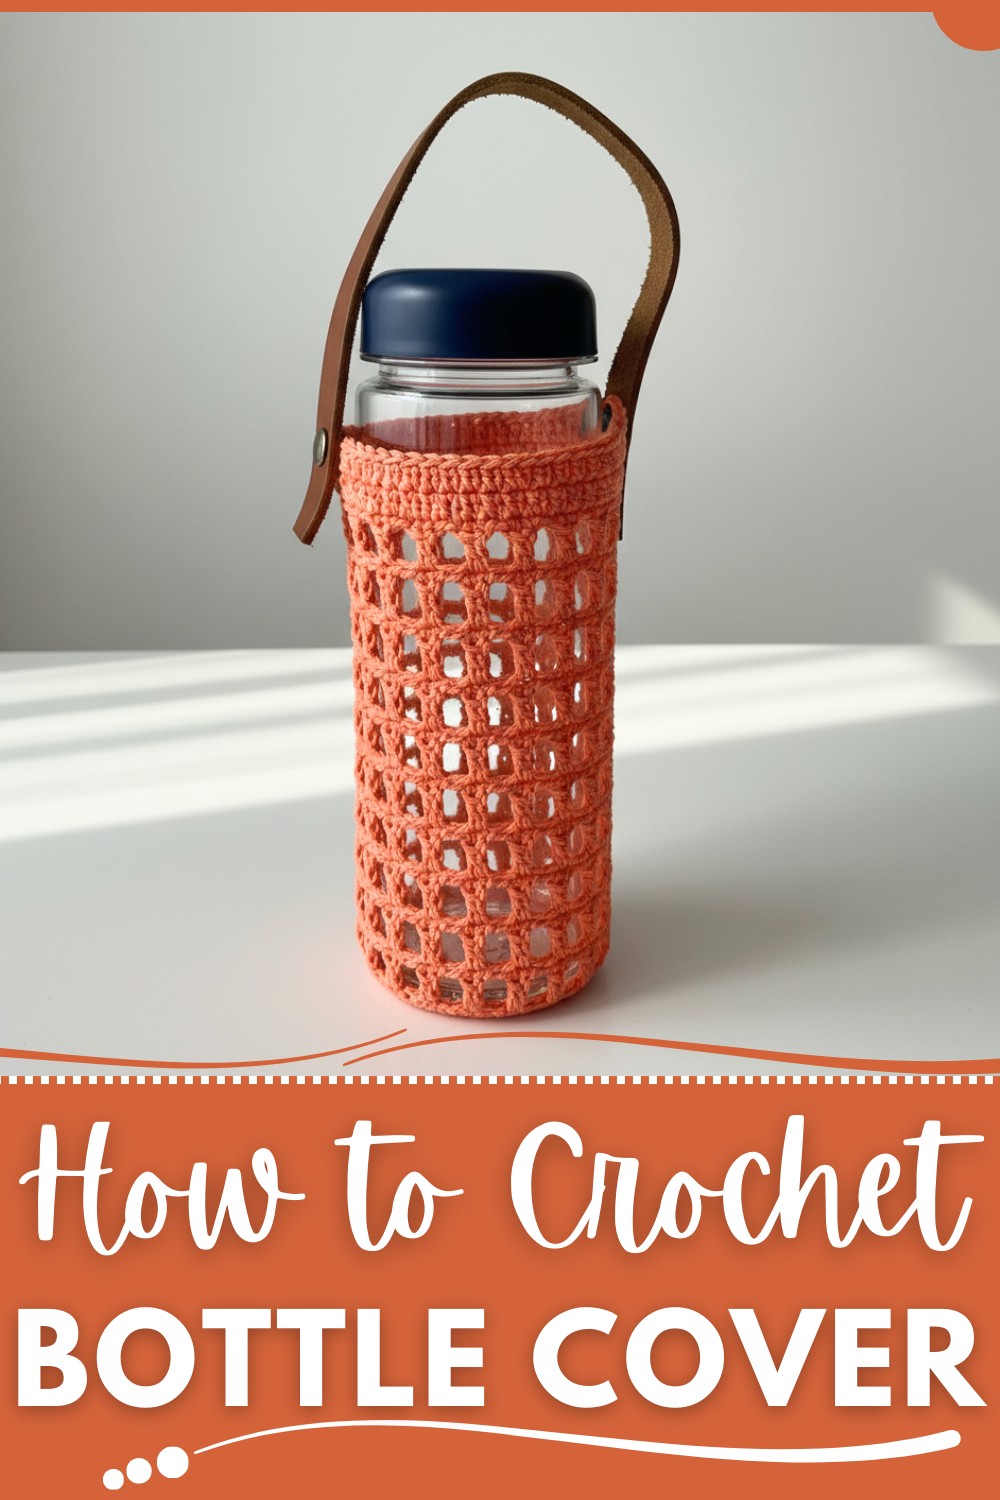
With endless color options and textures, you can match them to summer vibes or even gift them as thoughtful gestures. The breathable material keeps condensation in check, and the snug fit ensures portability. Pair it with a drawstring handle or leather strap for ultimate convenience and style. From functionality to fashion, bottle covers truly stand out.
Adorable Crochet Bottle Cover Pattern to Impress Everyone
Materials Required
- Yarn:
- 100% Cotton Yarn (Recommended: Fingering Weight or Lightweight Yarn, Category ⅔).
- Color options: Use light or soft shades for a summery vibe.
- Hook:
- 1.6 mm crochet hook for finer and detailed stitching.
- Additional Tools:
- Scissors.
- Darning needle for weaving ends.
- Tape measure to ensure correct sizing.
- Optional: Leather strap or drawstring for finishing.
Crochet Bottle Cover Pattern
This step-by-step guide will help you create a unique crocheted bottle cover using a creative pattern that stands out with its textured design. Perfect for summer, this cover is ideal for 350–500 ml bottles and can be customized for larger bottles. Written in US Crochet Terminology, the pattern is suitable for intermediate crocheters.
Skill Level
Intermediate
- You should be comfortable with foundational stitches (sc, dc), working in rounds, and creating textured patterns.
Key Abbreviations
- ch: Chain
- sc: Single Crochet
- dc: Double Crochet
- sl st: Slip Stitch
- st(s): Stitch(es)
- rep: Repeat
- yo: Yarn Over
- Rnd: Round
Special Notes
- Gauge/Size:
- Approximate diameter after the base is complete: 2.75–3 inches.
- Adjust as necessary by adding or reducing increase rows.
- Stretch Factor:
- Cotton yarn shrinks slightly when wet but also provides a snug fit. Make the cover slightly loose to account for this.
- Color Customization:
- Feel free to alternate yarn colors on each row or every few rounds for a striped or colorful design.
- Texture Focus:
- The pattern’s unique structure creates elegance and prevents the bottle from slipping.
Step-by-Step Pattern Instructions
Step 1: Base of the Bottle Cover
Rnd 1:
- Start with a magic ring.
- Work 12 sc inside the ring.
- Pull the ring tightly to close.
- Sl st to the first sc to join the round. (Total: 12 sts)
Rnd 2:
- Ch 3 (counts as the first dc), work 1 dc in the same stitch.
- Work 2 dc in each st around (increase in every stitch).
- Sl st to the top of ch-3 to close the round. (Total: 24 sts)
Rnd 3:
- Ch 3 (counts as 1 dc). Work 1 dc in the next st, then 2 dc in the next st.
- Rep: [1 dc, 1 dc, 2 dc in next st] around.
- Sl st to the top of ch-3 to close the round. (Total: 36 sts)
Rnd 4:
- Ch 3, then work 1 dc in each of the next 2 sts.
- Rep: [1 dc in next 2 sts, 2 dc in next st] around.
- Sl st to close. (Total: 48 sts)
Rnd 5:
- Ch 3, then work 1 dc in each of the next 3 sts.
- Rep: [1 dc in next 3 sts, 2 dc in next st] around.
- Sl st into the top of ch-3 to finish. (Total: 60 sts)
Rnd 6 (Optional - Adding Definition):
- Here, you can switch to BLO (back loop only) sc all around for a firm base edge.
- Work 1 sc into the back loop of each stitch around.
- This step creates a sharper edge transition to the main pattern, though it is optional.
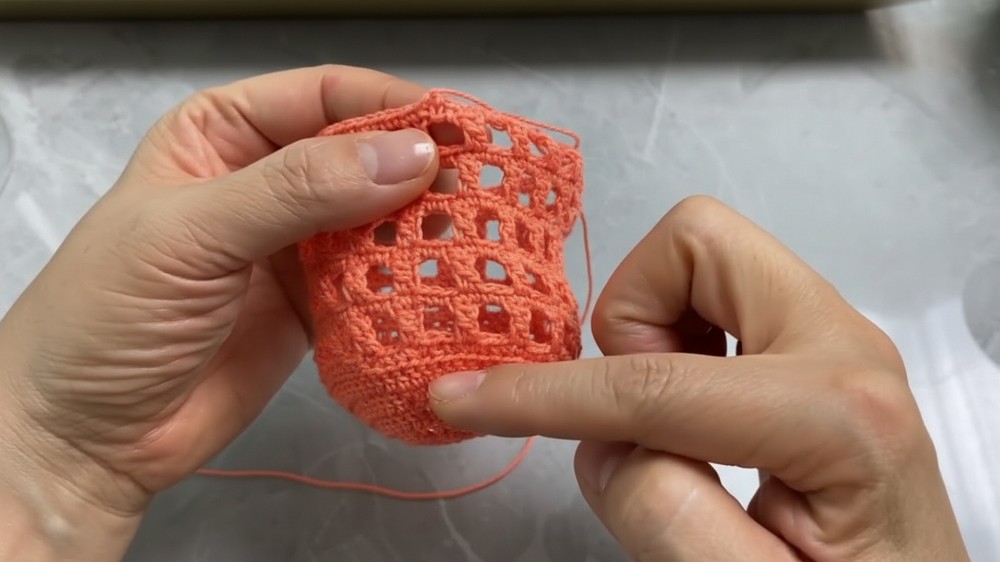
Step 2: Main Body – Pattern Introduction
Rnd 7:
- Ch 3, skip the next st, and work 1 dc in the next st.
- Chain 2, skip the next 2 stitches, then:
- On the next st, work the textured stitch:
- Yo, insert the hook into the next st, pull up a loop (3 loops on hook).
- Yo, insert back into the same stitch, pull up a loop again (5 loops on hook).
- Yo, pull through the first 3 loops, yo and pull through the remaining loops.
- On the next st, work the textured stitch:
- Repeat: [ch 2, textured stitch] around.
- Sl st into the first ch-3 to connect.
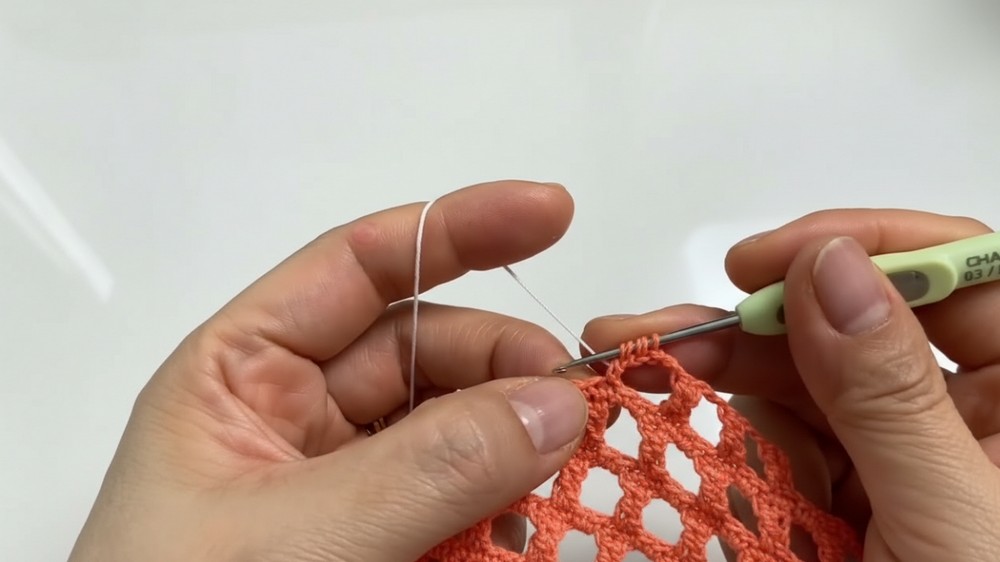
Rnds 8–X (Body Continuation):
- Continue building the unique pattern:
- Start each row by ch 3 and twisting the previous round’s texture.
- Work the textured stitch in each chain-2 space of the previous row.
- Repeat until the length of the cover matches your bottle height.
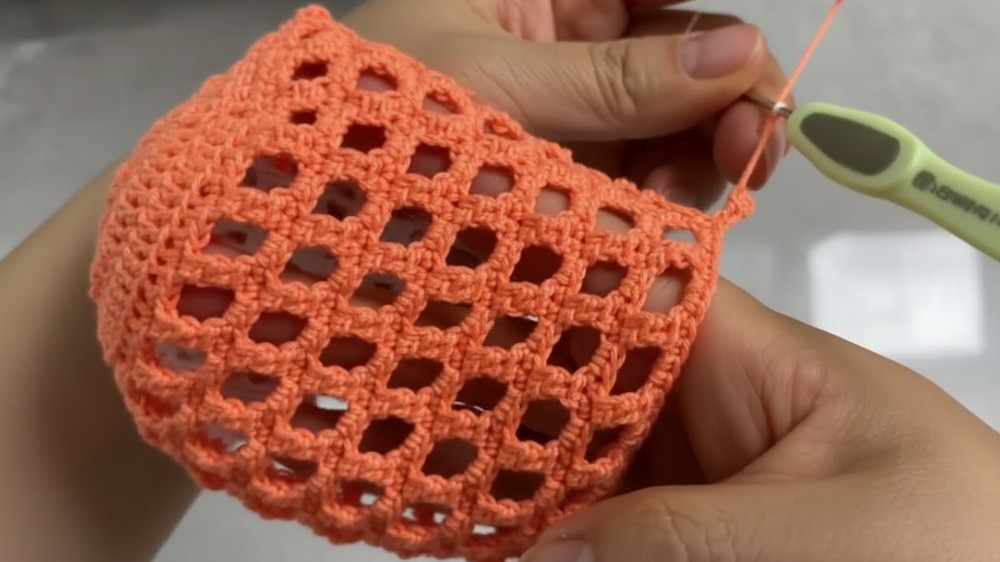
Step 3: Finishing Rows and Edging
Last Rows (Edging):
- After completing the main length, work 2–3 rows of sc:
- In each stitch, create 1 sc around to secure the lip of the bottle cover.
- For the final row, consider using slip stitches for a polished finish.
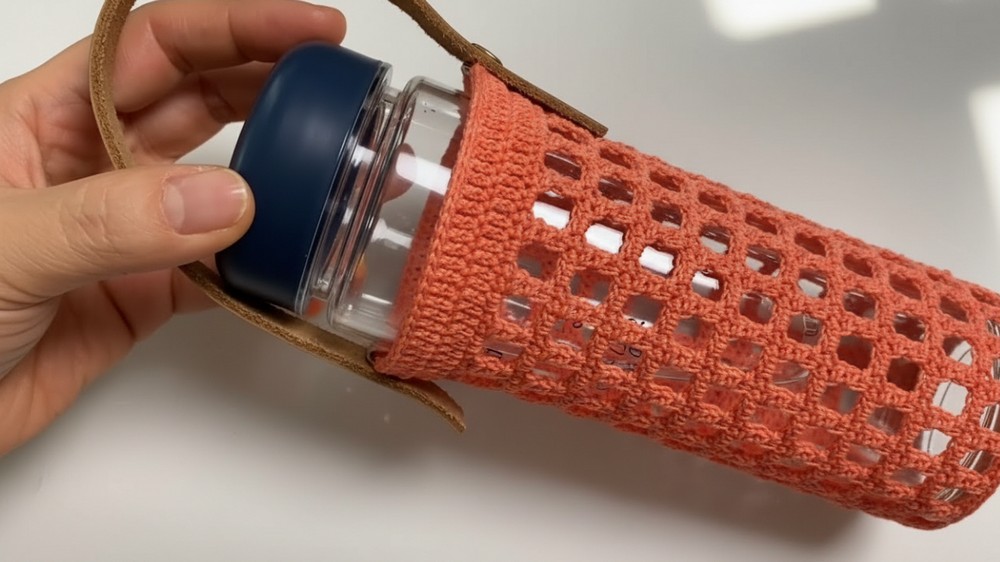
Optional Detail: Add Drawstring (Leather/Thread)
- Leave spaces in the last row to insert a drawstring or leather strap.
- Thread it through the eyelets and tie for easy carrying.
Conclusion
Your textured crochet bottle cover is now finished! Its elegant, soft design is perfect for summer outings, and the snug stretch ensures the bottle is secure. The textured pattern doubles as a stylish statement and functional gripping surface.
Pattern Corrections
- Ensure stitch counts stay consistent across rounds, especially when working with textured stitches.
- Measure the base diameter carefully—adjust increase rows if necessary for custom sizing.
Tips for Success
- Consistency in Gauge: Fine yarn and a small hook demand even tension for smooth texture.
- Customization: Change to thicker yarn or larger hooks to create larger bottle covers or bags.
- Reinforcement: Add additional rows for stronger edging.