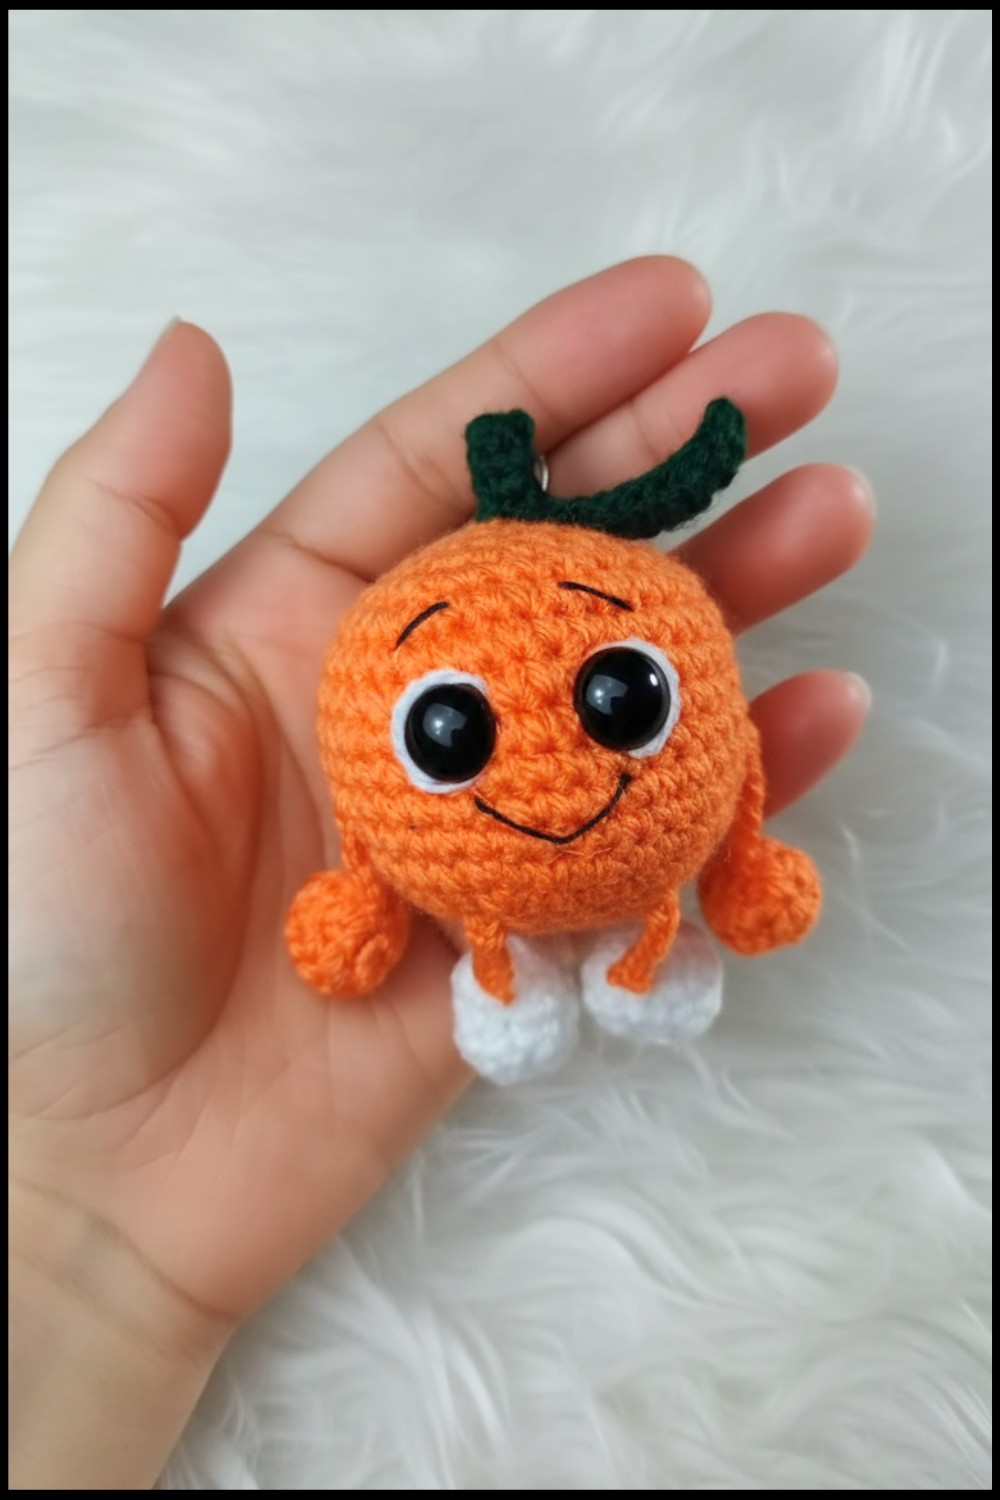
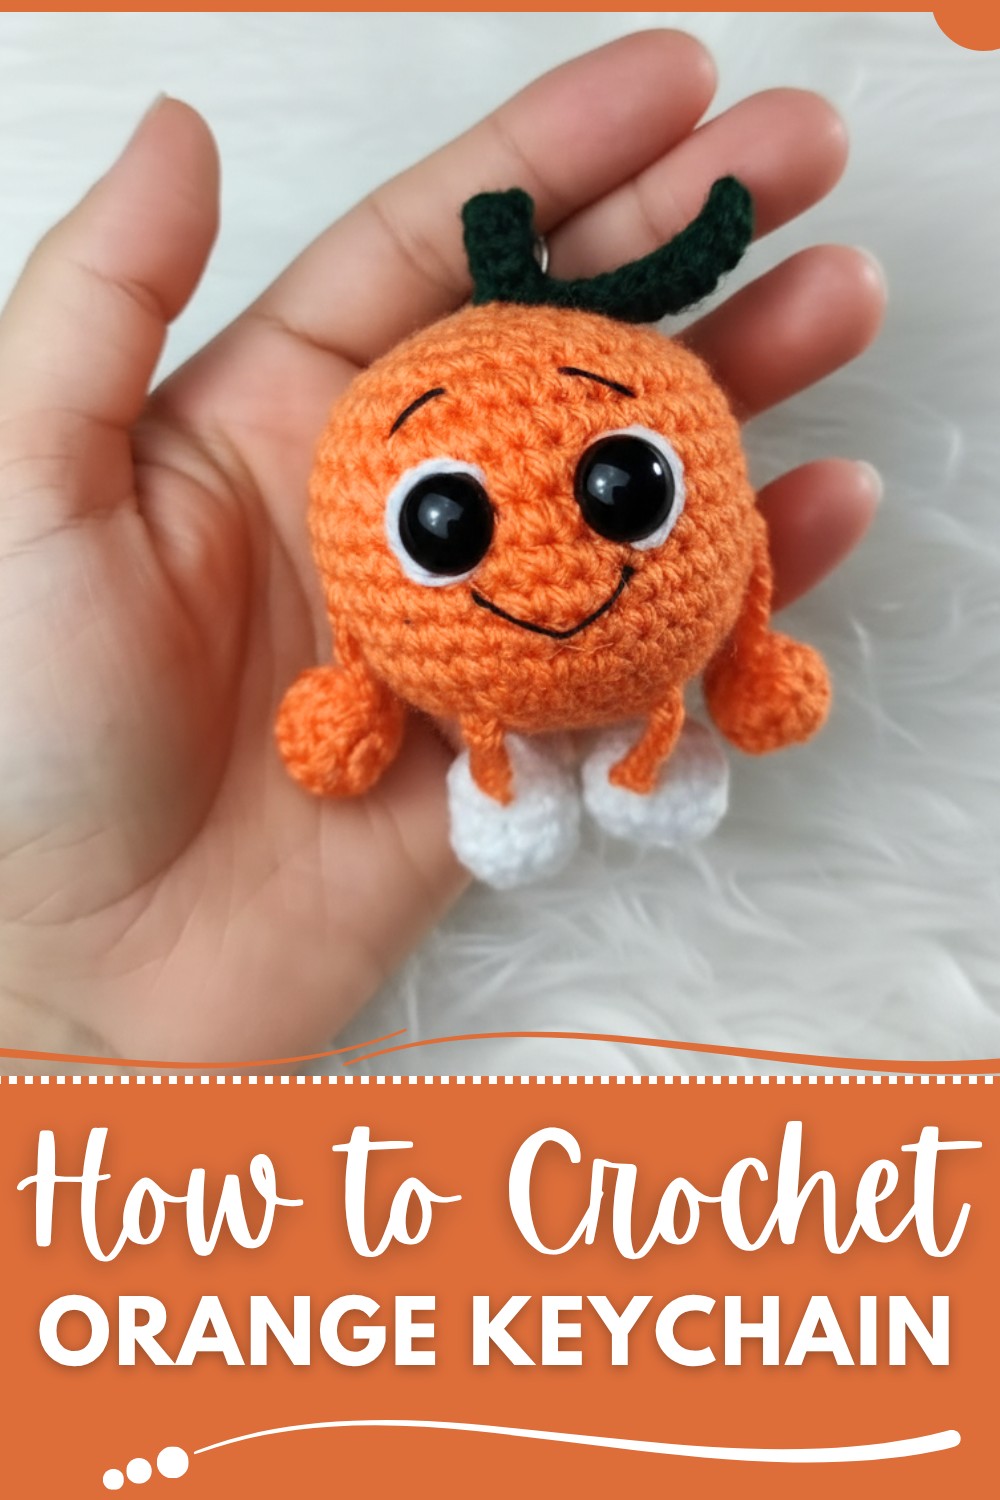
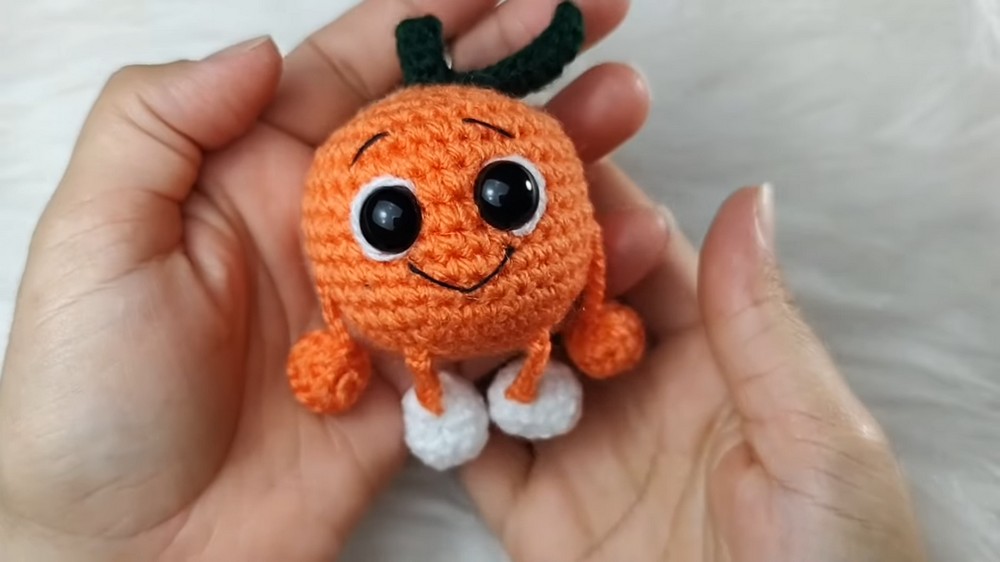
Brighten your day using this free crochet orange keychain pattern and give your keys, bags or backpacks a cute touch everyone will notice.
Small and round an orange charm shines bright and brings joy to anyone who sees it. Its bold color and tiny green leaf look just like a real orange but much cuter and friendlier. You will love using the Crochet Orange Keychain pattern because it helps you make a little piece of happiness that goes anywhere—clipped onto keys bags or even a pencil case for kids. This cheerful orange makes it easy to spot your things in a hurry so you never lose your keys again.
Quick Orange Keychain Pattern for Free Crocheters
The simple loops are gentle for your hands and the finished keychain is strong so it can last a long time. Each little orange can be a special gift to friends family or children and everyone will love the bright color and soft feel. Making this keychain is a pleasant way to spend time together with loved ones and they always bring a cheerful mood to your day. Every orange you finish is a fun memory and a treasure to keep.
Amigurumi Orange Crochet Pattern
Materials
- Yarn:
- Orange (main body, arms, legs)
- White (feet)
- Dark Green (stem & leaf)
- Black (mouth embroidery)
- Hook: 2.5 mm crochet hook
- Stuffing: Polyester fiberfill
- Plastic safety eyes: 12 mm (or preferred style/size)
- Tapestry/sewing needle
- Scissors
- Stitch marker (optional)
- Pins for assembly (optional)
Key Abbreviations (US Terms)
| Abbreviation | Meaning |
|---|---|
| MR | Magic ring |
| ch | chain |
| sc | single crochet |
| inc | increase (2 sc in 1 st) |
| dec | decrease (sc 2 sts tog) |
| sl st | slip stitch |
| st(s) | stitch(es) |
| hdc | half double crochet |
| dc | double crochet |
| tr | treble (triple) crochet |
| FO | fasten off |
Special Notes
- Finished size and proportions may vary depending on yarn and tension.
- Increase and decrease rounds are worked in a spiral. Use a stitch marker to mark the first stitch of each round.
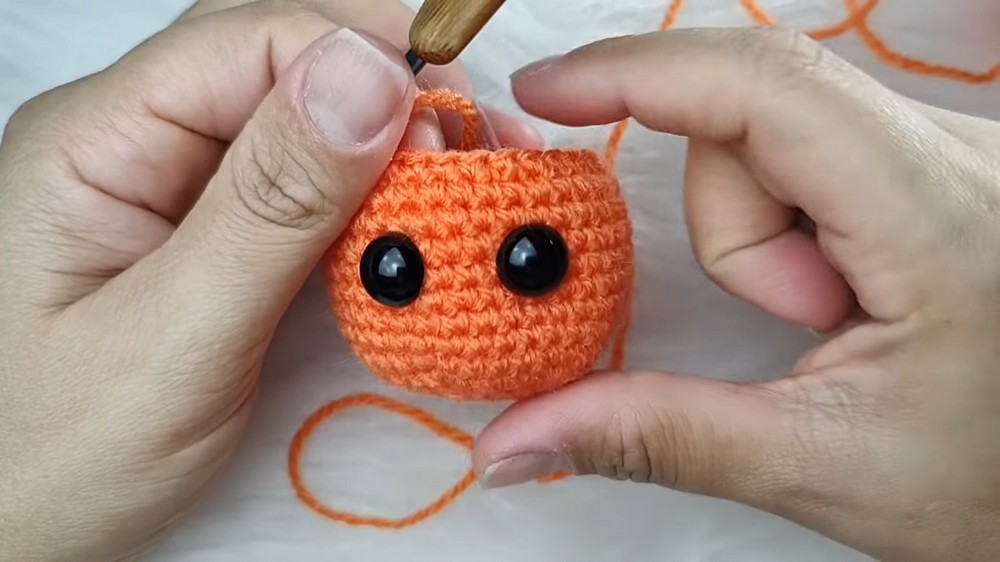
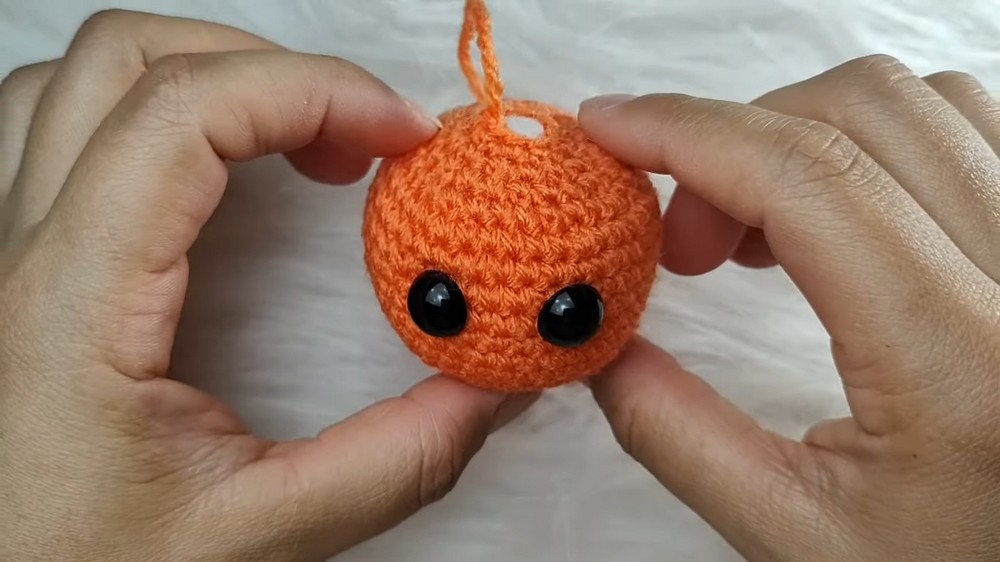
- Safety eyes are placed between Rounds 10 and 11, approximately 3 stitches apart.
Pattern
Orange Body
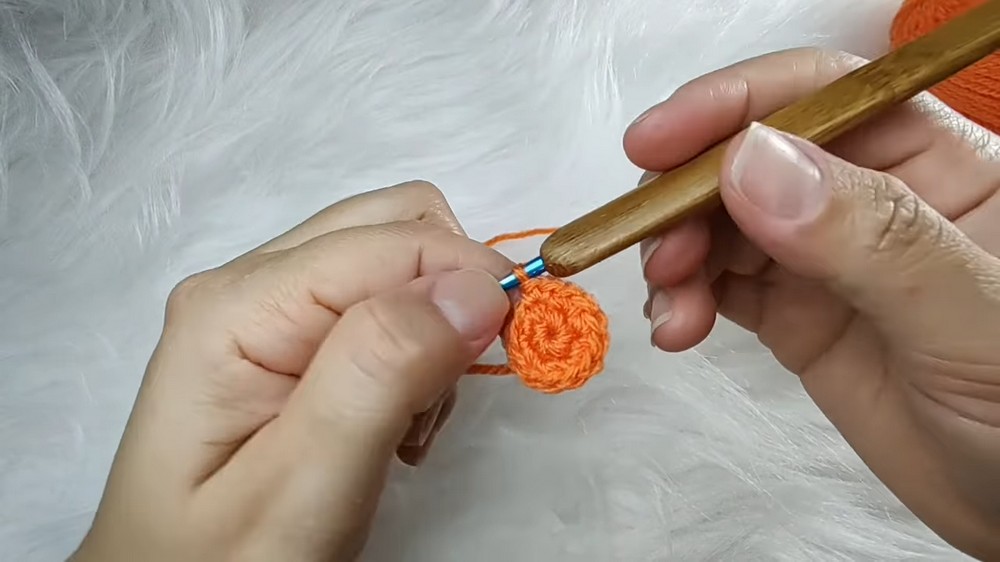
With orange yarn and 2.5 mm hook:
- MR, 6 sc into ring. (6)
- Inc in each st around. (12)
- [Sc in next st, inc in next st]—repeat around. (18)
- [Sc in next 2 sts, inc in next st]—repeat around. (24)
- [Sc in next 3 sts, inc in next st]—repeat around. (30)
6–13. Sc in each st around for 8 rounds. (30)- (Total: 13 rounds so far)
- Insert safety eyes between Rounds 10 and 11, spaced 3 sts apart.
- [Sc in next 3 sts, dec]—repeat around. (24)
- [Sc in next 2 sts, dec]—repeat around. (18)

- Begin stuffing firmly.
- [Sc in next st, dec]—repeat around. (12)
- [Dec]—repeat around. (6)
- Add more stuffing if necessary.
- FO, leaving a tail long enough to close remaining hole with a sewing needle. Weave in end.
Arms (make 2)
With orange yarn and 2.5 mm hook:
- MR, 6 sc into ring. (6)
- Inc in each st around. (12)
- Sc in each st around. (12)
- FO, leaving tail for sewing.
- Stuff lightly.
- Sew closed at opening.
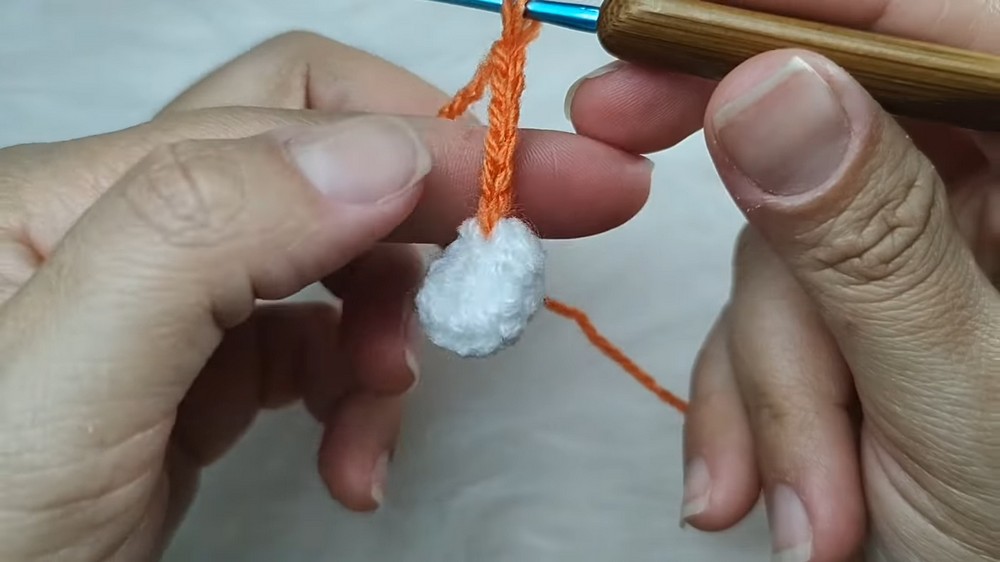
Legs (make 2)
With white yarn and 2.5 mm hook:
- MR, 6 sc into ring. (6)
- Inc in each st around. (12)
- Sc in each st around. (12)
- Add a small amount of stuffing (especially to give the foot some weight).
- FO white yarn.
- With orange yarn, join in any st.
- Ch 6, FO, leaving tail for sewing (this is the leg). You can adjust leg/foot length by increasing or decreasing the number of chains.
- Make another leg by repeating above steps.
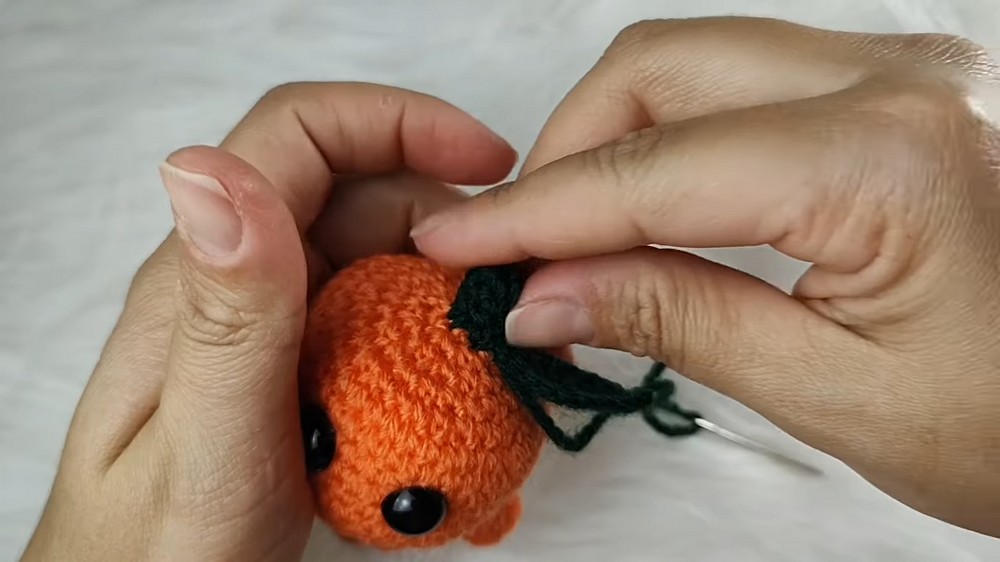
Stem & Leaf
With dark green yarn and 2.5 mm hook:
Stem:
- MR, 6 sc into ring. (6)
2–3. Sc in each st around for 2 rounds. (6 per round)- Do not stuff.
- Do not FO.
Leaf (worked off the stem):
- Ch 10.
- In 2nd ch from hook: sl st.
- Next ch: sc.
- Next ch: hdc.
- Next ch: dc.
6–7. Next 2 chs: tr in each. - Next ch: dc.
- Next ch: hdc.
- Next ch: sc.
- Sl st at base where you started chain to finish.
- FO, leaving tail for sewing.
Facial Embroidery
- With black embroidery thread/yarn and needle:
- Embroider mouth as desired, centered below eyes.
Assembly
- Sew legs: Attach to bottom of orange body, placing at approx. Rounds 4, evenly spaced.
- Sew arms: Attach one to each side of body, at approx. Round 8.
- Sew stem/leaf: Secure the stem at the top center of the body and secure the base of the leaf at stem (leave the leaf tip free).
- Secure all ends and weave in neatly.
- Optional: Pin pieces first for accurate placement. Use a bit of glue to secure any short yarn tails if desired.
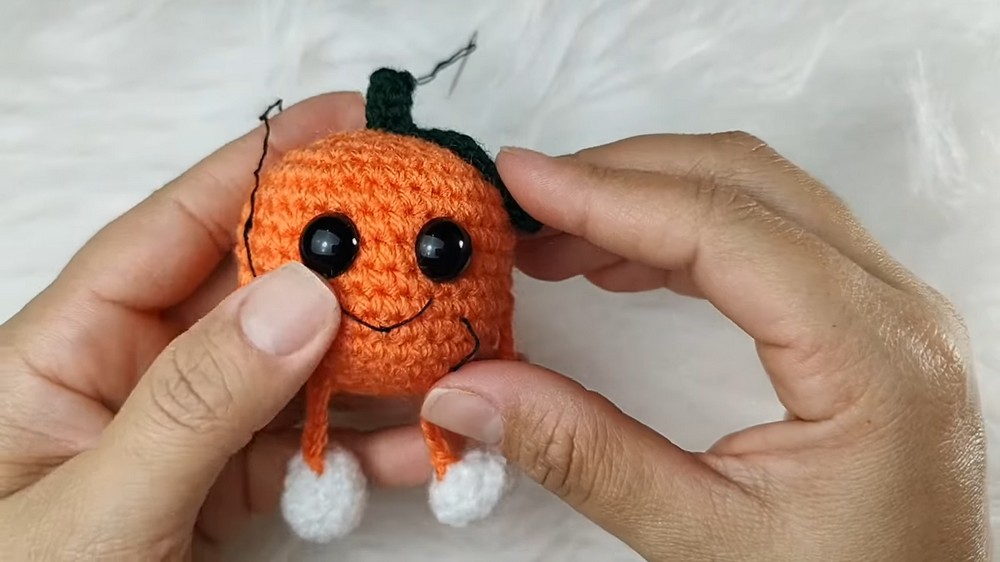
Conclusion
You have now completed a cute amigurumi orange! This pattern features straightforward amigurumi construction and creates an adorable, expressive fruit plush with legs, arms, and a sweet leafy top. Perfect for gifts, play, and decor.
Pattern Correction & Tips
- Correction: Always count your stitches after each increase/decrease round to ensure accuracy.
- Tips:
- Place eyes before decreasing and stuffing for best placement.
- Stuff the orange body firmly but not to stretch stitches.
- When making the leaf, be careful to crochet into each chain only once for smooth edges.
- Embroidering the mouth after stuffing and assembly helps with alignment.