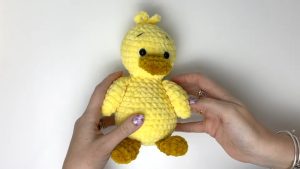
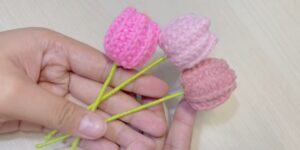
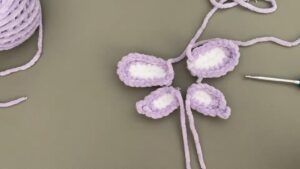
Jump into playful charm with this Free Crochet Octopus Pattern, bringing a whimsical and fun touch to toys, décor, or unique gift ideas.
A gentle ocean breeze sweeps across a quiet shoreline, where the rhythm of the waves inspires a sense of calm and curiosity. Translating this marine wonder into yarn brings both charm and personality to handmade creations. The Free Crochet Octopus pattern turns simple yarn into a delightful, soft figure that can serve as a toy, décor item, or stress-relieving companion. Its textured tentacles and rounded body provide tactile engagement, making it suitable for children, collectors, or as a whimsical accent in bedrooms or playrooms.
Trendy Crochet Octopus Pattern to Add Colorful Cuteness
This crochet project offers a focused yet enjoyable experience, with each stitch contributing to the playful curves and realistic shape of the octopus. Color choices allow for creative variation, from vibrant ocean-inspired hues to soft pastels, ensuring each piece has a unique personality. Its compact size and lightweight construction make it easy to display on shelves, attach to bags, or use as a comforting handheld item.
Beyond personal enjoyment, a completed octopus becomes a thoughtful handmade gift that combines aesthetic appeal with playful functionality. Each finished Free Crochet Octopus pattern reflects attention, patience, and creativity, turning simple yarn into a charming and versatile companion. Whimsical, tactile, and visually engaging, it adds character, comfort, and a touch of the sea’s magic to everyday life.
Special Features
- Compact and Fun Design:
The octopus has a charming design with a round body, detailed tentacles, and a skirt to join the tentacles seamlessly. - Beginner-Friendly Techniques:
Utilizes basic crochet stitches, including chain stitches, double crochet, and slip stitches, with clear guidance for techniques such as increasing, decreasing, and joining rounds. - Child-Friendly Design:
Safe to make for children, especially when using hypoallergenic toy stuffing and securely fastened eyes. - Detailed Shaping:
The tutorial demonstrates creating a 3D shape, from the body to its tentacles, while working inside out to achieve the perfect form.
Level of Difficulty
- Beginner to Intermediate:
The project is suitable for beginners familiar with basic crochet stitches, though there are some slightly more advanced techniques for shaping and assembling. The clear instructions make it accessible for those with limited experience and a willingness to learn.
Materials Needed
- Yarn:
- Soft yarn in your desired colors. Common color choices include pastel shades for the body and contrasting colors for eyes.
- Crochet Hook:
- A hook size appropriate for the yarn used. Check your yarn label for recommendations.
- Toy Stuffing:
- Use polyester or hypoallergenic stuffing suitable for children.
- Safety Eyes:
- Plastic safety eyes or yarn for embroidered eyes.
- Tapestry Needle:
- To sew in ends and assemble components.
- Scissors:
- To trim the yarn tails.
Step-by-Step Instructions
1. Beginning the Octopus Body
- Create a Sliding Knot:
- Wrap the yarn around your fingers, hook below the first strand and over the second, then pull through to form an adjustable sliding knot.
- Foundation Chain:
- Chain 2 stitches.
- Row 1 - Magic Ring Alternative:
- Double crochet 6 stitches into the second chain from the hook. Tighten the knot to bring the stitches together.
- Join the Round:
- Insert the hook into the first double crochet, yarn over, pull through, and through the loop on the hook.
2. Increasing the Body
- Row 2 – Increase Stitches:
- Start with a turning chain.
- Double crochet 2 stitches into every stitch from Row 1 (12 stitches total).
- Row 3 – Patterned Increase:
- Begin with a turning chain, then work 1 double crochet into the first stitch and 2 double crochets into the next.
- Repeat this pattern (1DC, 2DC) to complete the round (18 stitches total).
- Row 4 – Building the Shape:
- Chain 1. Work 1 double crochet into each of the first two stitches and 2 double crochets into the third stitch, repeating the pattern to complete the round (24 stitches total).
- Row 5 – Final Increase Round:
- Chain 1. For every three stitches, work one double crochet, then work 2 double crochets into the fourth stitch.
- This results in 30 stitches.
3. Straight Rows for Length
- Rows 6–11:
- Work one double crochet into each stitch without increasing.
- By the end of Row 11, you should have 30 stitches in total, giving the octopus a rounded “bowl” shape.
4. Decreasing to Close the Body
- Row 12 – First Decrease Row:
- Chain 1. Work double crochet into the first three stitches, then work a decrease:
- Yarn through the fourth stitch, repeat for the fifth stitch, and pull through all loops on the hook.
- This row results in 24 stitches.
- Chain 1. Work double crochet into the first three stitches, then work a decrease:
- Row 13 – Single Crochet Round:
- Add one double crochet to each stitch (no increases or decreases).
- Row 14:
- Alternate one double crochet, then a decrease for the next stitch pair. Results in 18 stitches.
- Rows 15–16 – Final Rounds:
- Create two rounds of single crochet to shape the head.
5. Adding and Assembling Facial Features
- Attach Safety Eyes:
- Fit eyes through gaps between stitches. Ensure they are securely fastened. Alternatively, embroider the eyes with yarn.
- Tidy Up Edges:
- Thread yarn tails into the work using a tapestry needle or smaller hook, tying small knots if needed.
6. Stuffing the Octopus
- Insert Stuffing:
- Use toy stuffing to gently fill the octopus without overloading it. The body should retain its 3D bowl shape while being squishy.
- Close the Body Hole:
- Double crochet two stitches together across the remaining distance until only 6 stitches are left, then stitch to close completely.
7. Creating the Skirt
- Join Yarn to Half Loops:
- Rejoin yarn to the half loops remaining from closing the base of the body.
- Base Round:
- Double crochet in each remaining half loop to form a round (18 stitches).
- Increase for Shape:
- Continue working patterned increases into the skirt for successive rounds until it flares and achieves a circular shape.
- Repeat Rounds:
- Work one double crochet into each stitch on the next round, followed by another round of increases as described in the video.
8. Adding Tentacles
- Create Tentacle Chain:
- Chain 18 stitches.
- Shape the Tentacles:
- Work slip stitches into the first three chains from the hook.
- Work 2 double crochets into each chain along the rest of the chain, allowing it to spiral naturally.
- Joining Tentacles:
- Attach tentacles evenly around the skirt by slip stitching into the start of each chain.
- Repeat:
- Make 8 tentacles in total, evenly spaced around the skirt.
Tutor’s Suggestions
- Count Your Stitches:
- Regularly count your stitches in each row to avoid uneven or misshapen work.
- Tighten Magic Ring:
- Safeguard the opening by tightening the sliding knot thoroughly at the beginning.
- Safety First with Eyes:
- Make sure plastic safety eyes are tightly secured if making this for small children.
Uses of the Crochet Octopus
- Toys for Children: Safe and soft play companion for infants or toddlers.
- Decorative Items: Display on a desk or shelf.
- Gifts: Thoughtful handmade present for loved ones.
- Charity Projects: Often made for neonatal units as preemie companions.
Crochet Tip
Blocking the Skirt: After completing the skirt, lightly block it by dampening and pinning it flat to ensure a neat and flared shape.
Conclusion
The crochet octopus is a fun and versatile project perfect for beginners looking to try a structured, 3D design. With clear instructions, room for customization, and various uses, this pattern is a great way to enhance your crochet skills while creating something truly adorable.


