Spark your imagination with this FREE tutorial on how to crochet a beautiful Moses basket – the perfect blend of DIY charm and cozy comfort!
A Moses basket is a timeless and practical item that has been cherished by parents for generations. Made to provide a safe and cozy space for a newborn, it is lightweight, portable, and perfect for keeping the baby close during those precious early months. Learning to crochet a Moses basket allows you to design something truly personal, whether it’s for your own baby or as a heartfelt gift. By weaving together durable yarn and using simple crochet techniques, you can construct a soft and sturdy basket that’s as functional as it is beautiful.
DIY Moses Basket | crochet tutorial

The benefits of a crocheted Moses basket are countless. It gives parents a portable sleeping solution while adding a handmade touch to a nursery. Customizing colors and patterns ensures it matches any décor or fits your personal style. Additionally, crocheting has its own advantages – it’s a relaxing and rewarding activity that helps improve focus and sparks creativity. Whether you’re new to crocheting or an experienced crafter, this project is both manageable and meaningful. With just a crochet hook, yarn, and a bit of patience, you can make something that will hold precious memories for years to come.
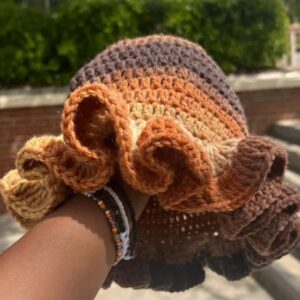
Crochet Bandana Pattern - Step-by-Step Details & Overview
Step-by-Step Details
1. Materials Needed
The instructor emphasizes the importance of choosing the right materials for a professional finish. The materials used in the project include:
- Yarn: 9mm braided cotton cord (from the brand Bobbiny in this case). The fiber is durable, comes in various colors, and is versatile for home decor or accessories.
- Crochet Hook: Two hooks are required—9mm (main hook) and 8mm (for fine-tuning specific patterns).
- Wooden Base (Optional): Ideal for added structure, measuring 29.5 inches x 16 inches, with specific hole dimensions as part of the tutorial.
- Accessories: Scissors, tape measure, and locking stitch markers (around seven) for accuracy.
- Note: Each bundle of cord has 100m (108 yards), and the amount varies depending on the complexity of the project.
2. Base Setup
- Start with a slip stitch around a wooden or traditional crochet base (if applicable).
- Pay attention to center alignment and symmetry.
- Slip stitches should have a tight, “braided” finish for a polished look. Adjust hook size as needed.
3. Building the Framework
- Work the round using single crochet stitches, ensuring you incorporate the tail as you advance. This technique eliminates loose ends as you go.
- Adjust placement by skipping holes if the base “fans out.” The instructor provides tips for reducing uneven shaping through trial and error (e.g., skipping specific holes).

4. Adding the Core Stitches
- Use the waistcoat stitch for subsequent rounds. It ensures each stitch stacks straight, avoiding a staggered or messy alignment.
- Multiple rounds are required, often continuing the same stitch to build structure and height.

5. Creating Add-Ons (e.g., Handles or Decorative Elements)
- Handles are optional but add portability and style. Mark stitch placement carefully with blue markers to ensure symmetry.
- Customize handle length based on intended use; low vs. floppy handles are both possible with minor adjustments.

6. Optional Hood Feature
- If including a hood, use short-row stitches for modern, slanted designs or adjust placement for fuller coverage. The tutorial notes that placement adjustments and creativity are encouraged.

7. Finalizing and Accessories
- After the structure is complete, use decorative elements like tassels to give the piece a finished look. Trim final cords and smooth the design edges carefully.
- Weave in loose ends using an invisible join for a professional, seamless finish.
Special Features
- Versatility: The bandana can be styled as a hair accessory, a lightweight scarf, or fashionable decor.
- Customizable Design: Add texture, change colors, or adjust size for personal preferences.
- Functional Additions: Handles, tassels, and stitching variations allow for functional use or gift-worthy presentation.
Level of Difficulty
- Beginner to Intermediate: While beginner-friendly, the project involves techniques like slip stitching, single crochet, waistcoat stitches, and invisible joins, making it beneficial for those aiming to practice and refine these skills.
Tutor’s Suggestions
- Adjustments are Key: If the pattern feels too tight or loose, don’t hesitate to unravel and revisit specific steps.
- Guard Your Hands: Working with sturdy materials can strain hands. Take breaks and use hand moisturizer.
- Use Durable Hooks: Avoid fragile or resin-based hooks, as heavy-duty projects can easily break them.
- Trial and Error: Especially with design elements like the base or handle placement, adjustments are encouraged.
Uses
- As a fashion accessory, the crochet bandana pairs well with casual and formal outfits.
- Perfect as gifts for loved ones.
- Can be created as part of themed decor for outdoor trips, baby showers, or other celebrations.
Pro Tip
When weaving the ends, use a crochet hook size smaller than your main hook to seamlessly tuck in loose cords. This not only reinforces the structure but also enhances the clean finish of your project.
Conclusion
The crochet bandana project is a rewarding experience, offering a stylish yet functional way to showcase your crochet skills. Whether you make it for personal use, a baby shower gift, or as decor for your home, the finished product reflects your creativity and effort. Don’t rush the process—each stitch matters. Once completed, you’ll have a unique handmade piece to cherish or share.