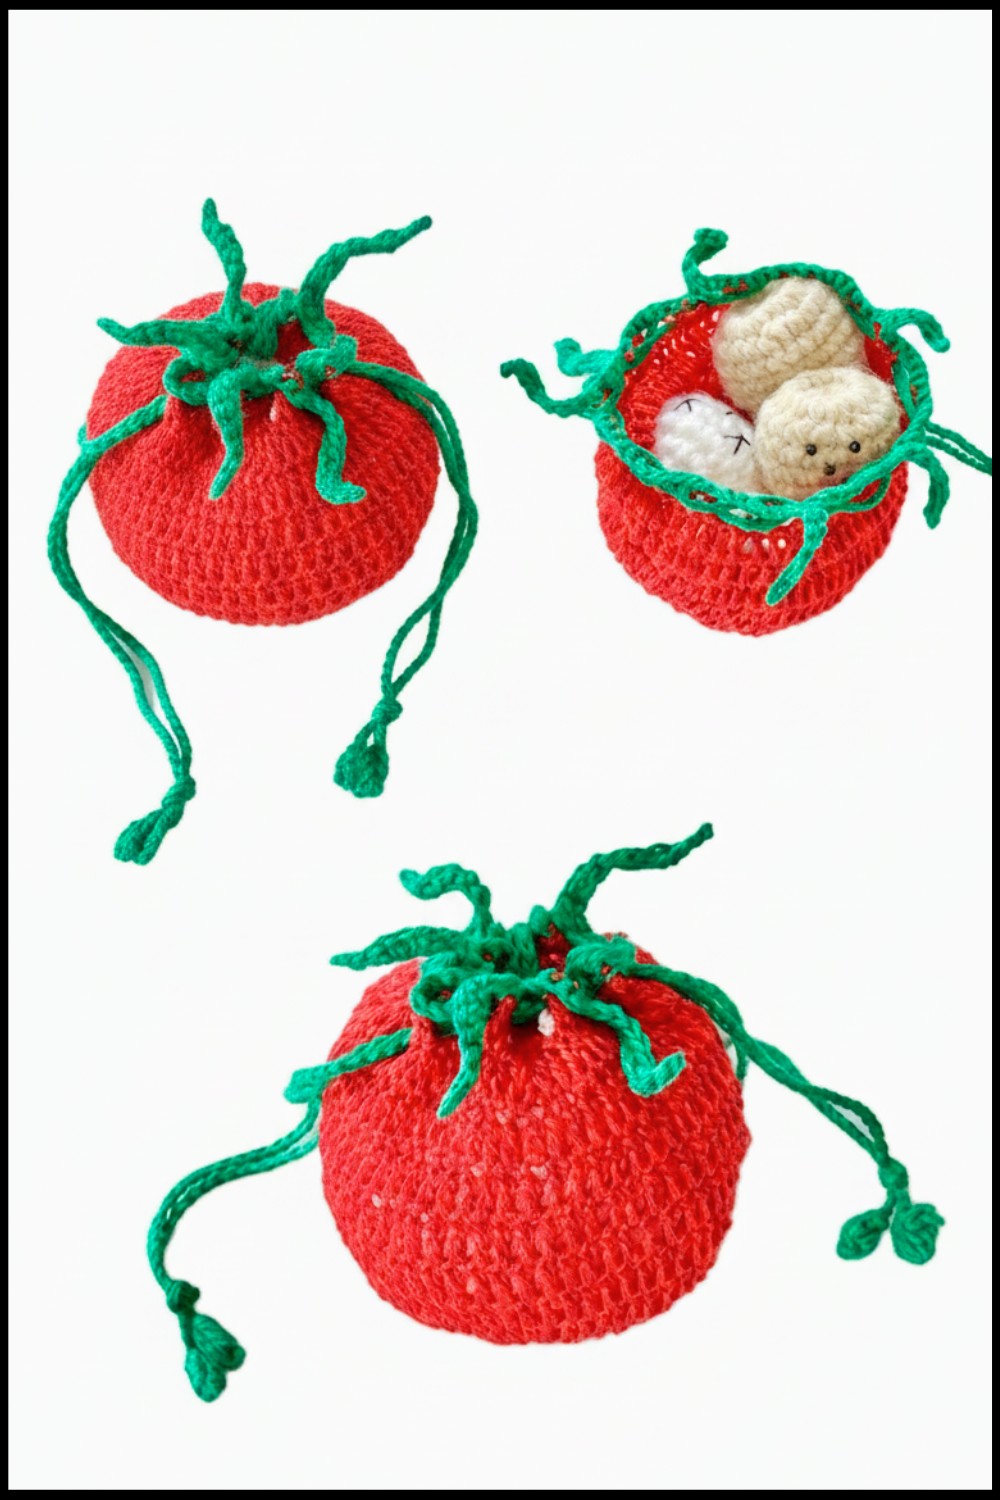
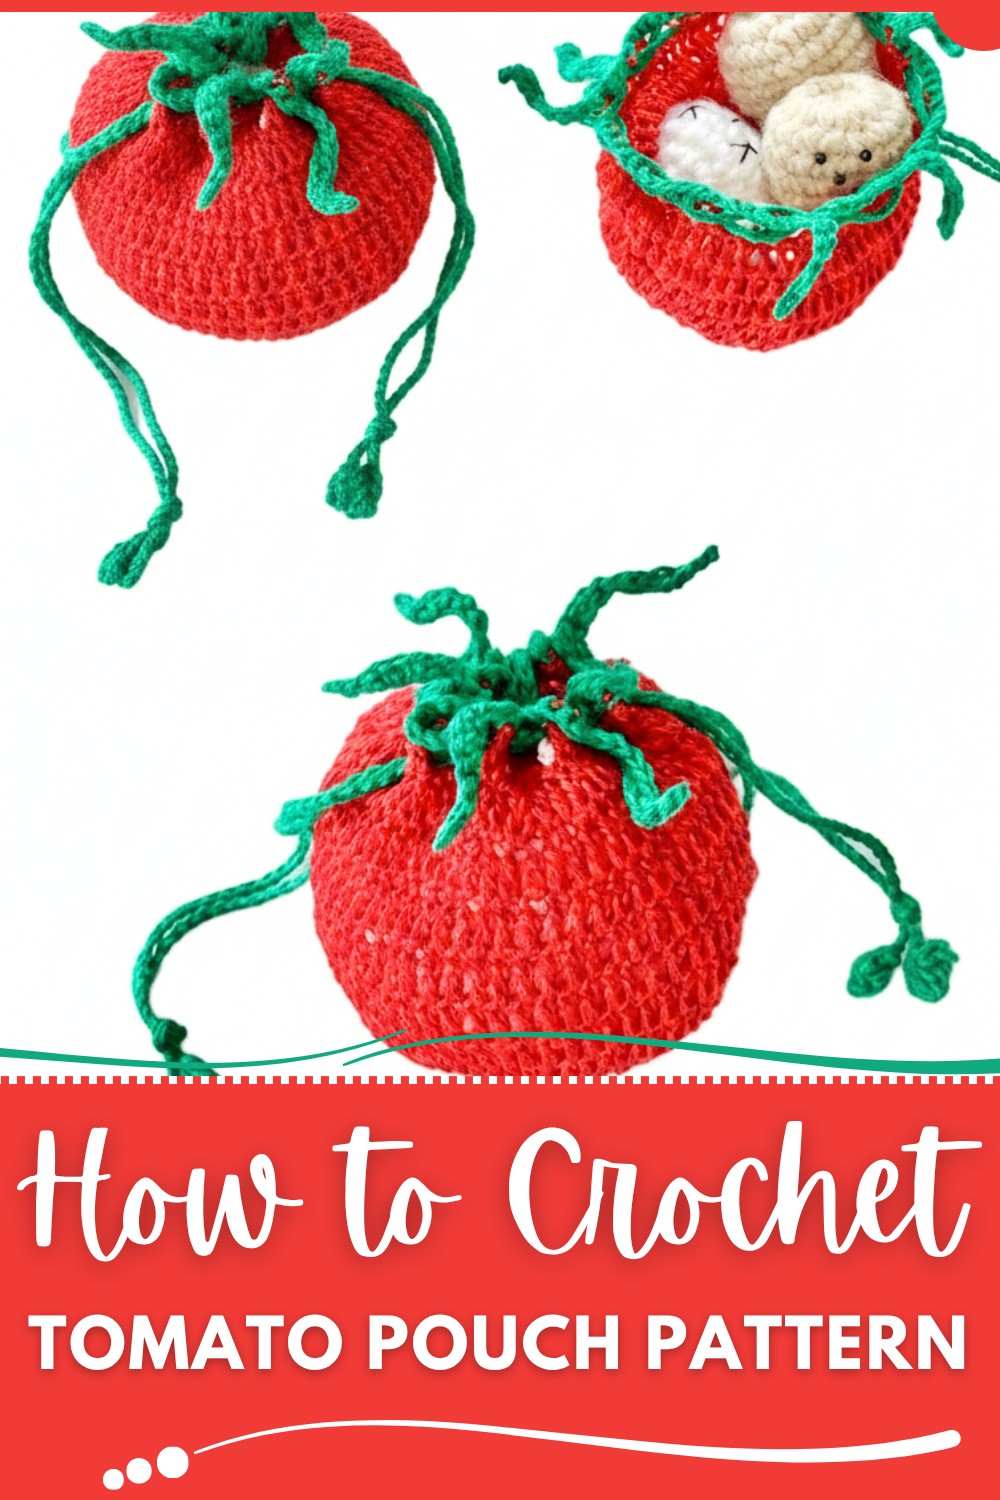
Brighten your day with this Free Crochet Tomato Pouch Pattern that's easy to follow fun to make and perfect for storing coins or small gifts.
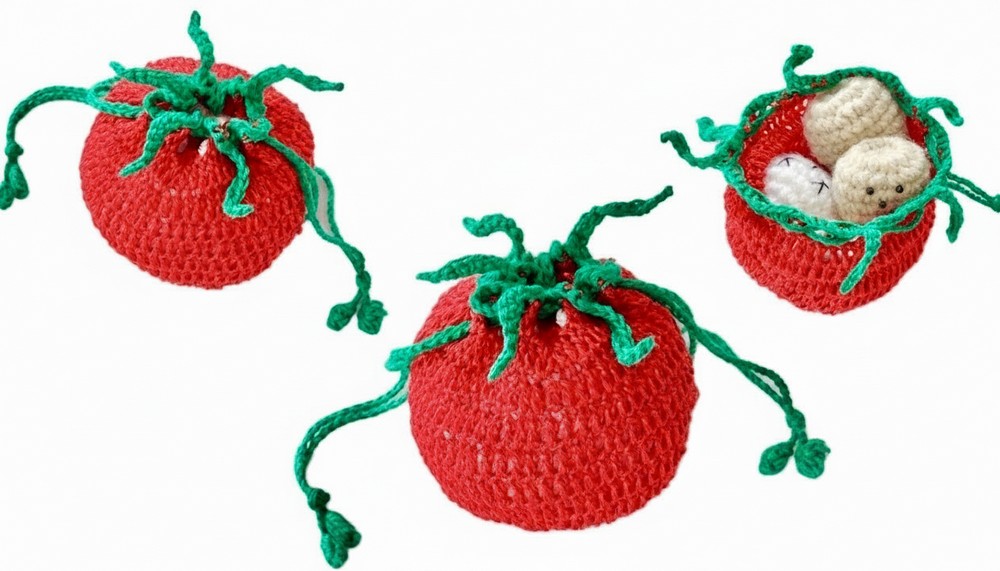
Red like ripe fruit and shaped as cute as can be this pouch looks like a tiny tomato in your hands. A little green top and bright round body bring smiles to everyone who sees it. Keeping coins safe or holding special treasures becomes more fun when you use a pouch that is cheerful and unique. Friends and family will notice the sweet look and ask where you found such an adorable holder. With the Crochet Tomato Pouch pattern you can add a playful detail to everyday life and give small gifts in a way that feels joyful.
Free Crochet Pattern: Tomato Themed Pouch for Kids
This pouch fits easily in your pocket bag or hangs with pride from a hook in your room. The stitches are simple and repeat in a way that is easy to learn making it perfect for anyone. Besides keeping things organized it adds a bright spot to daily routines and shares a warm creative touch with everyone who loves homemade treasures. This pouch is all about happiness and simple beauty.
Tomato Crochet Pouch Pattern
Materials Needed
- Yarn: Fingering or lace weight yarn in red (main color) and green (for leaves and strings)
- Hook Size: 2.0 mm – 2.5 mm (B or C, choose based on your tension)
- Needle: Yarn/tapestry needle for weaving in ends
- Scissors
- Optional: Stitch markers for row beginnings
Key Abbreviations
- ch – chain
- sl st – slip stitch
- sc – single crochet
- dc – double crochet
- st(s) – stitch(es)
- rep – repeat
- sp – space
- beg – beginning
Special Stitches:
- Bobble: [Yarn over, insert hook into st, yarn over, pull up a loop, yarn over, pull through 2 loops] 4 times in same st, yarn over, pull through all loops on hook.
- Leaf: Ch 10, sl st back into base st to form a leaf.
Special Notes
- The pouch is worked in rounds from the bottom up.
- Always join rounds with a sl st unless otherwise specified.
- Chains at the start of rounds count as a stitch unless stated.
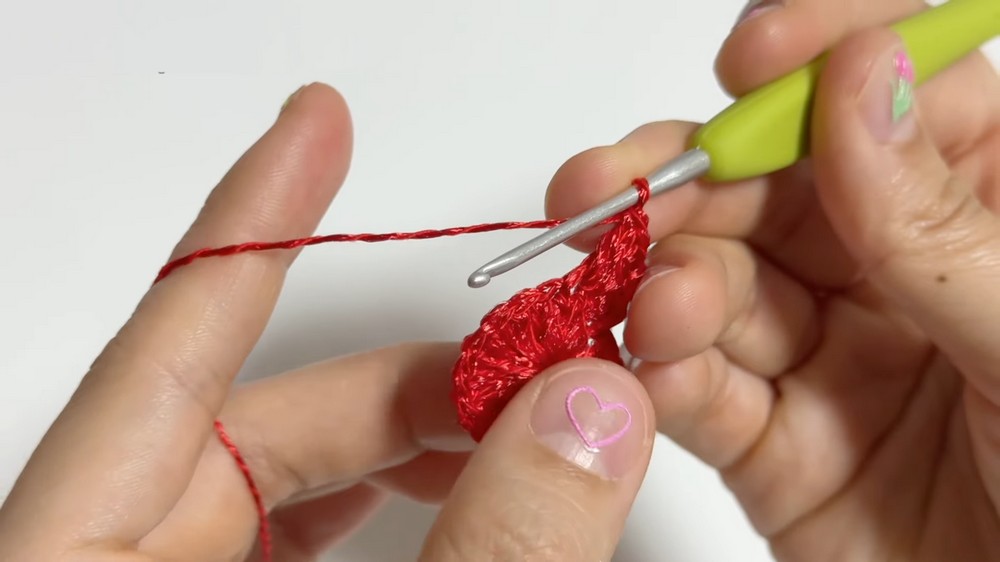
Pattern Instructions
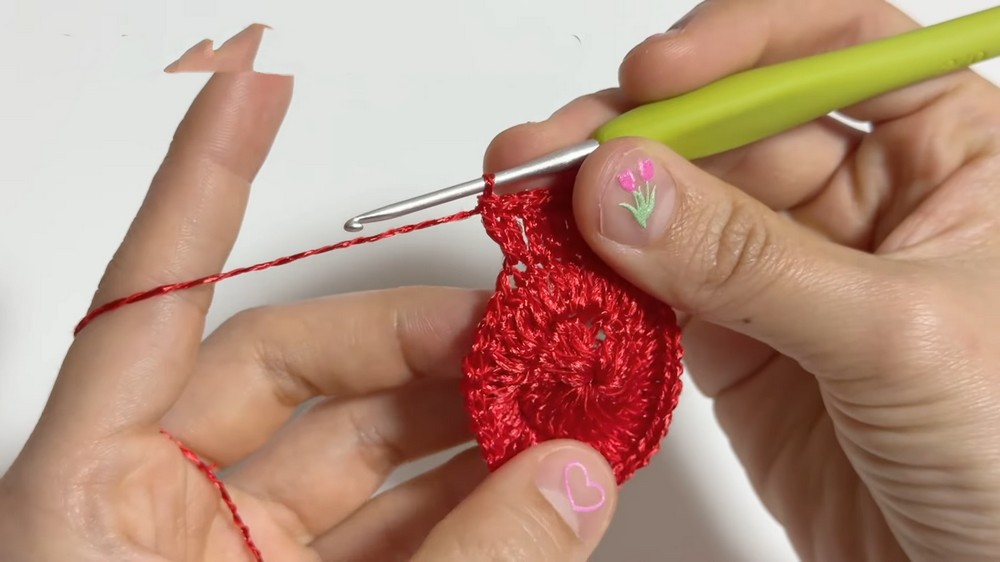
1. Bottom Circle Base
Round 1:
Ch 4, join with a sl st to form a ring.
- Ch 3 (counts as first dc), work 19 dc into the ring (20 dc total including the ch-3).
- Join with sl st to top of ch-3.
Round 2:
Ch 3 (counts as dc), dc into same st.
- 2 dc in each st around (40 dc).
- Join with sl st to top of ch-3.
Round 3:
Ch 3, dc in same st.
- Dc in next st, 2 dc in next st—rep from * to * around (60 dc total).
- Join with sl st.
Rounds 4–8:
Ch 3, dc in each st around.
- (60 dc per round).
- Join with sl st.
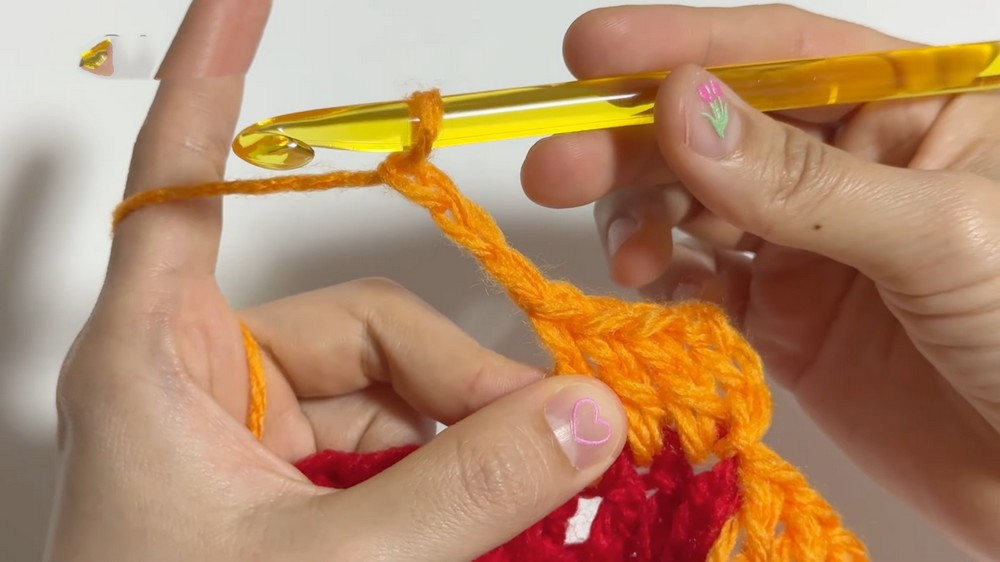
2. Creating Drawstring Eyelets
Round 9:
Ch 3, dc in next 2 sts, ch 3, skip 3 sts, rep from * to * around (will create 10 ch-3 sps), ending with a ch 3, join with sl st to top of first dc.
3. Pouch Upper Edge & Decorative Leaves
Round 10:
Ch 1, sc in next 3 dc, sc into chain space (not into chains but into the space itself), ch 10 for leaf, sl st into 2nd ch from hook and in each ch back to base (forming a leaf), sl st into same chain space, sc in next 7 sts, rep around to create 5 leaves evenly spaced.
(Each set of 10 ch after the sc in ch-3 sp is a leaf.)
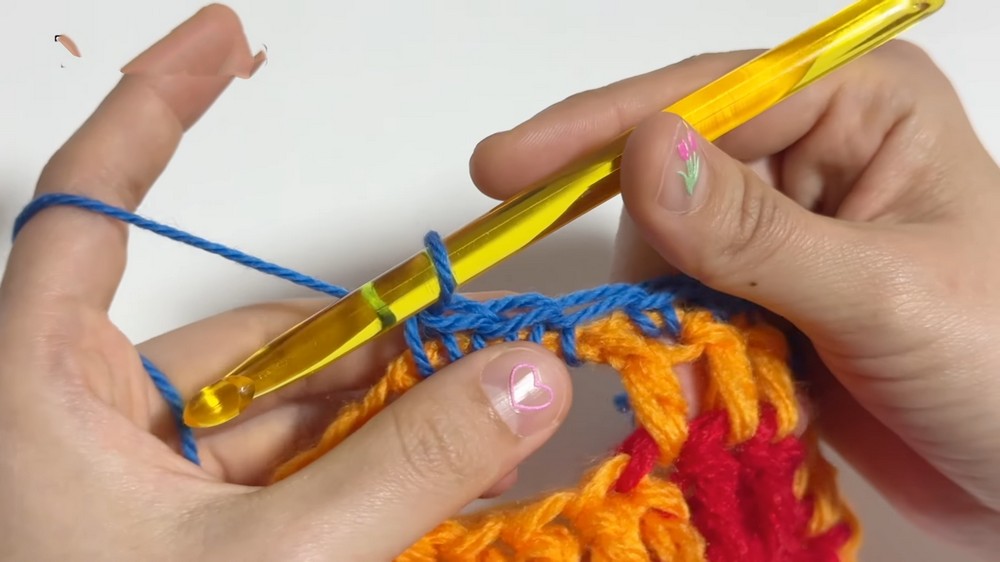
- When not making a leaf, just sc in every st and ch sp around.
After round ends, join with sl st. Fasten off red yarn.
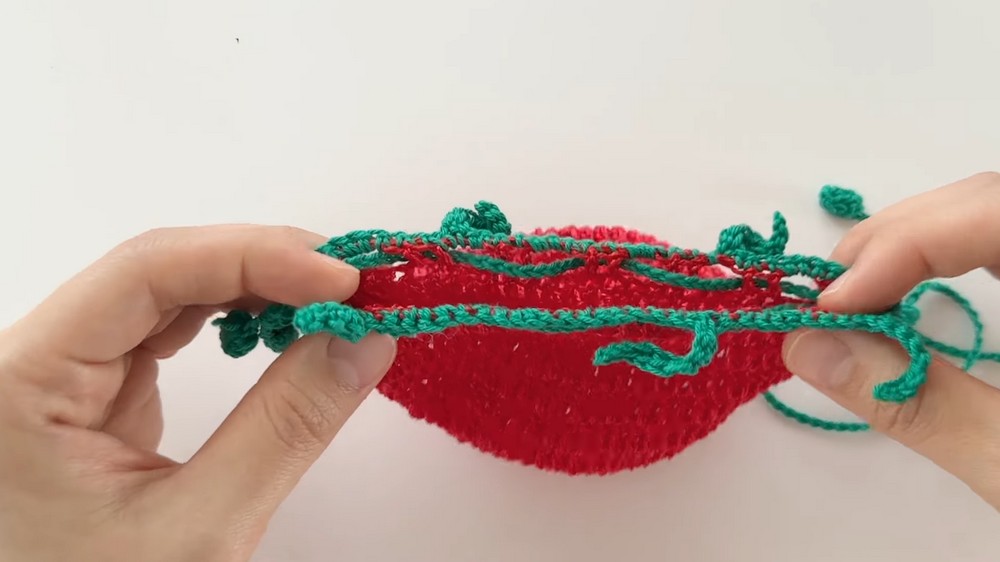
4. Optional Green Leaf Embellishments (If desired)
- Attach green yarn to any ch-3 sp from eyelet round.
- Ch 10, sl st back down (making a thin leaf).
- Rep in every alternate ch-3 sp or as desired.
5. Drawstring Cord (Make 2)
- With green yarn, ch 100 (or length preferred for pouch closing).
- Optionally, add a small bobble at each end for a ‘tomato’ look:
- Ch 3, work 4 dc bobble in first ch, ch 1, fasten off.
6. Threading the Drawstring
- Weave one cord in and out of the ch-3 spaces around Round 9, entering at one hole, skipping three sts, out the next hole, repeat.
- Weave the second cord starting on the opposite side, so both ends can be pulled to cinch the pouch.
7. Closing & Finishing
- At each cord's crossing point, tie a secure knot.
- Weave in any remaining yarn ends with a tapestry needle.
- Trim excess.
Conclusion
You have now created a charming Tomato Crochet Pouch, complete with a cinchable leaf-topped opening—ideal for small gifts, storing trinkets, or as a playful accessory.
Pattern Correction & Tips
Correction
- If you prefer a more rounded base, increase rounds steadily (dc in next 2 sts, 2 dc in next st; then next round dc in 3, 2 dc in next, etc.) until desired diameter.
- Check stitch count at the end of each round—incorrect totals may cause rippling or puckering.
Tips
- Use a stitch marker to keep track of round beginnings.
- If using thicker yarn, use an appropriately larger hook and adjust starting chains if necessary.
- For leaves, keep chain tight; loose chains make floppy leaves.
- The drawstring can also be made by braiding 3 strands for a thicker tie.
- To stiffen leaves, lightly spray with water and shape, or use a tiny bit of diluted white glue.