
Adding a playful, handmade touch to your accessories collection with something irresistibly fun. This charming crochet headband with a frog design is perfect for themed parties, adorable photo props, or simply to brighten up your day. Its cute, quirky style makes it great for kids and adults alike, offering both comfort and personality.
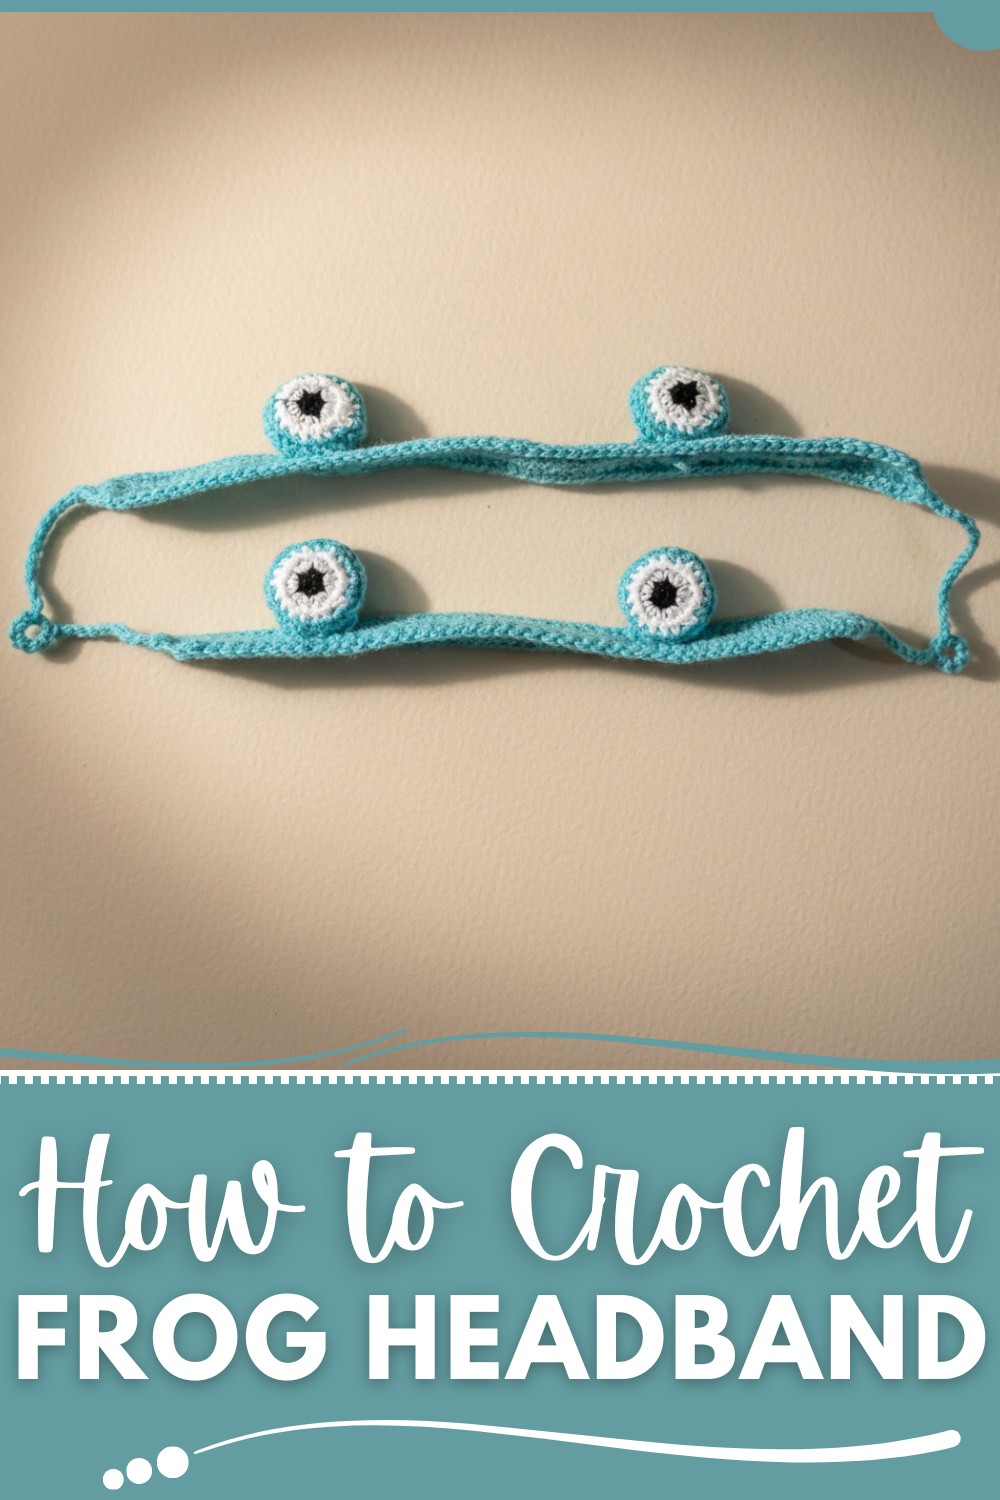
Made with soft yarn and simple stitches, this project is beginner-friendly yet creates an accessory that stands out. You can style this headband with casual outfits or gift it to someone who loves unique handmade items. Lightweight, practical, and easy to create, it’s a quick project that brings joy, creativity, and plenty of smiles to anyone who wears it.
Fast & Fun Crochet Frog Headband You’ll Adore
Materials Needed
- Yarn:
- 4-ply yarn (white, Cadet Blue, and any contrasting colors for the design).
- Crochet Hook: 3.5mm crochet hook.
- Scissors: For cutting yarn.
- Other Supplies: Stitch markers (optional).
Crochet Eyeball Headband Pattern
The following pattern covers the creation of an eyeball motif and a headband. This playful design is both engaging and easy to create, a great project for accessories, costumes, or decorations.
Below are step-by-step instructions based on the transcription, with customization options and helpful tips.
Pattern Details
Eyeball
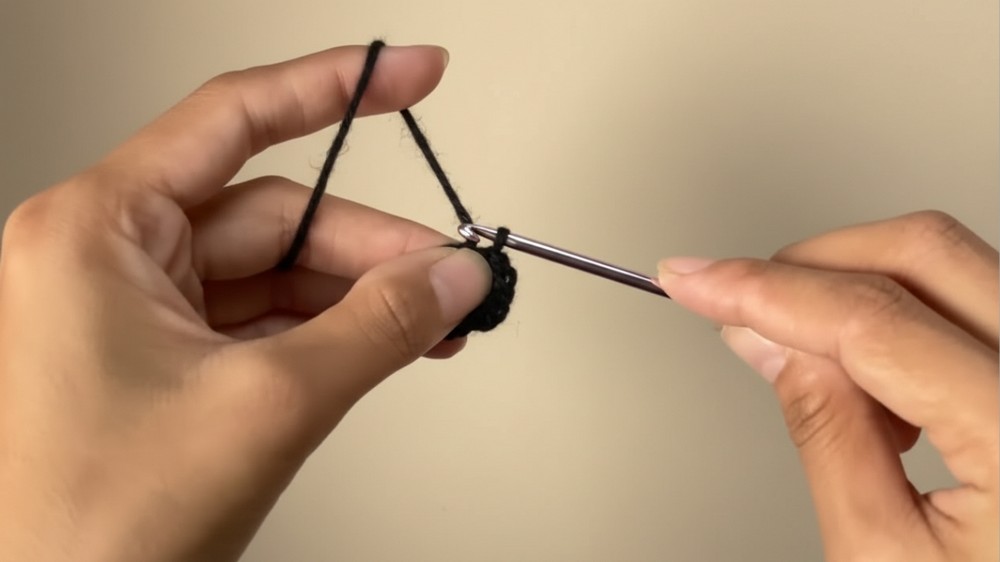
Step 1: Magic Ring with White Yarn
- Create a magic ring:
- Wrap yarn around fingers to form two parallel loops.
- Insert hook under the first loop, pull the second loop through, and complete with a chain stitch.
- Work 6 single crochets into the magic ring.
- Tighten the ring gently by pulling its tail. Slip stitch into the first single crochet to close this round.
Step 2: Expanding the Foundation
- Attach white yarn (or continue if using the same color). Chain 1.
- Work 2 single crochets into each stitch around:
- This creates an increase in every stitch.
- You should have 12 stitches at the end of this round.
- Slip stitch into the first single crochet and chain 1.
Step 3: Expanding Further
- In this round, alternate 1 single crochet in the first stitch and 2 single crochets in the next stitch.
- Repeat this pattern around, working increases in every other stitch.
- You should end up with 18 stitches by the completion of this round.
- Slip stitch into the first single crochet and chain 1.
Step 4: Adding Green Yarn
- Attach green yarn and chain 1.
- Alternate 1 single crochet into the first two stitches and 2 single crochets into the third stitch:
- Repeat this pattern for the round.
- You should end up with 24 stitches.
- Slip stitch into the first single crochet and chain 1.
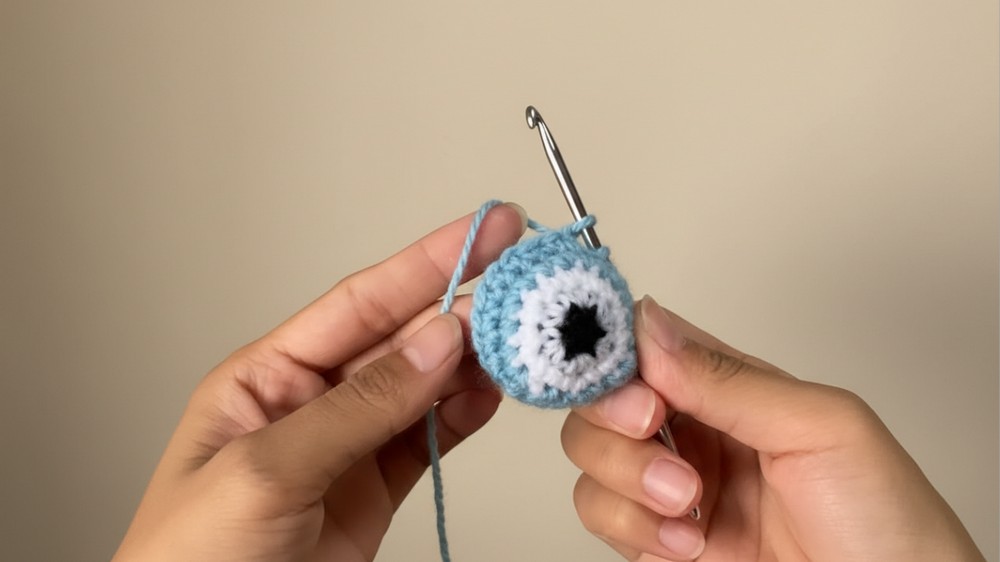
Step 5: Regular Single Crochet Round
- Work 1 single crochet in each stitch around (no increases). This stabilizes the eyeball’s shape.
- Continue until you have completed all 24 stitches.
- Slip stitch into the first single crochet and chain 1.
Step 6: Decreasing
- Begin decreasing:
- Work 2 single crochets into the first two stitches, followed by a decrease. To decrease:
- Insert hook into the front loop of the next stitch and into the front loop of the following stitch.
- Yarn over and pull through both loops.
- Work 2 single crochets into the first two stitches, followed by a decrease. To decrease:
- Continue this decrease pattern after every two single crochets.
- You should end this round with 18 stitches.
- Slip stitch into the first single crochet, chain 1, and fasten off.
Pattern Details: Headband
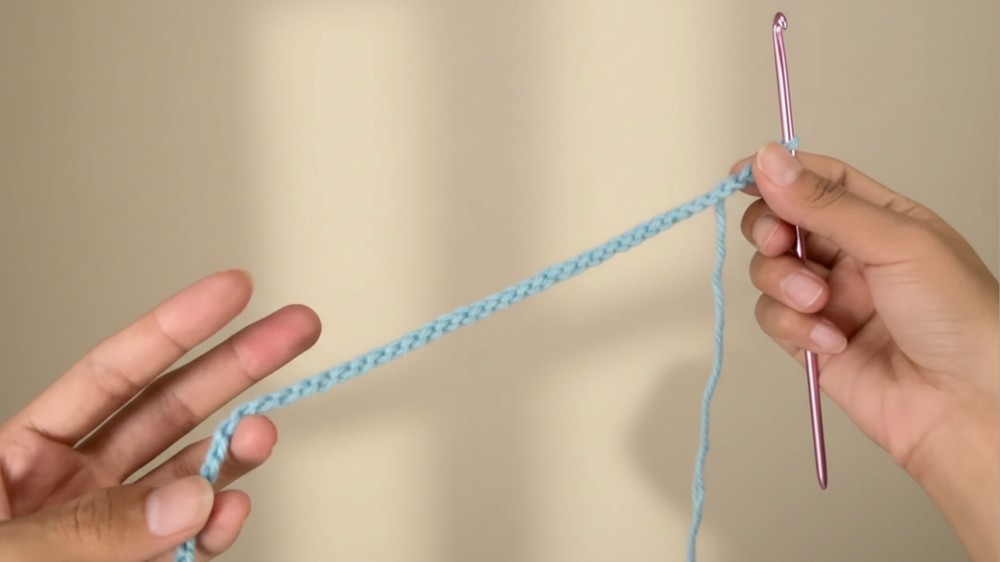
Step 1: Create the Foundation Chain
- Chain the desired length for your headband; adjust based on head size or intended fit.
Step 2: First Row of Half Double Crochet
- Start working half double crochet into the third chain from the hook and across.
- Half Double Crochet:
- Yarn over, insert hook, pull loop through (3 loops on the hook).
- Yarn over again, pulling through all 3 loops.
- Half Double Crochet:
- Complete this row and chain 2, turning your work.
Step 3: Build Rows with Half Double Crochet
- Continue working half double crochet rows, always chaining 2 and turning your work at the end of each row.
- Build up the rows until the fabric reaches the desired thickness (4 rows or more).
Step 4: End Straps
- Attach yarn to one side of the headband using a slip knot.
- Chain 1 and work 1 single crochet into each row (you should have 4 single crochets, one for each previously completed row).
Step 5: Decreasing Straps
- Turn your work and chain 1.
- Work decreases across the stitches:
- Make 1 decrease (as explained earlier).
- Repeat until only 2 stitches remain.
- Turn your work again, chain 1, and work 1 decrease to form a single point.
- Continue to build the strap’s length based on your preference.
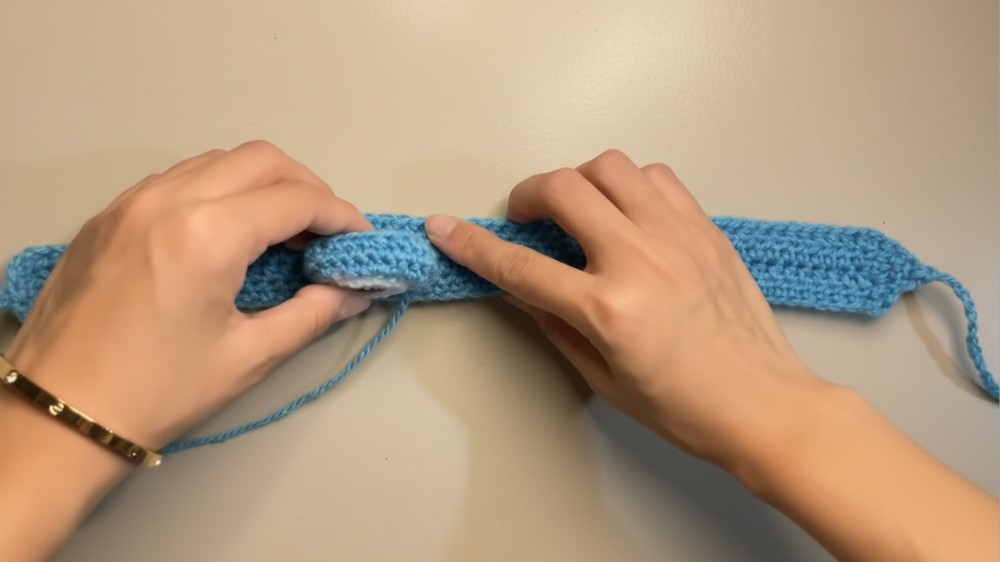
Assembly Ideas
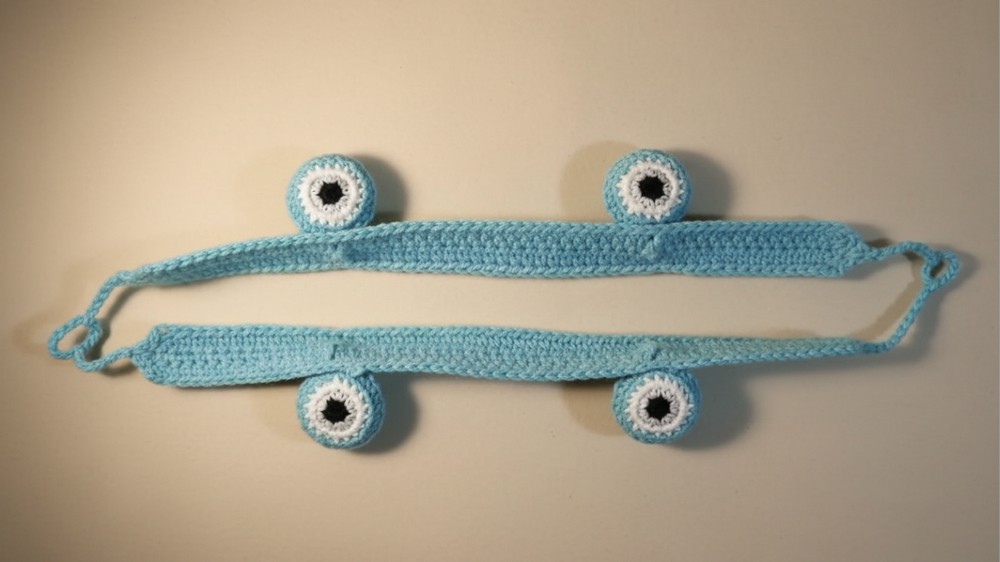
- Eyeball Placement: Sew or glue the eyeball motif onto the center of the headband for a fun Halloween vibe.
- Alternative Uses: Use the eyeballs as appliques for bags, scarves, blankets, or costumes.
Customization and Variations
Color Variations:
- Experiment with different colors for the iris (green, blue, brown, or even red for unique designs).
- Create multiple eyeballs in contrasting colors and attach them to the headband for quirky designs.
Size Adjustments:
- To make smaller or larger eyeballs, vary the number of stitches in the magic ring and adjust increases accordingly.
- For wider headbands, increase the number of foundation chains.
Embellishments:
- Add embroidery to simulate veins on the eyeball for Halloween decor.
- Use sparkly yarns for a whimsical appearance.
Tips for Success
- Consistent Tension: Maintain even stitches for a neat and polished finish.
- Secure Attachments: If sewing components, ensure stitches are tight, especially for wearable projects.
- Customize Fit: Measure head size accurately before completing the headband to ensure comfort.
Conclusion
This eyeball and headband crochet design is ideal for playful projects, themed outfits, or decorative elements. Its customizable features allow for endless creativity. Whether you're crocheting spooky Halloween accessories or fun everyday wear, this pattern is sure to bring personality to your work.


