
Gift a doll something truly special with detailed and charming accessories. A crochet doll shoes pattern allows you to personalize every tiny detail, making them perfect for matching with doll dresses, casual outfits, or stylish ensembles. This miniature shoes is not just adorable, It serve a purpose by elevating doll play to a whole new level.
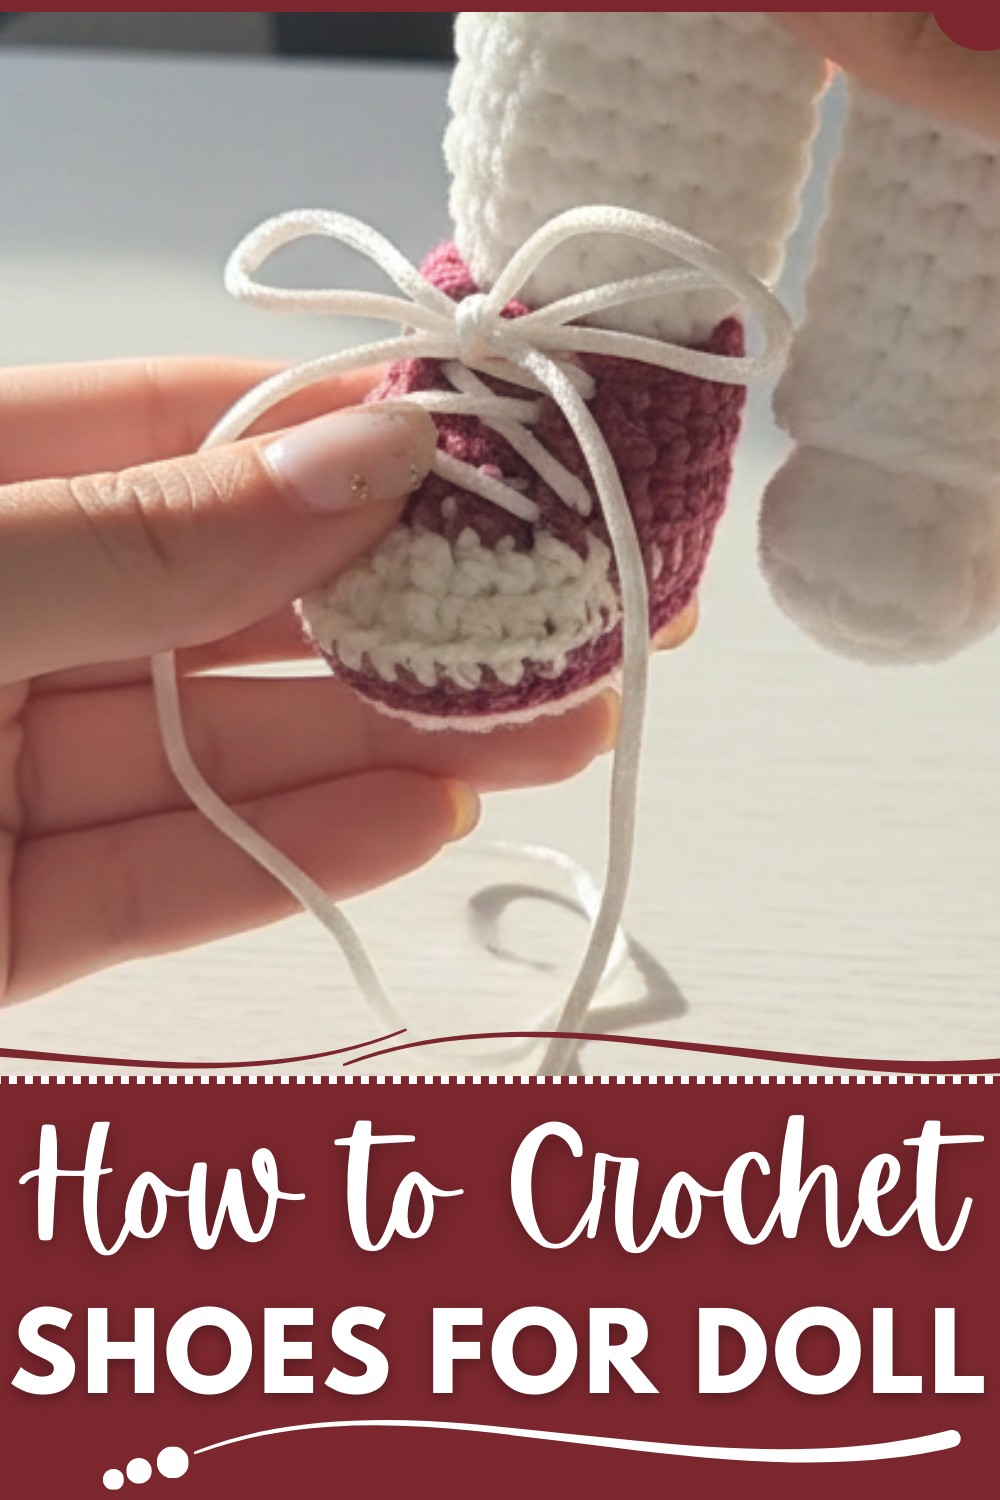
Perfect for collectors or children, it bring character and uniqueness to any doll wardrobe. From soft pastels to bold colors, the endless customization options make each pair distinctive. Thoughtful and practical, this is a fun way to enhance styling opportunities while adding a personal, handmade touch to a doll’s look. Perfect for gifting, or just completing a doll’s ensemble with charm.
Perfect Crochet Doll Shoes Pattern for a Stylish Look
Materials
- Yarn:
- Main Body Color: Lightweight yarn for the exterior (e.g., Wine Red).
- Sole Color: Contrasting lightweight yarn for the sole (e.g., white).
- Hook Size: D3 (3.25mm).
- Cord or Ribbon: For laces (optional: use yarn to crochet laces).
- Notions:
- Tapestry needle (for weaving edges).
- Stitch markers.
- Scissors.
Crochet Shoe Pattern for Doll
This comprehensive pattern outlines how to crochet a knitted-style shoe for a doll, focusing on aesthetics. The design intentionally fits slightly larger than the doll’s feet for stylistic purposes. The pattern below is formatted step-by-step with detailed instructions, abbreviations, and notes to ensure a clear and straightforward crocheting experience.
Finished Size
- Shoe dimensions: Approximately 4 ½ cm long x 3 ½ cm wide (adjustable based on yarn tension).
- Intended to fit SK suit dolls with smaller feet.
Special Notes
- Magic Ring: The shoe begins with a magic ring to create a neat center for the sole.
- Sole Construction: Worked in continuous rounds with no joining to maintain a seamless oval shape.
- Rim: The rim is constructed using BLO stitches to distinguish the sole from the main fabric of the shoe.
- Assembly: Pay attention to symmetry while joining stitches for lace holes or the upper fabric.
Pattern Instructions
Part 1: Sole
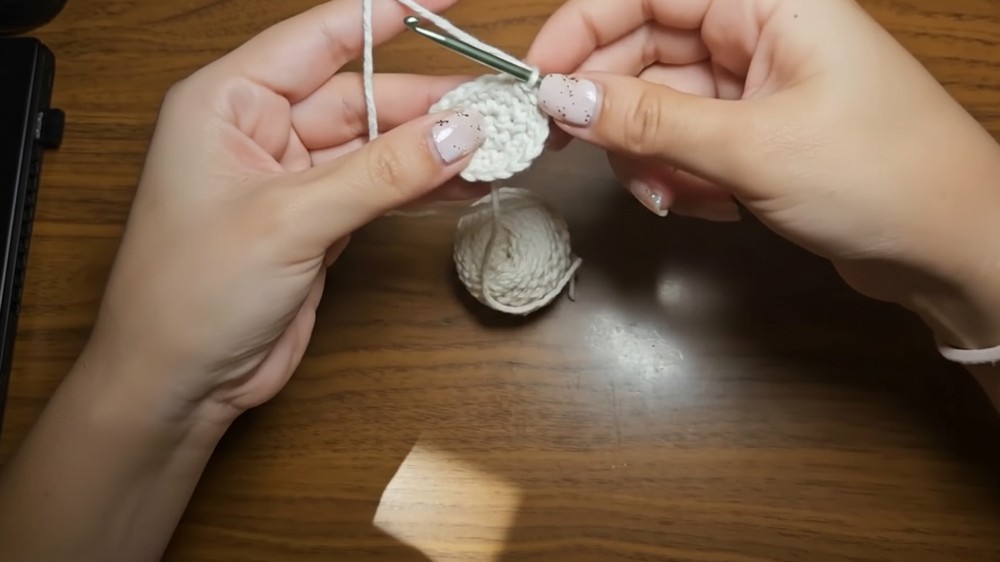
Step 1: Starting the Magic Ring
- Create a magic ring.
- Inside the ring, work 6 sc. Pull the tail to close the ring tightly.
Step 2: Row 1 – Build the Oval
- Work as follows:
- 1 sc in the next stitch.
- 2 sc in the following stitch.
- 3 sc in the next stitch.
- Repeat this 1 sc → 2 sc → 3 sc until you complete the round.
- You should now have an oval base.
Step 3: Row 2 – Expanding the Oval
- Work the sequence:
- 1 sc.
- 1 sc + 1 inc (increase).
- 1 sc.
- Repeat the increase pattern around the oval.
- Increases should form at 3 points along each side of the oval for symmetry.
Step 4: Row 3 – Final Expansion
- Work as follows:
- 1 sc in each stitch until you reach an increase stitch from Row 2.
- Make an increase in every stitch where you increased in the previous row.
- Continue around the oval until you complete the row.
Step 5: Row 4 – Oval Completion
- Create increases as necessary to finalize the sole dimensions:
- Work additional decreases when the sides begin to curve upward for shaping.
- The finished dimensions of the sole should measure approximately 4 ½ cm x 3 ½ cm.
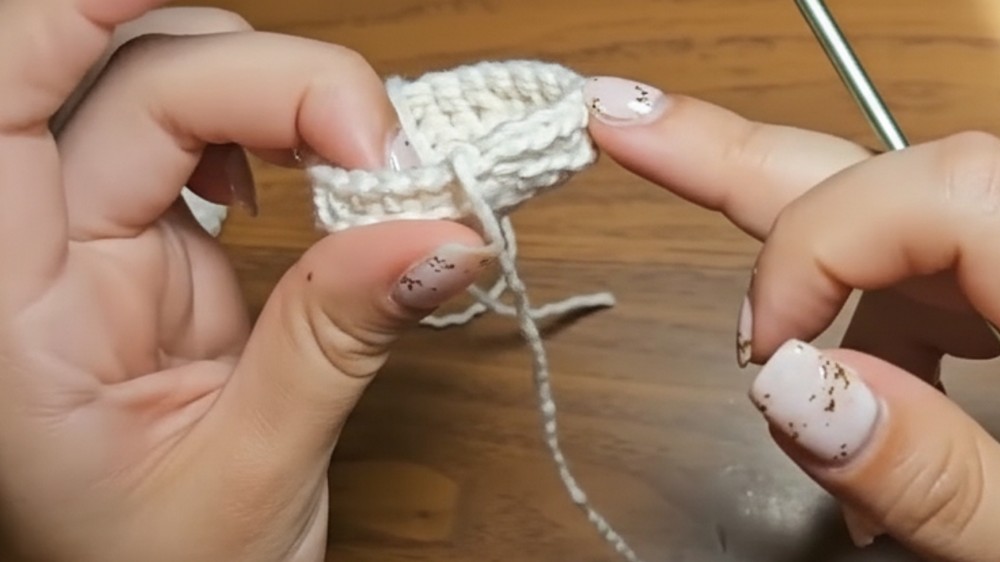
Part 2: Rim
Step 1: Defining the Rim
- Attach main color yarn to the first stitch of the oval sole.
- Chain 1 and begin working sc BLO (Back Loop Only) around the sole.
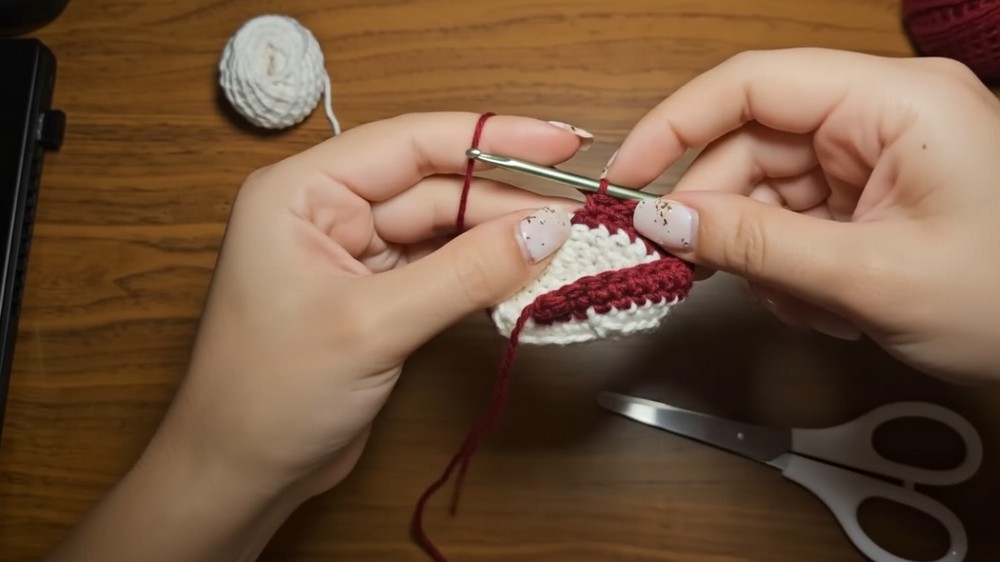
Step 2: Structural Shaping
- To make the sides curve upward:
- Work decreases in every 3rd stitch along the curved edges (front and back of oval).
- Maintain symmetry across both sides of the oval.
- Continue working sc BLO across the remaining side stitches without decreasing.
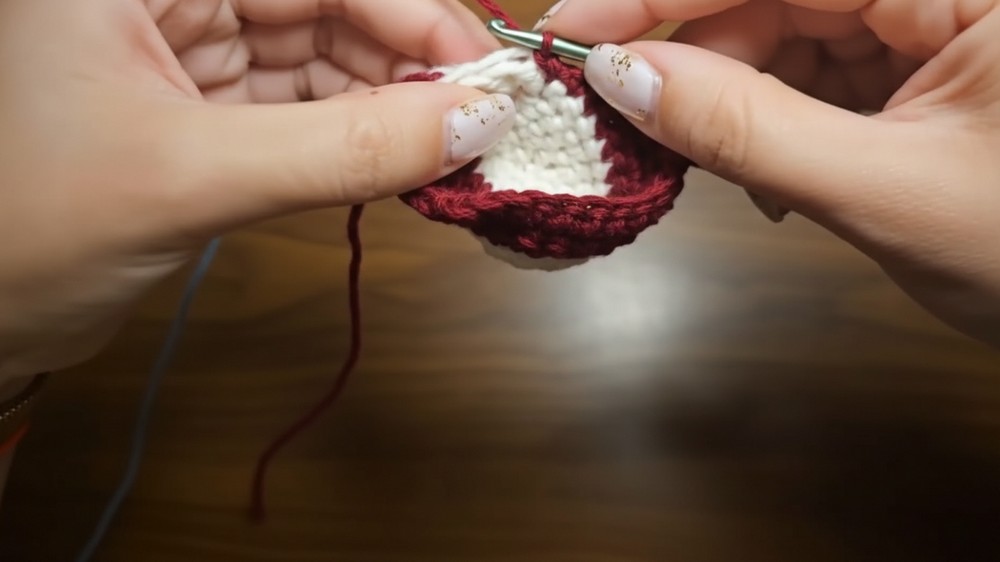
Step 3: Finishing the Rim
- Sl st into the first sc BLO to close the round.
- Fasten off and cut the yarn, leaving a tail for weaving in.
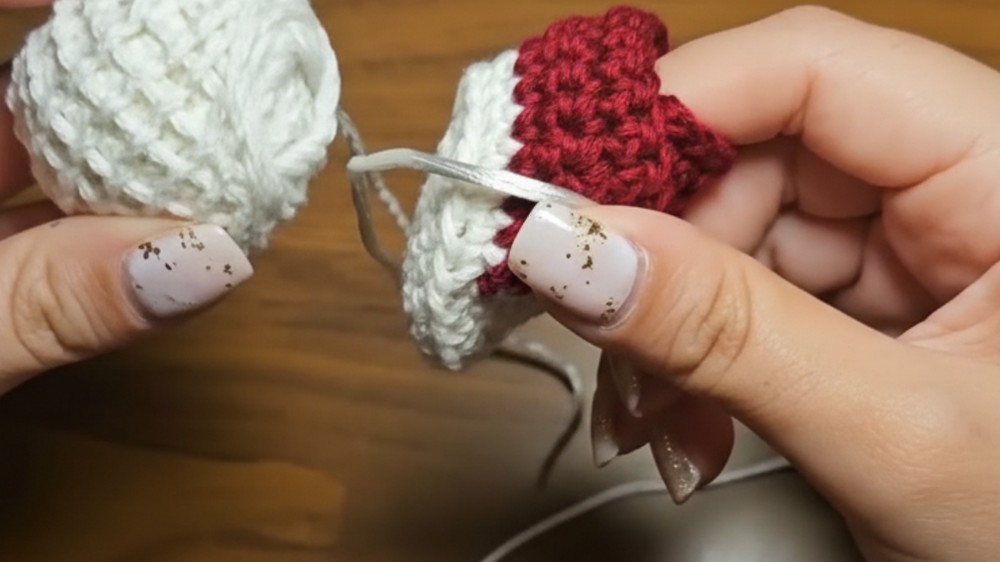
Part 3: Upper Fabric
Step 1: Attaching Yarn
- Attach the upper body color (blue) yarn to the front center of the rim (5 stitches from the center on each side).
- Place stitch markers for symmetry.
Step 2: Rows for Upper Fabric
- Row 1 (Base): Sc across the marked stitches to outline the front panel.
- Row 2–4:
- Work standard sc rows, turning at the end of each row.
- Introduce decreases in Row 3 to make the panel taper upward.
- Continue until the panel reaches the desired height when folded over.
Part 4: Toe Cap
Step 1: Attach Toe Cap Yarn
- Using the sole color (white), attach yarn to the front center.
- Work the following across the new row:
- Sc, sc, hdc (dec), hdc (dec), sc, sc.
Step 2: Closing the Toe Cap
- Sl st to the adjacent stitch on the rim to close the white toe cap.
- Cut the white yarn and weave in the end.
Part 5: Lace Holes
- Attach the main body yarn color (blue) to the edge of the upper fabric near the rim.
- Work sc rows upward, introducing small stitch gaps for laces on both sides.
- Ensure symmetry between the left and right panels.
Part 6: Laces
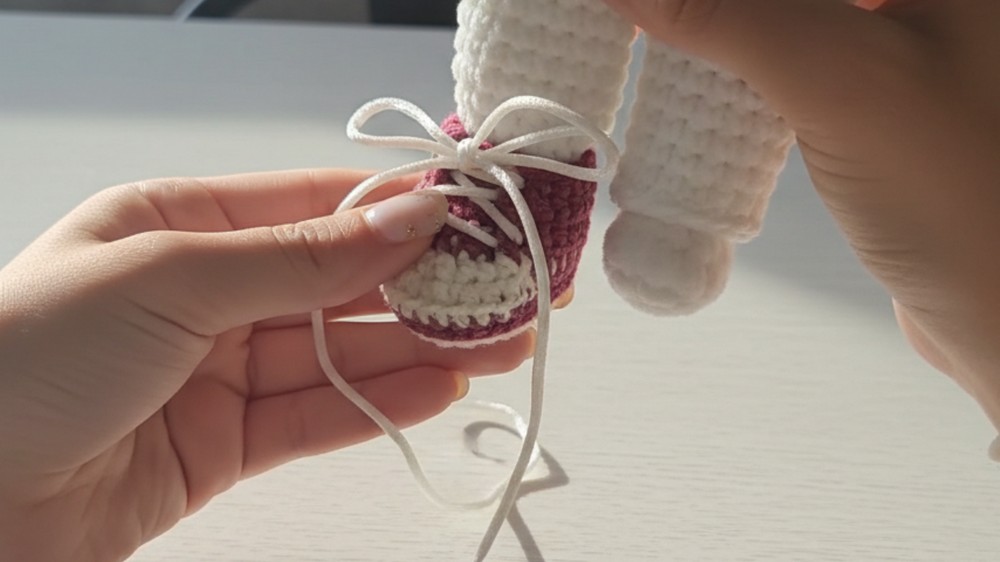
- Use ribbon or crochet a chain using the sole color (white) approximately 20 cm long.
- Thread through the holes, criss-crossing evenly. Fasten tightly at the top.
Conclusion
Congratulations! Your doll shoe is now complete. It provides a stylish look with a snug fit for your SK suit doll. The combination of the rim, upper fabric, and laces creates a polished and functional design specifically tailored for dolls.
Pattern Correction
- Toe Cap Alignment: Ensure the toe panel is attached at the center of the rim, otherwise, the fabric will not fold symmetrically.
- Rim Decreases: If the sole curves unevenly, adjust decrease placements to provide a balanced shape.
Tips
- Customization: Use different yarn shades to match your doll’s outfit. For example, pastel colors provide a softer aesthetic.
- Reinforcement: Overlay the sole with stiff material (e.g., felt or foam) for added durability.
- Finishing Touch: Seal the ribbon edges with fabric glue or burn them lightly to prevent fraying.


