Cozy vibes meet autumn charm with this Crochet Pumpkin Pillow pattern, perfect for adding warmth and cheer to any space.
Autumn has long inspired warmth, comfort, and a touch of whimsy in homes, and few decorations capture this spirit like a pumpkin. A crochet pumpkin pillow brings that seasonal charm into everyday life, combining softness, texture, and visual appeal in a versatile home accessory. Its rounded shape and vibrant hues add a cozy accent to sofas, beds, or reading nooks, instantly infusing spaces with personality and seasonal cheer.
Enchanting Crochet Pumpkin Pillow for Seasonal Bliss
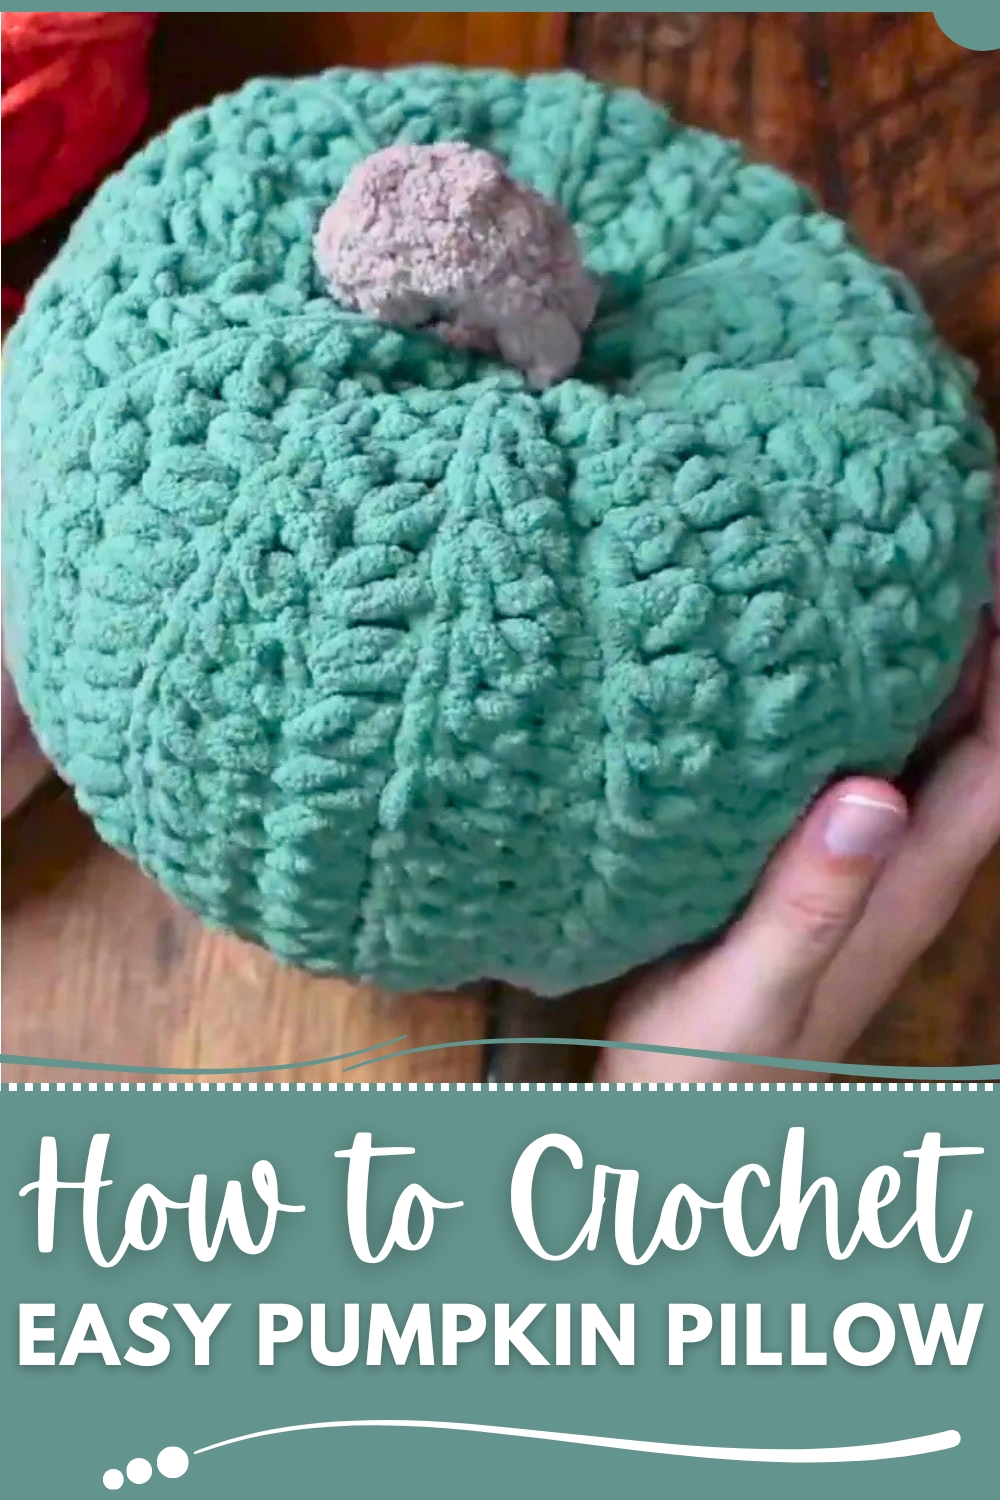
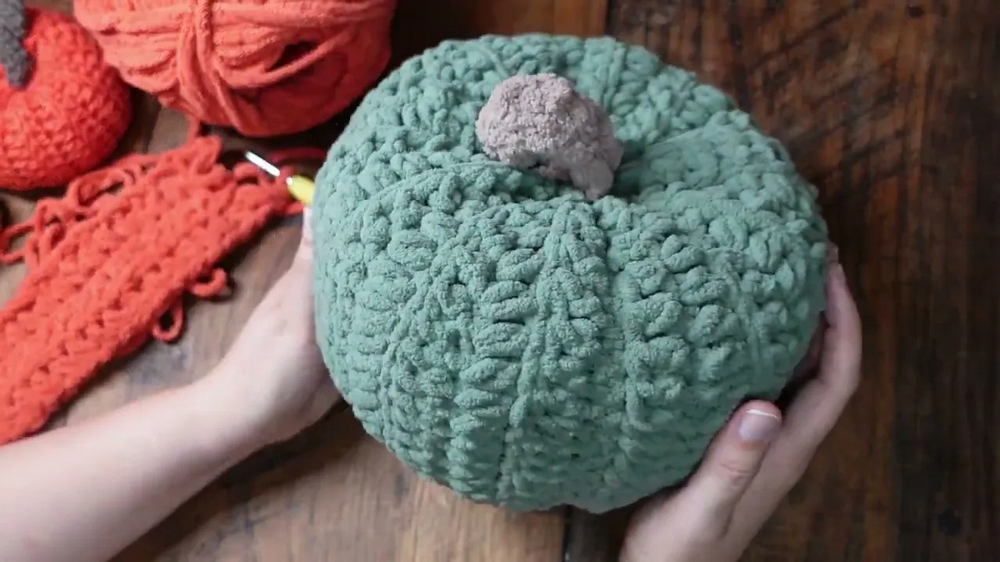
The pillow begins with a firm, evenly stitched base that ensures durability while maintaining a soft, inviting feel. Gradual shaping rounds create the characteristic plump pumpkin form, while subtle ridges or stitched details mimic natural contours, adding dimension and interest. A small stem or leaf accent can be added for extra realism, giving each piece a distinctive character. Lightweight yarn allows for easy handling, and the cushion’s size can be adapted to suit decorative or functional purposes.
Beyond its aesthetic appeal, the crochet pumpkin pillow provides comfort and practical use, supporting relaxation while also protecting furniture surfaces. It serves as a thoughtful seasonal gift or an enduring decorative element that can be swapped with the seasons. Combining tactile charm, visual warmth, and functionality, this pillow transforms a simple cushion into a delightful symbol of cozy living and festive elegance.
Materials Required
To make the chunky pumpkin pillow, the following materials are used:
- Yarn: Bernat Baby Blanket from Yarnspirations in the color "Orange Leaf" for the pumpkin body and "Mushroom" for the stem.
- Type: Super chunky size 6 yarn.
- Crochet Hook: An 8mm crochet hook.
- Darning Needle: A needle with a thick eye hole to handle chunky yarn.
- Stuffing: Polyfill or any stuffing material such as an old pillow’s filling, paper towels, or tissue paper.
- Scissors: For trimming excess yarn.
Special Features
- Oversized Design: This chunky pumpkin pillow is perfect for fall decor or as a cozy addition to your couch.
- Beginner-Friendly: The pattern is designed for absolute beginners, making it easy to follow with clear explanations.
- Soft and Fluffy Texture: The use of super chunky yarn adds extra fluff and warmth to the end product.
- Decorative and Functional: It is both a decorative piece and a functional pillow, making it versatile for home use.
- Customizable: The size and color can be adjusted to suit different preferences.
Step-by-Step Instructions
Step 1: Create the Base Chain
- Start with a slip knot:
- Hold the tail of the yarn in your dominant hand and make a loop with your non-dominant hand.
- Pull the longer side of the yarn through the loop to form a slip knot.
- Insert your crochet hook into the slip knot and tighten it slightly.
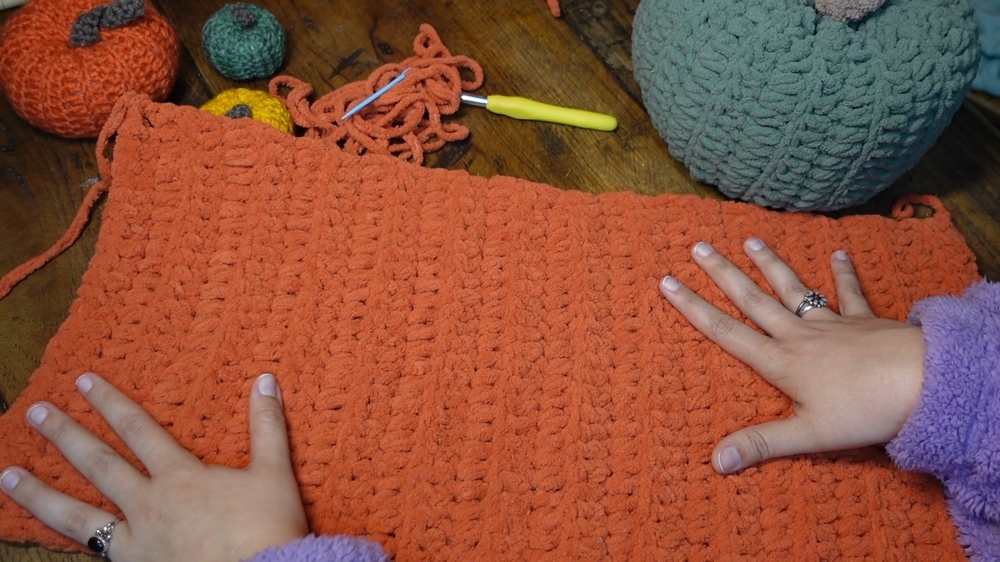
- Chain 25:
- Yarn over and pull through the loop on the hook; repeat 25 times to create the base chain.
- Tip: Keep these chains loose, as you will need to work back into them later.
2: Start Half Double Crochet (HDC)
- Hold the base chain flat, ensuring you can see the "V" shape of the stitches.
- Yarn over, skip the first chain, and insert your hook into the back loop of the second chain.
- Yarn over, pull through the loop, leaving three loops on your hook.
- Yarn over again and pull through all three loops to complete the stitch.
- Continue the half double crochet (HDC) method until the end of the row.
3: Chain and Turn the Project
- At the end of the row, chain 2 to avoid the common mistake of losing stitches and creating a triangle shape.
- Flip the project to start the next row.
4: Add Texture with Back Loop Crochets
- For the second and subsequent rows, work into the back loop only of each stitch:
- Yarn over, go into the back loop of the "V," yarn over and pull through the stitch, leaving three loops on the hook.
- Yarn over again and pull through all three loops.
- Continue this process for every row. Working into the back loops creates ridges, giving the pumpkin its bumpy and textured look.
5: Repeat Rows
- Continue crocheting rows with back loop half double crochets until you have 13 ridges on both sides of your project.
- At the end of each row, chain 2 and turn the project to maintain an even shape.
6: Sew the Pumpkin Together
- Once the project is the correct size:
- Cut a long tail of yarn to use for sewing after finishing the final row.
- Fold the project in half with the right side (the pumpkin’s exterior) facing inward.
- Use your darning needle to sew the open side closed with a whip stitch.
- On one end, weave the needle in and out along the top edge, pull tightly to cinch it closed, and secure it with a knot.
- Flip the project inside out so that the seams are on the inside.
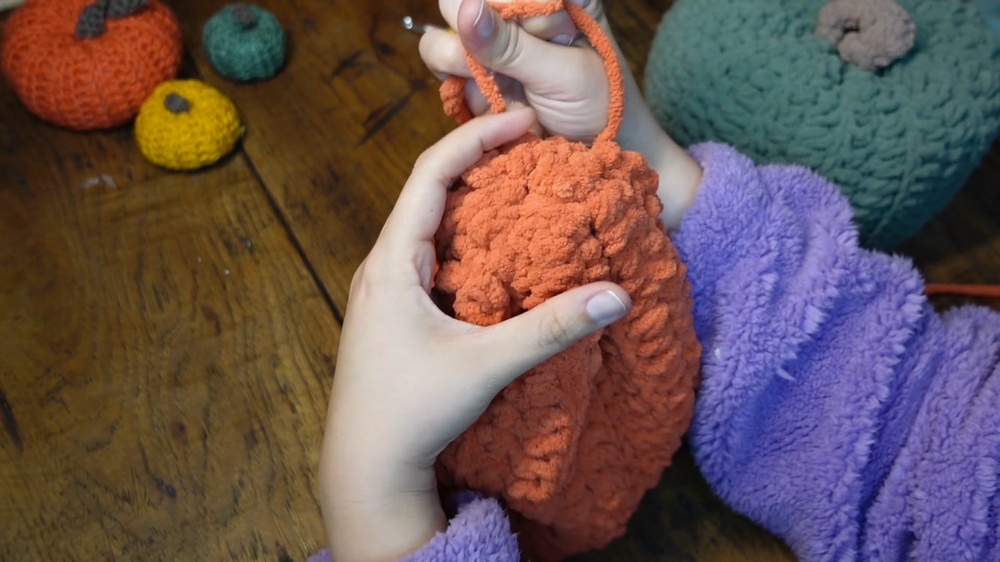
7: Stuff the Pumpkin
- Fill the pumpkin with polyfill (or any other stuffing material).
- Add enough stuffing to make it plump and fluffy, adjusting as needed to achieve your desired shape.
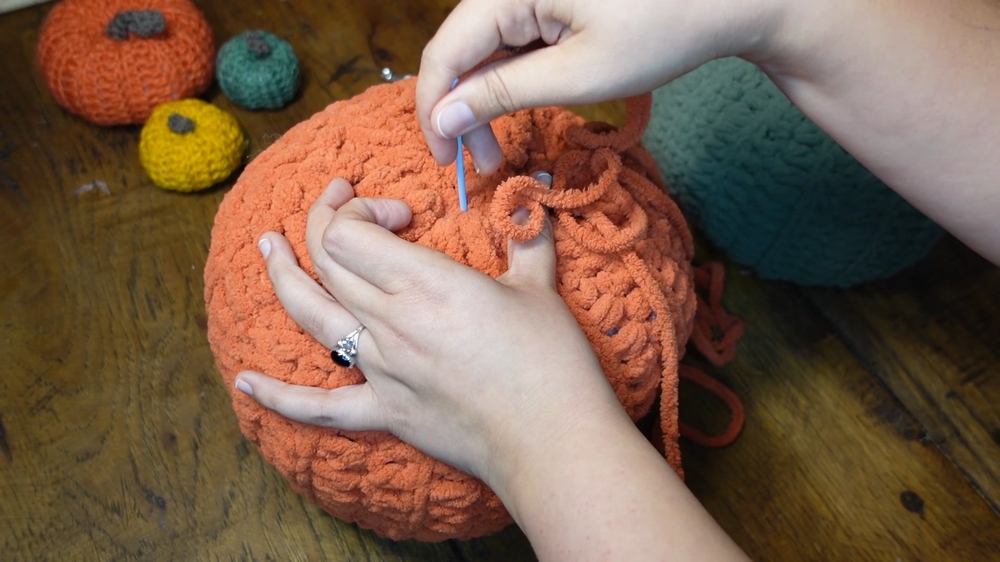
8: Close the Top and Shape the Pumpkin
- Weave the needle in and out along the top edge, pulling tightly to close it.
- Use the same yarn to create the pumpkin’s indentations:
- Insert the needle through the center top of the pumpkin, pulling it out at the bottom.
- Repeat this process several times, wrapping the yarn around the pumpkin to create the ridges and define its pumpkin shape.
- Knot the yarn securely and hide any loose ends by tucking them into the pumpkin.
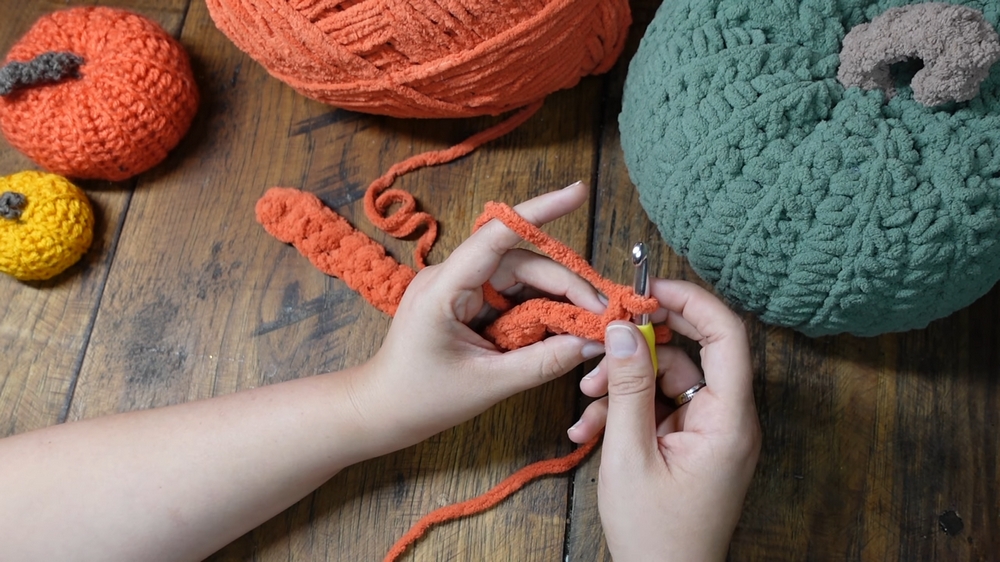
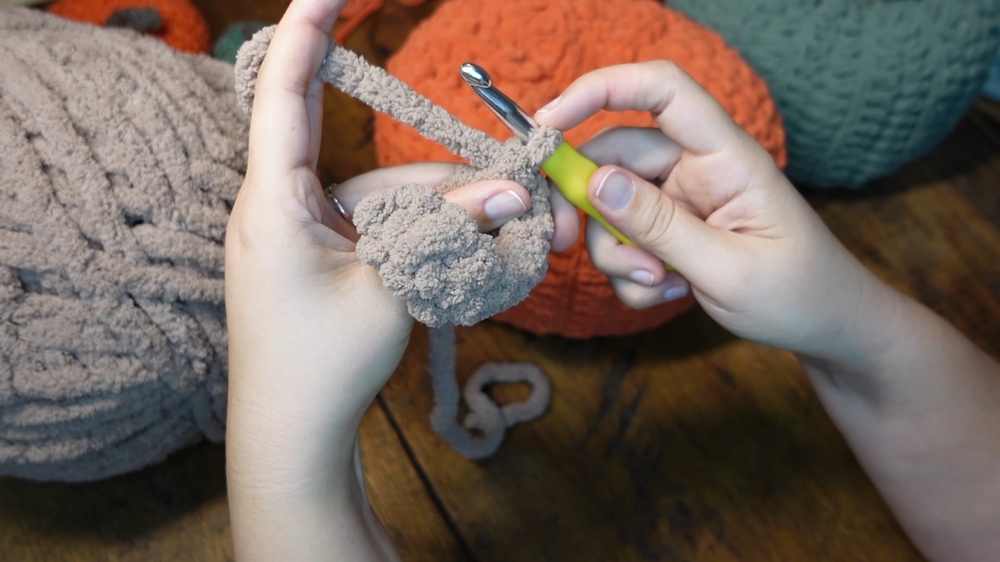
9: Make and Attach the Stem
- Start with a slip knot and chain 8.
- In the second chain from the hook, single crochet (SC) across the row.
- Insert the hook into the chain, yarn over, pull through, leaving two loops on the hook.
- Yarn over again and pull through both loops.
- Continue single crocheting to create the stem, adjusting the shape and size as desired.
- Leave a tail, finish off, and attach the stem to the top of the pumpkin:
- Use the stem’s tails to secure it by tying and weaving the yarn through the top of the pumpkin.
Level of Difficulty
This project is beginner-friendly, focusing on simple stitches like the half double crochet (HDC) and single crochet (SC). The repetitive nature of the rows and clear instructions make it approachable for first-time crocheters. More experienced crafters will also enjoy the satisfying and quick result.
Tutor’s Suggestions
- Avoid Fuzzy Yarn for Beginners: Although chunky yarn speeds up the process, fuzzy yarn can make it harder to see stitches. Take your time if you're a beginner.
- Keep Consistent Tension: Uneven tension may distort the shape of the project.
- Always Remember to Chain at the End of Rows: This prevents the project from shrinking into a triangle.
- Take Breaks: Large projects can strain your hands, so relax every now and then.
Uses of the Chunky Pumpkin Pillow
- Fall Decor: Perfect for sprucing up your living room, couch, or mantel during the autumn season.
- Themed Gifting: Great as a cozy handmade gift for friends and family.
- Seasonal Photography Prop: Works fantastically as a prop for fall-themed photoshoots.
Crochet Tip
If you accidentally snap the yarn while pulling tightly, simply tie the broken ends together and continue. Be gentle when tightening the chunky yarn to avoid snapping.
Conclusion
The "Chunky Pumpkin Pillow" project is a fun, beginner-friendly craft that yields an adorable seasonal decor item. With simple materials and easy-to-follow instructions, even absolute beginners can crochet this cozy and fluffy pumpkin. The project encourages creativity and customization, making it perfect to reuse for various fall-themed settings.