Feel cozy comfort with this free crochet slippers pattern, as soft stitches wrap your feet in warmth and joy for relaxing moments at home.
Cold floors and chilly toes no longer make anyone uncomfortable when soft yarn is woven into gentle shapes for your feet. The Crochet Slippers pattern shows a simple way to create warm slippers, offering bright colors or calm tones to match every mood. Walking around the house feels pleasant and smooth with these cozy foot coverings that bring comfort and style with every step.
Quick and Easy Crochet Slippers Pattern Free
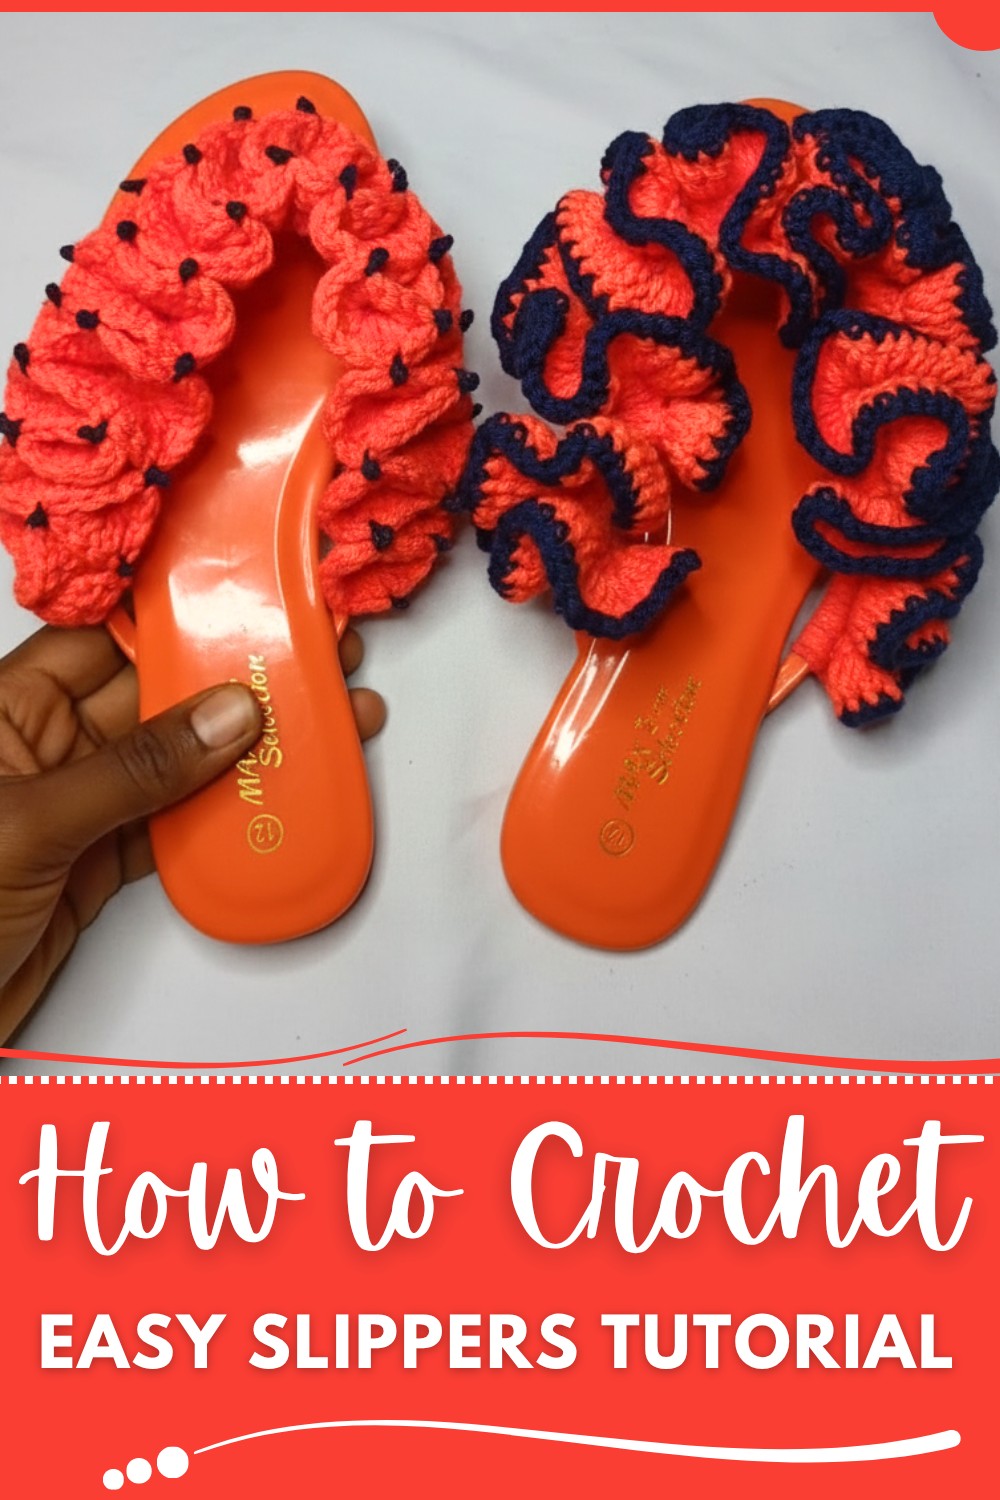
This pattern makes it easy for all to join in the fun, guiding you in crocheting slippers that fit perfectly from small to large feet. With the slippers made using this technique, giving gifts to loved ones becomes special, spreading warmth and care. The sturdy bottoms protect your feet and keep them comfy day after day, while the pretty stitches and lovely looks add charm. Durable and inviting, these slippers make daily life comfortable, turning every moment at home into a gentle, happy experience.
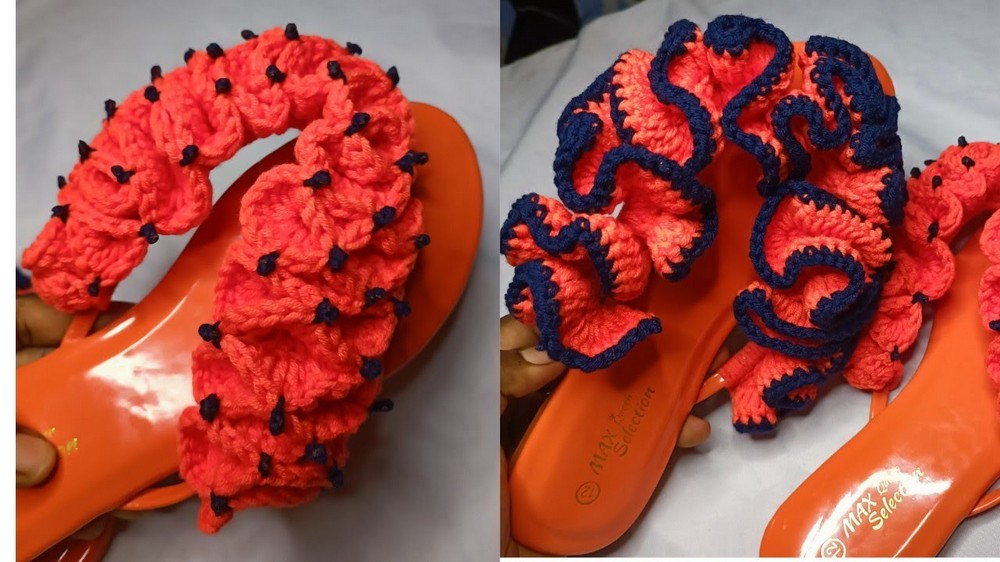
Beginner Crochet Slippers with Ruffle Designs
Materials List
- Yarn: Acrylic 5-ply yarn (or any worsted-weight yarn); use colors of your choice for main body and optional edging.
- Crochet Hook: 5.0 mm (H-8) crochet hook.
- Ready-made Slippers: Any plain slippers with a rope/cord edge that a hook can pass under.
- Notions:
- Scissors
- Yarn needle
- Lighter (for melting and securing yarn ends, optional; use caution.)
- Stitch markers (optional)
Key Abbreviations (US Terms)
- sc: single crochet
- dc: double crochet
- ch: chain
- sl st: slip stitch
- st(s): stitch(es)
- yo: yarn over
Special Notes
- All patterns are written in US crochet terminology.
- For first round, work over the tail — no need to weave in later.
- Work with a relaxed tension, especially for ruffle and edging rows, to maintain the slipper's shape and stretch.
- For flame-sealing (optional), only use a lighter if using acrylic yarn; be cautious, and do not allow flame near children.
Slippers with Ruffle Pattern — Step-by-Step
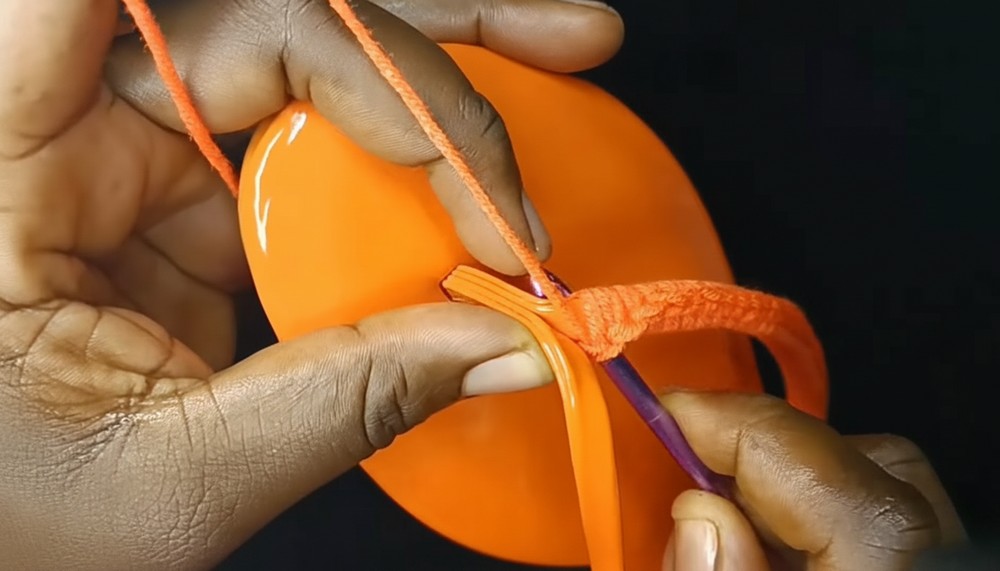
1. Attaching Yarn to Slipper
- Make a slip knot with your yarn.
- Insert your hook under the rope/edge of the slipper.
- Place slip knot on hook, pull loop under the rope, and yarn over, pull up a loop to attach.
- Continue under the rope, over the tail:
- Insert hook, yo, pull under rope (2 loops on hook).
- Yo, pull through both loops (sc made).
- Repeat single crochets (sc) all the way around the slipper edge, working each st over the yarn tail to secure and avoid weaving in.
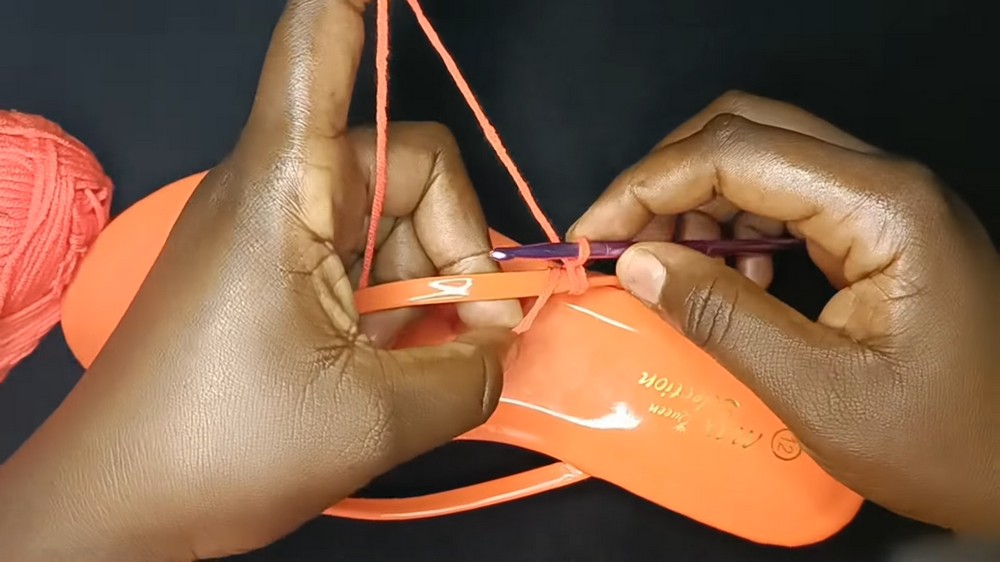
If gaps appear, gently spread the stitches with your hand.
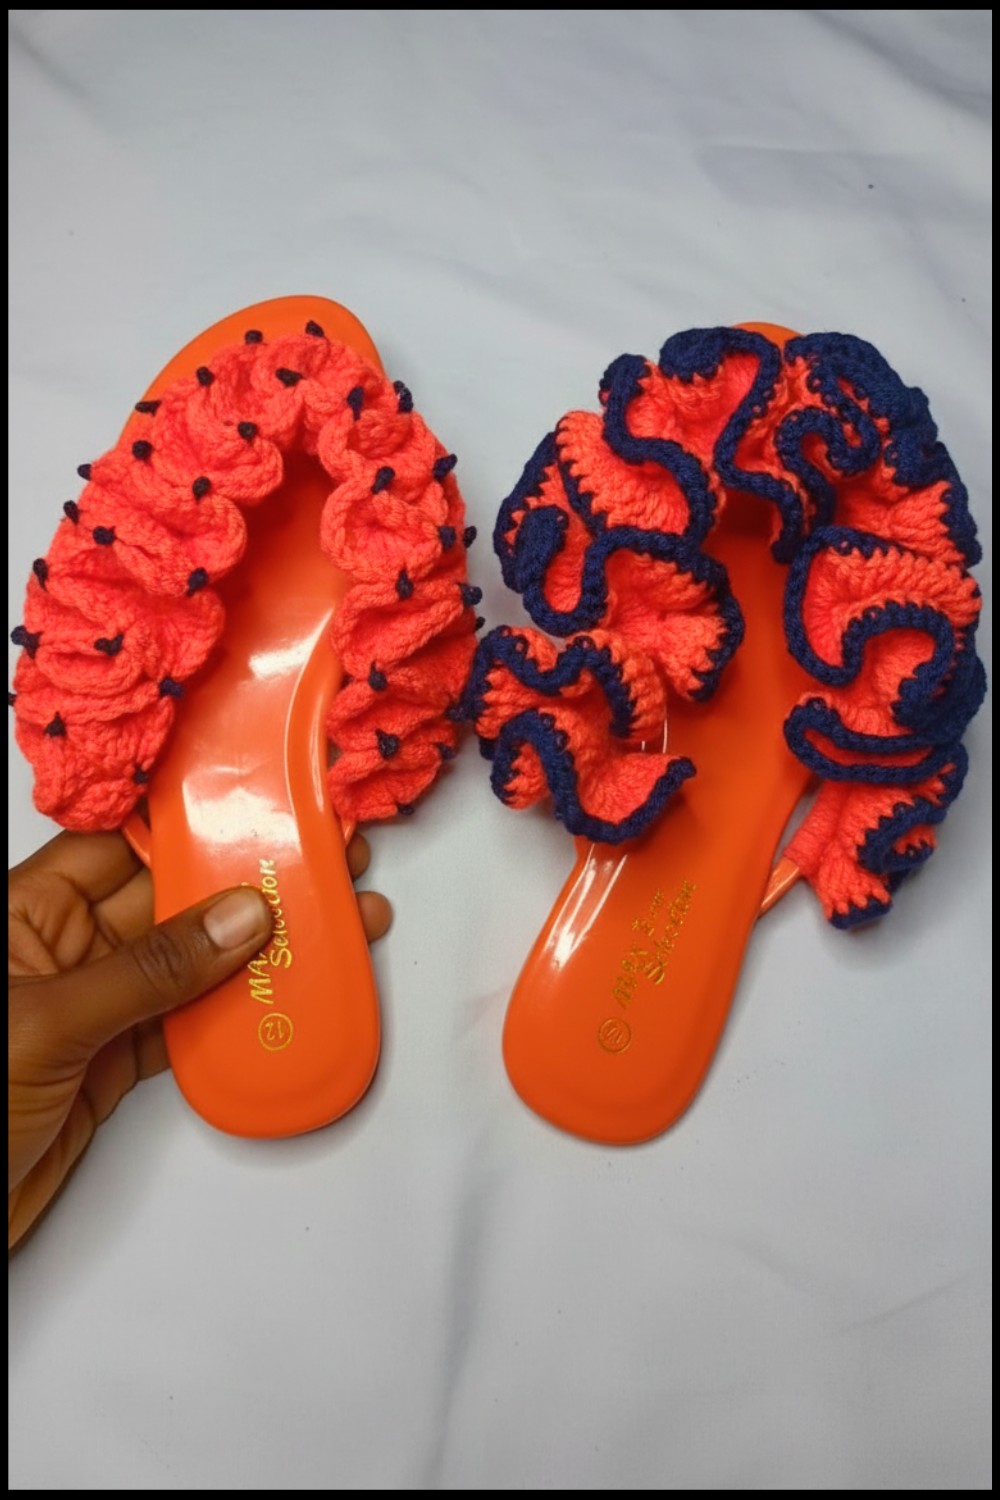
2. Ruffle Row (First Design)
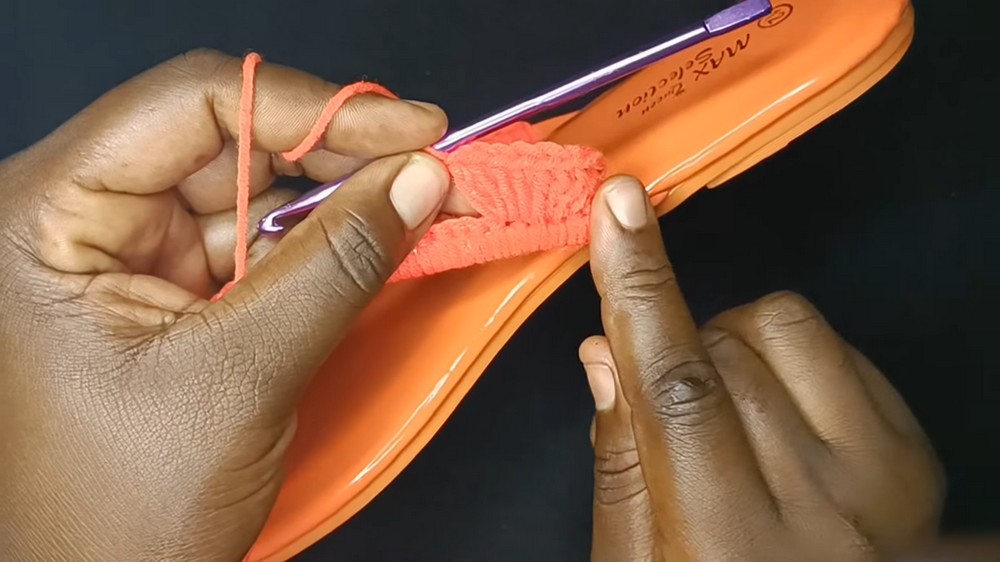
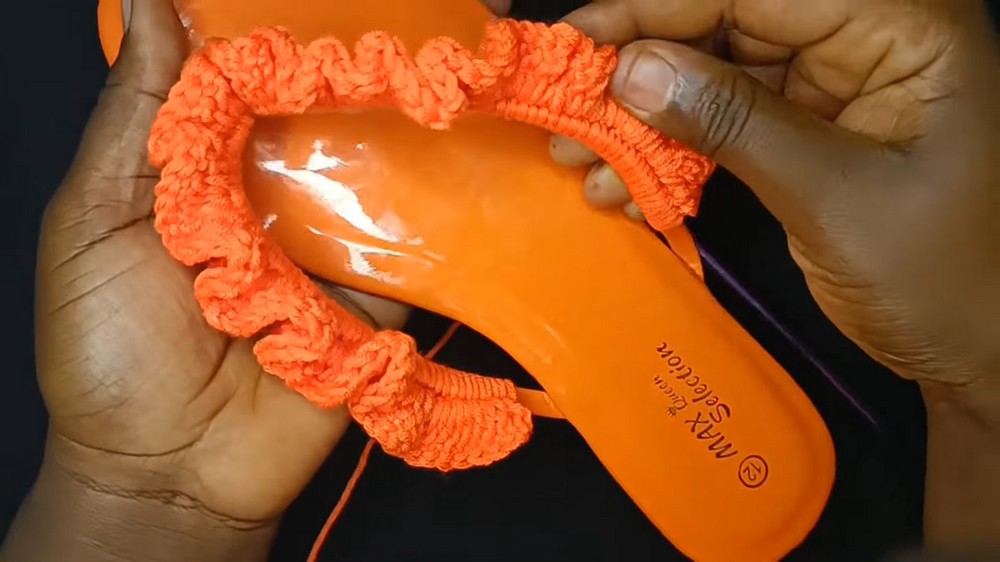
- When you've worked sc around, stop before the very end/edge to match your starting side.
- Ch 3; turn.
(Counts as first dc) - Dc in next 2 sts.
- Begin the ruffle pattern:
- In the 4th st, 3 dc in same st.
- In every following st to the last three sts: 3 dc in each st.
- When 3 sts remain at the end, dc in each of these last 3 sts.
3. Second Ruffle Row
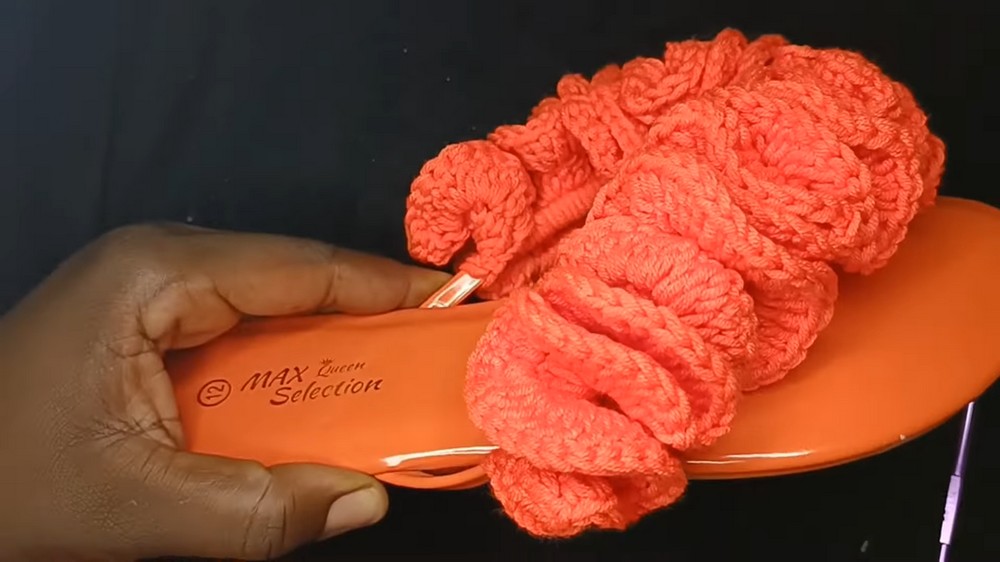
- Ch 3; turn. (Counts as dc)
- Dc in next 2 sts.
- Ruffle repeats:
- In the 4th st and each st across (except last 3): 3 dc in the same st.
- Dc in each of the last 3 sts.
- Fasten off and weave in ends.
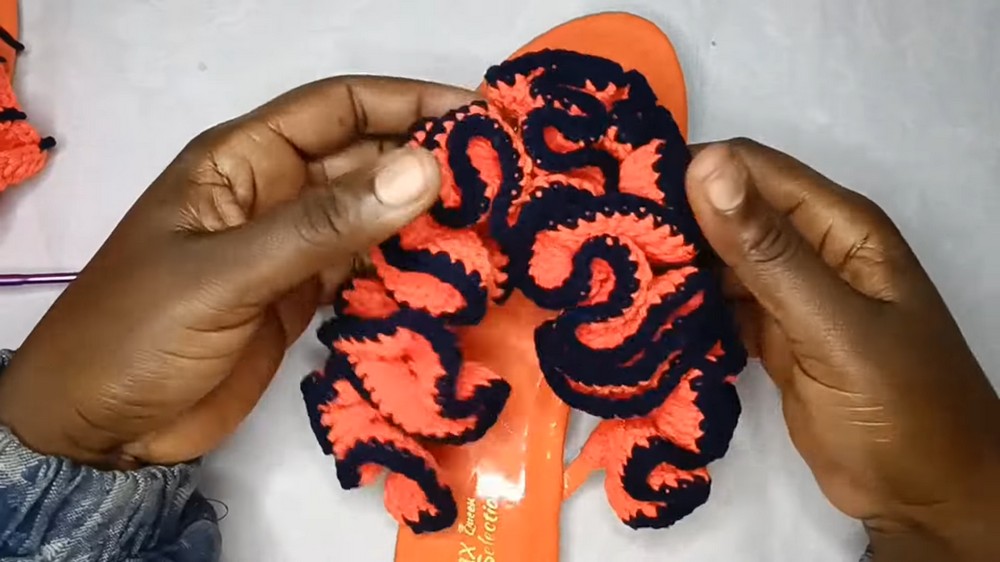
4. Edging or Border (Optional Second Design)
- With edging color, make a slip knot.
- Insert hook into the first st of the ruffle edge.
- Pull slip knot through, ch 1.
- Sc in each st around the entire ruffle edge, working loosely so as not to compress the ruffles.
- Do not increase; one sc in each st.
- At end, ch 1, cut yarn, and weave in tail.
- Repeat edging with any color for a unique look.
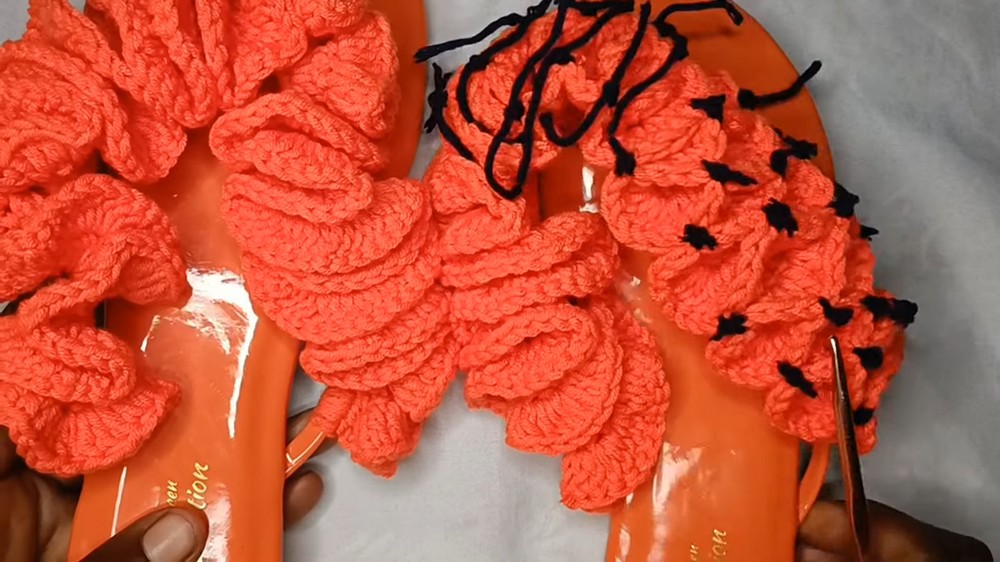
5. Tied & Fused Ruffle Finish (Third Design — Knotted Ruffles)
- Using a yarn needle & yarn:
- Arrange ruffles to your liking.
- Insert needle through two ruffles (one on each ruffled row) at any position where you wish to create a knot or firm tie.
- Cut a length of yarn, thread through, tie a tight knot (about four or five times).
- Leave tails hanging; do not trim yet.
- Repeat tying across as desired for both slippers.
- Once all knots are tied, trim yarn tails, leaving small ends.
- Carefully (with a lighter), melt (flame) both sides of each knot to fuse and prevent unraveling.
- Caution: Only use with acrylic or synthetic yarn; do not use flame on natural fibers.
Final Steps
- Arrange all ruffles for a uniform look.
- Weave in any remaining ends.
- Try slippers on for comfort.
- Share your creation!
Conclusion
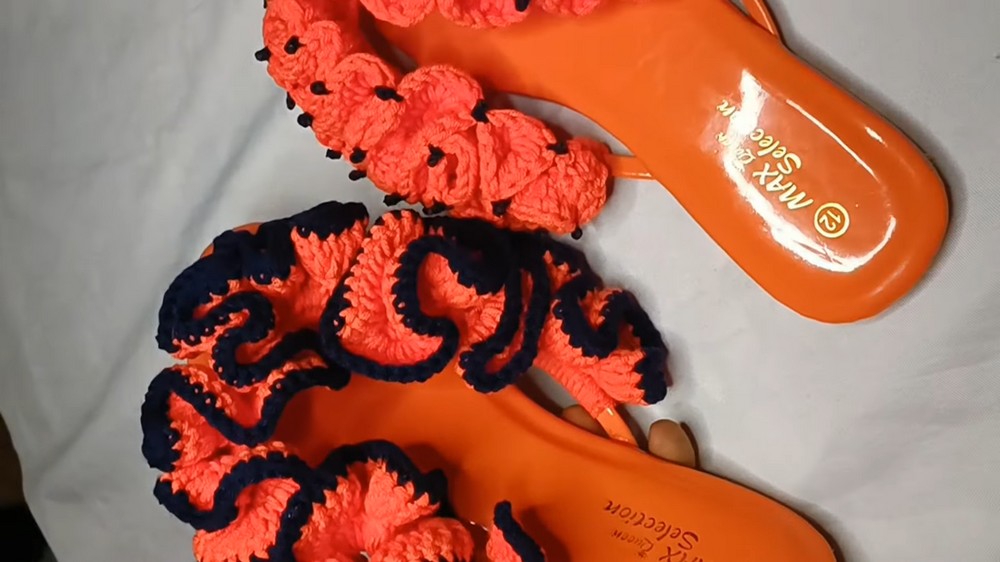
You have now completed a pair of stylish ruffled slippers with three edge options: plain ruffle, contrasting or matching color edge, and a unique knotted effect. This project is very beginner friendly and can be adjusted for any color style or slipper base.
Pattern Corrections & Tips
- Accuracy: Always ensure the same number of sc on each side for mirrored ruffles.
- Ruffle Consistency: Maintain even, loose tension for best results.
- Edging: Do not pull sc edging too tight; this will pucker the ruffles.
- Flame-sealing: Only use with synthetic (acrylic) yarn; never with wool or cotton.
- Placement: Start and finish at even points on both sides for symmetry.
- Customization: Try different yarn colors/textures for creative results!