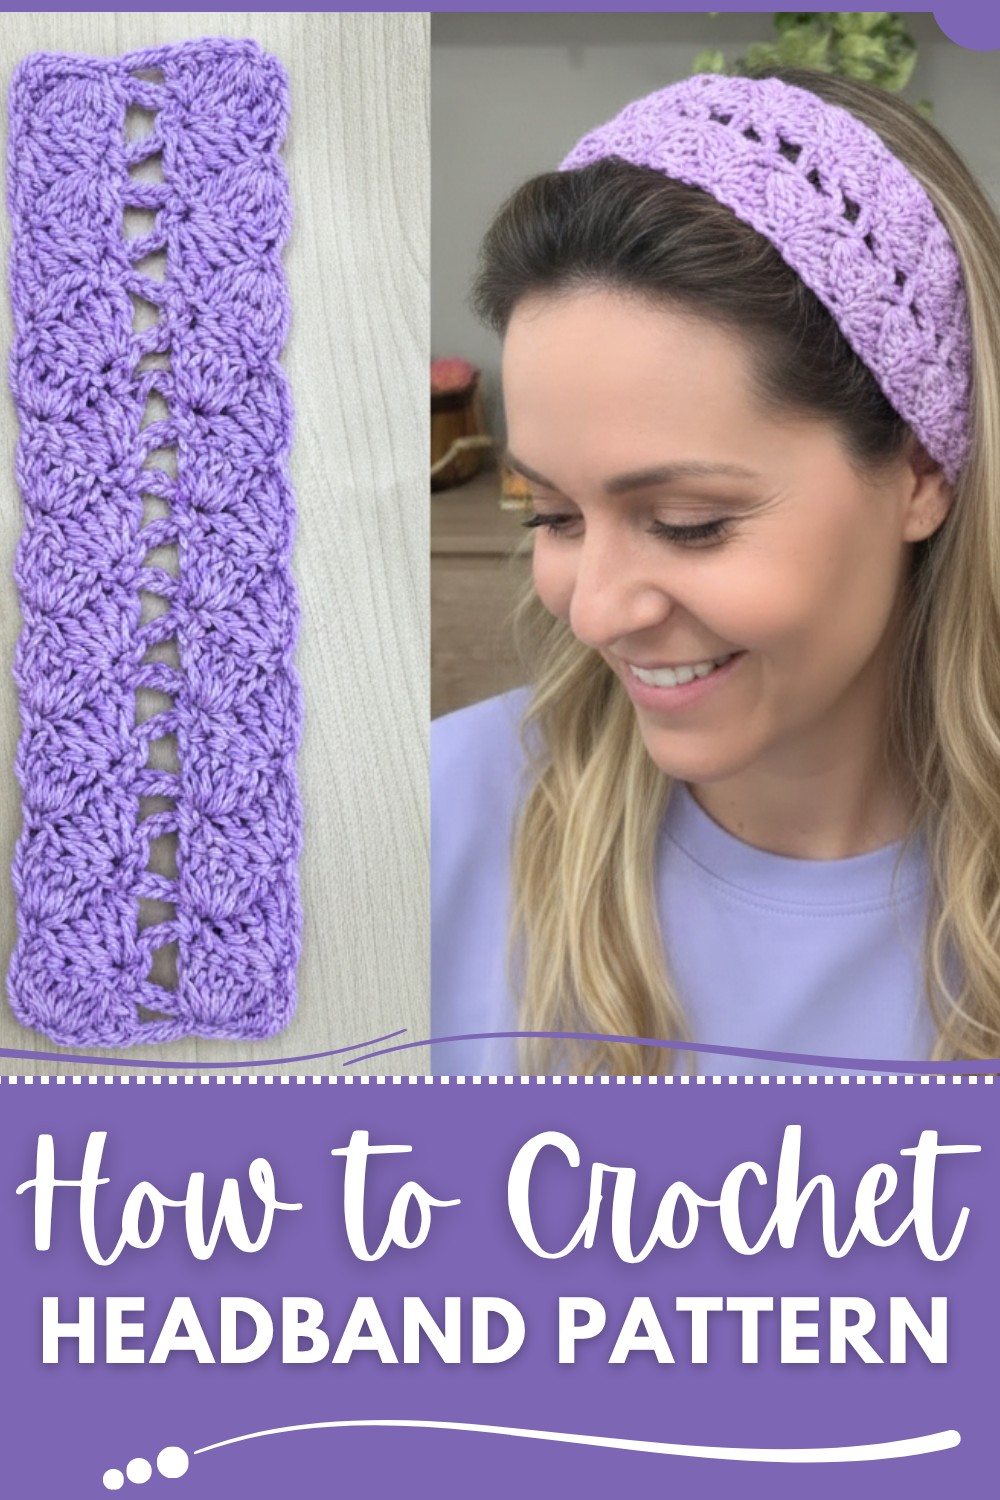
Feel cozy and stylish every day with this free crochet headband pattern that's offering an easy and fun way to brighten your look in minutes.
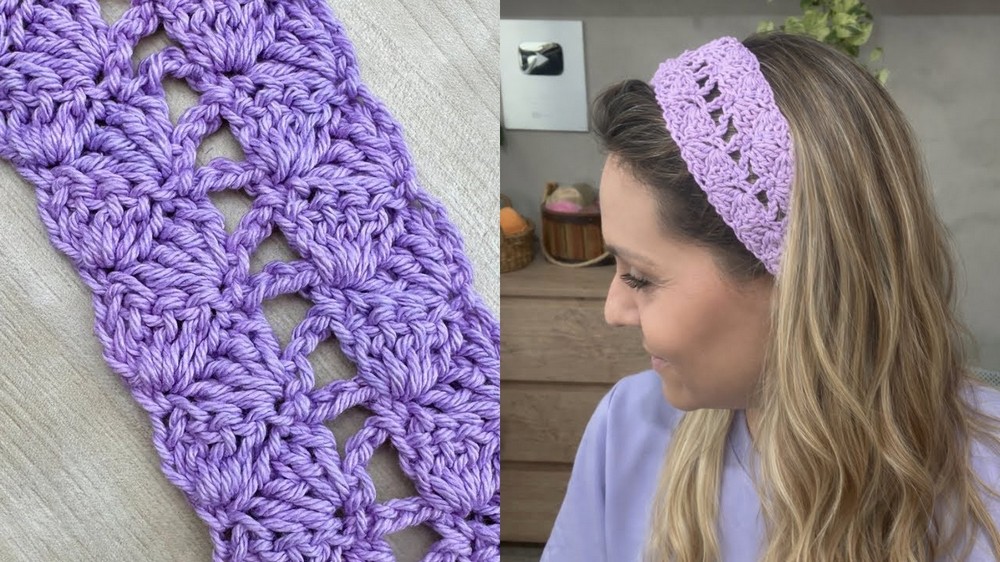
Looking for a simple way to keep hair neat and stylish while feeling cozy and comfortable every day? With a crochet headband pattern, you can create a lovely band that fits soft around the head and adds a gentle pop of color to a look. Soft and lightweight, this headband is perfect for bringing beauty to clothes and keeping hair out of the face while working or playing. Choose a favorite color and make a matching band for yourself or a friend, making a day feel brighter and more joyful.
Free Crochet Headband Pattern for All Ages
A crochet headband is easy to make and turns into a wonderful gift for a child or adult, showing care and creativity in a small, special way. This headband shines with unique style and can be used daily for any occasion. The stretch and gentle feel make it a favorite for anyone who tries it. Experience the beauty and comfort a handmade headband can bring to life.
Rapunzel Braided Crochet Headband Pattern
Materials
- Yarn:
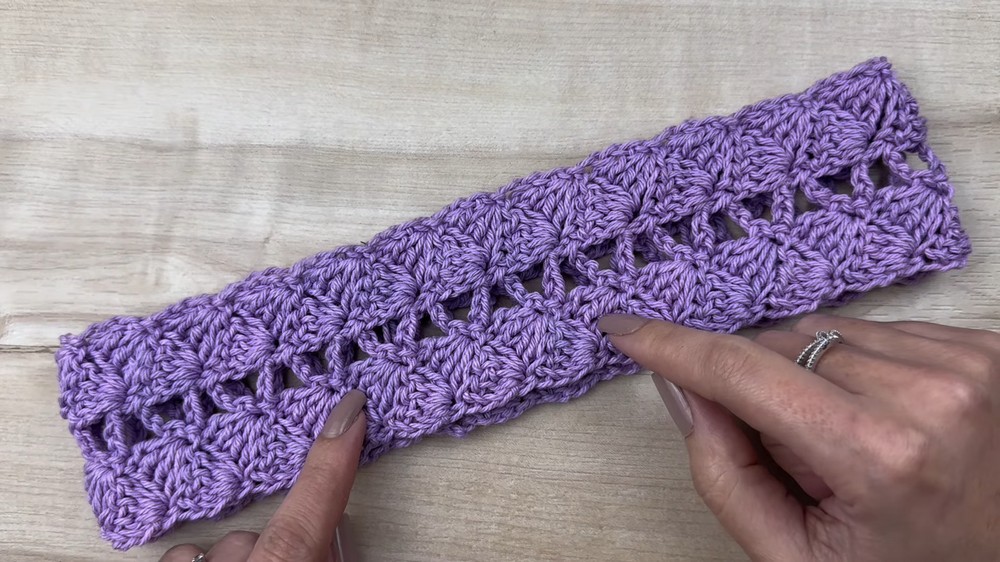
- Amigo Love by Cisney (Corrente) — 100% mercerized cotton, TEX 600, Color 109 (lilac used in example)
- For smaller sizes (baby/child): Camila Fashion (Corrente), 100% mercerized cotton, TEX 300 or any thinner cotton yarn
- Crochet Hook: 4.0 mm (for main yarn); 1.75 mm (for thinner yarns)
- Tapestry Needle: for weaving in ends
- Scissors
- Measuring Tape
- 2 Buttons (about 1 cm diameter each; any style)
- Quick-drying fabric glue (optional): for securing yarn ends
Key Abbreviations (US Terminology)
| Abbreviation | Meaning |
|---|---|
| ch | chain |
| sc | single crochet |
| dc | double crochet |
| st(s) | stitch(es) |
| yo | yarn over |
| sl st | slip stitch |
| rep | repeat |
| tog | together |
Special Notes
- Sizing: To adjust width, use thinner or thicker yarn/hook as appropriate. To adjust length, simply add or reduce pattern repeats (rows).
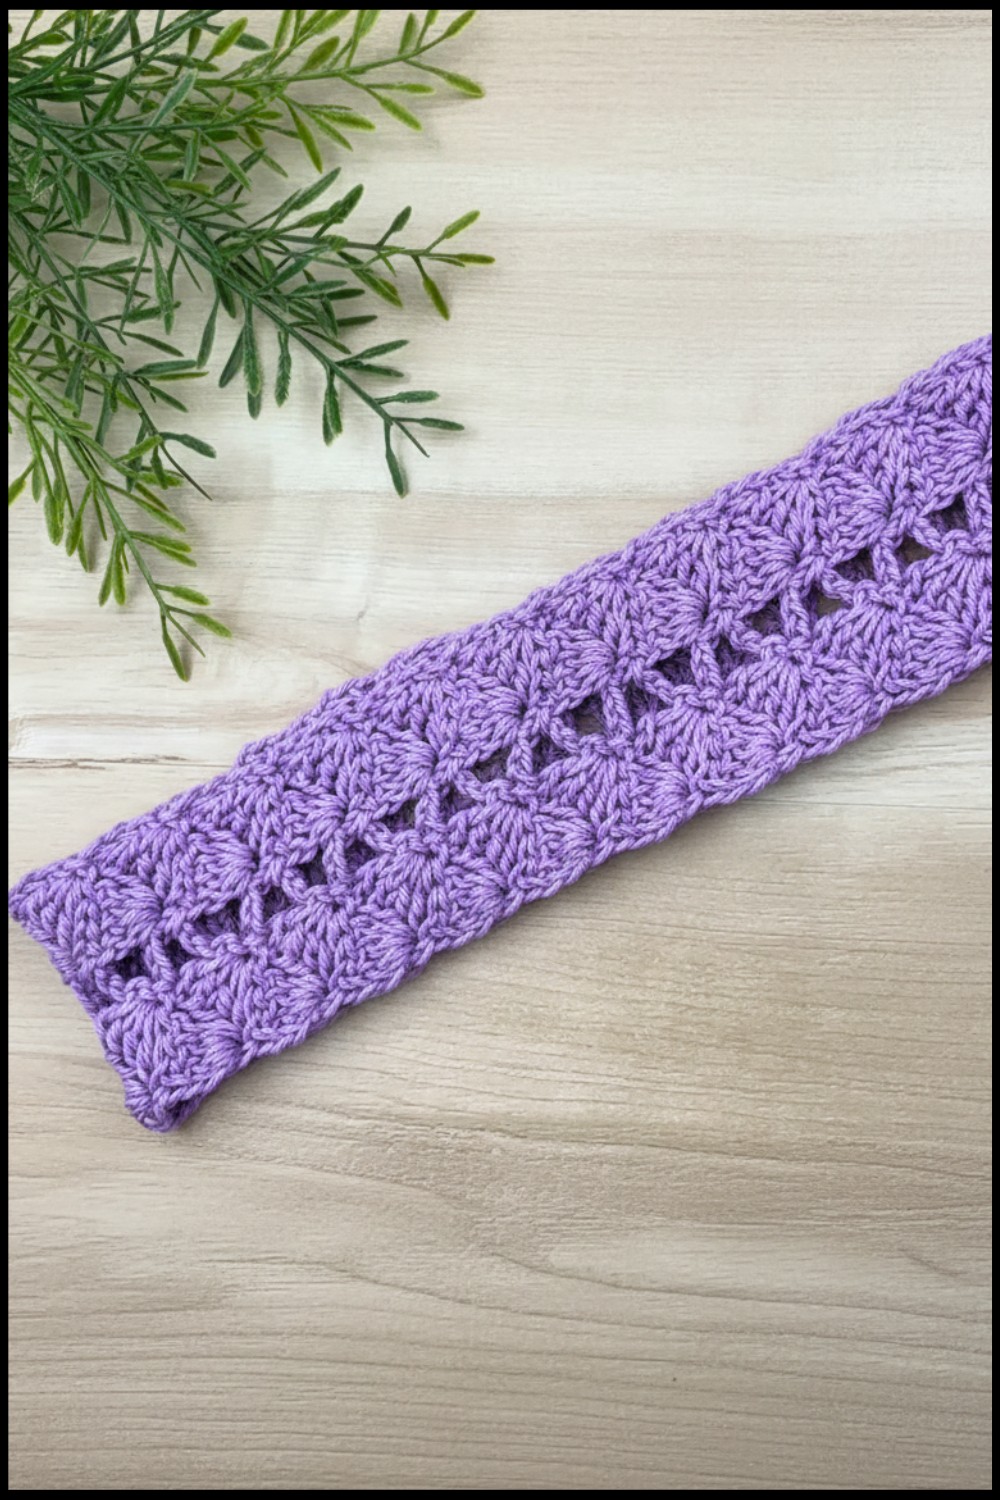
- Gauge/Sizing Example: The sample (using Amigo Love TEX 600 and 4.0 mm hook) is approx. 6.5 cm wide. Adjust as desired.
- Button Loops: The lacy pattern creates natural openings for button closure; no special loop needs to be made unless using extra-large buttons.
Pattern
Foundation Chain
Ch 16 (or as wide as desired for your headband).
Row 1
- Skip 3 ch (counts as first dc), dc in 4th ch from hook.
- Dc in same ch two more times (total 4 dc in same ch—first fan made, including skipped chains).
- Skip next 3 ch, sc in next ch.
- Ch 3, skip 3 ch, dc in next ch, dc in same ch three more times (total 4 dc—fan).
- Skip 3 ch, sc in last ch.
Turn.

Row 2
- Ch 3 (counts as first dc), turn.
- In same sc as turning ch, 3 dc (total 4 dc for fan including ch-3).
- Skip next 3 dc from previous row, sc in last dc of fan.
- Ch 3.
- In next sc from previous row, 4 dc (all in same st, making a fan).
- Skip next 3 dc, sc in the top of turning ch from previous row.
Turn.
Row 3 and All Following Rows
- Ch 3, turn.
- In same sc as turning ch, 3 dc (fan—4 dc including ch-3).
- Skip 3 dc, sc in last dc of fan below.
- Ch 3.
- 4 dc in next sc (fan).
- Skip 3 dc, sc in last dc or in the top of turning ch from previous row.
Turn.

Repeat Row 3 until band reaches desired length for the head circumference (measure as you go).
Final Row (for a neat finish)
After the last repeat, fasten off and weave in all ends.
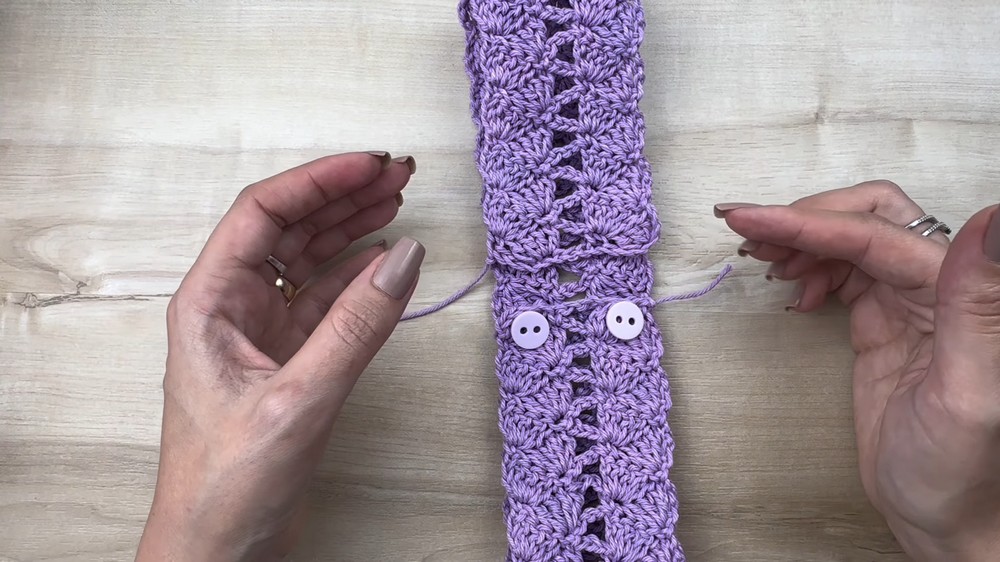
Attaching Buttons
- Place the headband flat with the initial chain edge and the last row edge at either end.
- Place one button at each end of the band, positioned so that each fits naturally into the fan or space at the opposite end when wrapped around head.
- Using a matching piece of yarn and a tapestry needle, sew the button securely in place.
- Test to ensure the button fits through one of the lacy gaps/fan spaces. If the opening is too tight, gently widen the gap or create a small ch-loop at the end.
- Weave in the yarn ends, securing them with a drop of fabric glue for added durability (optional).
Weaving & Finishing
- Hide yarn ends by weaving them inconspicuously through the back of stitches.
- For a neat look, always hide ends within thicker stitch groupings, not in open mesh areas.
- If using fabric glue, apply a small amount to final secured yarn ends and clip excess.
conclusion
You have created a stylish, beginner-friendly Rapunzel braided headband that fits a range of sizes. Its stretchy, lacy structure and button closure make it practical and comfortable for everyday wear or as a beautiful gift.
Pattern Corrections & Tips
- Pattern Correction: Make sure your initial chain count is a multiple of the pattern (if modifying width, always plan the chain so that fans and spacings work out evenly).
- Tip: To make for a baby or child, select a lighter weight yarn and appropriate hook. Reduce length with fewer rows.
- Tip: Use buttons that match or contrast with your yarn for creative effects.
- Tip: The natural gaps in the “fan” pattern make ideal buttonholes—no need to add extra button loops.
- Tip: If using yarn with little stretch, measure the band snugly as it will relax slightly with use.