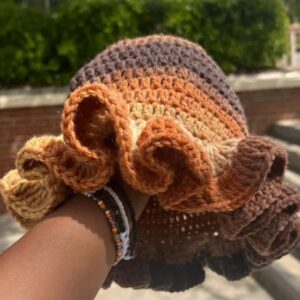
This pattern set is not only adorable but also practical, providing a cozy outfit for your little one. Perfect for newborn photoshoots or as a thoughtful handmade gift, this pattern allows you to add a personal touch to baby accessories. Benefits include the ease of crochet, customization with different yarn colors, and the ability to make something unique and heartfelt.
The cocoon is especially useful for swaddling, giving the baby a sense of security and comfort, while the beanie keeps the tiny head warm. Enjoy the process of making memorable keepsakes with this charming pattern set!
Tip:
Choose a soft, hypoallergenic yarn to ensure the utmost comfort for your baby's sensitive skin. This will make your handmade item both gentle and safe.
Step-by-Step Guide to crochet baby cocoon and beanie
Supplies Needed
- 5.5 mm crochet hook
- Yarn (Red Heart Super Saver Ombre in Coral, demonstrated in Turquoise)
- Tapestry needle
- Scissors
Instructions
Step 1: Begin with a Slipknot
- Form a slipknot on the hook.
- Chain 4.
- Slip stitch into the first chain to form a ring.
Step 2: Row 1 - Create the Base
- Chain 2 (does not count as a double crochet).
- Work 10 double crochets into the ring.
- Slip stitch into the top of the chain to close the row.
Step 3: Row 2 - Increase
- Chain 2.
- Put 2 double crochets in each stitch around (total 20 double crochets).
- Slip stitch into the top of the first chain.
Step 4: Rows 3 to 7 - Further Increase
- Row 3: Chain 2. 1 double crochet in the first stitch, 2 double crochets in the next. Repeat around.
- Row 4: Chain 2. 1 double crochet in the next two stitches, 2 double crochets in the third. Repeat around.
- Row 5: Chain 2. 1 double crochet in the next three stitches, 2 double crochets in the fourth. Repeat around.
- Row 6: Chain 2. 1 double crochet in the next four stitches, 2 double crochets in the fifth. Repeat around.
- Row 7: Chain 2. 1 double crochet in the next five stitches, 2 double crochets in the sixth. Repeat around.
Step 5: Rows 8 to 22 - Build the Body
- Chain 2.
- Work 1 double crochet in each stitch around.
- Repeat for rows 8 through 22.
Step 6: Create Lace Row
- Chain 4 (counts as double crochet and chain 1).
- Skip 1 stitch, double crochet in the next stitch, chain 1. Repeat around.
- Slip stitch into the third chain of the initial chain 4.
Step 7: Single Crochet Row
- Chain 1.
- Single crochet in each stitch and space around.
- Slip stitch to close.
Step 8: Double Crochet Row
- Chain 2.
- Work 1 double crochet in each stitch around.
- Slip stitch to close.
Step 9: Shell Stitch (Scalloped Edge)
- Chain 1.
- Single crochet in the same space.
- Skip 2 stitches, 5 double crochets in the next stitch, skip 2 stitches, single crochet in the next stitch. Repeat around.
- Slip stitch to close.
Step 10: Create the Drawstring
- Make a slipknot and chain 150.
- Chain 1 additional stitch (making it 151).
- Single crochet in each stitch across.
- Weave in the ends.
Step 11: Weave the Drawstring
- Use a tapestry needle to weave the drawstring through the lace row.
- Ensure it is evenly weaved and distribute it around the cocoon.
Finishing Touches
- Weave in any remaining ends.
- Optionally, tie the ends of the drawstring together.
Conclusion
Congratulations on completing your Crochet Baby Cocoon Swaddle! Enjoy wrapping your baby in the warmth and love of your handmade creation.


