
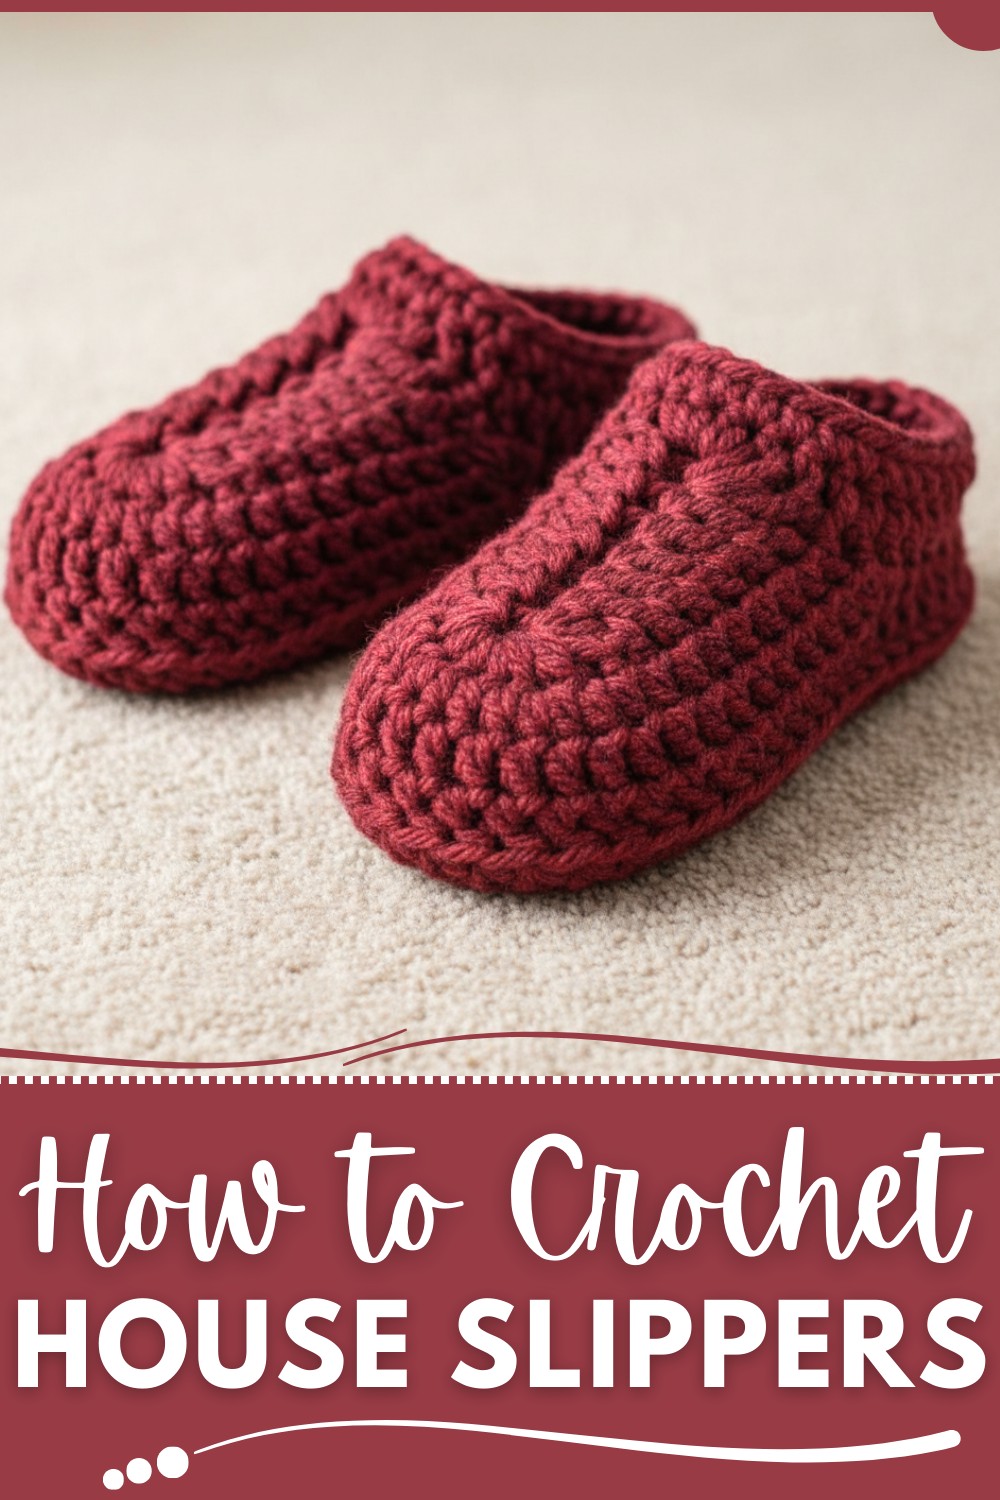
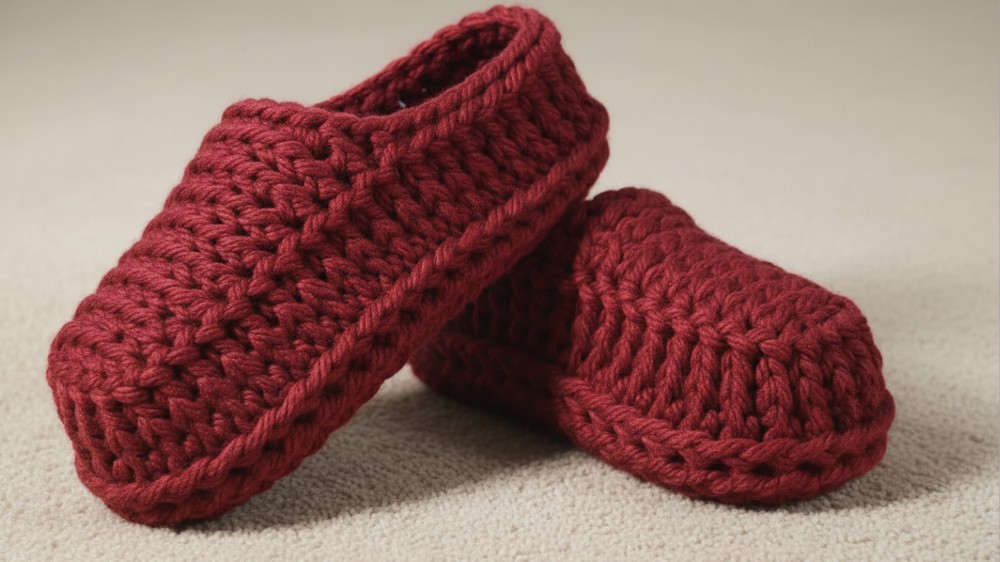
Quick and Cute Crochet Slippers to Keep Your Feet Warm
Materials Required
- Yarn:
- Weight: 6 (Super Bulky)
- Type: Any heavier-weight yarn (as demonstrated).
- Crochet Hook:
- Size: 6.0 mm
- Darning Needle:
- Useful for tying in and weaving ends.
- Scissors
- Measuring Tape
Crochet Textured Slippers Step-by-Step Pattern
This detailed pattern describes the process of crocheting textured slippers using front and back post double crochets. These slippers are cozy, durable, and perfect for gifting or personal use. This guide includes instructions, tips for customization, and optional add-ons for enhancing your project.
Finished Size
- Length: Approximately 5 inches or 13 cm for standard adult sizing.
- You can modify the size for different foot lengths or widths by adjusting the number of rounds or stitches.
Pattern Instructions
Step 1: Start with the Toe of the Slipper
Magic Circle
A magic circle creates a seamless base for the slipper.
- Form a loop with the yarn to create the magic circle.
- Secure the circle with Chain 1.
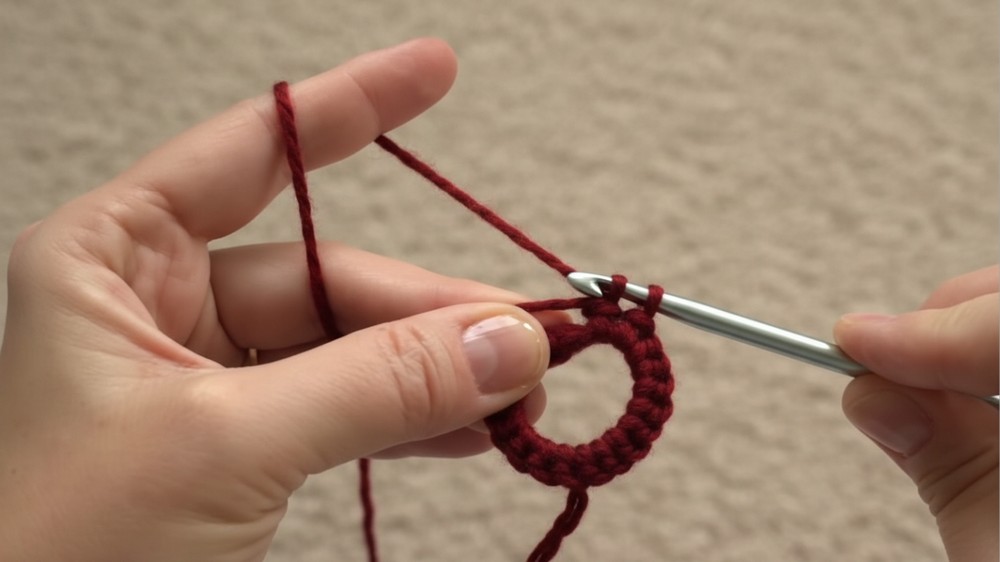
Round 1:
- Work 13 double crochets (DC) into the circle.
- Yarn over, insert hook into the circle, pull up yarn, yarn over, pull through two loops, yarn over, pull through remaining two loops.
- Slip stitch into the top of the first double crochet to join the round.
- Pull on the tail to tighten the magic circle.
- Total stitches = 13 stitches
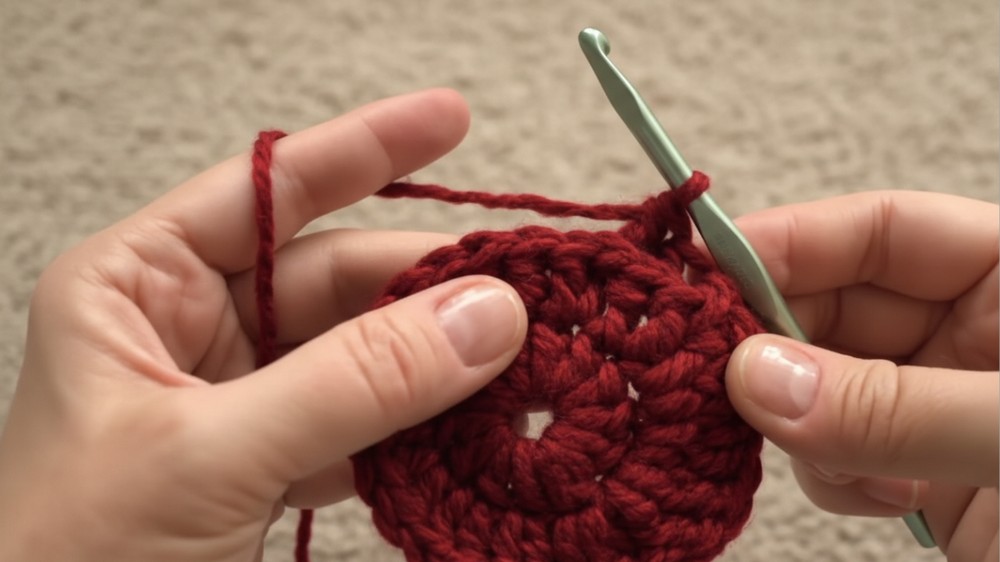
Round 2:
- Chain 1.
- Work 2 double crochets (DC) into each stitch from Round 1.
- Total stitches = 26 stitches
- Slip stitch into the top of the first double crochet to join.
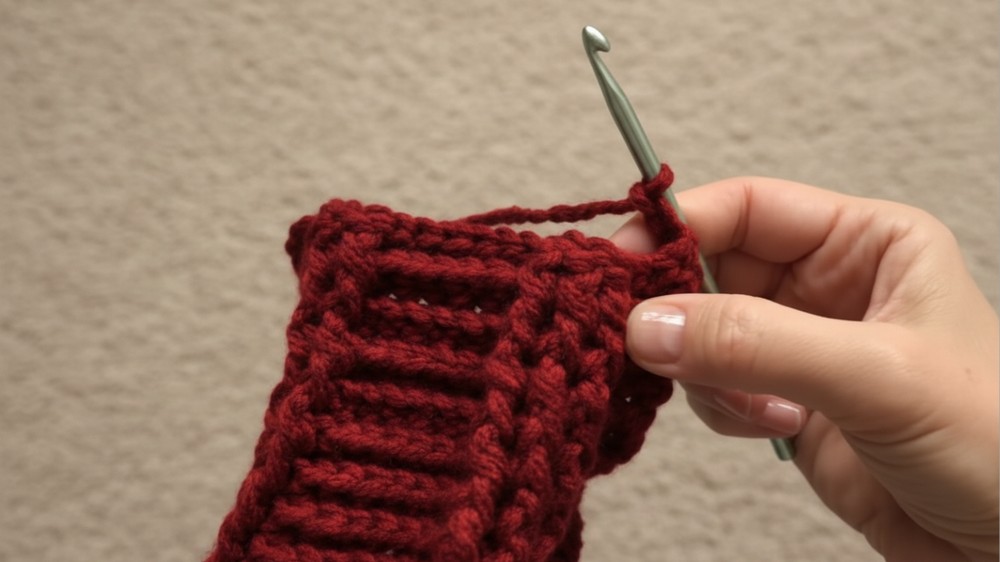
Step 2: Begin Texturing
Round 3:
- Chain 1.
- Begin alternating Front Post Double Crochet (FPDC) and Back Post Double Crochet (BPDC) stitches.
- FPDC: Yarn over, insert the hook from the front around the post of the previous DC, pull yarn through, yarn over, pull through two, yarn over, pull through two.
- BPDC: Yarn over, insert the hook from the back around the post, pull yarn through, yarn over, pull through two, yarn over, pull through two.
Pattern Instructions for Round 3:
- 7 FPDC
- 3 BPDC
- 3 FPDC
- 7 BPDC
- 3 FPDC
- 3 BPDC
- Slip stitch into the top of the first double crochet to join.
Rounds 4–12:
- Chain 1.
- Repeat the FPDC and BPDC sequence from Round 3.
- The texture of the slipper defines the top and sole sections as stated below:
- Top: 7 FPDC.
- Sides: Alternating 3 FPDC and 3 BPDC.
- Sole: 7 BPDC.
- The texture of the slipper defines the top and sole sections as stated below:
- Slip stitch to join after each round.
Adjusting Size:
Measure the slipper toe-to-arch length when completing Rounds 4–12. Add or reduce rounds based on personal sizing needs.
Step 3: Create the Sole & Sides
Continue with Sole Section:
- Chain 3 to start the section.
- Turn your work and slip stitch into the next stitch to shift slightly forward.
Row Pattern for the Sole:
- 1 DC (counts as chain 3)
- 2 FPDC
- 3 BPDC
- 7 FPDC across the sole.
- 3 BPDC
- 3 FPDC
Subsequent Rows:
- Chain 3 and turn.
- Work alternating rows of FPDC and BPDC along the sole.
- Repeat until 5 rows are complete.
Customizing Size:
Add rows until reaching desired foot-length measurement or slipper height.
Step 4: Decrease Rows for the Heel
Row 1 (Decrease):
- Chain 3 and turn.
- Work FPDC and BPDC as normal.
- Across the sole: Decrease 7 FPDC to 5 FPDC using FPDC2tog (FPDC Two Together).
- Yarn over, insert hook around first post, pull yarn, yarn over, pull through two loops.
- Yarn over, insert into next post, pull yarn, yarn over, pull through two loops.
- Yarn over and pull through all loops on the hook.
- Finish the row with 3 FPDC and BPDC.
Row 2 (Decrease):
Repeat similar decreases across 5 FPDC in the sole section into 3 FPDC.
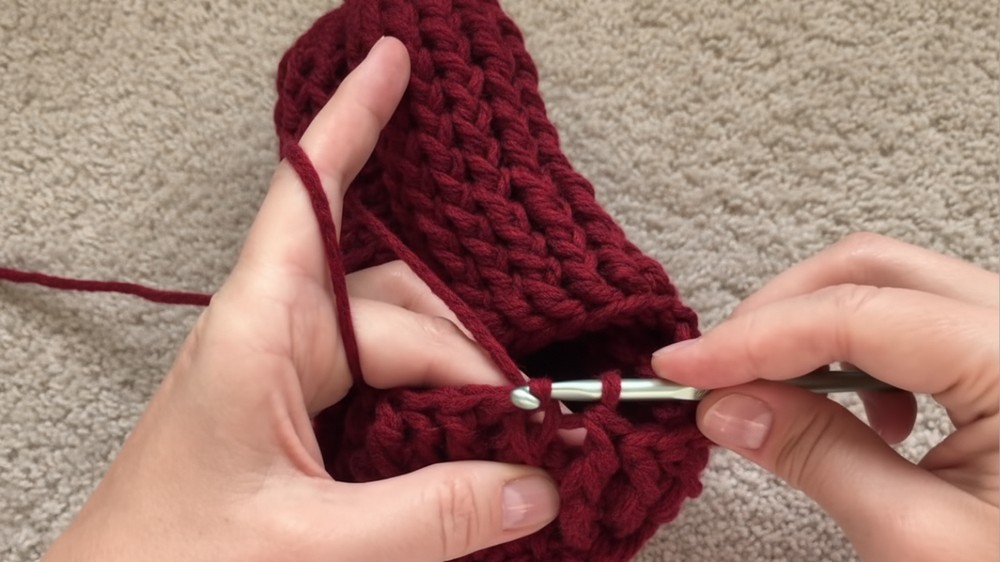
Step 5: Sewing the Heel
- Cut a tail at least 10 inches (25 cm) long for sewing.
- Flip the slipper inside out to sew the heel edge.
- Use a darning needle to join the two edges of the heel with whip stitches or any preferred sewing method.
- Weave in ends securely and trim excess yarn.
Step 6: Add the Top Section
- Starting at the center back of the slipper, pull up a loop and chain 1.
- Work 8 FPDC along the sides of the row edges.
- Locate row ends and make FPDC evenly across them.
- Continue along the slipper top with 7 FPDC.
- Work another 8 FPDC along the opposite side.
- Slip stitch into the first DC to join.
Repeat Rows for the Top:
- Chain 1 each round.
- Repeat the FPDC sequence for four rows total.
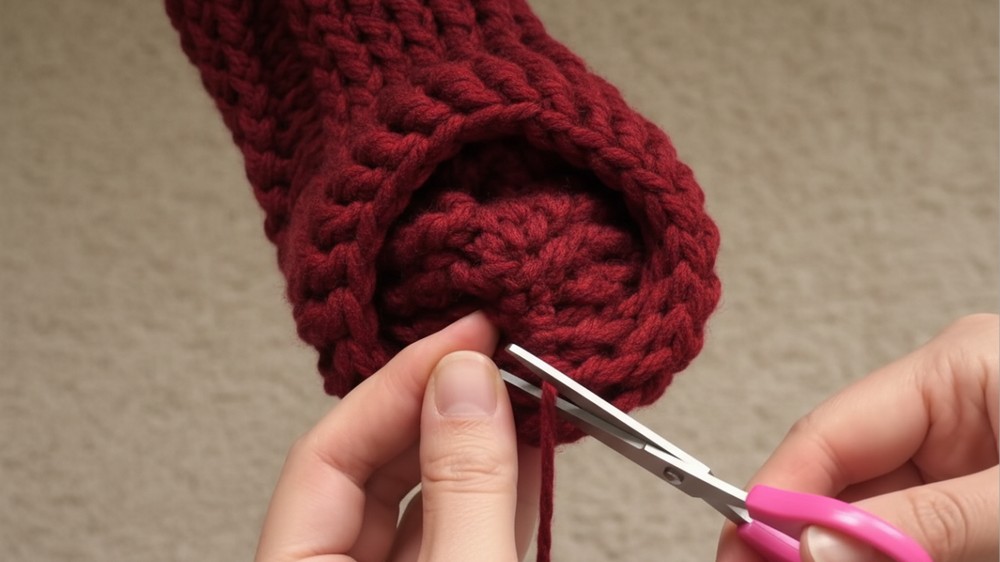
Final Finishing (Invisible Stitch):
- When finished, cut the yarn and use a darning needle for a seamless finish.
- Insert the needle into the next DC and bring it back into the previous stitch where the yarn previously exited.
- This creates a "V" stitch to mimic the existing pattern.
Customization Tips
- Adjust Size: To fit different foot lengths, increase or decrease the number of rounds in the toe, sole, or top sections.
- Enhanced Trim: Add fuzzy yarn or decorative edging around the top of the slipper for extra flair.
- Non-Slip Soles: Use anti-slip dots or fabric glue to create non-slip soles for safer wear.
Conclusion
Congratulations! You now have a beautifully crafted pair of textured slippers. The FPDC and BPDC stitches provide a comfortable, massaging feel on the sole while creating a visually appealing pattern. These slippers are perfect for cozy evenings or thoughtful handmade gifts.
Final Points
- Final Look: The textured pattern should define the slipper top and sole distinctly, with the heel snugly joined.
- Care Instructions: Wash gently and dry flat to maintain the shape and texture.


