Fall in love with the cutest crochet project ever—a no-sew cat amigurumi! This cuddly little cat is all about fun and ease, with no tricky sewing needed. You simply loop and hook the yarn with your crochet needle, creating a soft and squishy kitty that comes to life in your hands.
Crochet No-sew Cat Amigurumi Pattern

From its perky ears to its swirly tail, each stitch adds charm and character, making it the purr-fect pal for cat lovers of all ages! Whether you want a new crafty friend or a homemade gift for someone special, this no-sew cat is sure to be a hit with its adorable looks and huggable feel.
Materials Needed:
- Bulky yarn (The yarn used in this tutorial is from Hobby.)
- 4 mm crochet hook
Getting Started

Making a Magic Ring
- Wrap the yarn around your fingers, going over, under, and then crossing over.
- With your hook, go under the yarn, grab the yarn on the top, and pull it around the hook.
- Grab the yarn on the top again and pull it through the loop on the hook.
Start with six single crochets inside the magic ring.
- To perform a single crochet, insert the hook inside the magic ring, yarn under, pull through, yarn over and pull through both loops on the hook.
- Continue with five more single crochets.
- Begin closing the ring halfway through to make it easier to close completely at the end.
Crocheting the Pattern

Round 1
- Close the magic ring completely.
Round 2: Increases
- Perform an increase by doing two single crochets in the same stitch.
- Use a stitch marker at the beginning of the round to track the starting point and expected stitch count.
- Continue with increases throughout the round to end up with 12 stitches.
For Round 3: Single Crochet and Increase
- Follow a pattern of one single crochet, then an increase until the end of the round to achieve 18 stitches.
Round 4: Single Crochet Around

- Execute one single crochet per stitch around the entire round.
Round 5: Ears and Initial Body Shaping
- Mark the places for ears with stitch markers in stitches 3 and 7.
- Focus on crocheting in the front loops for creating the ear formations.
- Include a detailed step for creating the ear using double crochet, chains, and slip stitches.
- Proceed with rounds of single crochet, adding a bubble stitch for texture.
Rounds 6-9: Shaping and Detailing
- Continue shaping the kitty with single crochets, increases, and bubble stitches. Pay special attention to aligning bubble stitches and adding facial features like eyes and a nose.

Rounds 10-11: Tail and Decreases
- Introduce the tail by working in front loops and chaining.
- Perform decreases to start closing the kitty, incorporating both front loop only and back loop only decreases for shaping.
Finishing Touches
- Add stuffing the kitty before closing.
- Use a needle to close the opening by weaving through the front loops of each stitch.
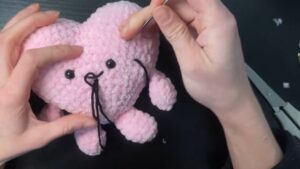
- Embroidery details such as the bottom, whiskers, and nose can be added according to personal preference.
Conclusion
Thank you for following this tutorial to crochet a cute kitty! Don't forget to check out the written pattern on my Instagram for an alternative format. If you decide to try out this pattern, I would love to see your creations - make sure to tag me! Subscribe for more crochet tutorials. See you in the next video!


