
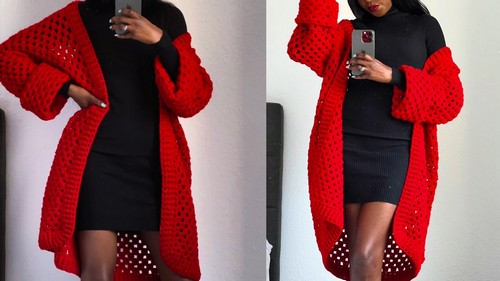
Craft a beautiful granny stitch oversized throw-on cardigan that's perfect for chilly autumn days. The cardigan shows a classic straight shape with comfy sleeves and a lovely ribbed edge.
Crafted from acrylic yarn, it feels cozy without being too heavy. Pair this stylish cardigan with the matching hat from Agnes' channel, and you’ve got a perfect set to keep you fashionably warm!
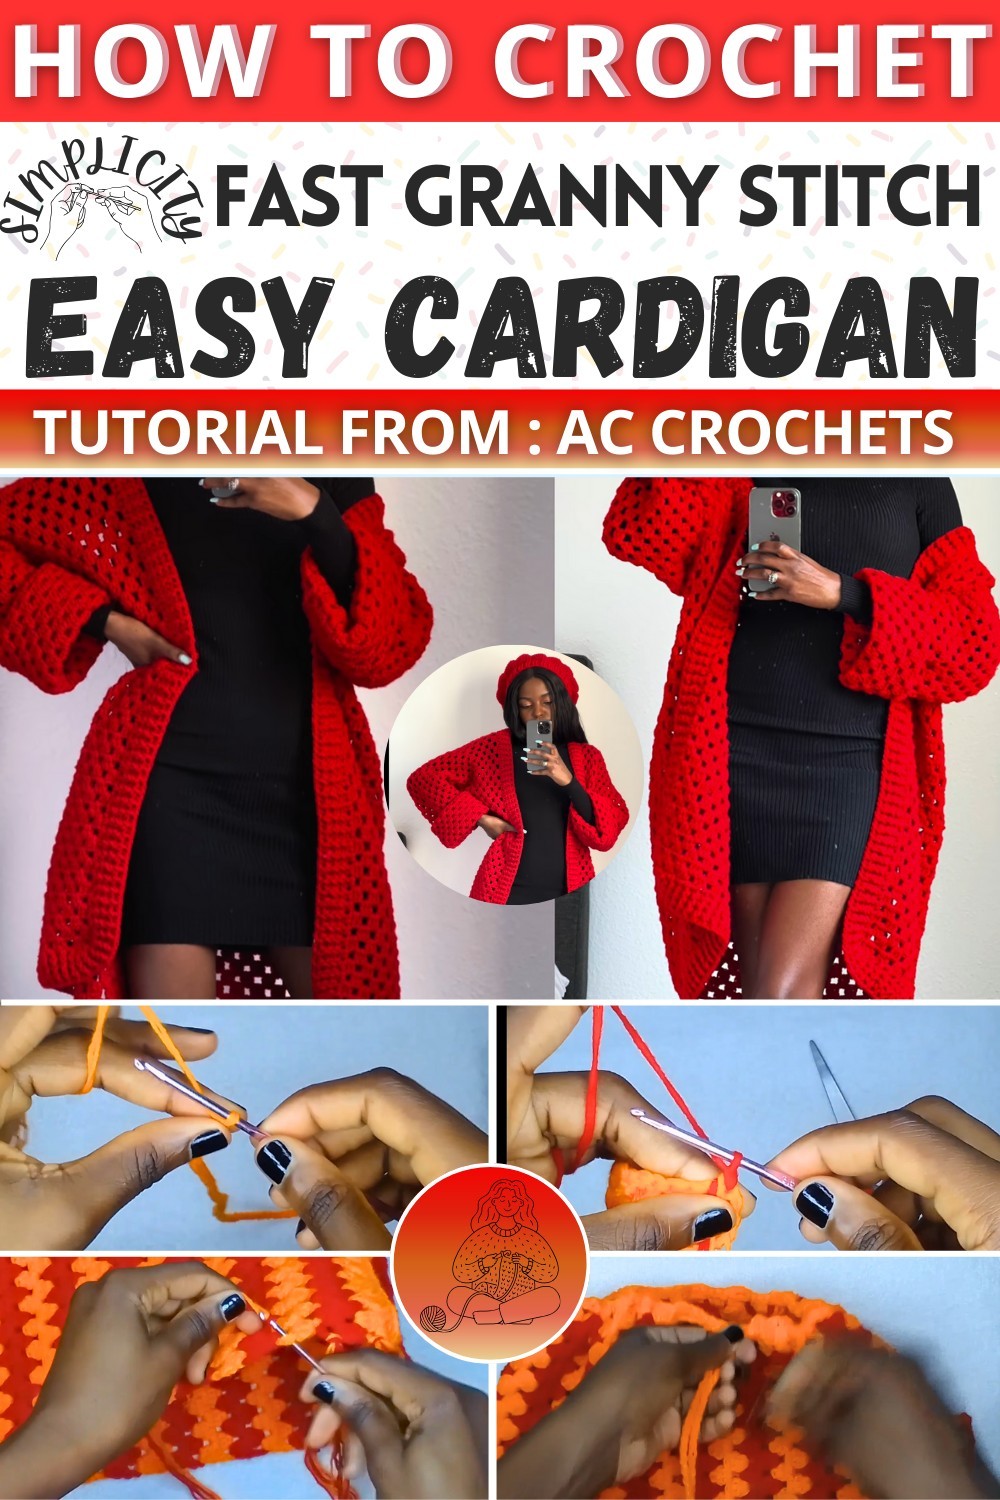
Making The Granny Stitch Cardigan
Materials Needed
- Yarn: 13 skeins of 50 grams (Acrylic yarn, 100%, medium weight, also compatible with DK weight yarn).
- Hook: 4.0 mm hook.
- Scissors
- Tape Measure
Step by step Pattern Details
- Back Panel:
- Start by making a foundation chain:
- Extra Small/Small: Chain 20 inches.
- Medium/Large: Chain 22 inches.
- Extra Large/XXL: Chain 24 inches.
- Row 1: Chain additional 2 chains, then yarn over and make a double crochet in the 3rd chain from the hook. Make two more double crochets in the same chain space.
- Chain 1, skip 2 chains, and in the 3rd chain, make 3 double crochets.
- Repeat the pattern (Chain 1, skip 2, make 3 double crochets) to the end of the row.
- Row 2: Chain 3, skip the first cluster, make 3 double crochets in the next chain-1 space.
- Chain 1, skip the next cluster, and make 3 double crochets in the chain-1 space.
- Continue this pattern to the end of the row, chaining 1 between clusters.
- Row 3+: Chain 1, turn your work, and make 3 double crochets in the first chain-1 space.
- To start the next row, chain 3 and make 3 double crochets in the first chain-1 space.
- Repeat Row 2 and Row 3 until you reach the desired length (28.5 inches for a short person, adjust according to your height).
- Start by making a foundation chain:

- Front Panels:
- Measurements:
- Determine the width for each front panel. Total width of back panel minus 8 inches (for the neckline) divided by 2.
- Attach yarn where you want the front panel to begin and repeat the granny stitch pattern as on the back panel.
- Ensure both front panels have the same number of rows as the back panel.
- Measurements:

- Sleeves:
- Measure 7 inches from the top down both sides of the cardigan and place stitch markers.
- Attach yarn at the stitch marker and make 2 single crochets in each row space up to the other stitch marker (total of 14 inches).
- First Row of Sleeve: Chain 2, make 3 double crochets in the first stitch (forming a cluster), chain 1, skip 2, make 3 double crochets in the third stitch.
- Continue in the granny stitch pattern until the sleeve measures 19 inches or adjust for personal preference.
- Repeat on the other side for the second sleeve.
- Joining Panels and Sleeves:
- Lay the cardigan panels flat, with the wrong side facing up.
- Use single crochet to join panels starting from the bottom of the sleeve, along the sides, around the underarm, and down the side of the cardigan.
- Ensure even stitching for a neat seam.

- Ribbing:
- Attach yarn at the bottom corner of the cardigan and work double crochets evenly around the edge, up the side, around the neckline, and down the other side.
- Row 1: Double Crochets (Foundation Row).
- Where clusters face up (back panel) make 2 double crochets in each chain and 2 double crochets in each chain space.
- Where clusters face down (front panel) make 3 double crochets in each double crochet cluster, and 1 double crochet in each chain space.
- Rows 2-3: Front Post Double Crochet and Back Post Double Crochet alternating to form a ribbed effect.
- Finish off and weave in all ends.

Final Step:
After all parts are connected and the ribbing is complete, weave in all ends. Flip the cardigan to the right side and enjoy your cozy, handmade granny stitch oversized throw-on cardigan!

Tips
- Ensure your stitches are loose when making the foundation chain to avoid tightness.
- Adjust the length of the cardigan and sleeves according to your personal preference and height.
- Keep notes on row counts to ensure symmetry between pieces.


