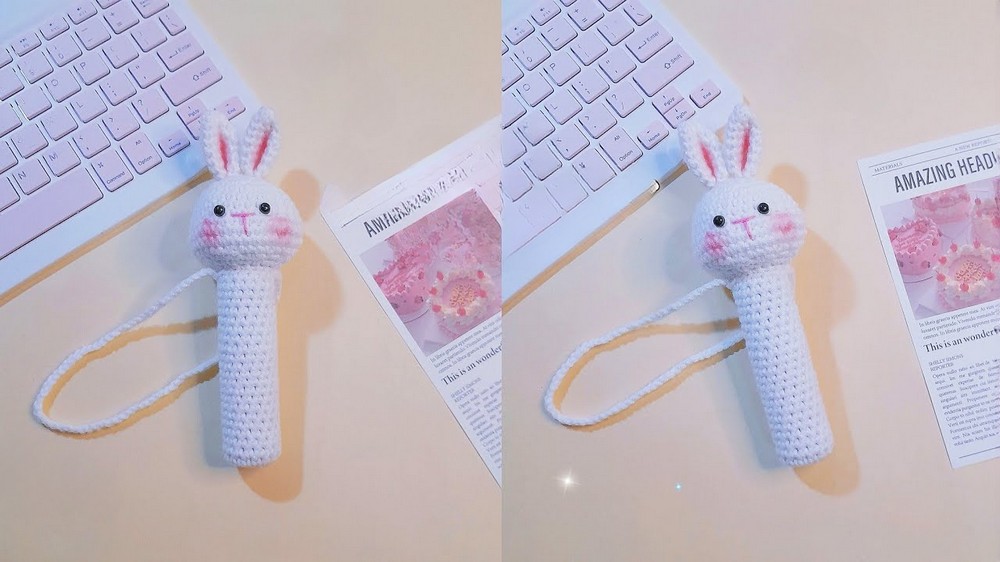
Having a cute little bunny holding your lipstick! Made with love, the Crochet Bunny Lipstick Holder is not just a holder; it's a delightful friend on your dressing table. Using soft yarn, this bunny is made to guard your lipstick with its adorable look.
Crochet Bunny Lipstick Holder
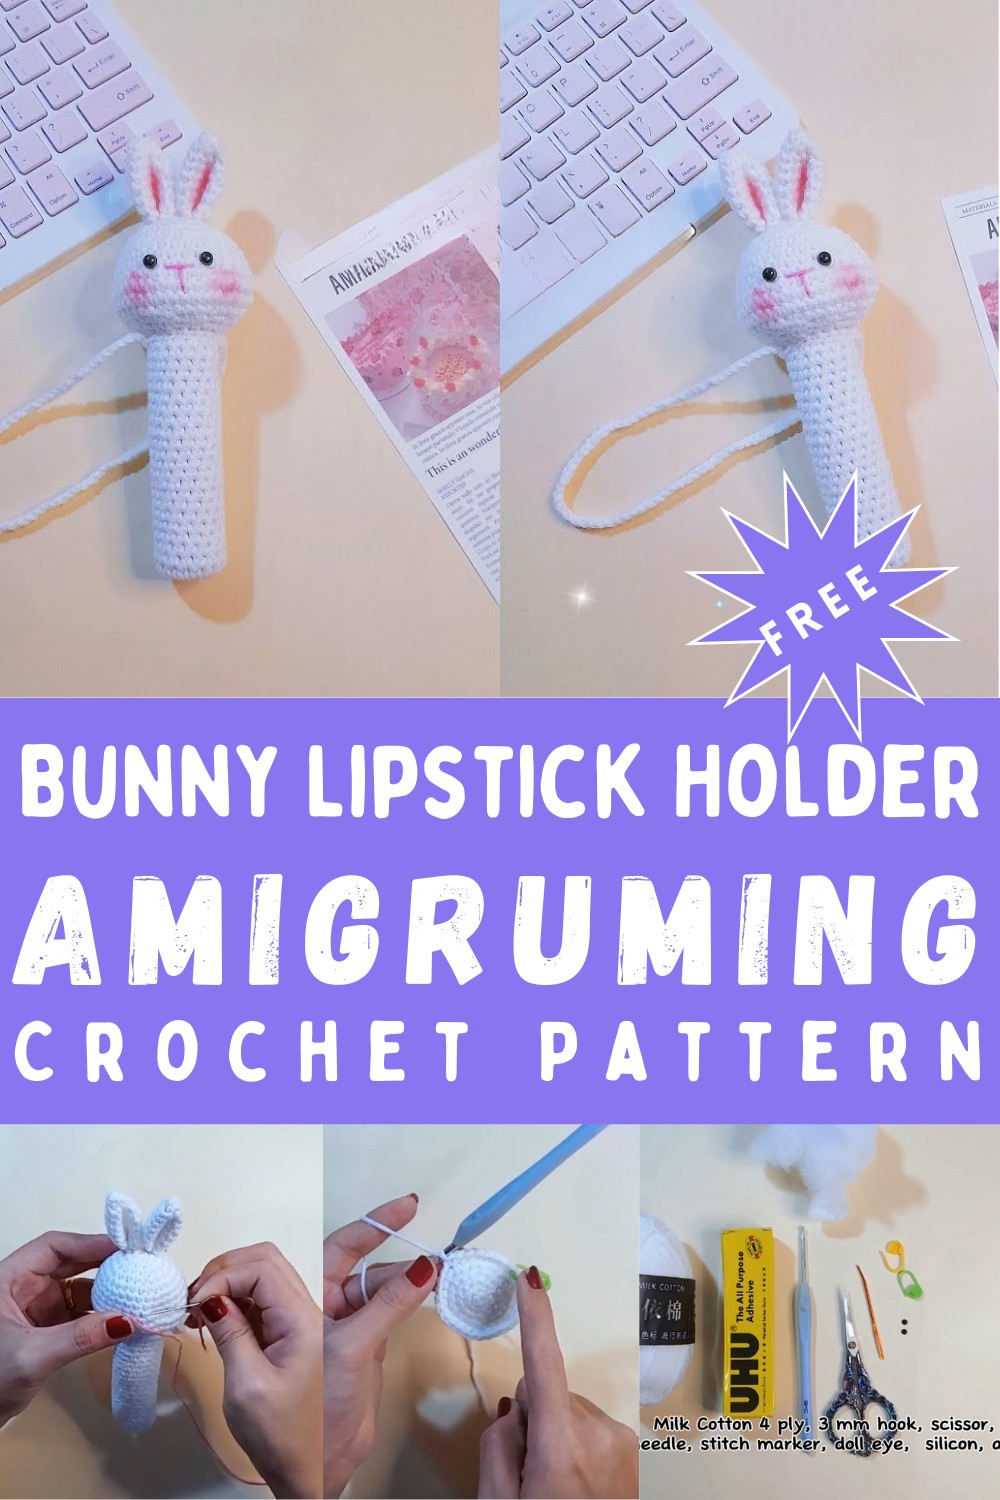
Its ears are perky, and its small eyes gleam with joy, making you smile every morning. This holder is not only practical, keeping your lipstick in place, but it also adds a touch of charm to your room. It's a simple pleasure, turning an everyday item into something special and heartwarming.
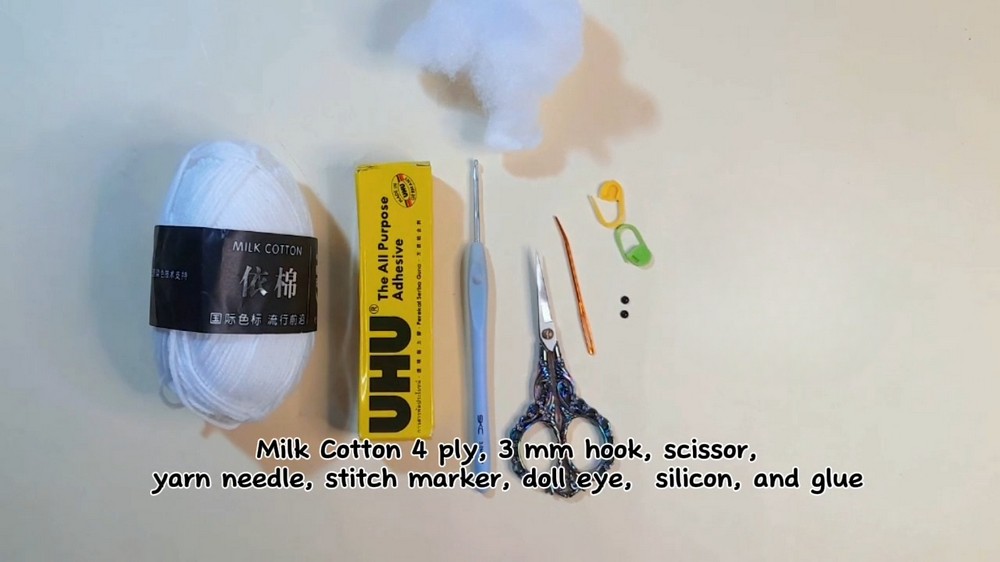
Materials
- Medium Weight Yarn
- Crochet Hook (3.5 mm - 4 mm)
- Stitch Marker
- Yarn Needle
- Scissors
- Polyester Fiberfill
- Safety Eyes (6mm-8mm)
- Embroidery Thread or Yarn (for details)
Lipstick Handle Part
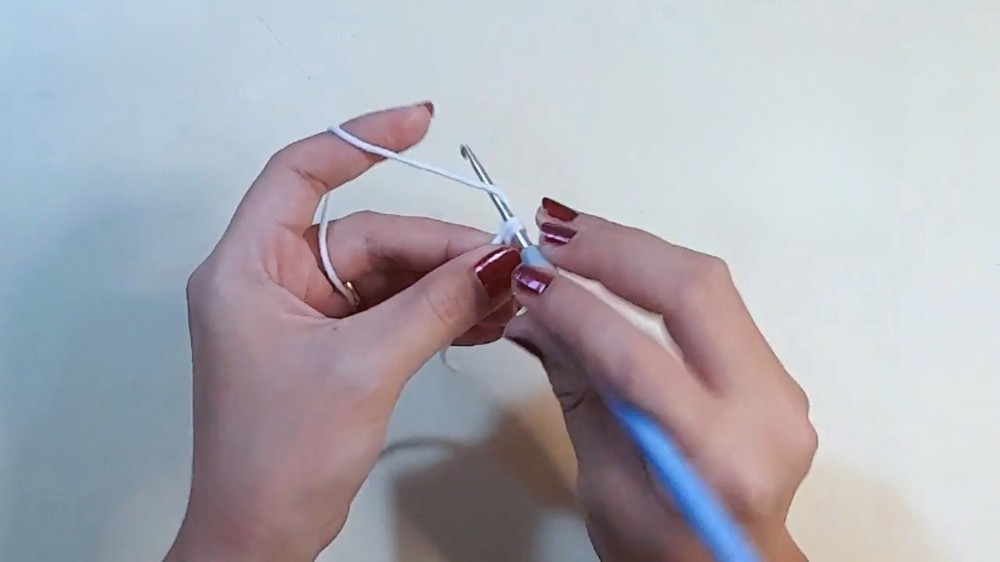
- Round 1: Start with a magic ring. Make 8 single crochets (sc) into the magic ring. Pull the ring tight and join with an sc in the first stitch.
- Place a stitch marker to mark the beginning of the round.
- Round 2: Increase by making 2 sc in each of the 8 stitches from the previous round (16 sc).
- Rounds 3-20: Make 1 sc in each of the 16 stitches. Continue in rounds until the pouch reaches the desired length.
- Round 21: Chain 7, skip 7 stitches, and then make 1 sc in each of the next 9 stitches.
Bunny's Head
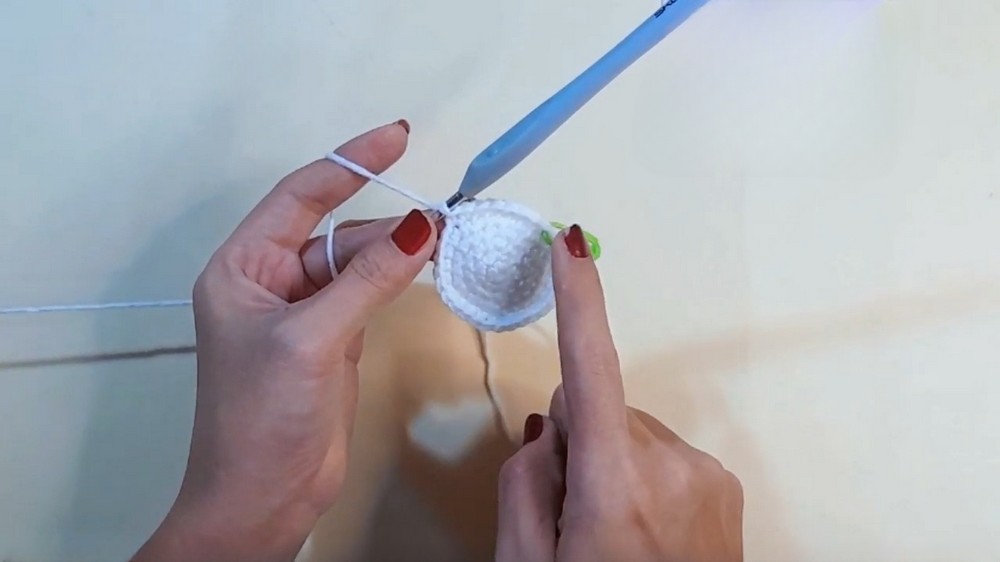
- Round 1: Start with a magic ring. Make 6 sc in the ring. Pull the ring tight and join with an sc in the first stitch.
- Place a stitch marker to mark the beginning of the round.
- Round 2: Increase by making 2 sc in each of the 6 stitches (12 sc total).
- Round 3: 1 sc, then 1 increase (2 sc in the next stitch). Repeat this pattern 6 times around.
- Round 4: Make 1 sc, then 1 increase, followed by 2 sc and then another increase. Repeat this pattern 5 times and finish with 1 sc in the last stitch.
- Round 5: 3 sc, then 1 increase. Repeat this pattern 6 times around.
- Rounds 6-8: Make 1 sc in each of the 30 stitches around.
- Round 9: 6 sc, then 1 increase in each of the next 3 stitches, 1 sc, 1 increase, 1 sc. Repeat this pattern 4 times and then make 1 increase in each of the next 3 stitches, ending with 6 sc.
- Rounds 10-11: Make 1 sc in each of the next 40 stitches.
- Round 12: 3 sc, then 1 decrease (sc 2 stitches together). Repeat this pattern 8 times around.
- Round 13: 1 sc, then 1 decrease. Repeat this pattern 7 times around and finish with 1 sc in the last stitch.
- Round 14: 1 sc, then 1 decrease. Repeat 8 times around.
Bunny's Ears (Make 2)
- Round 1: Start with a magic ring. Make 6 sc in the ring.
- Round 2: 1 sc, then 1 increase. Repeat 3 times around (9 stitches).
- Round 3: Make 1 sc in each of the next 9 stitches.
- Round 4: 2 sc, then 1 increase. Repeat this pattern 3 times around.
- Rounds 5-8: Make 1 sc in each of the 12 stitches.
- Round 9: 2 sc, then 1 decrease. Repeat 3 times around (9 stitches).
Assembly
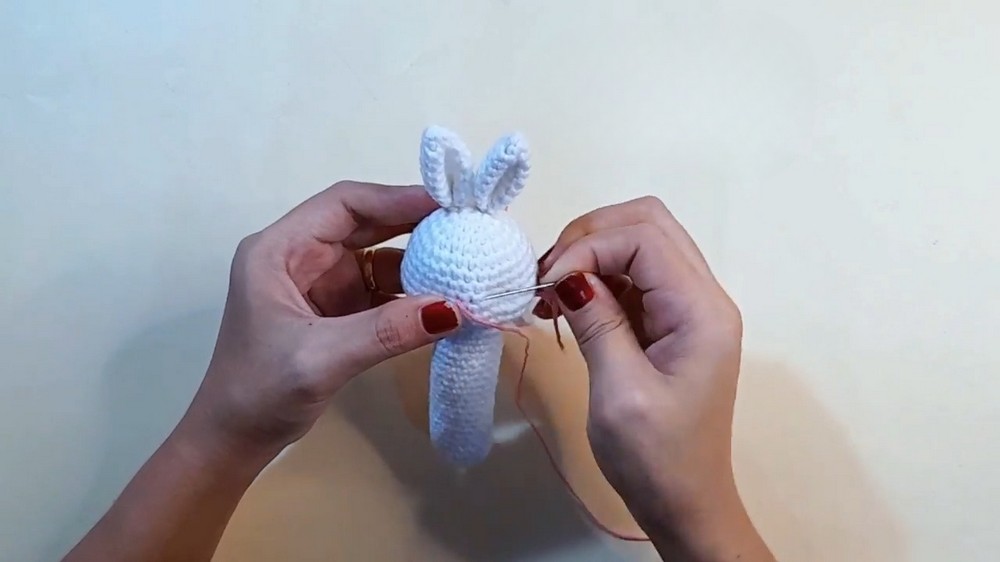
- Fold the ears in half and sew the edges to shape them.
- Position and sew the ears securely to the top of the head.
- Use pink yarn to stitch the nose and add doll eyes for finishing touches.