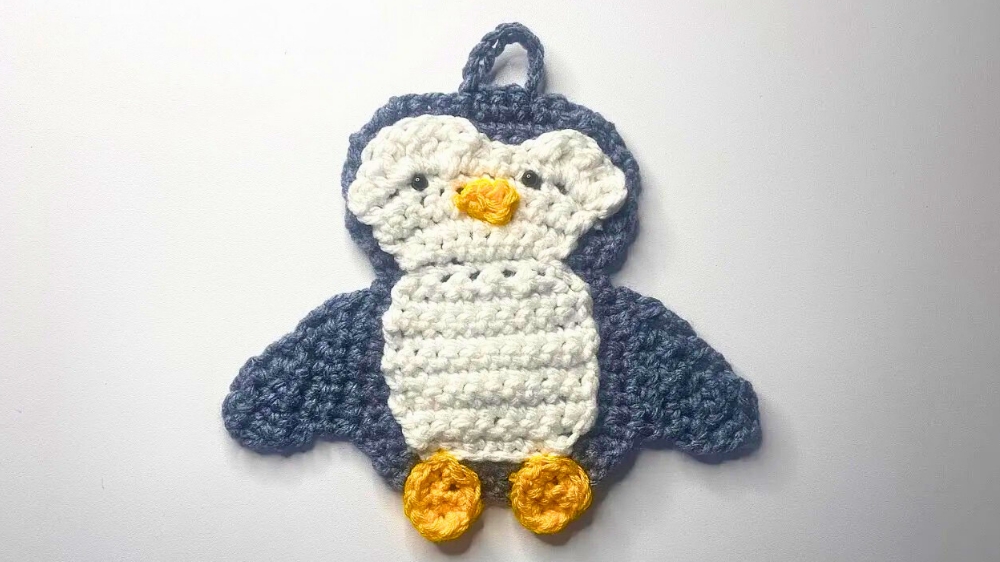
Whimsical and cozy, this Crochet Penguin Potholder pattern turns everyday kitchen tasks into a fun and cheerful experience.
Winter kitchens have long been a place where warmth and creativity meet, and small details can make daily tasks more joyful. A crochet penguin potholder captures that charm, transforming a practical kitchen tool into a cheerful and functional accent. Its playful penguin shape adds character to cooking spaces while providing the protection needed to handle hot pots, pans, or dishes safely. This combination of whimsy and utility makes it both a useful accessory and a decorative highlight.
Joyful Crochet Penguin Potholder for Bright Kitchen Spaces

The potholder begins with a firm base worked in tightly stitched rows, ensuring heat resistance and durability. Layers of yarn form the penguin’s body, with contrasting colors creating the classic black, white, and orange features. Details like wings, beak, and eyes are added carefully, enhancing its character while keeping it functional. The structure allows for a secure grip, and the soft, thick yarn provides comfort while handling hot cookware.
Beyond appearance, this crochet penguin potholder offers lasting practicality. It is washable, lightweight, and durable, making it a reliable tool for everyday cooking. Its cheerful form also makes it an ideal gift for family, friends, or penguin enthusiasts. Combining charm, protection, and playful elegance, the crochet penguin potholder adds warmth and personality to any kitchen.
Materials Required
To complete this project, you will need:
- Yarn: Various colors (e.g., base color, white, contrasting colors for the wings, beak, and feet).
- Crochet Hook: The size appropriate for your yarn (as recommended on the yarn label).
- Scissors: For trimming excess yarn.
- Stitch Markers (optional): To keep track of rounds, especially when decreasing or increasing.
- Darning Needle: For joining the parts and finishing touches.
- Eyes: Either safety eyes or embroidered eyes (optional).
Special Features of the Project
- Versatility: Functions both as a practical pot holder and as a decorative kitchen item.
- Customizable: The bird's colors and design elements can be customized to your preference.
- Detailed Shape: Includes features such as wings, a beak, feet, and a hanger loop for added functionality and charm.
- Beginner-Friendly with Challenges: While the main body is beginner-friendly, detailed parts like the feet and wings add fun challenges for intermediate crocheters.
Step-by-Step Instructions
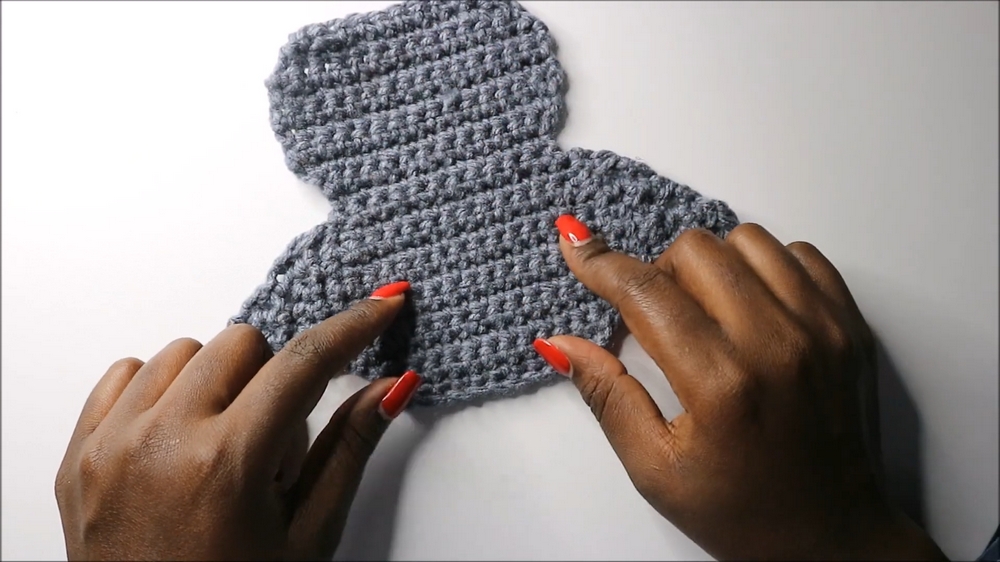
Main Body of the Pot Holder
- Start with the Base Chain:
- Chain 12.
- Begin single crocheting from the second chain from the hook, creating 11 single crochets for the first row.
- Increasing Rows (2–3):
- At the end of each row, chain 1 and turn.
- Increase in the first and last stitches, adding 2 stitches per row.
- By the end of Round 3, you will have 15 stitches.
- Maintaining Shape (Rounds 4–9):
- Work 15 single crochets for each row to maintain the body’s shape.
- Chain 1 at the end of each row and turn your work.
- Decreasing Rows (Rounds 10–13):
- Begin with a decrease at the first stitch and at the last stitch of the row.
- Follow the pattern:
- Round 10: 11 single crochets.
- Round 13: End with 11 stitches.
- Increasing the Top Shape (Rounds 14–19):
- Add increases in Row 14 to expand the width slightly.
- Continue to 15 stitches by repeating single crochets across.
- This defines the symmetrical pot holder's body.


Wings
- Attach your yarn just below the "neck" section of the pot holder.
- Crochet seven single crochets downward, creating the length of the wing.
- Follow the shaping pattern:
- Decrease in rows to create the tapered point of the wing.
- Alternate between decrease rows and slight increases to shape the rounded edge.
- Complete six rows for one wing, then create the second wing symmetrically on the opposite side.
Inner White Section
- Chain 8.
- Work single crochets starting from the second chain, creating 7 stitches for the base row.
- Follow this pattern:
- Work flat rounds with occasional increases.
- Increase and decrease rows strategically to form an oval-shaped section.
- Use double crochet (DC) to add textured rows around the edges, enhancing the design.

Feet
- Create a magic ring and crochet six single crochets into the ring.
- Increase every stitch in the next round to end with 12 stitches.
- Slip stitch and fasten off, leaving a long tail to sew the feet onto the base.
Beak
- Chain 5, starting the triangular shape.
- Decrease twice in the row to form a small triangle.
- Slip stitch and secure the yarn for sewing.
Assembly
- Attach the wings on opposite sides of the pot holder’s "neck."
- Sew the white section into the center of the base using a darning needle.
- Secure the feet and beak into their respective positions to give the design character.
- Add eyes (safety eyes, crochet, or embroidered) above the beak.

Hanger Loop
- Attach a strand of yarn to the top center.
- Chain a length suitable for hanging (customizable).
- Attach the chain securely to the opposite side to form the loop.
Level of Difficulty
This project is rated as beginner-to-intermediate:
- Beginner-Friendly Sections: The body of the pot holder involves basic single crochet stitches and incremental increases/decreases.
- Intermediate Challenges: The creation of details such as wings, feet, and the white inner section requires more precision and some shaping techniques, which may be slightly challenging for beginners but manageable with practice.
Tutor’s Suggestions
- Use Cotton Yarn: Cotton is heat-resistant, making it ideal for practical pot holders.
- Pay Attention to Stitch Placement: Consistent placement in decreases and increases ensures symmetrical shaping.
- Customize Colors: Experiment with contrasting yarns for bright, decorative designs.
- Block the Pot Holder After Completion: This helps the design retain its shape and creates a professional finish.
Uses of the Pot Holder
- Functional Pot Holder: A practical accessory to protect countertops or hands from hot pots and pans.
- Kitchen Decor: Use it as a hanging decor piece to brighten your kitchen space.
- Handmade Gifting: A charming, thoughtful handmade item for friends or family.
- Teaching Tool: Ideal for learning the transition between simple stitches and detailed structural elements.
Crochet Tip
When adding smaller parts (wings, feet, beak), pin them into place first before sewing. This ensures correct alignment and placement, preventing adjustments after attachment.
Conclusion
This pot holder crochet project is perfect for anyone looking to create a functional yet decorative handmade item. The balanced mix of basic and intermediate techniques makes it suitable for crocheters of all levels, and the result is a beautiful kitchen accessory with a unique bird theme.