
It’s a chilly morning, and you’re looking for something simple yet stylish to keep cozy while finishing that last-minute errand or stepping out for coffee. That’s where a crochet headband pattern becomes your ultimate go-to. Not only does a headband offer warmth without the bulk of a hat, but it’s also a chic accessory to complement any outfit.
Whether you’re crafting a chunky braided design for winter or a lightweight boho headband for summer festivals, the versatility is endless. Style it with loose curls, a high ponytail, or even a messy bun to instantly elevate your look. These patterns are a great way to experiment with colors, textures, and skills, making them perfect for beginners or pro crocheters craving a quick, fulfilling project.
Step-by-Step Crochet Headband That Look Professional
Materials
For the Headband
- Yarn:
- Main Color: Any soft baby yarn (White)
- Optional Color: White for flowers or Baby Blue
- Hook Size: 3.5mm crochet hook
- Notions:
- Scissors
- Stitch markers
- Measuring tape
- Tapestry needle
For Decoration
- Embellishments:
- 3 small pearls or decorative beads to sew onto the flowers
- Fabric glue (optional) for securing pearls
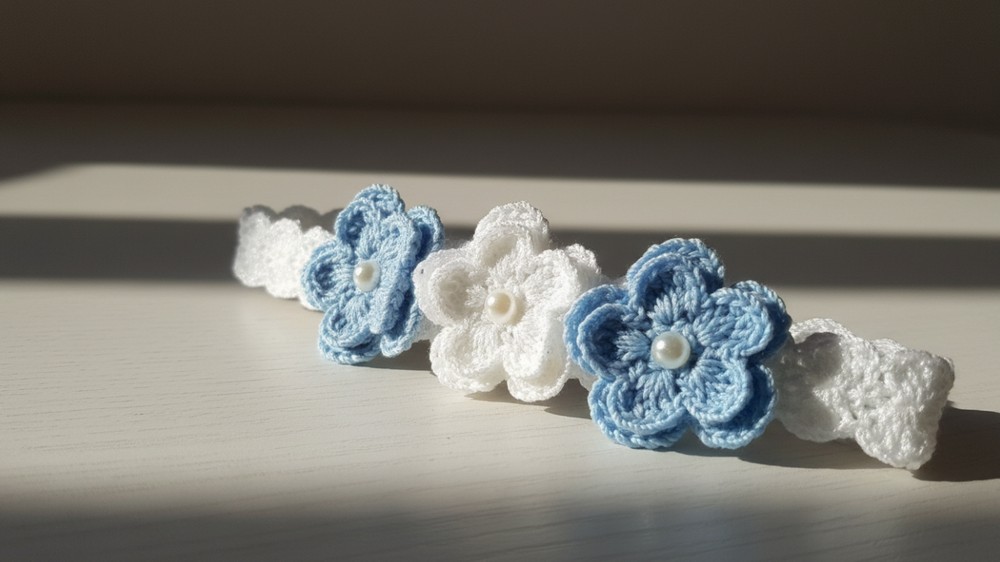
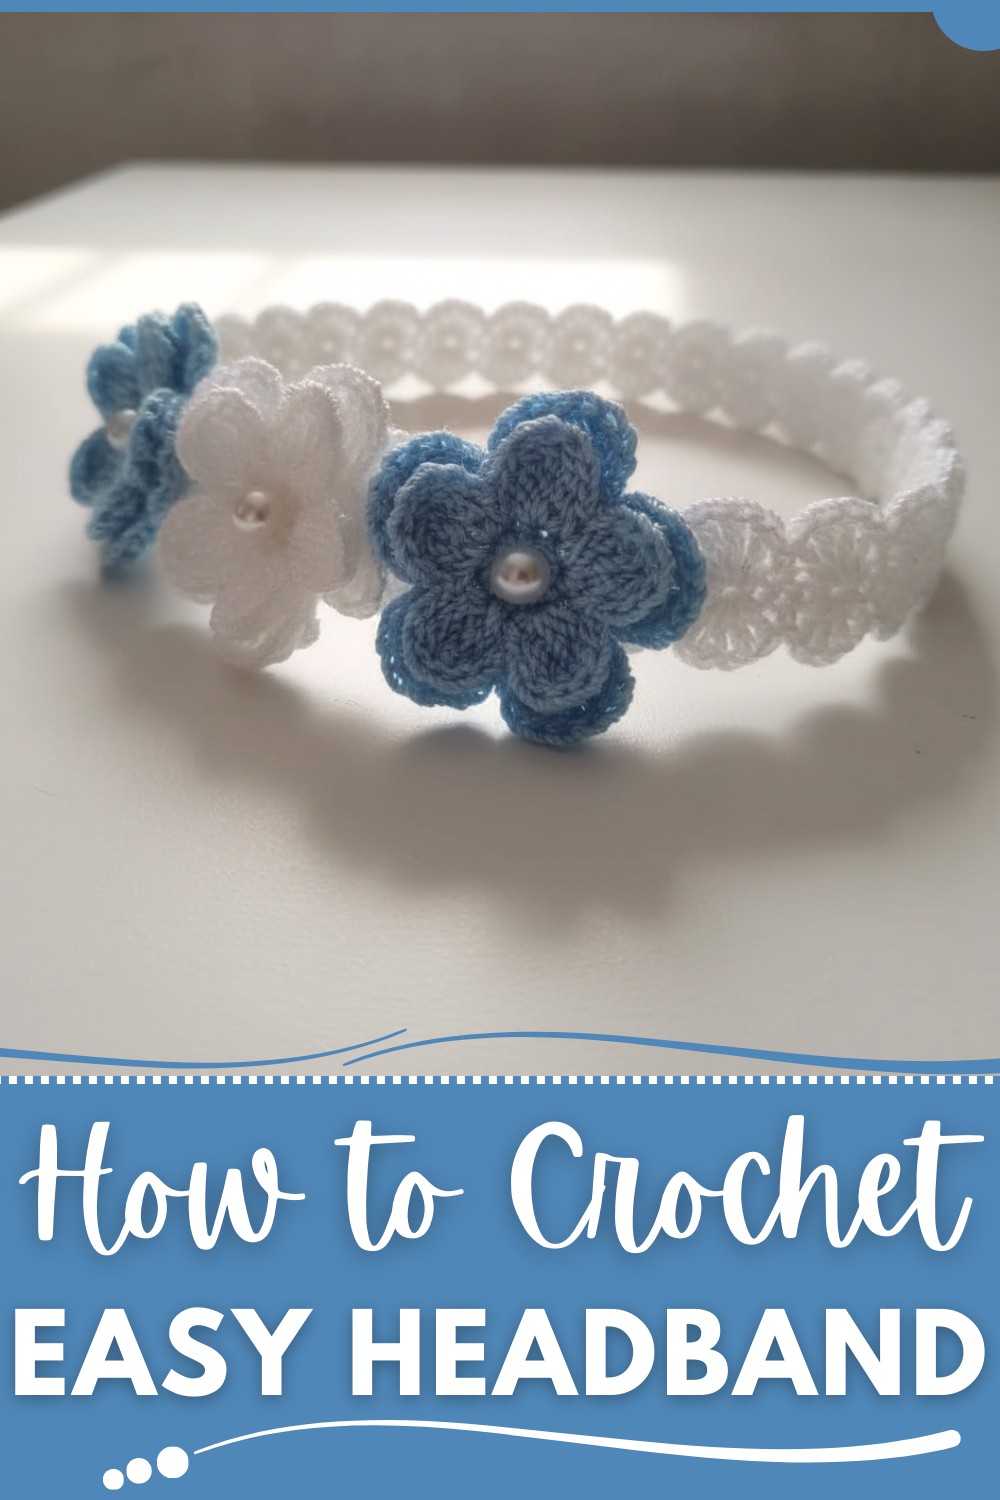
Crochet Headband Pattern with Flowers
This detailed pattern will guide you in making a crochet headband with matching flowers, perfect for babies aged 3–6 months. The instructions highlight all necessary materials, step-by-step directions, tips for success, customization ideas, variations, and essential remarks.
Skill Level: Intermediate
This project requires basic familiarity with creating chains, working in rounds, and forming magic rings. It's suitable for anyone with some experience in assembling crochet embellishments.
Pattern Overview
Headband Dimensions
- Default Size: 33cm (for ages 3–6 months). Adjust length by adding or subtracting chains in multiples of 4.
Finished Look
The headband features a textured body with cluster stitches and flowers sewn onto it, paired with pearl embellishments for elegance.
Key Abbreviations
- ch = Chain
- hdc = Half Double Crochet
- sc = Single Crochet
- sl st = Slip Stitch
- dc = Double Crochet
- sp = Space
Headband Pattern
Step 1: Base Chains
- Start with a slip knot.
- Chain 88 (or multiples of 4 for customization). This should measure roughly 33cm.
- Add 1 extra chain for turning.
Step 2: Row 1 – Half Double Crochet
- Skip the first chain and work 1 hdc in the second chain, continuing across the row.
- At the end of the row, you should have 88 hdc stitches.
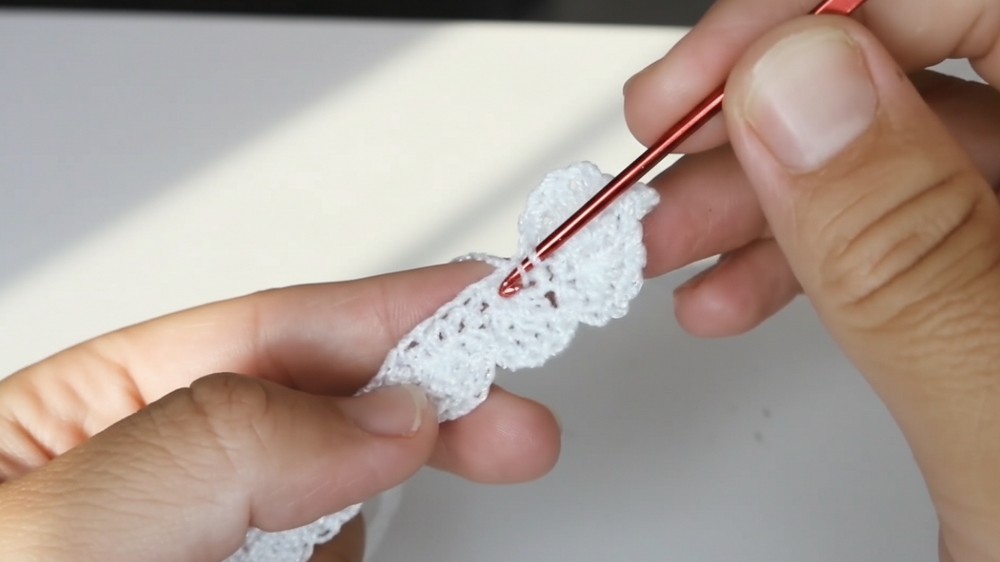
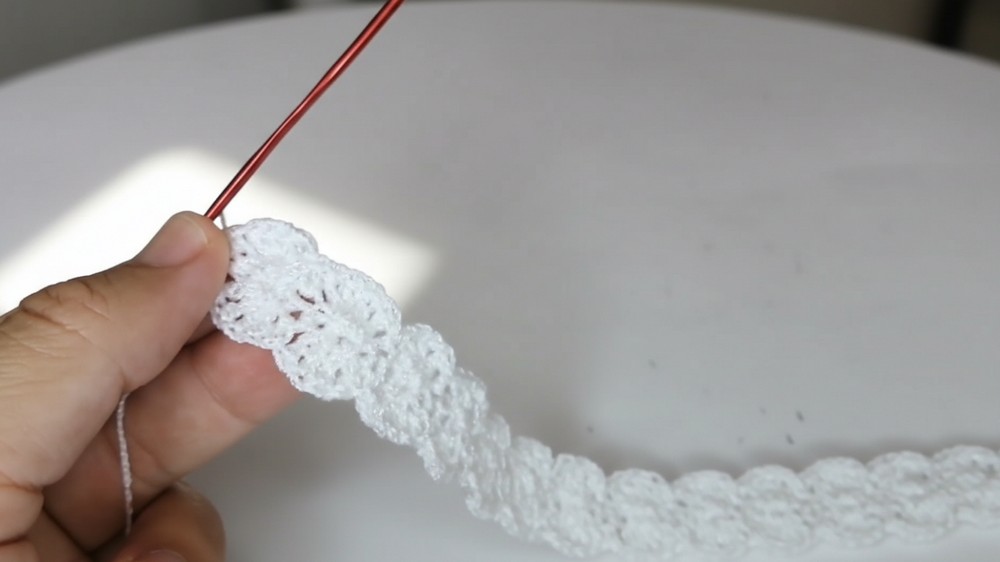
Step 3: Row 2 – Cluster Stitches
- Chain 1 and turn. Work 1 sc in the first stitch.
- Skip 1 stitch and work 4 dc in the next stitch.
- These form the cluster (massifs).
- Skip the next stitch and work 1 sc in the following stitch.
- Repeat across the row: Skip 1 stitch, 4 dc in the next stitch, skip 1 stitch, and 1 sc in the next stitch.
Step 4: Rows 3–5 – Adding Texture
- Repeat Row 2 for the next 3 rows to maintain the texture.
- Use a stitch marker to keep track of your rows.
Step 5: Final Row – Slip Stitches
- After completing your textured rows, end with sl st across each stitch.
- Fasten off and weave in the ends.
Flower Pattern
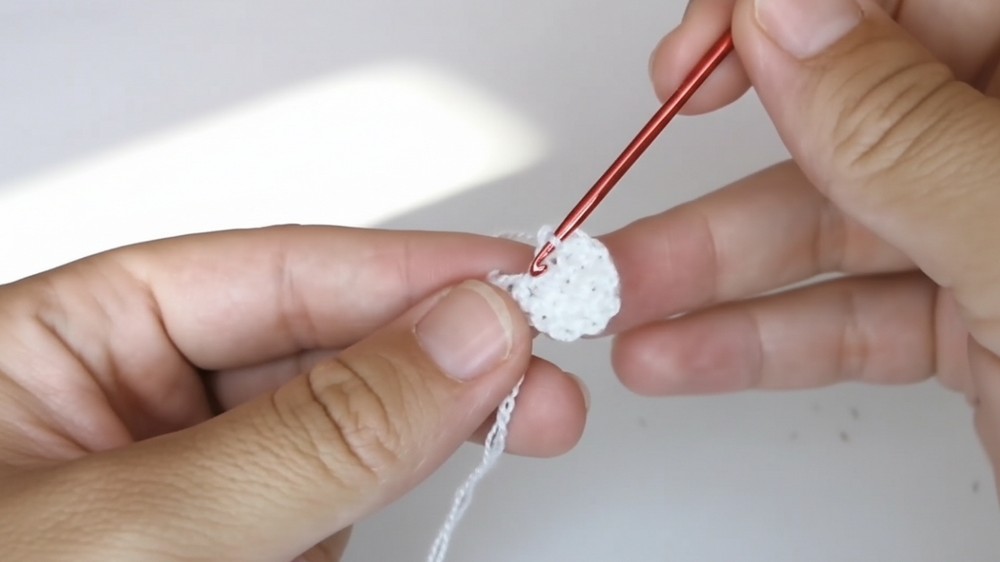
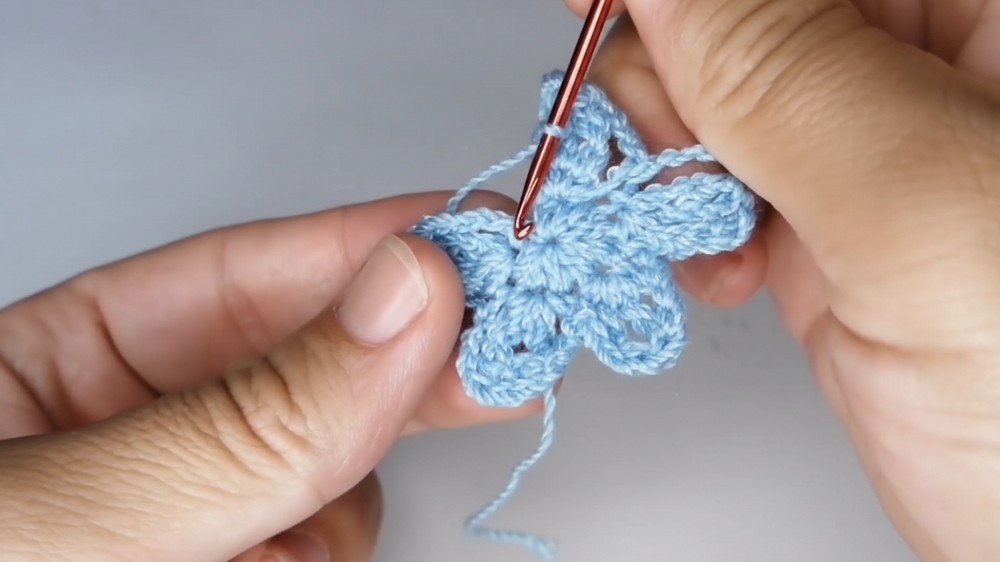
Step 1: Magic Ring
- Using the secondary color (e.g., mustard or white), create a magic ring.
- Work 9 hdc inside the ring.
- Pull the tail tightly to close the ring and join with a sl st.
Step 2: Creating Petals (First Layer)
- Chain 3, yarn over twice, and work 4 dc into the same stitch.
- Draw through the loops 4 times to complete each petal.
- Work 3 chains and secure them with a sc in the next stitch.
- Repeat until you have 5 petals, then sl st to close the round.

Step 3: Creating the Second Petal Layer
- Starting behind the previous petal layer, chain 3 and work 4 dc into each petal’s anchor point (the loop formed in the prior round).
- After completing 5 new petals, sl st to the start of the round.
Step 4: Embellishment
- Sew pearls or beads into the middle of each flower using needle and thread or glue.
- Fasten off and hide tails.
Assembly Instructions
- Arrange the flowers evenly on one side of the headband. You can place them in the middle or off-center.
- Use a tapestry needle to sew the flowers onto the headband securely.
- Ensure they cover any joins or extra strands.
- Secure any loose ends and test durability.
Customization Ideas
- Color Variation:
- Choose soft pastel colors for flowers or a gradient yarn for the headband.
- You can replace the white flower with baby pink or blue for gender-specific styling.
- Size Adjustment:
- For newborns, reduce the chains to 72 (about 27 cm).
- For toddlers, increase to 96 chains (~37 cm).
- Decoration Variation:
- Replace pearls with buttons, mini bows, or sequins for added charm.
Conclusion
Your crochet headband with matching flowers is now complete! This project adds a personal touch and elevates the style of a baby outfit, making it perfect for gifting or special occasions. The textured body of the headband paired with delicate flowers creates a beautiful accessory.
Important Remarks
- Ensure your yarn is soft and baby-friendly as this project is intended for delicate skin.
- Don’t forget to test the stretch of the headband before finishing—crocheting too tightly may limit elasticity.
Pattern Correction
If your stitches aren’t lining up:
- Ensure you maintain multiples of 4 chains for the foundation.
- Don’t forget to skip stitches when required to form the cluster texture (Row 2).
Tips for Success
- Always check stitch consistency throughout the project to avoid uneven texture.
- Use blocking techniques (light steaming) to ensure the flowers sit flat on the headband.
- For beginners: Practice the magic ring technique before starting the flowers.


