• Skip to primary navigation
  • Skip to main content
  • Skip to primary sidebar
Crochet Patterns logo
  • Home
  • Free Crochet Patterns
    • Amigurumi Patterns
    • Crochet Accessories
    • Crochet Hat Patterns
    • Crochet Bag Patterns
    • Crochet Top Patterns
    • Crochet Cardigan Patterns
    • Crochet Scarf Patterns
    • Crochet Blanket Pattern
    • Crochet Pillows
    • Crochet Shawl Patterns
    • Crochet Sweater Patterns
  • Contact Us
  • About Us
menu icon
go to homepage
search icon
Homepage link
  • Home
  • Free Crochet Patterns
    • Amigurumi Patterns
    • Crochet Accessories
    • Crochet Hat Patterns
    • Crochet Bag Patterns
    • Crochet Top Patterns
    • Crochet Cardigan Patterns
    • Crochet Scarf Patterns
    • Crochet Blanket Pattern
    • Crochet Pillows
    • Crochet Shawl Patterns
    • Crochet Sweater Patterns
  • Contact Us
  • About Us
×

Wooden Bottom Crochet Diagonal Basket Pattern Free

In this guide, creator shows how to make a beautiful basket using a diagonal pattern with a wooden base. Using "Biscuit" yarn in bell, niagara, and creamy colors, you can create a basket that's 16 cm in diameter and 9 cm tall. The step-by-step guide ensures that even beginners can achieve a neat, stylish basket. The final product is not only functional but also a pretty piece to display at home.

Beautiful Pattern Crochet Diagonal A Basket Of Knitted Yarn With A Wooden Bottom Needlework

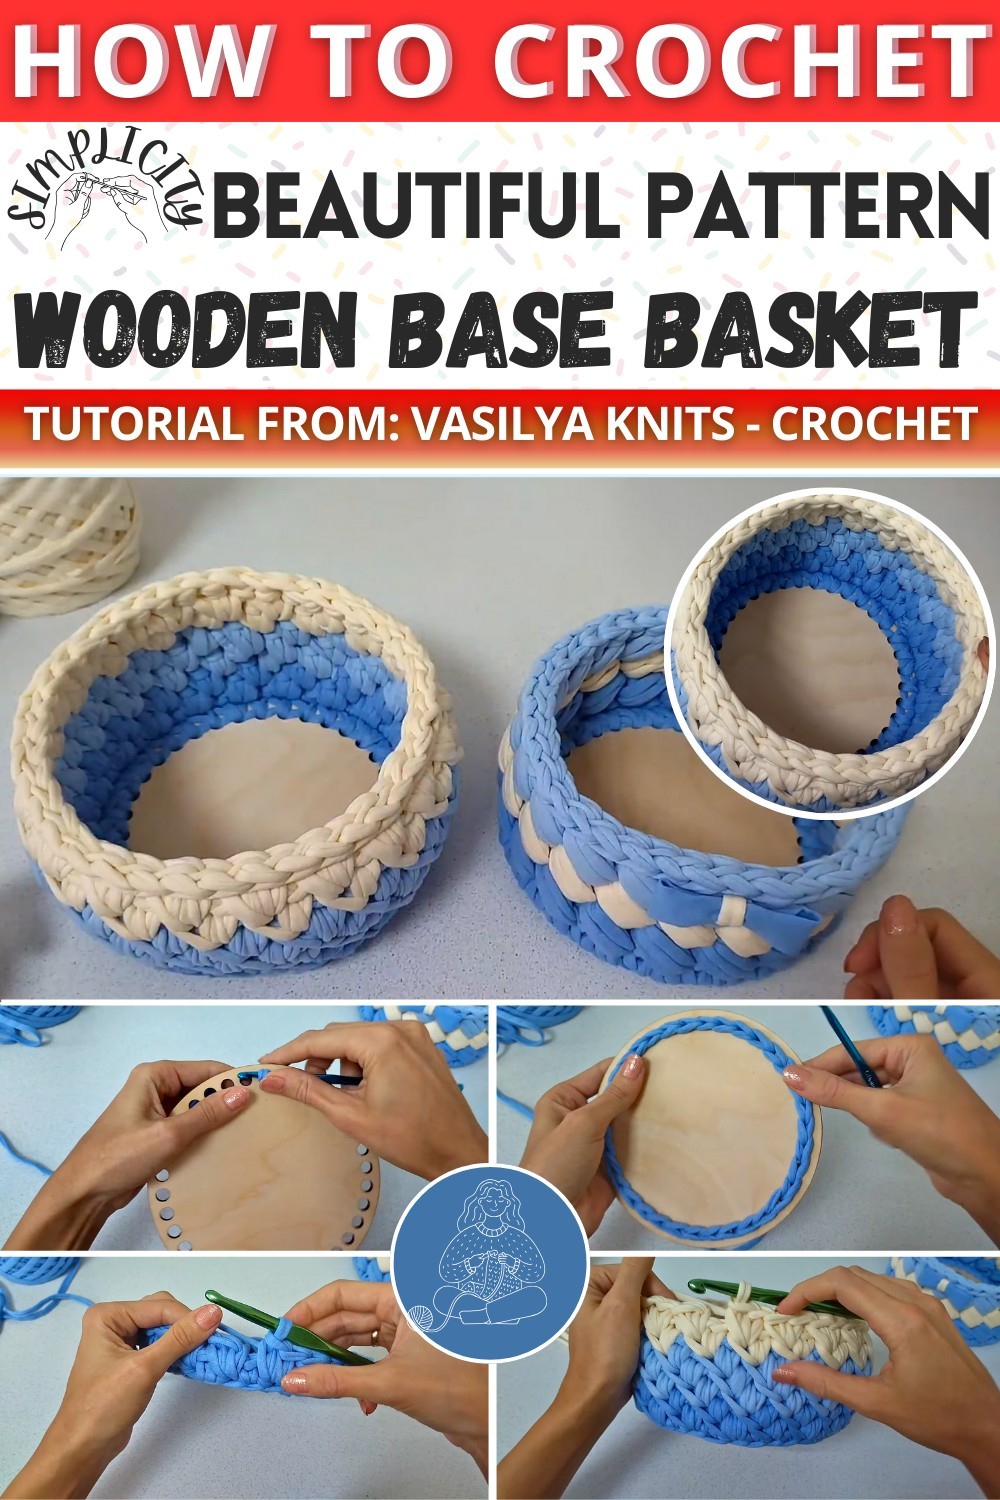
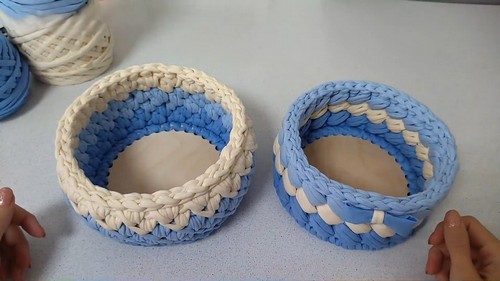
Making The Crochet Diagonal Basket

Materials Needed:

  • Yarn: Biscuit knitted yarn in three colors: bell, niagara, and creamy.
  • Wooden Bottom: 15 centimeters in diameter.
  • Hooks:
    • Hook number 5 for the bottom.
    • Hook number 8 for the walls.

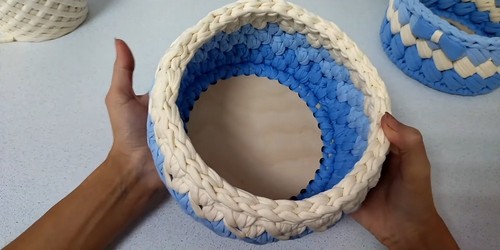
Final Dimensions of the Basket:

  • Diameter: 16 centimeters.
  • Height: 9 centimeters.

Step-by-Step Pattern:

  1. Preparation:
    • Take hook number 5.
    • Leave a 10-15 centimeters tail of the yarn.
  2. Knitting the Wooden Bottom:
    • Insert the hook into the first hole, pull out a loop and stretch it.
    • Insert the hook into the next hole, pull out a loop, and knit it.
    • Repeat until all holes are knitted.
    • For the last hole, insert the hook and grab the tail instead of the working thread, pull it through and completely pull out.
  3. Connecting the Bottom:
    • Insert the tail through the pigtail at the center of the first loop on the reverse side.
    • Stretch the tail along the knitting.
  4. Making Increments:
    • Increment to ensure the basket stays flat and doesn’t narrow:
      • Example with 34-hole bottom: Make 6 more increases to get 40 loops (even number required).
      • Insert hook where the tail comes out, pull the yarn, and knit a column.
      • In the same hole, knit another column (increase).
      • Repeat the sequence: Knit 5 single columns, make an increment by knitting 2 columns in one hole.
      • At the end, adjust the number of columns to maintain symmetry.
  5. First Row with Single Crochets:
    • Use the same yarn:
    • Knit single crochets in each hole, knitting through the upper pigtail and under the jumper.
    • Connect the row: Pull out a larger loop, hook under the first pigtail, grab the loop, and pull through.
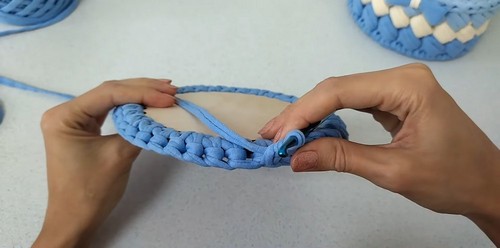
  6. Knitting the Main Diagonal Pattern:
    • Switch to hook number 8.
    • For each stitch:
      • Insert the hook under the V of the stitch, pull the yarn through, and form a loop at the same level.
      • Skip one V and repeat: insert, pull, and knit 2 loops together.
      • Continue the pattern across the row.
    • At the end, connect as done previously.
    • Switch colors as desired:
      • Cut the yarn, pull through the final loop, and transition to a new color.
      • Insert the new yarn and knit two columns in designated holes.
      • Repeat the diagonal pattern with the new color.
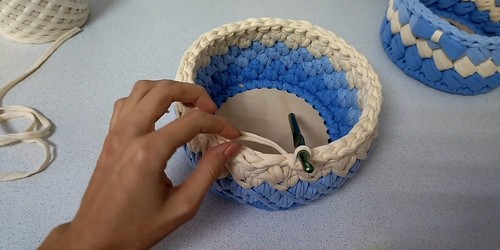
  7. Tying the Edge:
    • After desired rows (e.g., 7 rows):
      • Transition into creating a smooth edge using connecting loops.
      • Insert the hook into the next hole, pull the yarn, and knit it.
      • Continue around the basket edge.
    • Complete the connection at the end of the row.
    • Cut the yarn, pull the final thread through the loop, and hide the end.
  8. Finishing the Basket:
    • Steaming:
      • Lightly steam the basket with steam to shape it.
      • Mold it with hands for a more convex shape and leave it to dry.
    • Hide tails: Ensure all yarn tails are securely hidden within the stitches.

YouTube

Pin110
110 Shares

More Free Crochet Patterns

  • Stylish and Simple Fancy Granny Square Crochet Ideas
    Transform Your Projects with Our Free Fancy Granny Square Pattern
  • Simple & Easy Crochet Coaster Flower Bouquet Pattern
    DIY Floral Delight: Free Crochet Coaster Flower Bouquet Pattern
  • How to Crochet a Starburst Granny Square
    Shine Bright with This Free Starburst Granny Square Crochet Pattern
  • Cute & Colorful Crochet a Large Sunburst Granny Square
    Brighten Your Projects with This Free Large Sunburst Granny Square Pattern

Primary Sidebar

Latest Post

  • Crochet Reversible Sweater Vest 1
    FREE Crochet Reversible Sweater Vest Pattern for All-Season Wear
  • How To Make A Simple Bucket Hat 1
    FREE Crochet Simple Bucket Hat Pattern for Everyday Style
  • Crocheting Harry Styles Cardigan (Step By Step) 1
    Stylish & Fun FREE Crochet Harry Styles Cardigan
  • How to Make a Trendy Granny Square Sweater Vest- Free Crochet Pattern

Footer

↑ back to top

About Us

Crochet patterns is an online community where you can find and download the best crochet-free patterns. Learn to crochet or expand your crochet skills with our free crochet tutorials and easy-to-follow step-by-step instructions. Plus, we also provide crochet stitch tutorials so you can learn to crochet or expand your crochet skills

Copyright © 2023 Crochet Patterns

Contact Us | Privacy Policy | About Us