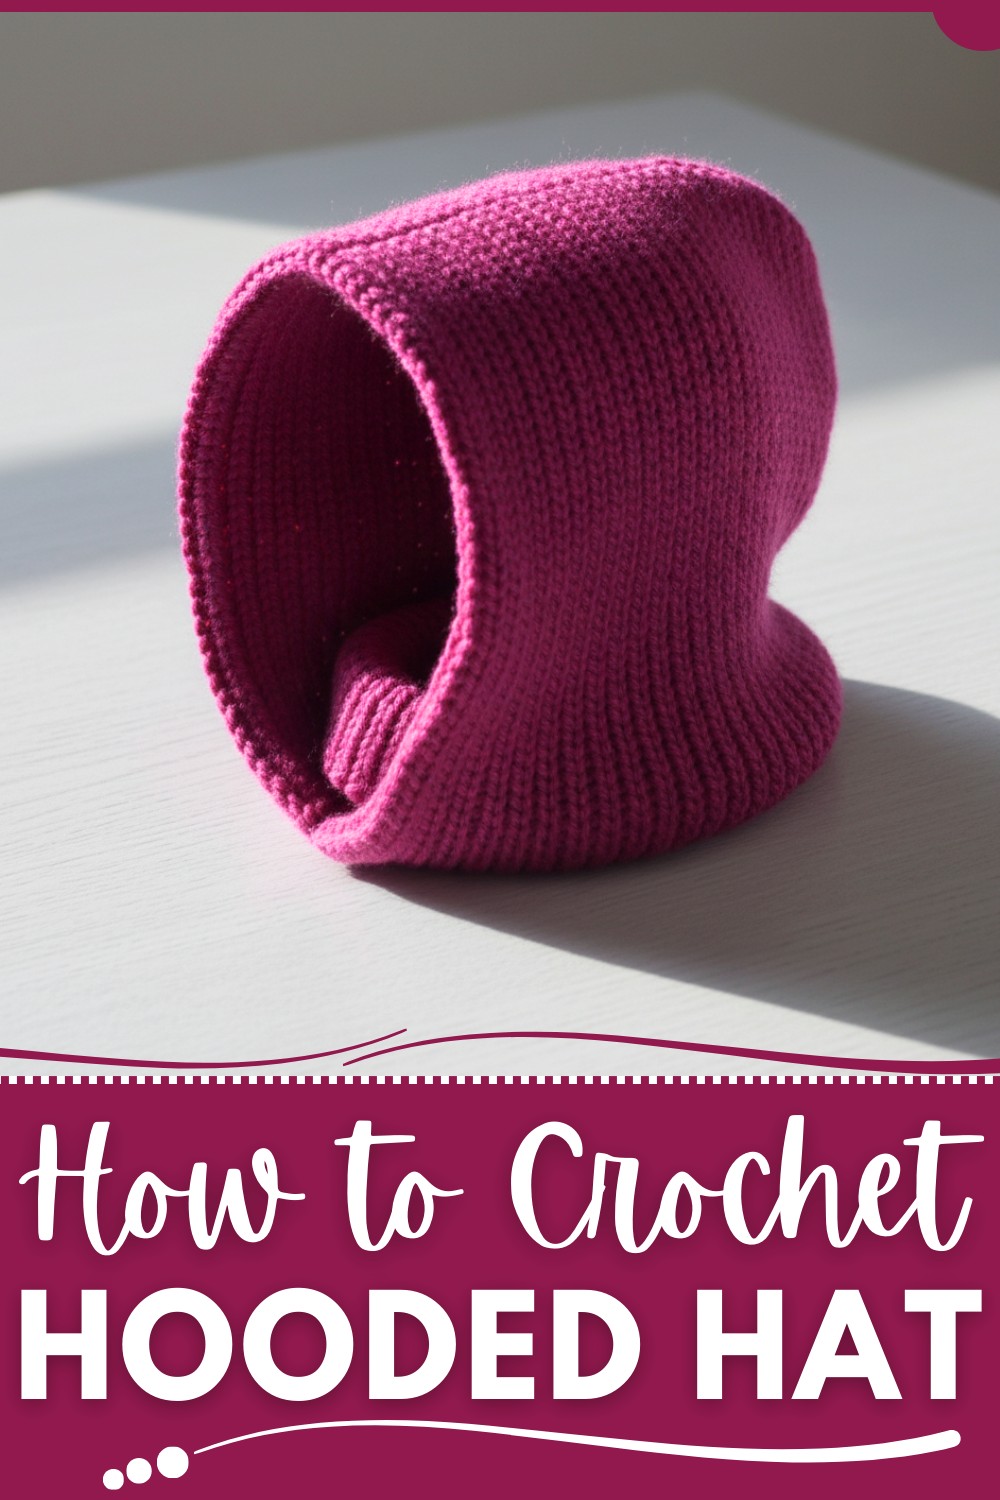
Looking for the perfect way to stay warm and stylish this winter? A crochet hooded hat pattern is the ultimate cozy accessory that combines practicality with charm. Blending the functionality of a hood and the snug fit of a hat, it’s perfect for outdoor hikes, chilly commutes, or casual winter outings. Pair it with layered sweaters or long coats for a head-turning, textured look.
You can personalize it with vibrant colors, intricate stitches, or fun embellishments like pom-poms or buttons to suit your style. Not only does it provide superior warmth, but it also makes a thoughtful handmade gift that loved ones will treasure. Stay cozy, creative, and fashionable with this winter wardrobe essential.
Warm Crochet Hooded Hat Pattern Great for Outdoor Walks
Materials Needed
- Yarn: Approximately 150 grams of medium-weight yarn (Category 3). Choose a soft, warm yarn suitable for children.
- Crochet Hook: 4 mm.
- Stitch Marker or Safety Pin: To track the transition between stitches.
- Scissors.
- Tapestry Needle: For sewing seams and weaving in ends.
Gauge
- Slip Stitches: 10 stitches x 10 rows = 5 cm x 5 cm using a 4 mm crochet hook.
- Half-Double Crochets on Back Loops Only: 12 stitches x 8 rows = 10 cm square.
Crochet Hood with Collar
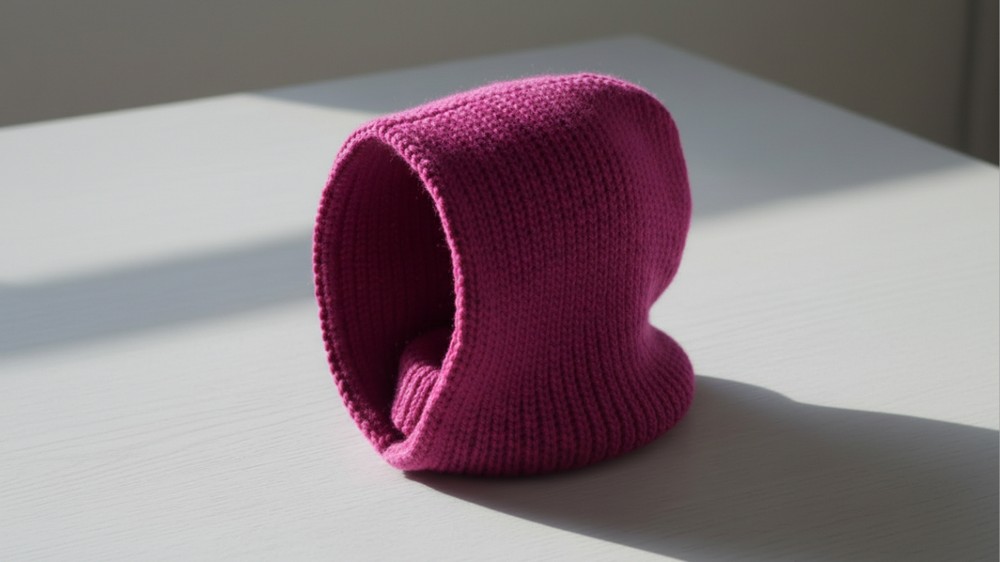
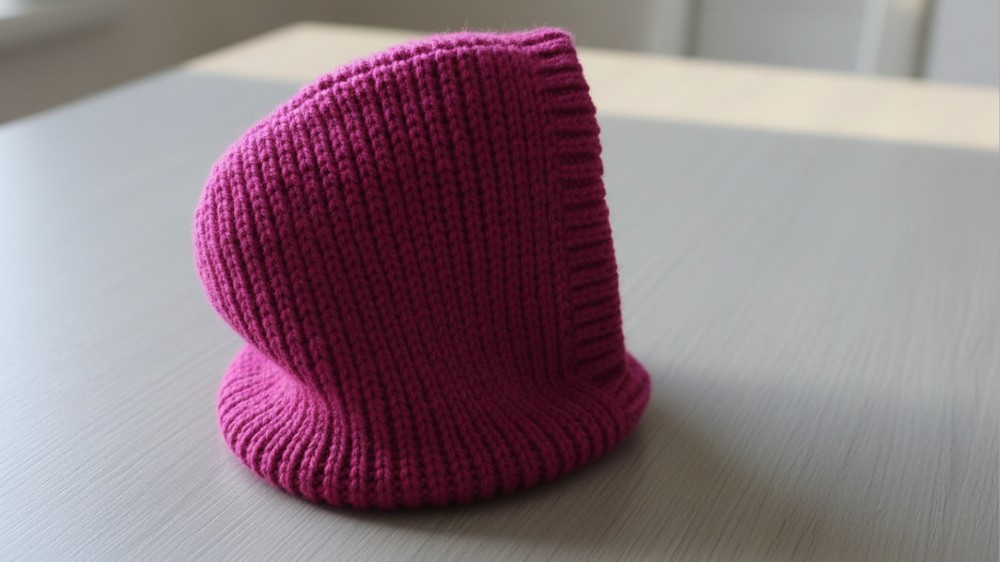
This step-by-step guide will help you create a practical and beautiful crochet hood with a collar, suitable for children aged 1-2 years. The design is lightweight, cozy, and perfect for keeping little ones warm. The project is beginner-friendly and works up quickly.
Finished Size
- Collar Circumference: Approximately 40 cm (16 inches).
- Collar Height: 16 cm (6.3 inches).
- Hood Height: Approximately 25 cm (9.8 inches).
- Hood Width (from chin to back): Approximately 25 cm (9.8 inches).
These measurements are suitable for children aged 1-2 years. Adjustments for other sizes are included further below.
Special Techniques
- Slip Stitch Crochet: Creates a stretchy texture and defines the collar area.
- Back Loops Only: Working in the back loop produces a ribbed effect, ideal for texture and stretch.
- Seaming with Slip Stitches: Creates an invisible seam when joining edges.
Pattern Instructions
Part 1: Collar
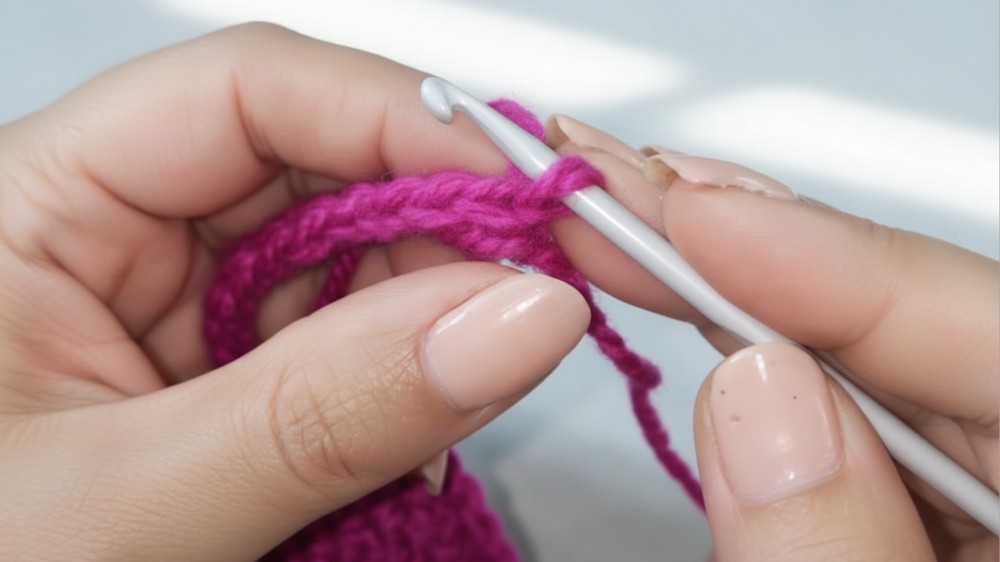
- Foundation Chains:
- Begin by chaining 35 chains (approximately 25 cm in length).
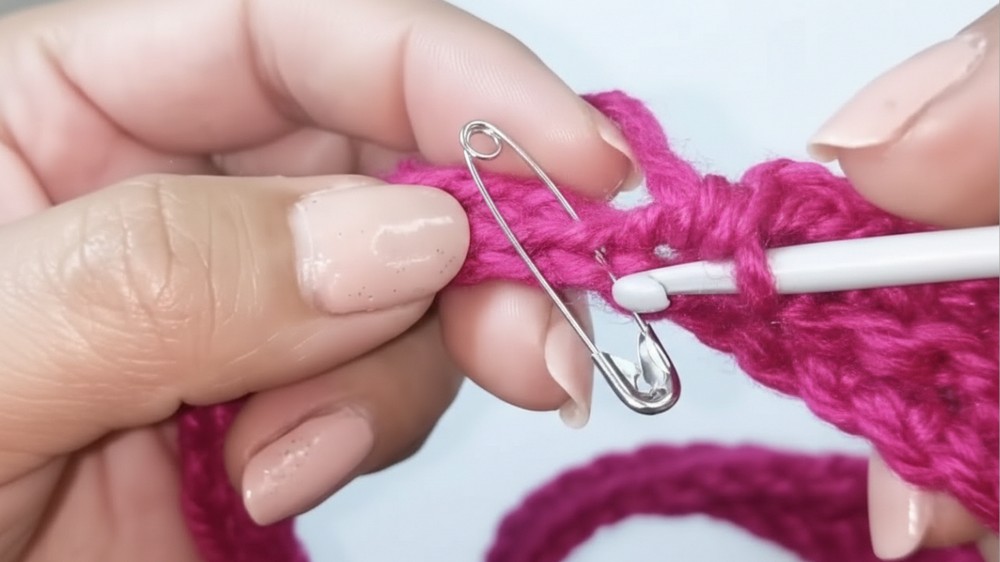
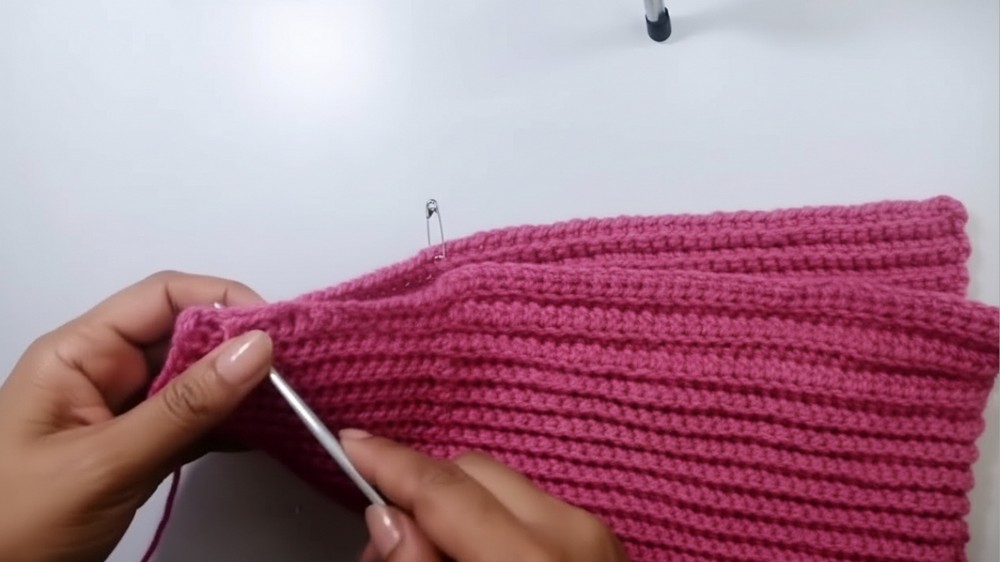
- Place a stitch marker on the 30th chain. This divides the collar section (30 chains/neck area) and the hood seam area (5 chains for adjustment).
- Row 1:
- From the second chain from the hook, begin working half-double crochet (hdc) stitches all the way to the stitch marker (30 hdc). Stop at the marker.
- From the marker onwards, work slip stitches into the remaining 5 chains. Move the stitch marker to the last slip stitch you crocheted to mark the transition point.
- Row 2 (Return Row):
- Chain 1, turn your work. Work slip stitches in the back loops only across the 5 slip stitches.
- When you reach the marker, transition to hdc in the back loops only across the remaining 30 hdc of the row.
- Row 3 Onwards:
- Repeat Row 2. Each row will alternate front-to-back direction and use the stitch marker to separate the collar area (hdc) from the seam area (slip stitches).
- Continue until you have 40 cm in length or 80 rows.
Part 2: Seaming the Collar
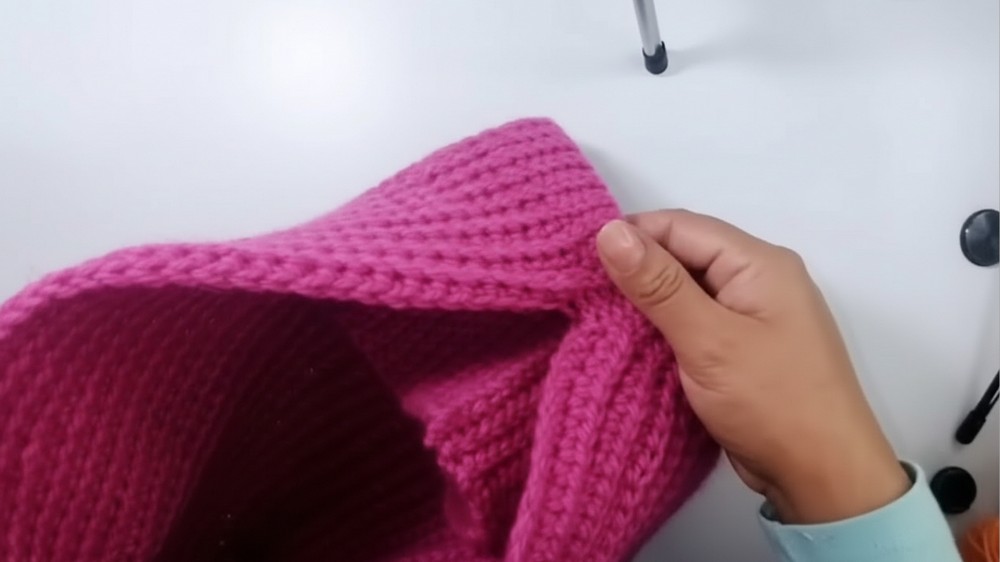
- Align the Edges:
- Fold the rectangle lengthwise, bringing the starting edge to meet the working edge.
- Ensure that the collar and seam sections align properly.
- Join with Slip Stitches:
- Take the back loop of one edge and the front loop of the other edge. Crochet together with slip stitches across the entire seam.
- Once finished, secure and weave in the ends. This creates the tubular neckpiece.
Part 3: Hood
- Foundation for the Hood:
- Identify the edge of the collar facing outward (where half-double crochets are). Attach your yarn to one corner of the collar.
- Row 1 of the Hood Base:
- Chain 1 and crochet hdc in the back loops only across the top edge of the collar, keeping stitches evenly spaced (approximately 55 hdc around).
- Place a stitch marker once you complete the row to mark the starting point.
- Build the Hood Height:
- Work evenly in hdc in the back loops only for approximately 25 cm (about 40 rows).
- Once you achieve the desired height, fasten off your yarn.
Part 4: Seaming the Hood
- Align the Hood Edges:
- Fold the hood piece vertically so the two sides align at the top.
- Slip Stitch Seam:
- Join the top of the hood by working slip stitches through the back loops only of both sides.
- Once the hood is fully joined, leave a small opening near the face if desired.
- Secure the yarn and weave in the ends.
Tips for Success
- Yarn Choice: Soft, child-friendly yarn is recommended to prevent irritation. Avoid stiff or scratchy fibers.
- Tension: Keep your slip stitches loose when working the neck and hood areas to maintain elasticity.
- Hood Adjustments: For larger or smaller sizes, adjust the base row length and hood height measurements as needed.
- Precision Marking: Use a stitch marker at each transition point (collar-to-hood and slip stitch sections) for accuracy.
Customization Ideas
- Color Options: Create a two-tone effect by using contrasting colors for the collar and hood.
- Buttons or Ties: Add decorative buttons to the collar or a drawstring around the face opening for extra customization.
- Front Flap or Tassel: Add earflaps or attach a tassel to the top of the hood for a fun detail.
Pattern Variations for Other Sizes
To adapt this pattern to other sizes, use the following guidelines:
- 3-4 Years:
- Collar Rows: Work 90 rows (45 cm circumference).
- Hood Base: Crochet 65 stitches for the foundation, and work 30 cm height for the hood.
- 6-12 Months:
- Collar Rows: Work 70 rows (35 cm circumference).
- Hood Base: Crochet 45 stitches for the foundation, and work 20 cm height for the hood.
Conclusion and Final Look
This crochet hood with collar is a warm and adorable accessory for toddlers aged 1-2 years. The ribbed texture and seamless construction make it both comfortable and stylish. Its versatility allows for quick size customization or personal touches like color changes and embellishments. Coupled with practical elasticity from slip stitches, this project is beginner-friendly and works up quickly.