Weave love into every project with this Free Crochet Heart Granny Square Pattern, for creating charming, textured throw pieces with full of style.
Symbols of affection have long inspired small tokens that convey warmth and care, and few motifs capture that sentiment as sweetly as the heart. The Free Crochet Heart Granny Square pattern transforms this timeless symbol into a versatile piece that can enhance a variety of handmade projects. Each square combines delicate stitching with a charming heart at its center, offering both visual appeal and tactile interest.
Cute Crochet Heart Granny Square Pattern to Gift Friends
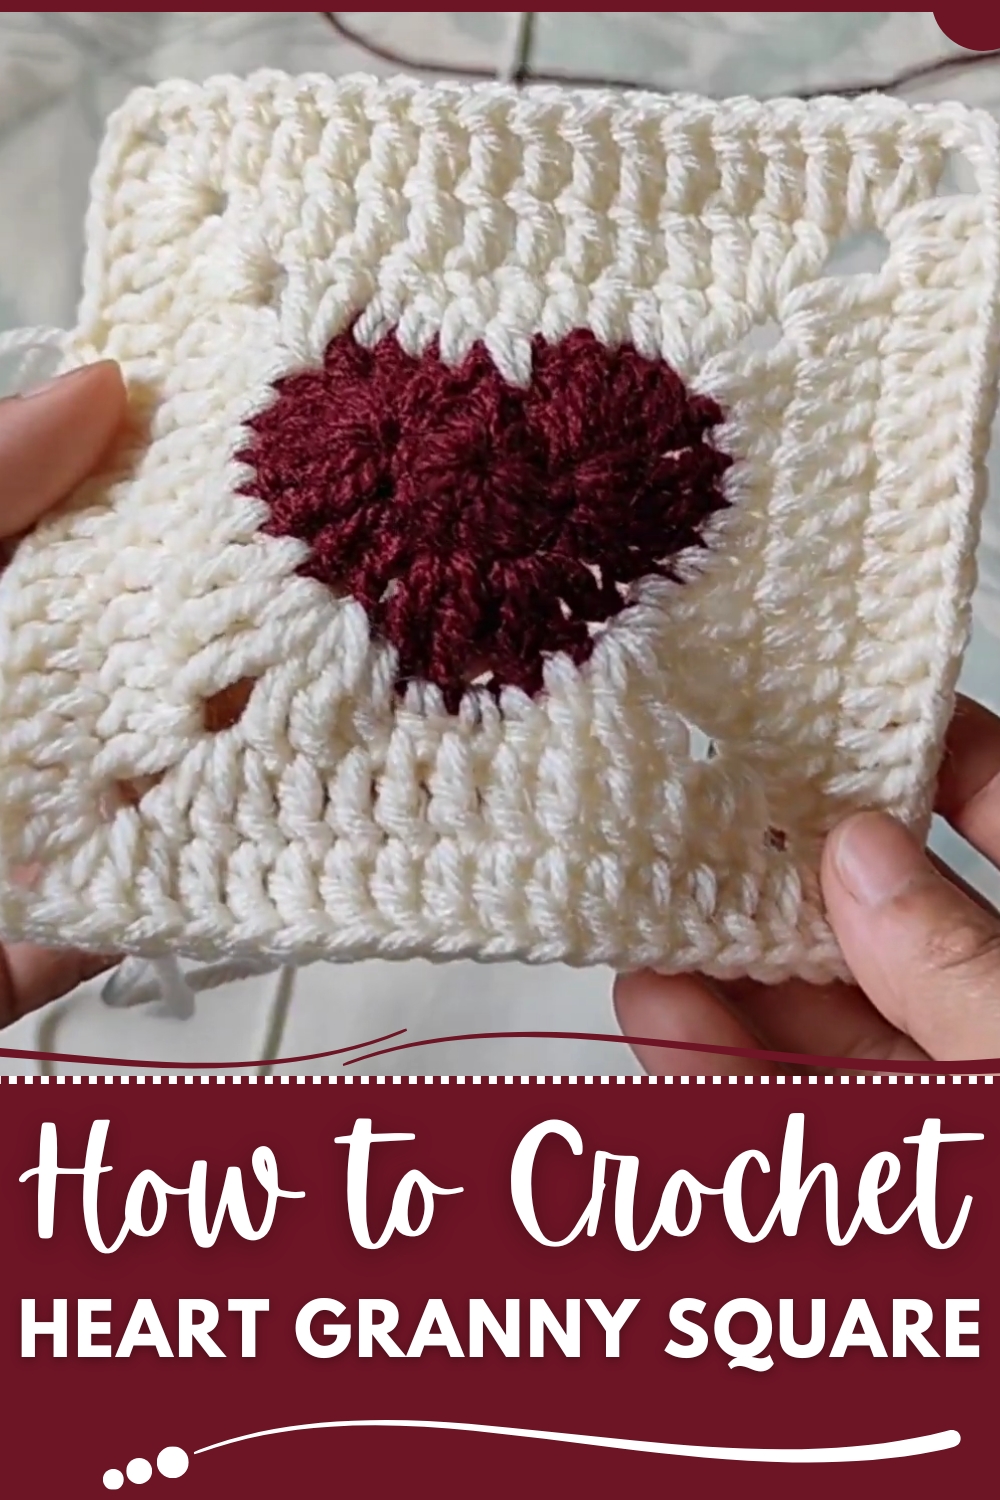
These squares can be joined to form blankets, cushions, or throws that bring a cozy, personalized touch to living spaces, while single squares make thoughtful additions to gifts, wall hangings, or even small decorative accents. The adaptable size and stitch structure allow for easy customization with colors, letting each piece reflect personal taste, seasonal palettes, or meaningful combinations for special recipients.
Lightweight yet sturdy, these squares maintain their shape while offering softness and comfort. Beyond decoration, they encourage mindful creation, providing a satisfying rhythm and a tangible sense of accomplishment. The Free Crochet Heart Granny Square pattern celebrates both the art of crochet and the expression of heartfelt emotion, resulting in charming, functional pieces that carry warmth and affection into every corner of the home and into the hands of those who cherish handmade treasures.
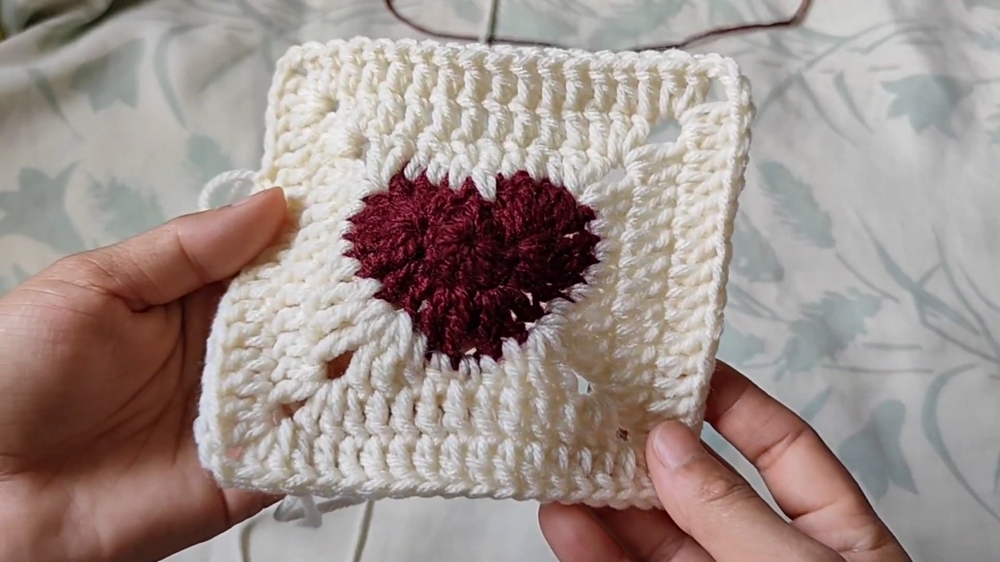
Crocheted Heart Granny Square Pattern
In this pattern, you’ll create a beautiful heart-themed granny square, starting from a magic ring and shaping it with carefully placed stitches. This step-by-step instruction follows the video’s flow, guiding you through forming a heart, adding a decorative border, and expanding into a classic granny square you can use for blankets, bags, or decor.
Quick Overview Of Pattern
- Begin with a magic ring, fill with double crochets
- Shape the heart with a combination of triple and double crochets
- Add a lacy border around the heart to emphasize the motif
- Transform the motif into a square with round increases at corners
- Work additional rounds to your preferred size
Notes
- Pattern uses US crochet terms.
- Gauge is not critical, but consistent stitch size creates neat motifs.
- Adjust colors as desired; recommended to use at least two—one for the heart and another for the border/square.
- For a neat finish, block your square after completion.
Skill Level
Advanced Beginner to Intermediate:
Familiarity with magic ring, basic and tall stitches (single, half double, double, triple crochets), working in the round, and identifying corners for increasing.
Materials
- Worsted weight or DK yarn in two contrasting colors (e.g., red or pink for the heart; white or cream for the background)
- Crochet hook size 4.0 mm (G-6) or suitable for yarn used
- Yarn needle for weaving ends
- Scissors
Measurements / Sizing
- Each finished square measures approx. 4–5 inches (10–12 cm) across, depending on yarn and hook.
- Easily adjust size by adding or reducing rounds.
Gauge
- 12 dc and 6 rows = 4” (10 cm), but gauge is flexible for this motif.
Stitch Abbreviations
- MR = Magic ring
- ch = chain
- sc = single crochet
- hdc = half double crochet
- dc = double crochet
- tr = triple (treble) crochet
- sl st = slip stitch
- st(s) = stitch(es)
- inc = increase (2 stitches in same stitch)
Special Stitches
- Magic Ring: Loop yarn, insert hook, pull yarn through, ch 1 to secure, and work stitches directly into the loop.
- Triple Crochet (tr): Yarn over twice, insert hook into st, yarn over, pull up a loop (4 loops on hook), (yarn over, pull through 2 loops) three times.
- Corner Increase: For square rounds, 2 dc, ch 2, 2 dc in the same corner.
The Crochet Pattern
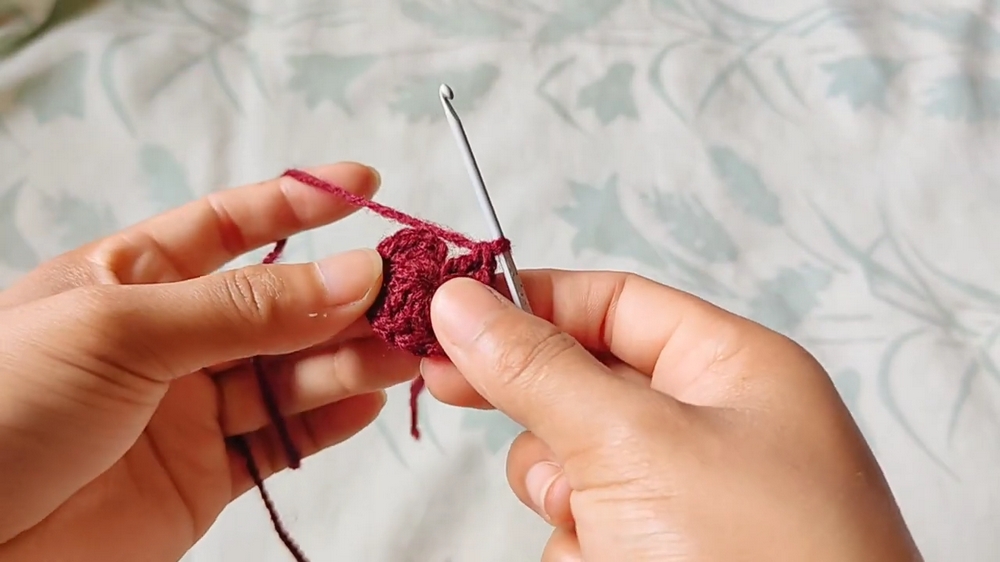
1. Creating the Magic Ring
- Start with a magic ring (MR).
- Ch 3 (counts as first dc). Make 12 double crochets (dc) into the ring (13 dc total counting ch-3).
- Pull the short yarn end to tighten the ring.
- Insert your hook into the top of the starting ch-3, sl st to close the ring.
2. Forming the Heart Shape
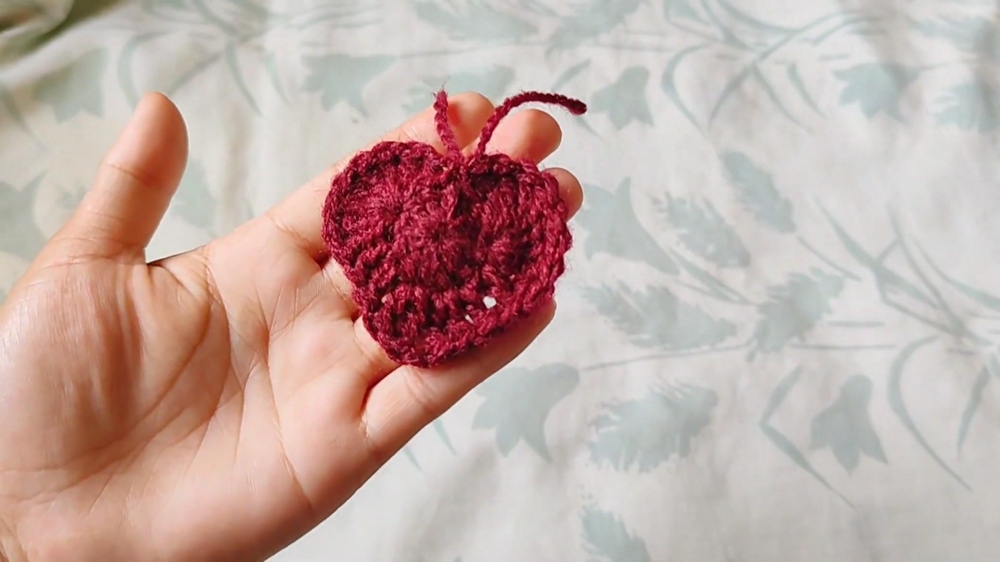
- Skip two stitches. In the third stitch:
- Work 8 triple crochets (tr).
- Next stitch:
- 1 double crochet (dc).
- Next stitch:
- 1 double crochet (dc).
- Next stitch:
- 1 double crochet (dc), then 1 triple crochet (tr) in the same stitch.
- Next stitch:
- ch 1, then (in the same stitch) 1 triple crochet (tr) and 1 double crochet (dc).
- In subsequent stitches:
- Work dc as needed to shape the side of the heart.
- In the next central bottom stitch:
- Make 8 triple crochets (tr) (mirroring the other side).
- Continue in pattern, working up the opposite side:
- Continue with dc in next stitches.
- In next, work 1 dc and 1 tr in same st, then ch 1, 1 tr and 1 dc in same st as earlier.
- End at the starting point.
- Close the round with a slip stitch (sl st) in the first stitch to complete the heart.
3. Adding the Border
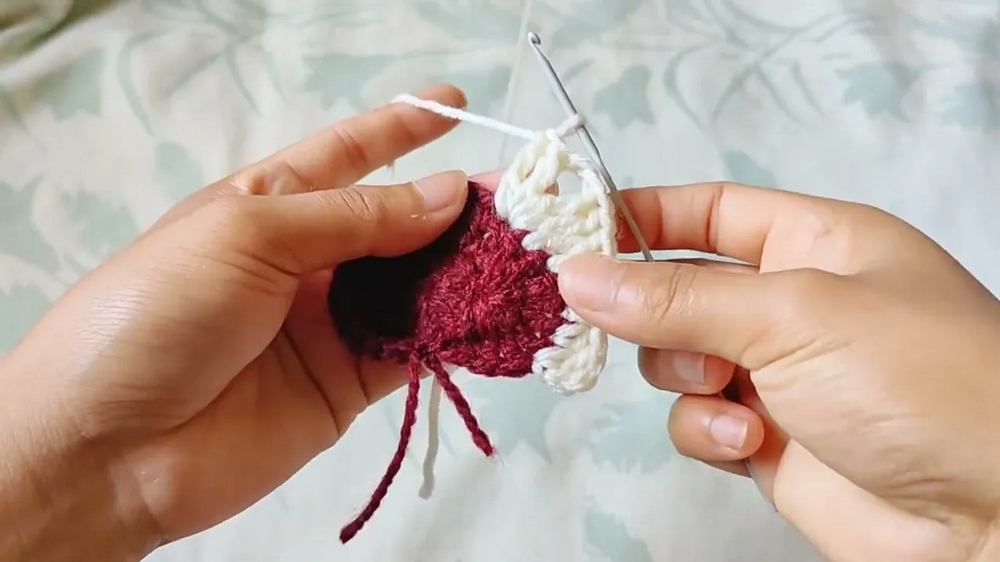
Switch to the border color (if changing):
- Skip three stitches from the finishing point.
From the fourth stitch begin:- ch 3 (counts as dc).
- In the same stitch: 1 dc, 1 hdc.
- sc in next stitch.
- hdc in next stitch.
- dc in next stitch.
- Next stitch:
- tr, and in the same stitch, 2 more tr (3 total).
- ch 2, 2 tr in same stitch.
- Work along the curve:
- dc, hdc, sc, hdc, dc in consecutive stitches.
- Next stitch:
- 2 tr, ch 2, 2 tr in same stitch (corner).
- Continue with:
- tr, dc, hdc, sc, hdc.
- In the following stitches:
- 2 dc in the same stitch, ch 2, dc in same stitch.
- Continue in pattern, mirroring border stitches for balance, until the heart is enclosed in a rounded-corner shape.
- Sl st to starting stitch to finish border.
4. Completing the Square
Round 3:
- At each corner (where ch-2 spaces were made in border):
- Work (2 dc, ch 2, 2 dc) to form the corner.
- Along each side:
- Work dc in each stitch up to next ch-2 space (corner).
- Repeat for all four sides.
- Sl st to beginning dc to close the round.
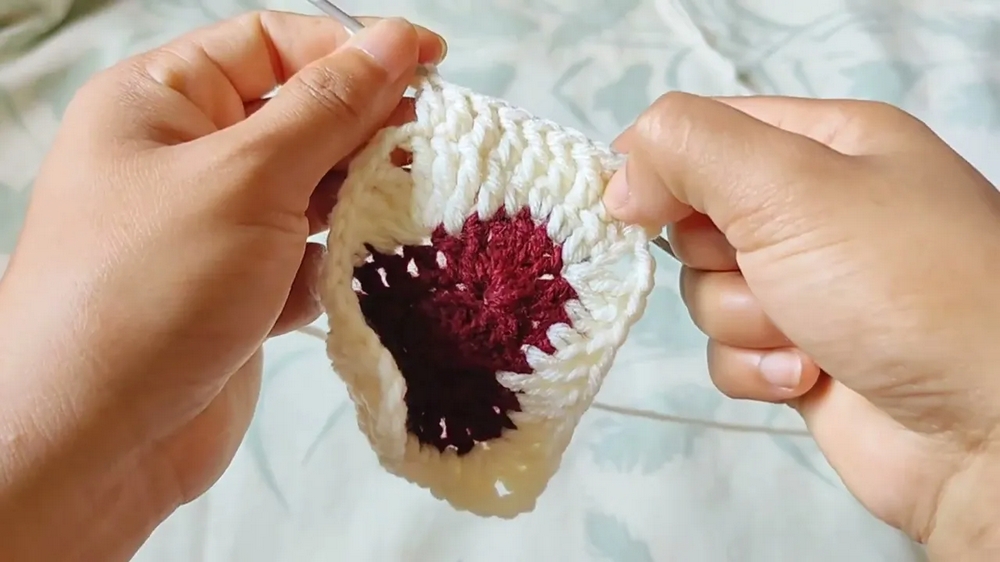
Round 4:
- Work dc in every stitch along sides.
- At each corner ch-2 space:
- (2 dc, ch 2, 2 dc) in each corner.
- Continue rounds to desired size using this system—dc along edges, corners as above.
Assembly & Finished Size
- Weave in all yarn ends.
- Lightly block if needed for sharper corners and neat sides.
- Squares can be joined to form larger projects such as blankets, pillows, bags, or displayed individually as coasters or motifs.
- Finished square measures approx. 4–5 inches per side with suggested yarn/hook.
Conclusion and Ending Words
Your heart granny square is complete! This versatile motif is perfect for assembling into heartfelt gifts, home accessories, or wearables. Feel free to explore color variations or edge patterns for unique looks. If you enjoyed this project, experiment with more motifs or join multiples to create custom items.