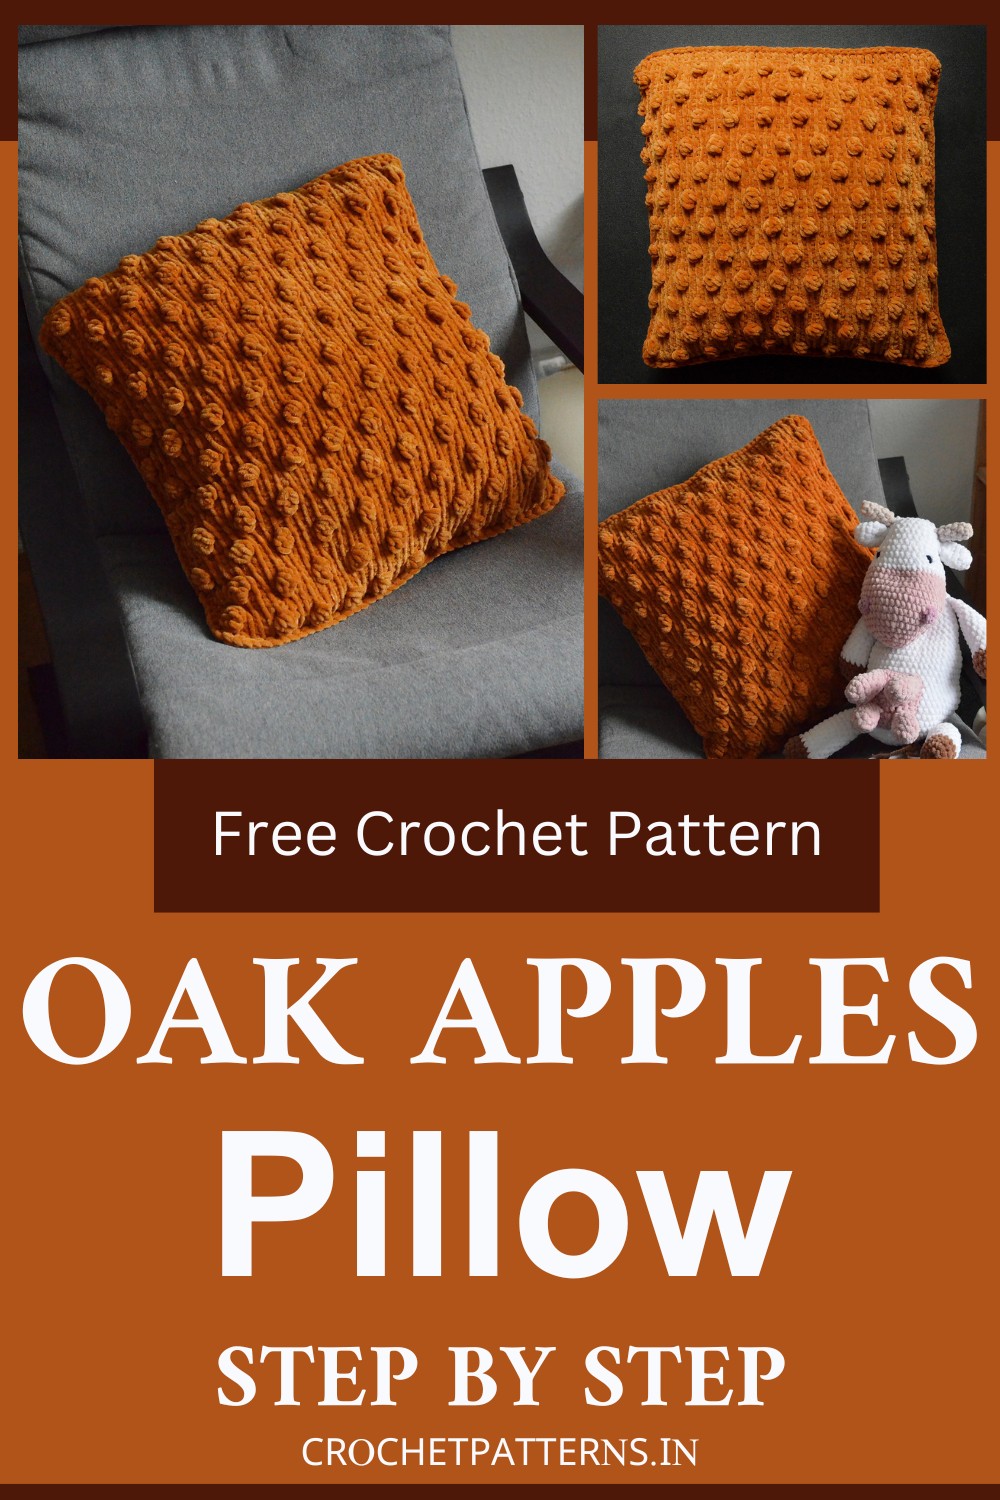
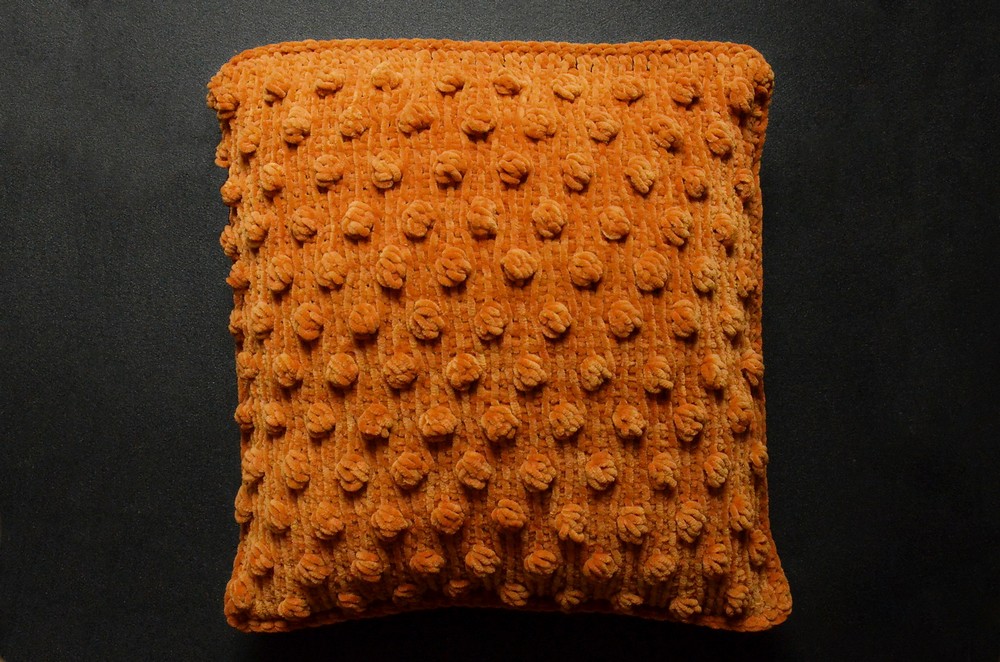
Pillows are not just for resting your head. They add beauty and coziness to any room, making them important for your home's decoration. Now, let's talk about a special kind of pillow the Oak Apples Pillow. This pillow pattern is all about creating a cushion with a lovely autumn feel that you'll want to keep close when it's chilly. Designed especially for people who love to feel different textures for comfort, this pillowcase has bumpy bobbles on one side and a smooth, velvety surface on the other. It's perfect for anyone looking for a sweet, soft spot to squeeze and hug while lounging on their sofa or chair. Plus, if you're looking to make a thoughtful gift for someone who cherishes sensory experiences, this magical crochet pillow is just the thing that could brighten their day, month, or even year!
Oak Apples Pillow Pattern
Making Your Oak Apples Pillow
Supplies:
- Yarn: chenille yarn such as Himalaya Dolphin Baby
- Hook – 7 mm hook – straight Tunisian crochet hook or hook with a cable;
- Pillow – 50 by 50 cm or 19.5 by 19.5 inches pillow insert;
- Tapestry needle;
- Scissors;
- Optional: 3 pairs of snaps, sewing thread, and needle.
Stitches and other abbreviations:
- Ch – chain
- Ls – the last stitch
- Pop – Tunisian popcorn stitch
- R – regular Tunisian return
- Sl St – slip stitch;
- TDs – Tunisian double stitch
- Trs – Tunisian reverse stitch
- Tss – Tunisian simple stitch
- YO – yarn-over.
Crocheting a Pillowcase
Materials Needed:
- Crocheting yarn
- Crocheting hook
- Safety pins
- Scissors
- 3 pairs of snaps
Step by step Pattern
Part 1: Starting the Pattern
- Row 1: Ch 41, 40 Tss, Ls, R
- Row 2: 40 Tss, Ls, R
- Repeat Row 2: 34 times.
Part 2: Middle Section
- Row 37: Ch1, 40 TDs, Ls, R
- Row 38: 40 Tss, Ls, R
- Row 39: Repeat [3 Tss, 1 Pop] 10 times, Ls, R
- Row 40: 40 Tss, Ls, R
- Row 41: 40 Tss, Ls, R
- Row 42: 1 Tss, repeat [3 Tss, 1 Pop] 9 times, 3 Tss, Ls, R
- Row 43: 40 Tss, Ls, R
- Repeat Rows 38-43: 5 times.
Part 3: Ending the Pattern
- Row 74: Ch1, 40 TDs, Ls, R
- Row 75: 40 Tss, Ls, R
- Repeat Row 75: 4 times.
- Row 80: 40 TRs, Ls, R
Part 4: Adding the Flap
- Add more rows if you want the flap to be longer.
Part 5: Cast Off
- Cast off by making slip stitches in the back vertical loops of the stitches, as if to make TRs, but instead of keeping the loops on the hook, you slip them.
- Note: Do not cut the yarn once you reach the end of the row, as you will use it to seam up the pillowcase.
- Weave in any ends that you have from adding yarn, making sure they can’t worm out (work over at least 5 cm forwards and backwards 3 times).
Part 6: Assembling the Case
- Fold up the piece along the two rows of double stitches. Use safety pins to keep the layers in place until you finish the assembly. Using the same hook, make Sc stitches around the edge of the pillowcase, going through either 2 or 3 layers, picking up both loops of each stitch.
- When you reach the edge with double stitches, make Sc stitches in the horizontal loop between the stitches, which will create a beautiful edge along all the sides of the pillow.
- For corners, make 1Sc, Ch1, and 1Sc in the same corner spot.
- When you reach back to the beginning, all around the pillowcase, cut off the yarn and make an invisible join, then weave in the last end.
Part 7: Adding Snaps to the Pillowcase (Optional)
- Optionally, sew three pairs of snaps, spaced 10 stitches apart, to keep the pillowcase closed.
- Sew each snap side 10 stitches apart from the others and from the edges.
- The snaps on the bottom are sewn on row 6 and the snaps on the top on row 80.
By following these seven parts, you'll end up with a beautiful crocheted pillowcase that you made by hand. Enjoy your lovely creation!