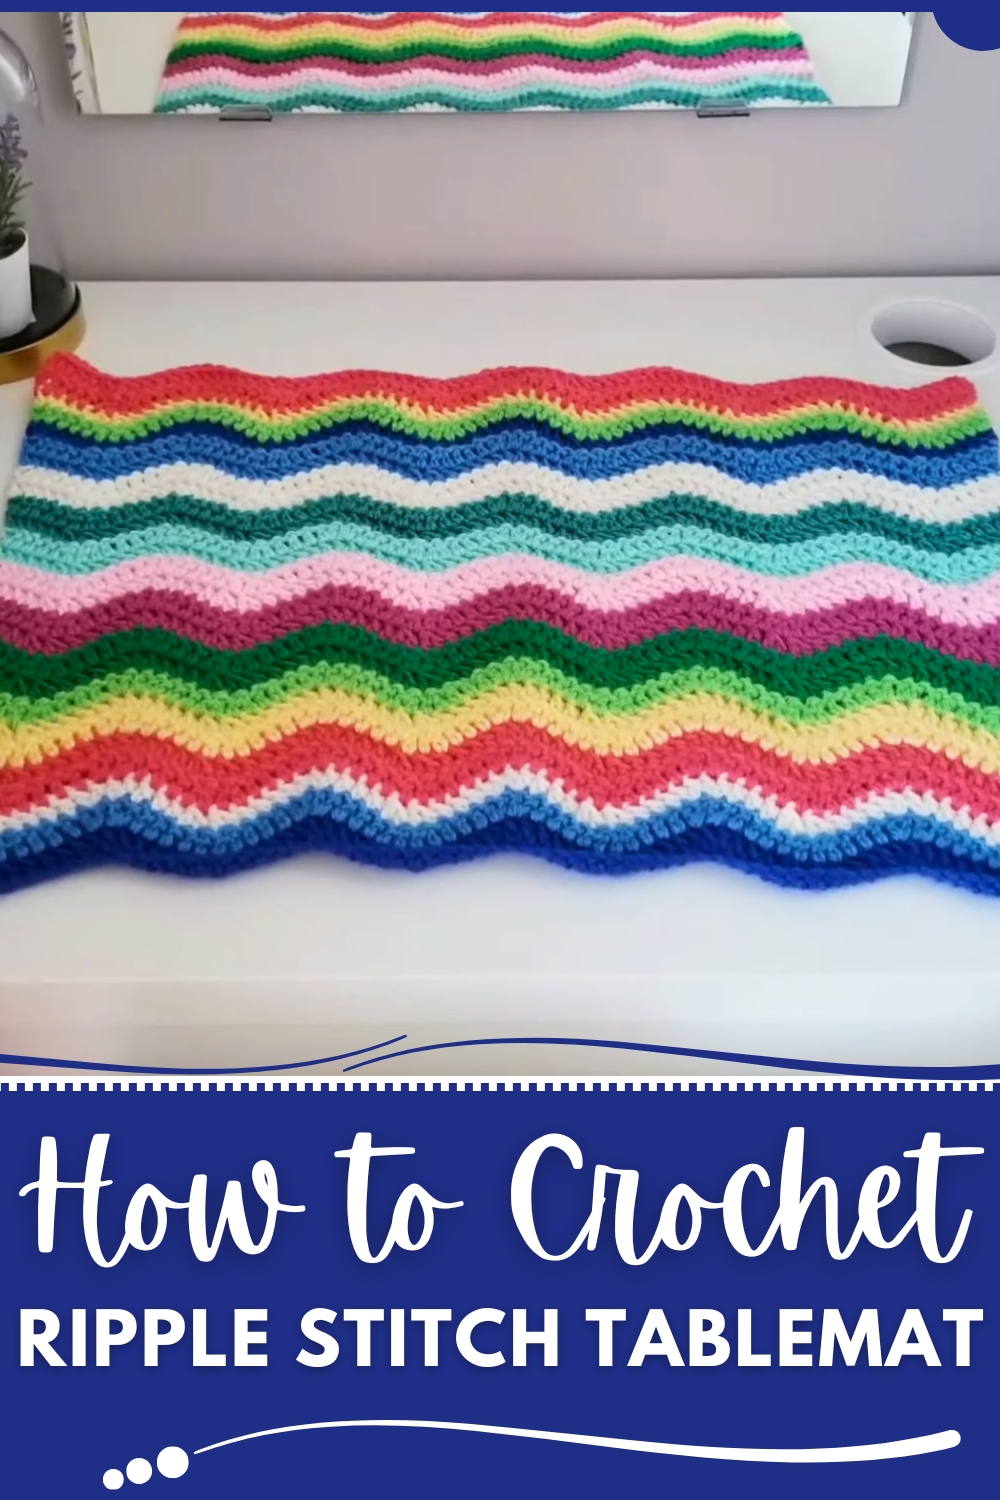
Wave vibrant style with this Free Crochet Ripple Stitch Tablemat Pattern offering a handmade accent perfect for tabletops home décor and thoughtful gifting
Tables have long served as the center of gatherings, holding meals, conversations, and memories alike. The Free Crochet Ripple Stitch Tablemat pattern brings a touch of handmade charm to these everyday settings, transforming a simple surface into a visually appealing focal point. The instructions guide through forming gently undulating rows that create the characteristic ripple effect, producing texture and movement that catch the eye without overwhelming the space. Its structured yet flexible fabric provides durability and protection for tabletops, helping to prevent scratches, stains, or heat marks while adding a cozy, tactile element to dining experiences.
Soft Crochet Ripple Stitch Tablemat Pattern for Everyday Dining Use
The ripple stitch allows for creative color arrangements, whether subtle gradients or vibrant contrasts, offering endless opportunities to coordinate with décor or seasonal themes. Beyond aesthetics, the tablemat provides practical benefits: it can be used under dinnerware, decorative objects, or as a base for serving trays, enhancing both function and visual appeal.
Ideal as a handmade gift or a personal home accent, it combines artistry with utility, demonstrating attention to detail and skill. Each completed mat not only elevates the atmosphere of a table but also reflects the care invested in creating a warm, welcoming environment, turning everyday moments into opportunities for style, texture, and thoughtful craftsmanship.

Materials Needed
Here is a list of materials you’ll need:
- Yarns: Multiple colors of yarn (ideal for a multi-color ripple pattern).
- Crochet Hook: Use a hook that matches your yarn specifications.
- Scissors: For cutting loose ends after each row.
- Yarn Needle: Optional, for weaving in loose ends after completing the project.
Step-by-Step Instructions
1. Start with a Slip Knot and Chains
- Begin by making a slip knot on your hook using your yarn.
- Crochet a chain in multiples of 12 to set the base of your ripple pattern.
- Adjust the number of chains depending on the desired size of your tablecloth. For this tutorial, the instructor uses 72 chains as an example.
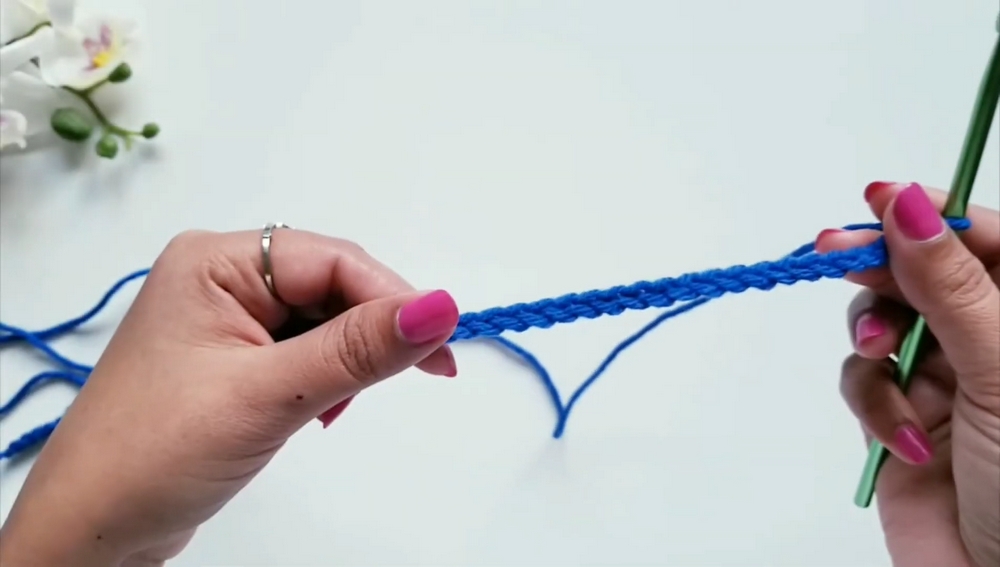
2. Add Three Turning Chains
- After completing your base chain, crochet three additional chains. These chains will count as the first double crochet stitch in your row.
3. Row 1: Begin with Double Crochets
- Work a double crochet stitch in the fourth loop from the hook. The first three loops are skipped.
- Move to the next three loops, crocheting one double crochet stitch in each loop.

4. Create a Decrease (Valley of the Ripple)
- To form the valley of the ripple pattern:
- Step 1: Yarn over, insert your hook in the next loop, pull up a loop, then pull the yarn through the first two loops only on the hook.
- Step 2: Yarn over again, insert your hook into the next loop, pull up a loop, and pull the yarn through the first two loops only.
- After this, you’ll have three loops remaining on your hook. Pull the yarn through all three loops, completing the decrease.

5. Continue Double Crochet Stitches
- Crochet three double crochet stitches in the next three loops.
6. Create an Increase (Peak of the Ripple)
- To form the peak of the ripple pattern:
- Crochet two double crochet stitches in the same loop.
- Repeat this in the next loop, creating a total of four double crochet stitches in two loops.

7. Repeat the Pattern Across the Row
- Alternate between:
- Three double crochet stitches in individual loops.
- A decrease (valley) across two loops.
- Three double crochet stitches in individual loops.
- An increase (peak) with two double crochet stitches in the same loop.
- Continue this pattern until you reach the end of the row.
8. End of Row: Add Two Stitches in the Last Loop
- In the last loop of the row, make two double crochet stitches to ensure the edges of the tablecloth remain neat and balanced.
9. Change Yarn Colors
- To create a colorful ripple pattern, switch to a different yarn color at the end of the row.
- Cut the current yarn and secure the loose end. Tie the new yarn, then pull it through to continue with the next row.

10. Row 2 and Beyond: Follow the Same Pattern
- Begin each row with three turning chains, and repeat the same increase, decrease, and double crochet pattern from Row 1.
- Alternate yarn colors every row or every few rows, depending on your desired pattern.
11. Finish the Last Row
- On the final row, secure the last double crochet stitches with a chain and cut the yarn. Tie a knot and weave in any loose ends using a yarn needle.
Special Features
- Vibrant Ripple Design: The wave-like ripple design is visually stunning and adds texture to your tablecloth.
- Customizable Size and Colors: Tailor the length and width by adjusting the number of base chains. Mix and match yarn colors for a personal touch.
- Great Scrap Project: Perfect for using leftover yarn from other projects.
Level of Difficulty
- Beginner to Intermediate: This project is suitable for beginners who are familiar with basic stitches (chain stitch, double crochet stitch) and want to learn increases and decreases.
Tutor’s Suggestions
- Keep Chains Consistent: Avoid making your base chains too tight or too loose, as this can distort the pattern.
- Practice the Decrease Stitch: The decrease stitch is slightly challenging—practice it separately if needed to build confidence.
- Use Multiple Colors: Switching colors highlights the ripple pattern, making the tablecloth more vibrant.
Uses
- Tablecloth/Table Mat: The ripple design makes it the perfect addition to your dining or coffee table.
- Gift Idea: A handmade crochet ripple table mat is an excellent personalized gift.
- Home Décor: This pattern can also be used for blankets, cushion covers, or wall hangings.
Tip
When changing yarn colors at the end of a row, pull the new yarn through the last loop of the current row. This ensures the color transition blends seamlessly.
Conclusion
This ripple pattern tablecloth is an enjoyable and creative project for crocheters. It allows you to combine different yarns and colors to create a stunning, personalized piece. The alternating increases and decreases create an elegant wave-like pattern, making it perfect as a tablecloth or for other decorative purposes. With practice, you can master this technique and adapt it for other projects.