Refresh your everyday style with free bandana pattern that adds playful flair and vibrant charm to favorite looks for all ages and occasions.
There’s something magical in a little triangle of yarn, stitched with care and color, that brings smiles and turns simple moments bright. With a crochet bandana pattern, a splash of beauty is added to your day—whether it sits softly over your hair or ties neatly around your neck. Not just lovely to look at, this accessory keeps you cool in the sun, keeps hair tidy, and even adds gentle warmth in the chill.
Free Crochet Bandana Pattern for All Skill Levels
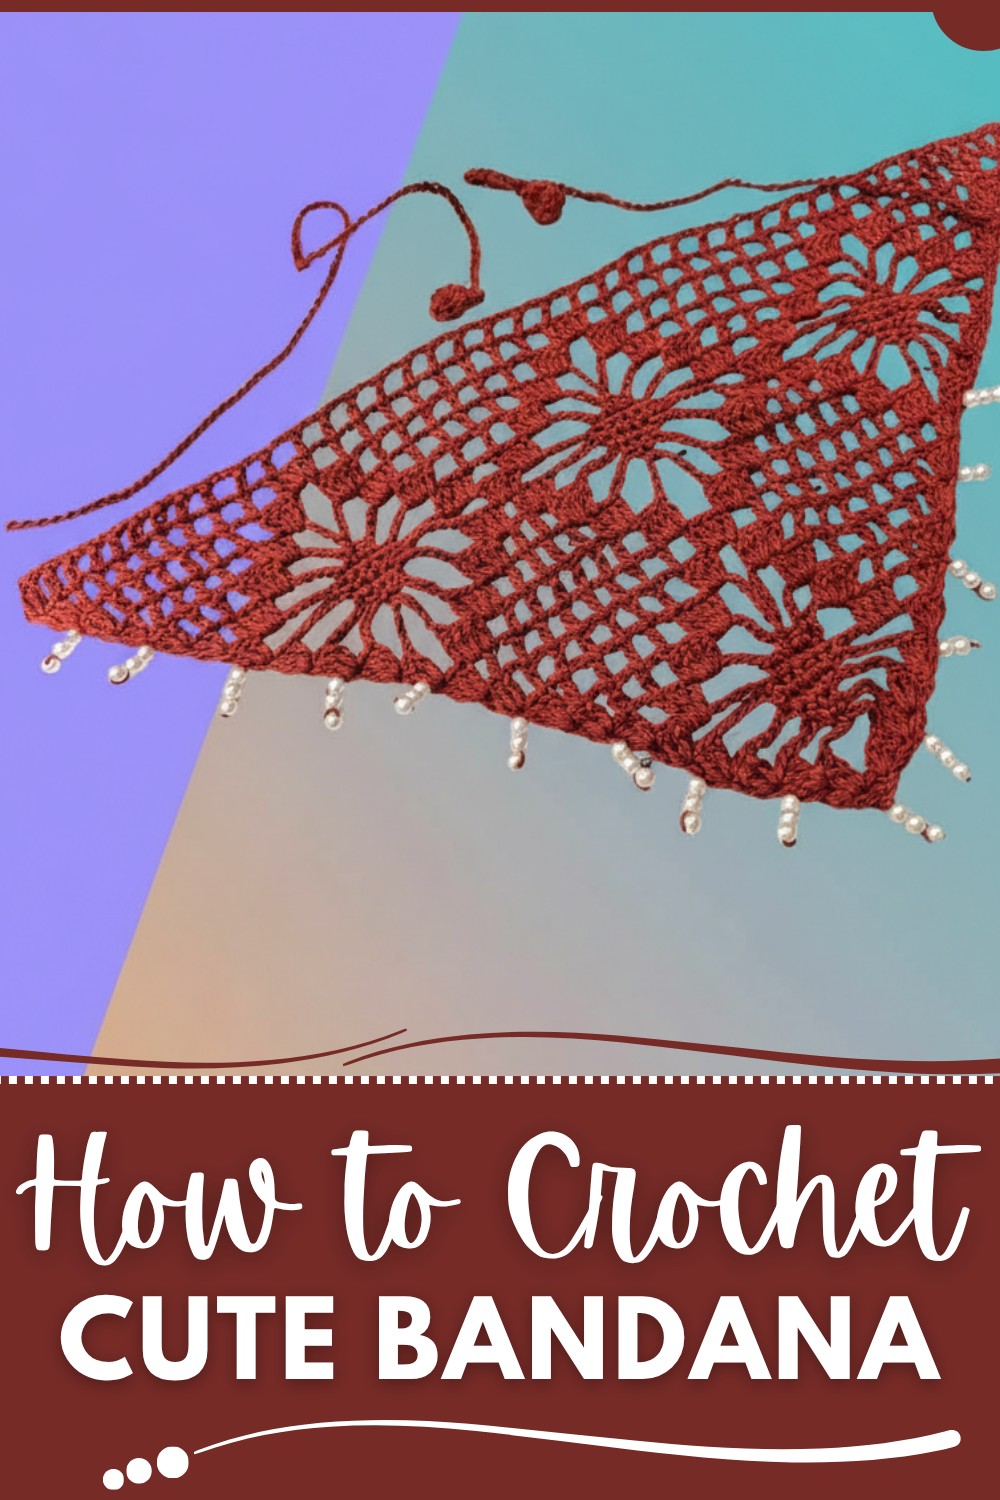
Pick your favorite colors and let that bandana show off your style, because it’s truly made to fit all looks and ages. Gentle on skin and easy to wash, the crochet bandana pattern makes life simple and cheerful. It’s a small way to feel special and fresh, perfect for gifting a little happiness or keeping for yourself. Fun to wear, easy to use, and always ready to turn any outfit into something new—this bandana is a touch of sunshine for everyone.
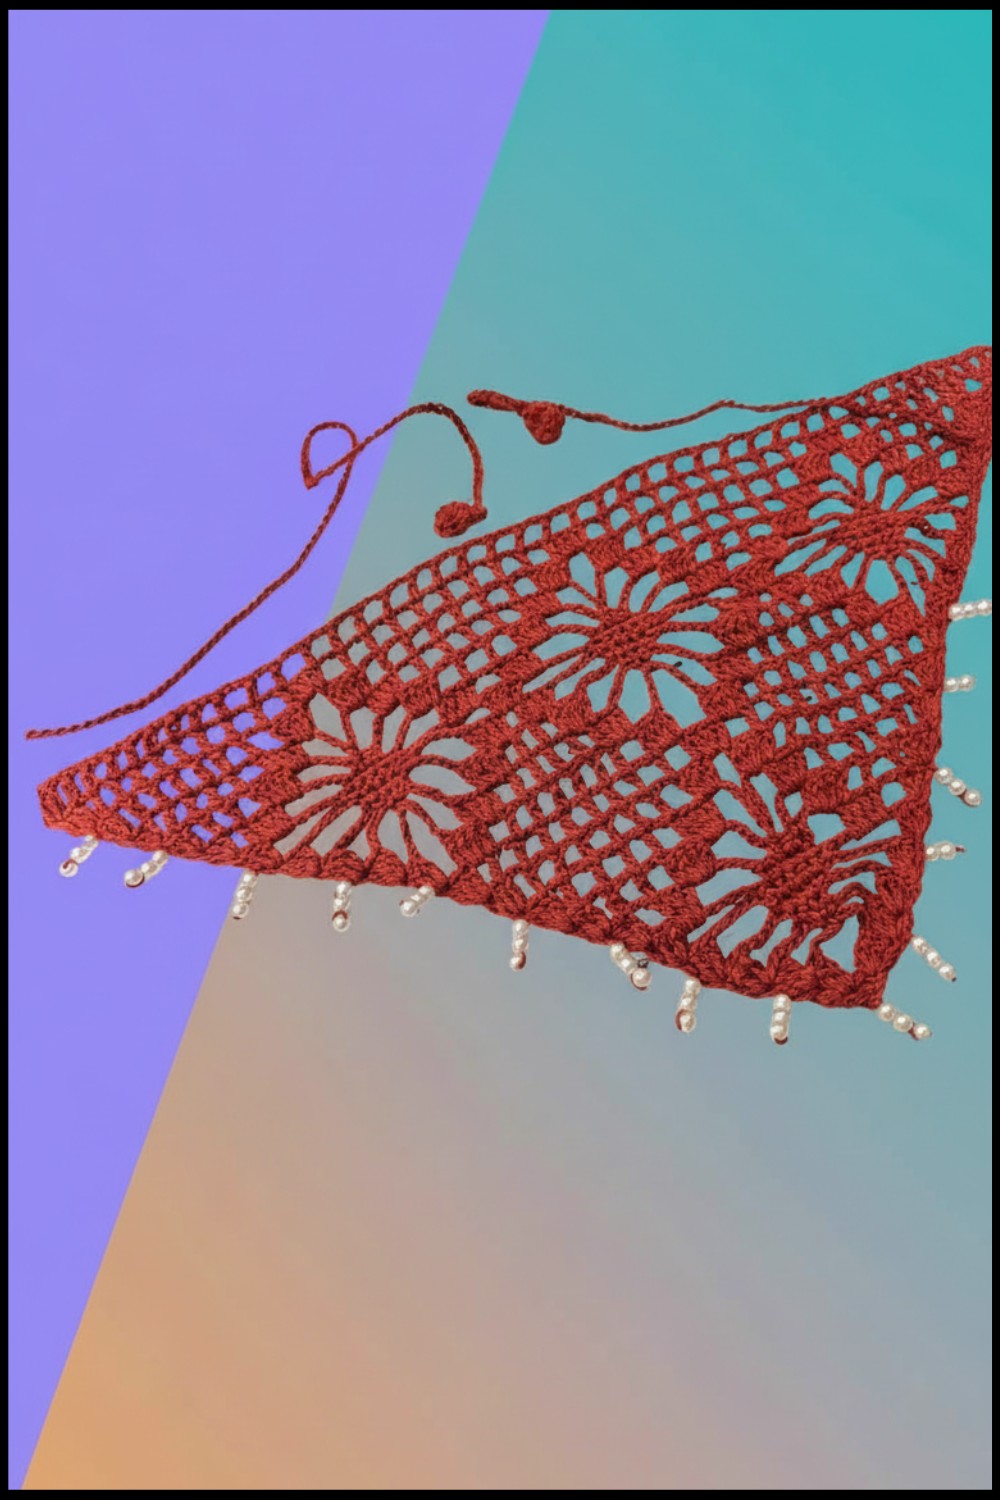
Lacy Crochet Bandana Pattern
Materials
- Yarn: Fingering, sport, or light DK weight cotton/acrylic yarn (sample uses Pinguim Bela yarn)
- Hook: 3.0 mm crochet hook (adjust if you use different yarn)
- Beads/Pearls: Small, with a hole large enough for yarn/stringing (optional, for edging)
- Tapestry Needle: For weaving in ends and sewing beads
- Scissors
- Stitch Marker: Optional, to highlight starting stitches
Key Abbreviations
| Abbreviation | Meaning |
|---|---|
| ch | Chain |
| sc | Single crochet |
| dc | Double crochet |
| sl st | Slip stitch |
| sp | Space (usually chain space) |
| rep | Repeat |
| st(s) | Stitch(es) |
All terms are in US crochet terminology.
Special Notes
- Work flat in rows, turning after each row.
- The beginning and end of each row always increase with three double crochets worked in the first and last st.
- The central motif (or “drawing”) forms naturally as increases and chain spaces combine.
- Optional beads/pearls are added after crocheting (see "Finishing & Edging").
Pattern
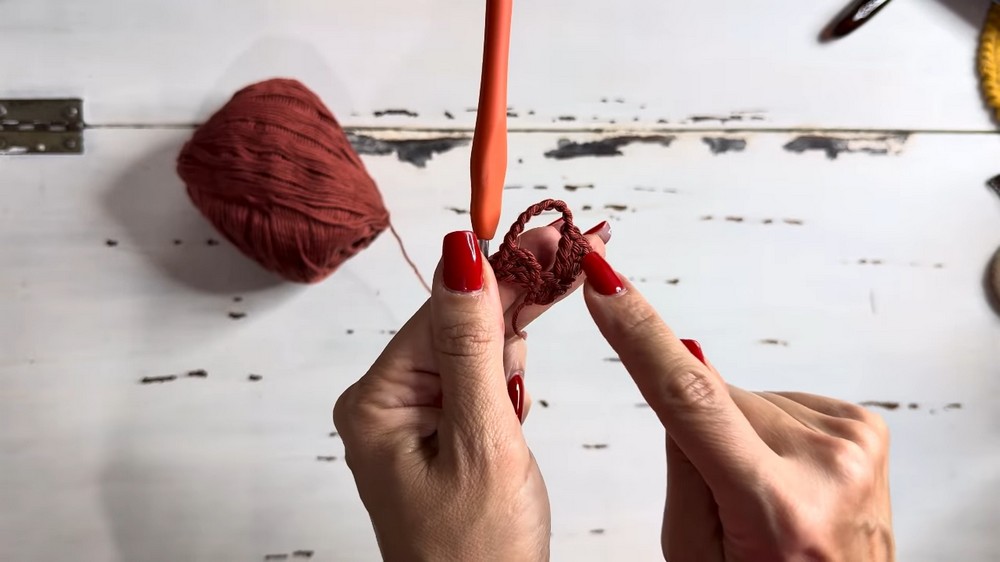
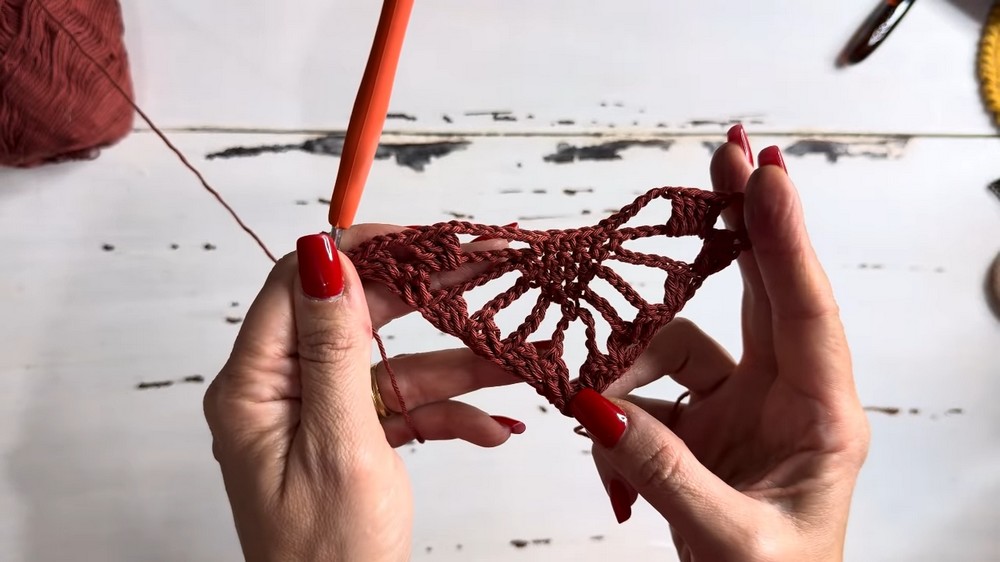
Center Triangle/Motif
Row 1:
Ch 3 (counts as first dc here and throughout), work 2 dc in the first ch (or in ring if preferred). (3 dc)
Row 2:
Ch 3, turn.
Work 2 dc in same st (first dc base).
Ch 8, skip to the last st, work 3 dc in last st. (3 dc, ch-8, 3 dc)
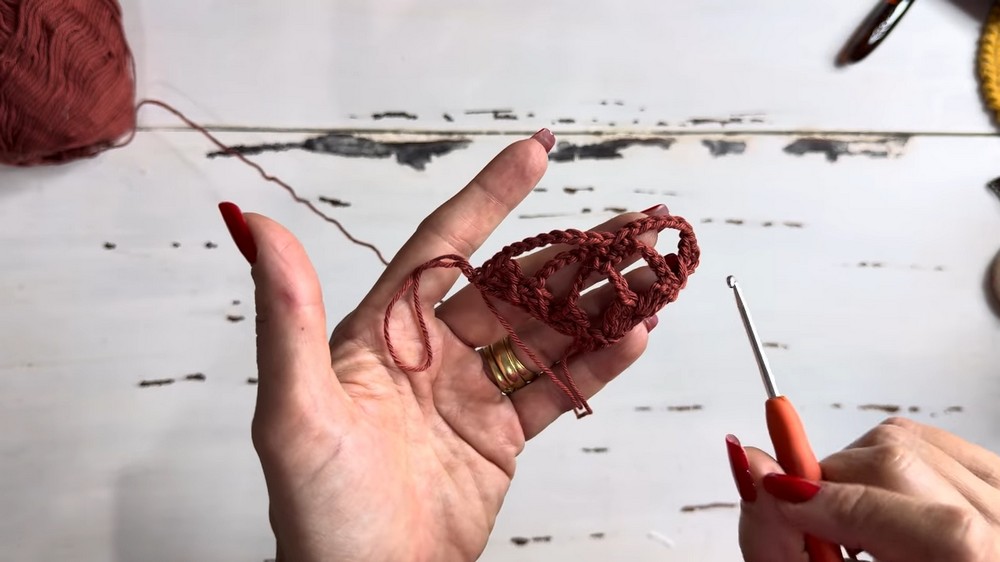
Row 3:
Ch 3, turn.
Work 2 dc in same st.
Ch 6, skip to central chain space, sc in 5th ch of ch-8 (from previous row).
Ch 6, go to last st, work 3 dc in last st. (3 dc, ch-6, sc, ch-6, 3 dc)
Row 4:
Ch 3, turn.
Work 2 dc in same st.
Ch 6, sc in center ch of previous ch-6, ch 6; rep this for each ch-6 across.
Work 3 dc in last st.
Row 5:
Rep Row 4, working additional sc/ch-6 for each new chain space, always starting and ending with 3 dc in first/last st.
Row 6:
Ch 3, turn.
Work 2 dc in same st.
Ch 2, work 4 dc in first available ch-sp (center or as per pattern established), ch 2,
Continue pattern, as follows for each section:
- Work sets of 4 dc, each in its own ch-sp, separated by ch-2;
- For each large chain space, after working all blocks, ch 6, sc in next ch-sp, ch 6, repeat across to end;
- End row with 3 dc in last st.
Rows 7+:
- Continue as established, alternating rows of dc blocks and open mesh rows (chain spaces and single crochet joins), according to the visual motif in the sample (see notes below).
- At every straight edge, always do 3 dc at the start/end.
- Increases are worked only at edges, always with 3 dc.
- For motif shape, adjust number of dc/block or chain spaces as the pattern grows.
- Open mesh rows (ch-6, sc to chain space, ch-6) alternate with denser "block" rows (groups of 4 dc, each separated by ch-2, aligned with previous blocks).
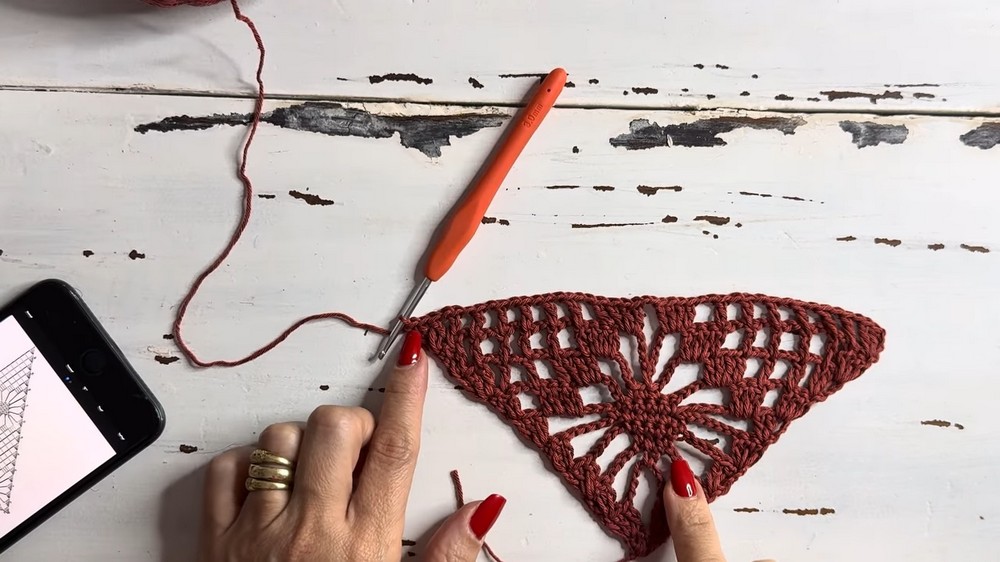
Continue:
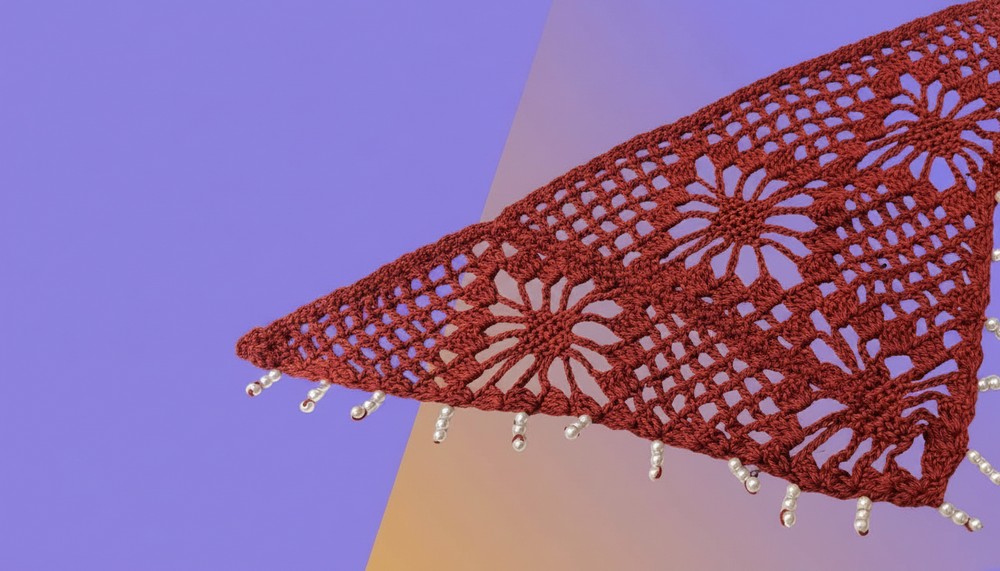
- Work the pattern in this manner until the bandana reaches the desired size or until you’ve completed three major motifs/drawings as in the video illustration (most bandanas will measure approx. 30–40cm across the top edge).
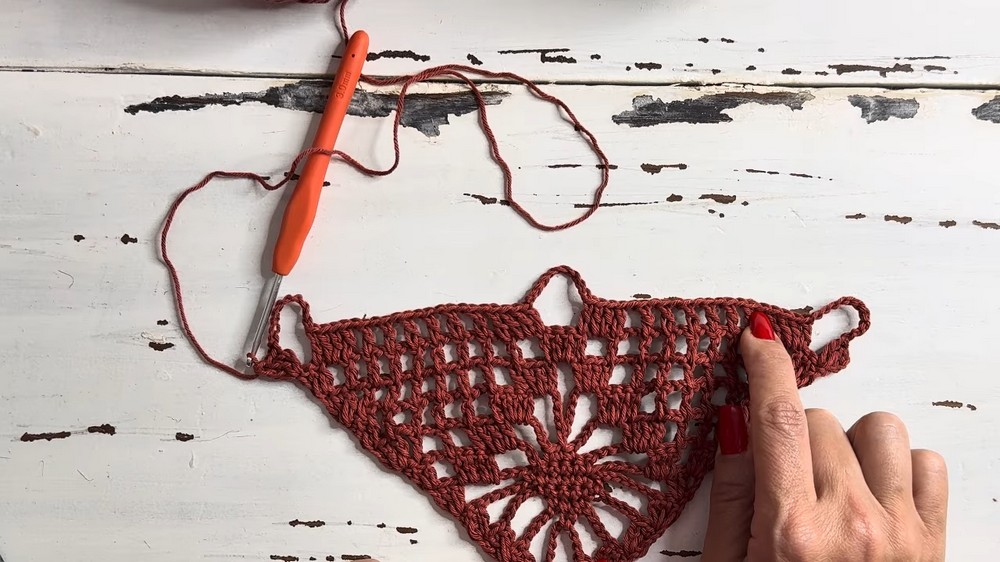
Final Edge Row
After completing the main triangle and motifs:
Optional Last Mesh Row:
- Repeat a mesh row (as established: ch-6, sc in each chain space, ch-6), ending with 3 dc at the edge.
- Fasten off, weave in all ends prior to beading.
Bandana Ties & Picot/Ball Edge
Bandana Ties:
- With yarn still attached at either top corner, ch a length long enough for a secure tie (approx. 45–60 cm).
- At the end, work a small cluster as a “bead” (see next step):

Making the Decorative End "Ball":
- Ch 3, in 4th ch from hook: (yo, pull up loop, yo, pull through 2 loops) three times (3 dc cluster) in same ch.
- Ch 3, sl st in base of cluster to close the ball.
- Fasten off. Use needle to weave in tail, securing the "bead" end.
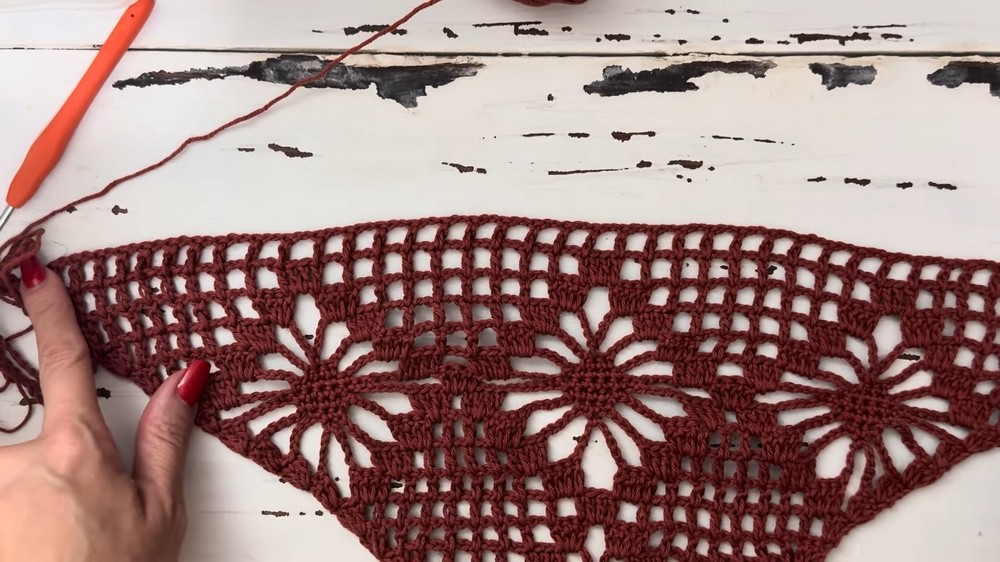
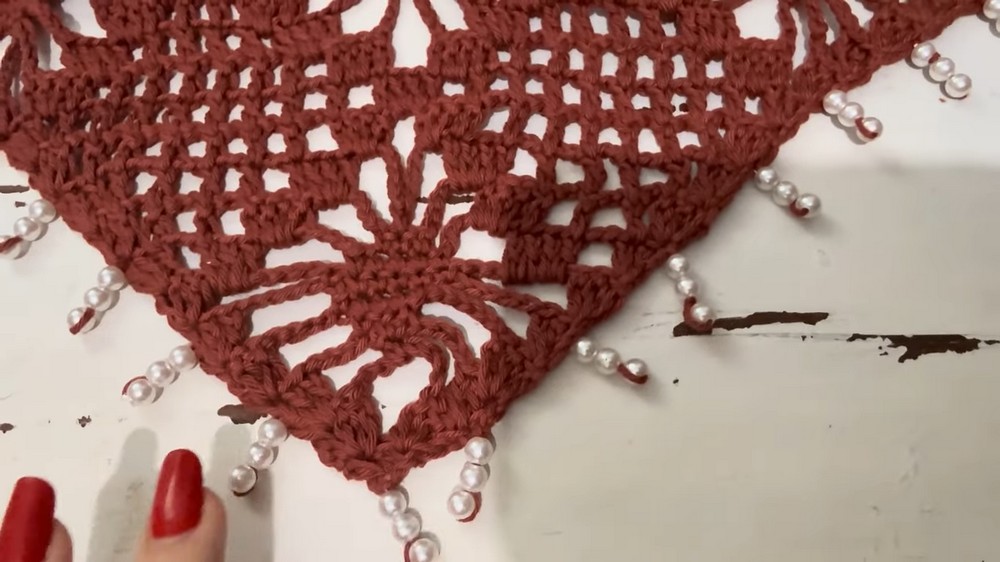
Finishing & Edging (Optional with Beads/Pearls)
- Thread needle with a strong matching yarn or sewing thread.
- Starting at one end of the bandana's lower edge, attach pearls or small beads—
- Take a stitch through the point, string 3 pearls, pass needle back through 2 pearls, then insert the needle into the bandana’s next point.
- Space pearls evenly (every 2 rows or as desired), working across all points along the bottom edge.
- Take care to leave pearls loose enough to dangle but secure enough not to fall off.
- Weave in all ends.
Conclusion
This delicate crochet bandana showcases repeating lace motifs and can be easily adjusted for various sizes and styles. Adding pearls or beads enhances its elegance—perfect for special occasions or casual wear.
Pattern Correction & Tips
- Correction: Always check your stitch count after each row for correct motif alignment; each motif should be symmetrical.
- Tip: Use blocking after crocheting for crisp edges and openwork motifs.
- Tip: If using dark yarn, ensure good lighting while working to see the stitches clearly.
- Tip: For the beaded edge, use a needle thin enough to pass through the pearls/beads.